EINHELL TC-LL 2 User manual

TC-LL 2
Art.-Nr.: 2270107 I.-Nr.: 11018
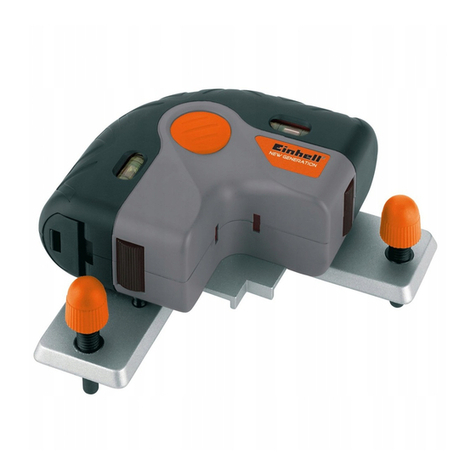
7
EN Original operating instructions
Self-Leveling Cross-Line Laser
SP Manual de instrucciones original
Láser de líneas cruzadas
FR Traduction du mode d’emploi
d’origine
Laser à lignes croisées
Anl_TC_LL_2_USA_SPK7.indb 1Anl_TC_LL_2_USA_SPK7.indb 1 03.04.2019 08:45:0603.04.2019 08:45:06

- 2 -
Anl_TC_LL_2_USA_SPK7.indb 2Anl_TC_LL_2_USA_SPK7.indb 2 03.04.2019 08:45:0703.04.2019 08:45:07

- 3 -
1
2
2
3
3
a b
7
4
5
1
68
9a
10
Anl_TC_LL_2_USA_SPK7.indb 3Anl_TC_LL_2_USA_SPK7.indb 3 03.04.2019 08:45:0703.04.2019 08:45:07

- 4 -
4 5
Anl_TC_LL_2_USA_SPK7.indb 4Anl_TC_LL_2_USA_SPK7.indb 4 03.04.2019 08:45:0803.04.2019 08:45:08

EN
- 5 -
Table of contents
1. Safety information
2. Layout and items supplied
3. Intended use
4. Technical data
5. Before starting the equipment
6. Operation
7. Cleaning, maintenance and ordering spare parts
8. Disposal and recycling
9. Storage
Einhell USA LLC · 305 Veterans Blvd · Carlstadt · NJ 07072 · USA
Anl_TC_LL_2_USA_SPK7.indb 5Anl_TC_LL_2_USA_SPK7.indb 5 03.04.2019 08:45:0903.04.2019 08:45:09

EN
- 6 -
Danger! - Read the operating instructions to reduce the risk of injury
Anl_TC_LL_2_USA_SPK7.indb 6Anl_TC_LL_2_USA_SPK7.indb 6 03.04.2019 08:45:0903.04.2019 08:45:09

EN
- 7 -
DANGER!
When using the equipment, a number of safety
precautions must be observed to avoid injuries
and damage. Please read the complete operating
instructions and safety information with due care.
Keep these operating instructions in a safe place
so that the information is available at all times. If
you give the equipment to any other person, hand
over these operating instructions and the safety
information as well. We cannot accept any liability
for damage or accidents which arise due to
failure to follow these instructions and the safety
information.
1. Safety information
DANGER!
Read all the safety information and
instructions. Failure to adhere to the safety
information and instructions set out below
may result in electric shock, fire and/or serious
injury. Keep all the safety information and
instructions in a safe place for future use.
Special information about the laser
Caution: Laser radiation
Do not look into the beam
Laser class II
LASER RADIATION
DO NOT STARE INTO BEAM
CLASS 2 LASER PRODUCT
<1.0mW @635nm IEC60825-1:2007
Complies with 21 CFR 1040.10 and 1040.11
except for deviations pursuant to Laser
Notice No.50, dated June 24/2007
• Never look directly into the laser path.
• Never direct the laser beam at reflecting
surfaces or persons or animals. Even a low
output laser beam can inflict injury on the eye.
• Caution: Use of controls or adjustments or
performance of procedures other than those
specified herein may result in hazardous
radiation exposure.
• Never open the laser module.
• It is prohibited to carry out any modifications
to the laser to increase its power.
• The manufacturer cannot accept any liability
for damage due to non-observance of the
safety information.
Safety information on the batteries
Use of the batteries
• Inserting the batteries when the laser is
switched on can cause accidents.
• If the equipment is not used correctly, the
batteries may leak. Avoid contact with the
battery fluid. If you come into contact with
battery fluid, clean the affected body part with
running water. If you get battery fluid in your
eyes, seek immediate medical assistance.
• Escaped battery fluid can cause skin irritation
and acid burns.
• Never expose the batteries to excess heat
such as sunshine, fire or similar.
• Never recharge batteries that are not suitable
for recharging. There is a risk of explosion!
• Keep batteries away from children, do not
short circuit batteries or disassemble.
• Seek a doctor’s advice immediately if a
battery is swallowed.
• If necessary, clean the contacts on the
battery and equipment before inserting the
batteries.
• Ensure that you insert the batteries the right
way round.
• Remove flat batteries immediately from the
equipment.There is an increased risk of
leakage.
• Always change all batteries in one go.
• Insert only batteries of the same type, do not
use different types of batteries or used and
new batteries together.
• Make sure that the equipment is switched off
after use.
• Remove the batteries if the equipment is not
used over a longer period.
Keep this safety information in a safe place.
Anl_TC_LL_2_USA_SPK7.indb 7Anl_TC_LL_2_USA_SPK7.indb 7 03.04.2019 08:45:0903.04.2019 08:45:09

EN
- 8 -
2. Layout and items supplied
2.1 Layout (Fig. 1-3)
1. On/Offswitch (blocking the laser)
2. Horizontal laser
3. Vertical laser
4. LED display
5. Laser line selector button
6. Battery compartment cover
7. ¼ inch female thread
8. Universal clamp
9. Adjusting screw
10. ¼ inch male thread with wheel
2.2 Items supplied
Please check that the article is complete as
specified in the scope of delivery. If parts are
missing, please contact our service center or the
store where you made your purchase at the latest
within 5 work days after purchasing the article and
upon presentation of a valid bill of purchase.
• Open the packaging and take out the
equipment with care.
• Remove the packaging material and any
packaging and/or transportation braces (if
present).
• Check to see if all the items are supplied.
• Inspect the equipment and accessories for
transport damage.
• If possible, keep the packaging until the end
of the guarantee period.
Danger!
The equipment and packaging material are
not toys. Do not let children play with plastic
bags, plastic sheets and small parts.There is
a risk of choking and suffocating!
• Cross-line laser
• Mounting
• Bag
• Original operating instructions
• Safety information
3. Intended use
The cross-line laser uses lasers to project lines
onto the wall and is therefore designed for
aligning objects such as tiles, windows, doors or
pictures.
The equipment is allowed to be used only for its
prescribed purpose. Any other use is deemed to
be a case of misuse.The user/operator and not
the manufacturer will be liable for any damage or
injuries of any kind resulting from such misuse.
Please note that our equipment has not been
designed for use in commercial, trade or
industrial applications. Our warranty will be voided
if the equipment is used in commercial, trade or
industrial businesses or for equivalent purposes.
4. Technical data
Power supply: .............. 2 x 1.5 V; type AA (LR06)
Self-leveling range: ........................................± 4°
Accuracy: ............. ± 3⁄16 -in. @ 30-ft (± 0.5 mm/m)
Work range: ......................................... 26 ft (8 m)
Wavelength of vertical laser: ................... 635 nm
Wavelength of horizontal laser:................ 635 nm
Laser class: ....................................................... II
Output power: .........................................< 1 mW
Weight: .......................................0.44 lbs (0.2 kg)
This standard applies to equipment designed
to be safe at least under the following
conditions:
a) Indoor use
b) Altitude up to ~6500ft (2000m)
c) Temperatures 41°F – 104°F ( 5°C – 40°C)
d) Maximum relative humidity 80%
for temperatures up to 88°F (31°C)
decreasing linearly to 50% relative
humidity at 104°F (40°C)
5. Before starting the equipment
5.1 Inserting batteries (Fig. 2)
• Turn off the equipment using the ON/OFF
switch (1)
• Open the battery compartment cover (6) by
pressing the nib (a) down.
• Insert the batteries (b), ensuring that you fit
them the right way round.
Anl_TC_LL_2_USA_SPK7.indb 8Anl_TC_LL_2_USA_SPK7.indb 8 03.04.2019 08:45:0903.04.2019 08:45:09

EN
- 9 -
• Close the battery compartment cover (6)
again, making sure that it locks securely
• If the LED indicator flashes red continuously
even though the device is upright, this means
that the batteries are flat. Replace them as
described above.
5.2 Using the universal clamp (Fig. 3/Item 8)
You can fasten the supplied universal clamp (8)
to a table, shelf or similar object by clamping it in
position.
To fit the equipment to the universal clamp,
proceed as follows:
• Place the equipment by the female thread (7)
on the base of the equipment onto the male
thread (10) of the universal clamp (8)
• Screw the equipment to the mounting with the
help of the wheel
• Using the adjusting screw (9) and the ball
joints (a), you can tilt the equipment to the
angle you require
To disassemble, proceed in reverse order
6. Operation
6.1 Switching On/Off(Fig. 1)
Switching on:
• Place the laser on a flat surface or fit it to the
universal clamp and fasten it as described in
5.2.
• To switch the laser on, push the On/Off switch
to the left (viewed from the front).The lasers
switch on, the green LED (4) comes on and
the pendulum will no longer be blocked,
which means the laser can be aligned.
• Press the button (5) to display or hide the
vertical or horizontal lines again individually.
Switching off:
To switch off, push the On/Offswitch back to
the position on the right (viewed from the front).
The lasers switch offand the pendulum will be
blocked.
Important!
To prevent damage during transport or storage,
the equipment must always be switched offas
described above.
6.2 Automatic alignment of the laser (Fig. 4)
After the laser has been switched on with the On/
Offswitch (1), the lasers are aligned automatically
by the pendulum so that the vertical and
horizontal lines are displayed level on the wall.
(See Fig. 4)
Press the button (5) to display or hide the vertical
or horizontal line individually.
Important!
Make sure that the equipment is never tilted
more than 4 degrees or stands at an angle.
If this is the case, the laser beams will flash
and the LED (4) will light up red.
6.3 Manual alignment of the laser (Fig. 5)
The laser can also be aligned manually, to enable
a diagonal line to be displayed. Proceed as
follows:
• Place the laser on a flat surface or fit it to the
universal clamp and fasten it as described in
5.2.
• To switch the equipment on, push the On/Off
switch (1) to the left (viewed from the front).
• Wait until the lasers are aligned and then
move the On/Off switch (1) back to the right.
• Now press the button (5).The lasers switch
on and the LED (4) lights up red, because the
pendulum is blocked.
• Now you can tilt the laser to the angle you
require, so that the lines are displayed
diagonally on the wall. (See Fig. 5)
• Press the button (5) to hide or display the
vertical or horizontal line individually or to
switch the equipment off again.
7. Cleaning, maintenance and
ordering spare parts
7.1 Cleaning
• Keep all safety devices, air vents and the
motor housing free of dirt and dust as far as
possible.Wipe the equipment with a clean
cloth or blow it down with compressed air at
low pressure.
• We recommend cleaning the equipment
immediately each time after use.
• Clean the equipment regularly with a damp
cloth and some soft soap. Do not use
cleaning agents or solvents; these may
be aggressive to the plastic parts in the
equipment. Ensure that no water can get into
Anl_TC_LL_2_USA_SPK7.indb 9Anl_TC_LL_2_USA_SPK7.indb 9 03.04.2019 08:45:0903.04.2019 08:45:09

EN
- 10 -
the interior of the equipment.The ingress of
water into an electric power tool increases the
risk of an electric shock.
7.2 Maintenance
There are no other parts inside the equipment
which require maintenance.
7.3 Ordering replacement parts:
Service
1. If your power tool requires service,
contact an authorized Einhell USA dealer
or call the Einhell USA customer service
center at 1-866-EINHELL
(1-866-346-4355). Only identical
replacement parts should be utilized for
repairs.This will ensure that the safety of the
power tool is maintained.
2. If the battery charger cable is damaged, it
must be immediately replaced to avoid a
hazard. Contact the Einhell USA®customer
service center at 1-866-EINHELL
(1-866-346-4355) for assistance.
8. Disposal and recycling
The equipment is supplied in packaging to
prevent it from being damaged in transit.The
raw materials in this packaging can be reused or
recycled.The equipment and its accessories are
made of various types of material, such as metal
and plastic. Never place defective equipment in
your household refuse.The equipment should
be taken to a suitable collection center for proper
disposal. If you do not know the whereabouts of
such a collection point, you should ask in your
local council offices.
Battery Caution + Disposal
Disposal
Should your appliance need replacement after
extended use, do not dispose of it with the
household refuse, but in an environmentally safe
way.
Waste produced by electrical machine
items should not be handled like normal
household rubbish. Please recycle where
recycle facilities exist. Check with your local
authority or retailer for recycling advice.
Always dispose of your battery pack according
to federal, state, and local regulations. Contact
a recycling agency in your area for recycling
locations.
CAUTION! Even discharged battery packs
contain some energy. Before disposing, use
electrical tape to cover the terminals to prevent
the battery pack from shorting, which could cause
a fire or explosion.
WARNING! To reduce the risk of injury or
explosion, never burn or incinerate a battery
pack even if it is damaged, dead, or completely
discharged.When burned, toxic fumes and
materials are emitted into the surrounding
atmosphere.
1. Batteries vary according to device. Consult
your manual for specific information.
2. Install only new batteries of the same type in
your product (where applicable).
3. Failure to insert batteries in the correct
polarity, as indicated in the battery
compartment or manual, may shorten the life
of the batteries or cause batteries to leak.
4. Do not mix old and new batteries.
5. Do not mix Alkaline, Standard (Carbon-Zinc),
or Rechargeable (Nickel Cadmium, Nickel
Metal Hydride, or Lithium-Ion) batteries.
6. Do not dispose of batteries in fire.
7. Batteries should be recycled or disposed of
as per state and local guidelines.
When shipping or disposing of batteries and
cordless tools, always ensure that they are
packed individually in plastic bags to prevent
short circuits and fires.
9. Storage
Store the equipment and its accessories out
of children‘s reach in a dark and dry place at
above freezing temperature. The ideal storage
temperature is between 41°F and 86°F
(5°C and 30°C). Keep the electric tool in its
original packaging.
The reprinting or reproduction by any other
means, in whole or in part, of documentation and
papers accompanying the products is strictly
subject to the express consent of iSC GmbH.
Subject to technical changes
Anl_TC_LL_2_USA_SPK7.indb 10Anl_TC_LL_2_USA_SPK7.indb 10 03.04.2019 08:45:0903.04.2019 08:45:09
EN
- 11 -
EINHELL CUSTOMER PROMISE
PRODUCT REGISTRATION:
Einhell strongly encourages you to register
your purchase. You can register online at
EinhellUSA.com Failure to register your product
purchase will not diminish your warranty rights.
However, registering your purchase will allow Einhell
to better serve you with any of your customer service
needs.
WHAT IS COVERED?
Einhell warrants to the owner that if this Machine
fails within 2 years from the date of purchase due to
a defect in material or workmanship or as a result of
normal wear and tear from ordinary household use,
Einhell will send a replacement part or product, as
needed, free of charge and with free shipping to the
original purchaser. If, in Einhell’s sole discretion, the
failed Machine cannot be repaired with a part, Einhell
will elect to either (A) send a new Machine at no charge
and with free shipping or (B) refund the full purchase
price to the owner.
WHO CAN SEEK WARRANTY COVERAGE?
This Warranty is extended by Einhell to the owner
of this Machine (a “Machine” consists of a product
powered by a motor) for residential and personal
household use only. This warranty is limited to thirty
(30) days from the start of original purchase of any
EINHELL brand product that is used for commercial
purposes, or any other income-producing purpose.
Should ownership of this machine change during the
coverage period, please update the Machine’s owner
information at EinhellUSA.com
WHAT IS NOT COVERED?
This warranty does not cover any product that
has been subject to misuse, neglect, negligence,
or accident, or that has been operated in any way
contrary to the operating instructions as specified in
the operator’s manual. This Warranty does not cover
cosmetic changes that do not affect performance.
This Warranty is only valid if the Machine is used
and maintained in accordance with the instructions,
warnings and safeguards contained in the owner’s
manual. Einhell will not be responsible for the cost
of any unauthorized warranty repairs. This warranty
does not cover any cost or expense incurred by the
purchaser in providing substitute equipment or service
during reasonable periods of malfunction or non-use
of this product while waiting for a replacement part or
unit under this warranty.
Wearing parts like belts, augers, chains and tines
are not covered under this warranty, and can
be purchased at EinhellUSA.com or by calling
1-866-EINHELL (1-866-346-4355). Batteries are
covered in full for 90-days from the date of purchase.
Repair, replacement or refund of the purchase price
are the exclusive remedies of purchaser and the sole
liability of Einhell under this warranty. No employee or
representative of Einhell is authorized to make any
additional warranty or any modification to this warranty
which may be binding upon Einhell. Accordingly,
purchaser should not rely upon any additional
statements made by any employee or representative
of Einhell. In no event, whether based on contract,
indemnity, warranty, tort (including negligence),
strict liability or otherwise, shall Einhell be liable for
any special, indirect, incidental, or consequential
damages, including, without limitation, loss of profit or
revenue.
Some states do not allow limits on warranties. In such
states, the above limitations may not apply to you.
Outside the USA and Canada, other warranties may
apply.
QUALITY COMES FIRST. The Einhell name is synonymous with high-performance tools and high-quality
European craftsmanship.From cordless screwdrivers to electric lawn mowers, Einhell USA designs and develops
state-of-the-art handheld power and garden tools for DIY enthusiasts, hobby gardeners, and handymen.
Einhell USA’s quality assurance and engineering teams ensure products are subjected to stringent quality and
performance tests. We know that sometimes tough tools go through tough times. In the event that you should
experience any issue with your product, you have our commitment that we’ll do everything we can to get you
back a tool that’s ready to work as hard as you do.
Anl_TC_LL_2_USA_SPK7.indb 11Anl_TC_LL_2_USA_SPK7.indb 11 03.04.2019 08:45:0903.04.2019 08:45:09

SP
- 12 -
Índice de contenidos
1. Instrucciones de seguridad
2. Descripción del aparato y volumen de entrega
3. Uso adecuado
4. Características técnicas
5. Antes de la puesta en marcha
6. Manejo
7. Mantenimiento, limpieza y pedido de piezas de repuesto
8. Eliminación y reciclaje
9. Almacenamiento
Einhell USA LLC · 305 Veterans Blvd · Carlstadt · NJ 07072 · USA
Anl_TC_LL_2_USA_SPK7.indb 12Anl_TC_LL_2_USA_SPK7.indb 12 03.04.2019 08:45:1003.04.2019 08:45:10

SP
- 13 -
Peligro! - Leer el manual de instrucciones para reducir cualquier riesgo de sufrir daños
Anl_TC_LL_2_USA_SPK7.indb 13Anl_TC_LL_2_USA_SPK7.indb 13 03.04.2019 08:45:1003.04.2019 08:45:10

SP
- 14 -
Peligro!
Al usar aparatos es preciso tener en cuenta una
serie de medidas de seguridad para evitar le-
siones o daños. Por este motivo, es preciso leer
atentamente este manual de instrucciones/adver-
tencias de seguridad. Guardar esta información
cuidadosamente para poder consultarla en cual-
quier momento. En caso de entregar el aparato a
terceras personas, será preciso entregarles, asi-
mismo, el manual de instrucciones/advertencias
de seguridad. No nos hacemos responsables de
accidentes o daños provocados por no tener en
cuenta este manual y las instrucciones de segu-
ridad.
1. Instrucciones de seguridad
Peligro!
Lea todas las instrucciones de seguridad
e indicaciones. El incumplimiento de dichas
instrucciones e indicaciones puede provocar des-
cargas, incendios y/o daños graves. Guarde to-
das las instrucciones de seguridad e indica-
ciones para posibles consultas posteriores.
Advertencias especiales sobre el láser
Cuidado: Radiación láser
No mirar directamente el trayecto del rayo
Clase de láser II
LASER RADIATION
DO NOT STARE INTO BEAM
CLASS 2 LASER PRODUCT
<1.0mW @635nm IEC60825-1:2007
Cumple 21 CFR 1040.10 y 1040.11 excepto
las desviaciones conforme a la norma Laser
Notice núm. 50 del 24 de junio de 2007
• Nunca mirar directamente el canal de salida
del rayo.
• No dirigir nunca el rayo láser a superficies
reflectantes, ni tampoco a personas ni ani-
males. Incluso un rayo láser de baja potencia
puede provocar lesiones oculares.
• Atención: si no se siguen estas instrucciones
al pie de la letra se podría producir una expo-
sición peligrosa a las radiaciones.
• Jamás abrir el módulo láser.
• No se permite realizar modificaciones en el
láser para aumentar la potencia del láser.
• El fabricante no asume ninguna responsabili-
dad por los daños resultantes de la no obser-
vancia de las advertencias de seguridad.
Instrucciones de seguridad para las pilas
Utilización de las pilas
• Introducir las pilas con el láser encendido
puede provocar accidentes.
• Si las pilas no se utilizan adecuadamente, su
líquido podría derramarse. Evitar el contacto
con el líquido de las pilas. En caso de que
una parte de su cuerpo entre en contacto con
el líquido de las pilas, limpiarla con agua co-
rriente. En caso de que el líquido de las pilas
entre en contacto con los ojos, es imprescin-
dible además acudir inmediatamente a un
médico.
• El líquido puede provocar irritaciones o que-
maduras.
• No exponer las pilas a un calor excesivo ni a
la radiación solar, el fuego o similares.
• Nunca cargar pilas que no sean recargables.
¡Peligro de explosión!
• Mantener las pilas fuera del alcance los ni-
ños, no cortocircuitarlas, ni abrirlas.
• En caso de ingerir una pila, acudir inmediata-
mente a un médico.
• Cuando sea necesario, limpiar los contactos
de las pilas y de los aparatos antes de intro-
ducirlas.
• Asegurarse de introducirlas con la polaridad
correcta.
• Extraer inmediatamente las pilas gastadas
del aparato. En caso contrario, existe un gran
peligro de que se derrame el líquido.
• Cambiar siempre todas las pilas a la vez.
• Introducir solamente baterías del mismo tipo,
no utilizar tipos diferentes o mezclar pilas
usadas con nuevas.
• Asegurarse de apagar el aparato después de
usarlo.
• Retirar las pilas cuando el aparato no vaya a
utilizarse durante un largo tiempo.
Guardar las instrucciones de seguridad en
lugar seguro.
Anl_TC_LL_2_USA_SPK7.indb 14Anl_TC_LL_2_USA_SPK7.indb 14 03.04.2019 08:45:1003.04.2019 08:45:10

SP
- 15 -
2. Descripción del aparato y
volumen de entrega
2.1 Descripción del aparato (fig. 1-3)
1. Interruptor ON/OFF (bloqueo del láser)
2. Láser horizontal
3. Láser vertical
4. Indicación LED
5. Selector líneas de láser
6. Tapa del compartimento de pilas
7. Rosca interior de ¼ pulgadas
8. Abrazadera universal
9. Tornillo de reglaje
10. Rosca exterior de ¼ pulgadas con rueda gira-
toria
2.2 Volumen de entrega
Sirviéndose de la descripción del volumen de en-
trega, comprobar que el artículo esté completo. Si
faltase alguna pieza, dirigirse a nuestro Service
Center o a la tienda especializada más cercana
en un plazo máximo de 5 días laborales tras la
compra del artículo presentando un recibo de
compra válido.
• Abrir el embalaje y extraer cuidadosamente
el aparato.
• Retirar el material de embalaje, así como los
dispositivos de seguridad del embalaje y para
el transporte (si existen).
• Comprobar que el volumen de entrega esté
completo.
• Comprobar que el aparato y los accesorios
no presenten daños ocasionados durante el
transporte.
• Si es posible, almacenar el embalaje hasta
que transcurra el periodo de garantía.
Peligro!
¡El aparato y el material de embalaje no son
un juguete! ¡No permitir que los niños jue-
guen con bolsas de plástico, láminas y pie-
zas pequeñas! ¡Riesgo de ingestión y asfixia!
• Láser de líneas cruzadas
• Soporte
• Bolsa
• Manual de instrucciones original
• Instrucciones de seguridad
3. Uso adecuado
El láser de líneas cruzadas proyecta con ayuda
de láseres líneas en la pared y, por ello, está
indicado para alinear, por ejemplo, baldosas, ven-
tanas, puertas o cuadros.
Utilizar la máquina sólo en los casos que se indi-
can explícitamente como de uso adecuado. Cual-
quier otro uso no será adecuado. En caso de uso
inadecuado, el fabricante no se hace responsable
de daños o lesiones de cualquier tipo; el respon-
sable es el usuario u operario de la máquina.
Tener en consideración que nuestro aparato no
está indicado para un uso comercial, industrial o
en taller. No asumiremos ningún tipo de garantía
cuando se utilice el aparato en zonas industria-
les, comerciales o talleres, así como actividades
similares.
4. Características técnicas
Alimentación de
corriente: ..................... 2 x 1,5 V; Tipo AA (LR06)
Margen de autonivelación: ............................± 4°
Precisión:............ ± 3⁄16 -plg. @ 30-ft (± 0.5 mm/m)
Área de trabajo: ................................... 26 ft (8 m)
Longitud de onda láser vertical: .............. 635 nm
Longitud de onda láser horizontal:........... 635 nm
Clase de láser: .................................................. II
Tensión de salida: .................................... < 1 mW
Peso: ............................................0.44 lb (0.2 kg)
Esta norma se aplica a equipos diseñados
para ser seguros al menos en las siguientes
condiciones:
a) Uso en interiores
b) Altura hasta ~6500 ft (2000 m)
c) Temperaturas 41°F – 104°F ( 5°C – 40°C)
d) Humedad relativa máxima del 80% para
temperaturas hasta 88°F (31°C), disminu-
ye linealmente al 50% de humedad relati-
va a 104°F (40°C)
Anl_TC_LL_2_USA_SPK7.indb 15Anl_TC_LL_2_USA_SPK7.indb 15 03.04.2019 08:45:1003.04.2019 08:45:10

SP
- 16 -
5. Antes de la puesta en marcha
5.1 Cómo colocar las pilas (fig. 2)
• Apagar el aparato con ayuda del interruptor
ON/OFF (1).
• Abrir la tapa del compartimento de pilas (6)
presionando el saliente (a) hacia abajo.
• Introducir las pilas (b) asegurando que la po-
laridad sea correcta.
• Cerrar la tapa del compartimento de pilas (6)
asegurándose de que se enclava.
Si el LED parpadea en rojo de manera continua a
pesar de que el aparato está en posición vertical,
quiere decir que las pilas están vacías. Cambiar-
las como se describe más arriba.
5.2 Emplear la abrazadera universal (fig. 3/
pos. 8)
La abrazadera universal suministrada (8) se pue-
de fijar a mesas, estantes, etc.
Para montar el aparato en la abrazadera univer-
sal, proceder de la siguiente manera:
• Poner el aparato con la rosca interior (7) en la
parte inferior del aparato sobre la rosca exte-
rior (10) de la abrazadera universal (8).
• Con ayuda de la rueda giratoria, atornillar el
aparato al soporte.
• Con ayuda del tornillo de ajuste (9) y de las
articulaciones esféricas (a) el aparato se pue-
de ajustar a la inclinación deseada.
El desmontaje se lleva a cabo realizando la mis-
ma secuencia pero en sentido contrario
6. Manejo
6.1 Conexión/desconexión (fig. 1)
Conexión:
• Poner el láser sobre una superficie plana o
montarlo en la abrazadera universal y fijarlo
como se describe en el apartado 5.2.
• Conectar el láser desplazando el interrup-
tor ON/OFF hacia la izquierda (visto desde
delante). El láser se enciende, el LED (4) se
ilumina en verde y el péndulo deja de estar
bloqueado de manera que el láser se puede
dirigir.
• Pulsar la tecla (5) para apagar o volver a
encender individualmente la línea vertical u
horizontal.
Apagar:
Para desconectar, desplazar el interruptor ON/
OFF de nuevo hacia la derecha (visto desde de-
lante). El láser se apaga y el péndulo se bloquea.
¡Advertencia!
Para evitar daños en el transporte o almace-
namiento, apagar el aparato siempre como se
describe arriba.
6.2 Ajuste automático del láser (fig. 4)
Después de la conexión con ayuda del interruptor
ON/OFF (1), los láseres se ajustan automática-
mente a través del péndulo, de manera que en la
pared se proyectan la línea vertical y horizontal
equilibradas. (Véase fig. 4)
Pulsar la tecla 5 para apagar o volver a encender
individualmente la línea vertical u horizontal.
¡Advertencia!
Asegurarse de que el aparato no se incline
más de 4° ni se coloque en diagonal. En este
caso, los rayos del láser parpadean y el LED
(4) se ilumina en rojo.
6.3 Ajuste manual del láser (fig. 5)
El láser se puede ajustar también manualmente
de manera que se muestre una línea diagonal.
Para ello proceder como sigue:
• Poner el láser sobre una superficie plana o
montarlo en la abrazadera universal y fijarlo
como se describe en el apartado 5.2.
• Conectar el aparato desplazando el interrup-
tor ON/OFF (1) hacia la izquierda (visto des-
de delante).
• Esperar a que los láseres se hayan ajustado
y volver a poner el interruptor ON/OFF (1)
hacia la derecha.
• Pulsar ahora la tecla (5). Los láseres se en-
cienden y el LED (4) se ilumina en color rojo
puesto que el péndulo está bloqueado.
• Ahora se podrá inclinar el láser en el ángulo
deseado de manera que se muestren las
líneas diagonalmente en la pared. (Véase la
figura 5)
• Pulsar la tecla (5) para apagar y encender
individualmente la línea vertical u horizontal o
para volver a apagar el aparato.
Anl_TC_LL_2_USA_SPK7.indb 16Anl_TC_LL_2_USA_SPK7.indb 16 03.04.2019 08:45:1003.04.2019 08:45:10

SP
- 17 -
7. Mantenimiento, limpieza y pedido
de piezas de repuesto
7.1 Limpieza
• Reducir al máximo posible la suciedad y
el polvo en los dispositivos de seguridad,
las rendijas de ventilación y la carcasa del
motor. Frotar el aparato con un paño limpio o
soplarlo con aire comprimido manteniendo la
presión baja.
• Se recomienda limpiar el aparato tras cada
uso.
• Limpiar el aparato con regularidad con un
paño húmedo y un poco de jabón blando. No
utilizar productos de limpieza o disolventes ya
que se podrían deteriorar las piezas de plás-
tico del aparato. Es preciso tener en cuenta
que no entre agua en el interior del aparato.
Si entra agua en el aparato eléctrico existirá
mayor riesgo de una descarga eléctrica.
7.2 Mantenimiento
No hay que realizar el mantenimiento a más pie-
zas en el interior del aparato.
7.3 Pedido de piezas de repuesto:
Servicio
1. Si su herramienta eléctrica necesita ser-
vicio, póngase en contacto con un distri-
buidor autorizado de Einhell USA o llame
al centro de atención al cliente de Einhell
USA 1-866-EINHELL (1-866-346-4355). Uti-
lice exclusivamente piezas de repuesto idén-
ticas para las reparaciones. Solo así se podrá
mantener la seguridad de la herramienta
eléctrica.
2. Si el cable del cargador está dañado,
cámbielo de inmediato para evitar peli-
gros. Si necesita asistencia, llame al centro
de atención al cliente de Einhell USA®al
1-866-EINHELL (1-866-346-4355).
8. Eliminación y reciclaje
El aparato está protegido por un embalaje para
evitar daños producidos por el transporte. Este
embalaje es materia prima y, por eso, se puede
volver a utilizar o llevar a un punto de reciclaje. El
aparato y sus accesorios están compuestos de
diversos materiales, como, p. ej., metal y plástico.
Los aparatos defectuosos no deben tirarse a la
basura doméstica. Para su eliminación adecuada,
el aparato debe entregarse a una entidad reco-
lectora prevista para ello. En caso de no conocer
ninguna, será preciso informarse en el organismo
responsable del municipio.
Precaución y eliminación de la batería
Eliminación
Si su artefacto necesita ser reemplazado luego
de un uso prolongado, no lo arroje a la basura
doméstica. Hágalo de una forma ecológica y
segura.
Los desechos producidos por máquinas
eléctricas no deben ser manipulados como
basura doméstica común. Recíclelos
donde hayan emplazamientos de reciclaje.
Consulte con las autoridades o tienda
minorista de su localidad para obtener información
sobre reciclaje.
Deshágase de su batería de acuerdo con los
reglamentos federales, estatales y locales. Para
encontrar lugares de reciclaje, comuníquese con
un servicio de reciclaje en su localidad.
¡PRECAUCIÓN! Incluso las baterías
descargadas contienen algo de energía. Antes
de deshacerse de éstas, use cinta aislante para
cubrir los terminales y evitar que la batería haga
cortocircuito, lo cual puede causar una explosión
o incendio.
¡ADVERTENCIA! Para reducir el riesgo de
lesiones personales o explosión, nunca queme
o incinere una batería incluso si está dañada,
inservible o completamente descargada. Al ser
quemada, los humos y materiales tóxicos son
emitidos a la atmósfera circundante.
1. Las baterías varían de acuerdo al dispositivo.
Consulte su manual para obtener la
información específica.
2. Instale solo nuevas baterías del mismo tipo
en su producto (donde corresponda).
3. No insertar las baterías con la polaridad
correcta, tal como se indica en el
compartimiento de la batería o en el manual,
puede reducir el ciclo de vida útil de las
Anl_TC_LL_2_USA_SPK7.indb 17Anl_TC_LL_2_USA_SPK7.indb 17 03.04.2019 08:45:1003.04.2019 08:45:10

SP
- 18 -
baterías o causar fugas en las baterías.
4. No combine baterías nuevas con antiguas.
5. No combine baterías alcalinas, estándar
(de zinc-carbono) o recargables (de níquel-
cadmio, de níquel-hidruro metálico o de iones
de litio).
6. No arroje las baterías al fuego. Pueden llegar
a explotar.
7. Las baterías deben ser recicladas o
desechadas según los reglamentos locales y
estatales.
Para el envío o la eliminación de baterías
o del aparato, estos deben embalarse por
separado en bolsas de plástico para evitar
cortocircuitos o incendios.
9. Almacenamiento
Guardar el aparato y sus accesorios en un lugar
oscuro, seco, protegido de las heladas e inacce-
sible para los niños. La temperatura de almace-
namiento óptima se encuentra entre los 41°F y
86°F (5 y 30 ˚C). Guardar la herramienta eléctrica
en su embalaje original.
Sólo está permitido copiar la documentación y
documentos anexos del producto, o extractos
de los mismos, con autorización expresa de iSC
GmbH.
Nos reservamos el derecho a realizar modifica-
ciones técnicas
Anl_TC_LL_2_USA_SPK7.indb 18Anl_TC_LL_2_USA_SPK7.indb 18 03.04.2019 08:45:1003.04.2019 08:45:10

SP
- 19 -
LA PROMESA DE EINHELL AL CLIENTE
REGISTRO DEL PRODUCTO:
Einhell le recomienda encarecidamente que
registre su compra. Puede registrarla online en
EinhellUSA.com. En caso de no hacerlo, el producto
comprado no perderá los derechos de garantía. No
obstante, registrando su compra permite que Einhell le
preste un mejor servicio de atención al cliente cuando
lo necesite.
¿QUÉ CUBRE?
Einhell garantiza al propietario que, si esta máquina falla
en un plazo de 2 años a partir de la fecha de compra
debido a un defecto en el material, en la manufactura
o como resultado de un desgaste normal del uso
doméstico ordinario, Einhell le enviará una pieza o un
producto de repuesto, según se necesite, de manera
gratuita y sin gastos de envío al comprador original. Si, a
criterio exclusivo de Einhell, la máquina averiada no se
puede reparar con una pieza, Einhell decidirá si a) envía
una nueva máquina de manera gratuita y sin gastos de
envío, o b) reembolsa al propietario el importe completo
de la compra.
¿QUIÉN PUEDE OBTENER COBERTURA DE GARANTÍA?
Einhell hace entrega de la presente garantía al
propietario de esta máquina (una “máquina” consiste
en un producto alimentado por un motor) para un uso
exclusivamente doméstico y privado. Esta garantía está
limitada a treinta (30) días a partir de la fecha de compra
original de cualquier producto de la marca EINHELL
que se use para fines comerciales o cualquier otro
fin que produzca beneficios. Si la máquina cambia de
propietario durante el periodo de cobertura, actualice
la información del propietario de la máquina en
EinhellUSA.com
¿QUÉ NO CUBRE?
Esta garantía no cubre ningún producto que haya sufrido
un uso indebido, negligencia, o accidente, o que haya
sido operado de forma contraria a las instrucciones de
uso especificadas en el manual de servicio. La presente
garantía no cubre cambios estéticos que no afecten al
funcionamiento.
Esta garantía solo será válida si la máquina se usa y
mantiene conforme a las instrucciones, advertencias
e instrucciones de seguridad indicadas en el manual
de servicio. Einhell no se hará responsable del coste
de ninguna reparación de garantía no autorizada. Esta
garantía no cubre ningún costo o gasto incurrido por el
comprador al proporcionar equipos sustitutos o servicio
durante períodos razonables de avería o no utilización
de este producto, mientras se espera por una pieza de
repuesto o nuevo producto conforme a esta garantía.
La garantía no cubre piezas de desgaste como
correas, brocas, cadenas ni dientes, que se pueden
comprar en EinhellUSA.com o llamando al
1-866-EINHELL (1-866-346-4355). Las baterías están
completamente cubiertas durante 90 días a partir de la
fecha de compra.
La reparación, sustitución o el reembolso del precio
de compra constituyen compensaciones exclusivas
del comprador y única responsabilidad de Einhell
conforme a esta garantía. Ningún empleado ni
representante de Einhell está autorizado a realizar
ninguna garantía adicional ni modificación alguna a la
presente garantía que pueda ser vinculante para Einhell.
Por consiguiente, el comprador no deberá ampararse
en ninguna declaración adicional hecha por ningún
empleado o representante de Einhell. Einhell no se
hace responsable en ningún caso, ya se base en el
contrato, indemnización, garantía, agravio (incluyendo
negligencia), responsabilidad absoluta o de otro
tipo, de ningún daño especial, indirecto, accidental o
consecuentes incluyendo, sin limitaciones, la pérdida de
beneficios o ingresos.
Algunos estados no permiten límites en las garantías.
En dichos estados, no se aplicarán las limitaciones
expuestas anteriormente.
Fuera de EE. UU.y Canadá se aplicarán otras garantías.
LO PRIMERO ES LA CALIDAD. El nombre de Einhell es sinónimo de herramientas de alto rendimiento y
manufactura europea de alta calidad. Desde destornilladores inalámbricos hasta cortacéspedes eléctricos, Einhell
USA diseña y desarrolla innovadoras herramientas para jardinería y eléctricas de mano para amantes del DIY,
jardineros aficionados y manitas.
Los equipos de aseguramiento de la calidad y de ingenieros de Einhell USA garantizan que los productos se
sometan a las pruebas más exigentes en materia de calidad y rendimiento. Sabemos que incluso las herramientas
más resistentes pueden sufrir complicaciones. Si nota alguna anomalía en su producto, le aseguramos que
haremos todo lo posible para devolverle una herramienta capaz de trabajar satisfaciendo sus exigencias.
Anl_TC_LL_2_USA_SPK7.indb 19Anl_TC_LL_2_USA_SPK7.indb 19 03.04.2019 08:45:1003.04.2019 08:45:10

FR
- 20 -
Sommaire
1. Consignes de sécurité
2. Description de l’appareil et contenu de l’emballage
3. Utilisation conforme
4. Caractéristiques techniques
5. Avant la mise en service
6. Fonctionnement
7. Nettoyage, entretien et commande de pièces de rechange
8. Élimination et revalorisation
9. Conservation
Einhell USA LLC · 305 Veterans Blvd · Carlstadt · NJ 07072 · USA
Anl_TC_LL_2_USA_SPK7.indb 20Anl_TC_LL_2_USA_SPK7.indb 20 03.04.2019 08:45:1003.04.2019 08:45:10
Other manuals for TC-LL 2
2
Table of contents
Languages:
Other EINHELL Measuring Instrument manuals

EINHELL
EINHELL 41.327.76 User manual

EINHELL
EINHELL NKL 90/4 User manual

EINHELL
EINHELL NWL 90 User manual

EINHELL
EINHELL SPK7 User manual

EINHELL
EINHELL TC-LD 50 User manual

EINHELL
EINHELL NDM 15 User manual

EINHELL
EINHELL 11037 User manual

EINHELL
EINHELL 22.700.75 User manual

EINHELL
EINHELL 41.331.15 User manual

EINHELL
EINHELL 21010 User manual
Popular Measuring Instrument manuals by other brands

Sun Microsystems
Sun Microsystems MGA-1400 installation instructions

SMERI
SMERI S-VTX instruction manual

Chauvin Arnoux
Chauvin Arnoux B102 user manual

HT
HT iDM70 user manual

Ronan Engineering
Ronan Engineering X76CTM series Instructions and operating manual

Honeywell
Honeywell Elster EK280 Applications manual