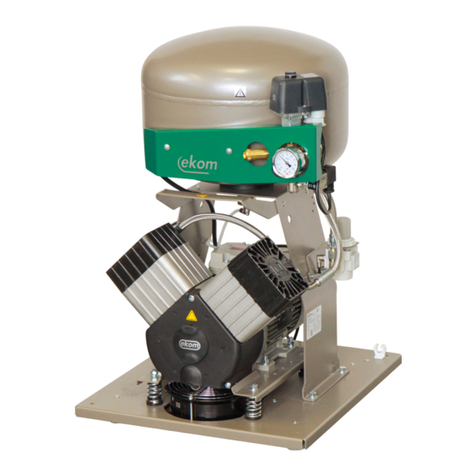
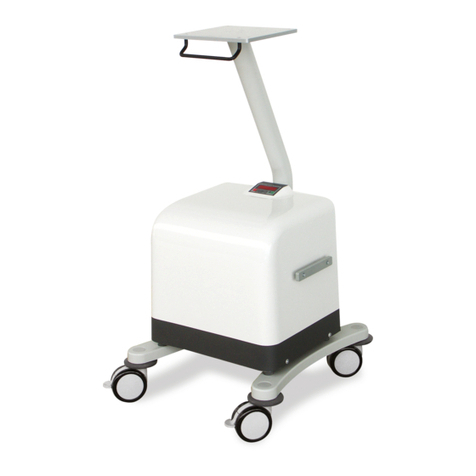
EKOM DK50 D Owner's manual


MEDICAL COMPRESSOR
МЕДИЦИНСКИЙ КОМПРЕССОР
MEDICINÁLNY KOMPRESOR
DK50 D
DK50 DM
MANUFACTURER
ПРОИЗВОДИТЕЛЬ
VÝROBCA
EKOM spol. s r. o.
Priemyselná 5031/18
SK-921 01 Piešťany
Slovak Republic
tel.: +421 33 7967255
fax: +421 33 7967223
www.ekom.sk
email: [email protected]
DATE OF LAST REVISION
ДАТА ПОСЛЕДНЕГО ПЕРЕСМОТРА
DÁTUM POSLEDNEJ REVÍZIE 11/2010

CONTENTS
NP-eVENT-6_11-2010.doc 1 GB
CONTENTS
1. GENERAL INFORMATION............................................................................................2
INDICATIONS FOR USE ..........................................................................................2
OPERATOR'S RESPONSIBILITY FOR PATIENT SAFETY.....................................2
MARKING..................................................................................................................2
WARNINGS...............................................................................................................2
General safety warnings ..................................................................................3
Safety warnings regarding the protection agaist electric current......................3
ALERT NOTICES AND SYMBOLS...........................................................................4
USAGE ON PURPOSE.............................................................................................5
STORAGE AND TRANSPORT CONDITIONS..........................................................5
2. DEVICE DESCRIPTION.................................................................................................6
3. TECHNICAL DATA........................................................................................................8
4. OPERATION..................................................................................................................9
INSTALLATION AND FIRST PUTTING INTO OPERATION.....................................9
Unfixing of the air pump...................................................................................9
Compressed air connection ...........................................................................10
Electric connection.........................................................................................10
First putting into operation..............................................................................11
Additive accessory.........................................................................................11
PERSONNEL..........................................................................................................12
Switch on compressor....................................................................................12
Running on compressor.................................................................................12
Cleaning of air intake filter..............................................................................13
Cooling failure alarm......................................................................................13
Cleaning the compressor...............................................................................13
5. MAINTENANCE...........................................................................................................14
INFORMATION ON REPAIR SERVICE..................................................................14
INTERVALS OF MAINTENANCE ...........................................................................14
Check of safety valve.....................................................................................15
Replacement of filters of air pump..................................................................15
Replacement of filter in blow filter ..................................................................16
Replacement of filter in pressure regulator ....................................................16
Checking of capacity......................................................................................17
Fixing of compressor before shipping............................................................17
CUT-OFF.................................................................................................................17
DISPOSAL OF THE APPLIANCE...........................................................................17
6. TROUBLESHOOTING.................................................................................................18
7. SPARE PARTS............................................................................................................19
8. ELECTRIC AND PNEUMATIC DIAGRAMS................................................................20
WIRING DIAGRAM.................................................................................................20
PNEUMATIC DIAGRAM..........................................................................................21
9. PARTS LIST ..............................................................................................................64
10.WARRANTY ..............................................................................................................67

GENERAL INFORMATION
GB 2 NP-eVENT-6_11-2010.doc
1. GENERAL INFORMATION
INDICATIONS FOR USE
The EKOM DK50 D, DK50 DM is indicated for use as medical air compressor
to supply a source of clean, oil-free pressurized air for use with medical
ventilators.
OPERATOR'S RESPONSIBILITY FOR PATIENT SAFETY
The installation, operation and maintenance manual is an integral part of the
appliance. It is necessary to always keep this document close to the
appliance. Strict observance of this manual is a prerequisite for the correct
operation of the appliance.
Rx only
USA Federal law restrict this device to sale by or on the order of a physician.
MARKING
Products marked with CE mark of compliance meet safety requirments of
European Union (93/42/EEC).
WARNINGS
•The safety of operating personnel and failure-free operation of the
appliance are ensured only when using the original components of the
appliance. It is possible to use accessories and spare parts mentioned in
the technical documentation or clearly permitted by the manufacturer.
•When used with non authorized accessories or consumable material, the
manufacturer cannot assume responsibility for the safe operation and
functionality of the device.
•The warranty does not cover damages that originate due to the use of non
authorized accessories or consumable material other than those
recommended by the manufacturer.
•The manufacturer assumes responsibility regarding safety, reliability and
function only if
the installation, calibration, amendments, extensions and repairs are
made by the manufacturer or his representative or a service organization
authorized by the manufacturer,
the appliance is used in accordance with the installation, operation and
maintenance manual.
•The installation, operation and maintenance manual, at the time of
printing, correspond to the design of the appliance and its state according
to the relevant safety and technical standards. The manufacturer reserves
all copyrights for the given wiring schemes, methods and names.

GENERAL INFORMATION
NP-eVENT-6_11-2010.doc 3 GB
General safety warnings
The manufacturer developed and constructed the appliance so that damage
would not occur when the appliance is used for its intended purpose. The
manufacturer considers it his obligation to describe the following safety
measures in order to avoid further damages.
•When operating the appliance, it is necessary to observe laws and
regional regulations valid in the place of usage. In order to ensure safe
course of works, the operator and user are responsible for the observation
of regulations.
•The original packaging should be kept for the possible return of the unit.
Only original packaging guarantees an optimal protection of the appliance
during transportation. If it would be necessary to return the appliance
during warranty period, the manufacturer is not responsible for damages
caused by incorrect packing.
•If an undesirable event occurs in the operation of appliance, the user is
obliged to immediately inform his supplier to this event.
•This product is not intended for use in areas with the risk of explosion.
Possible explosion hazard if the compressor is used in the presence of
flammable anesthetics.
•Never put oxygen or nitrous oxide into the compressor. The electrical
components are not approved for oxygen or nitrous oxide use.
•This device can be used only with ventilator equipped with low pressure
alarm.
Safety warnings regarding the protection agaist electric current
•The appliance must only be connected to an appropriate power source
that has correct grounding. Reliable earth ground can only be achieved
when equipment is connected to a receptacle marked "hospital grade".
•Prior the connecting the compressor, verify whether the mains voltage and
frequency specified on the apparatus are in accordance with the local
supply.
•Prior to putting into operation, check for possible damages on the
appliance and the air connectors. Damaged cables and sockets/plugs
must be replaced immediately.
•In the case of a dangerous situation or a technical failure, immediately
disconnect the appliance from mains supply.
•During all repairs and maintenance:
- ensure that the mains plug is removed from the power socket,
- pressure pipes must be air vented,
- pressure must be released from pressure tank.
•Only a qualified expert can install this appliance.

GENERAL INFORMATION
GB 4 NP-eVENT-6_11-2010.doc
ALERT NOTICES AND SYMBOLS
For your information, the symbols below are used in the installation,
operation and maintenance manual, on packaging materials and on the
product:
Attention, see instructions for use
Caution, risk of electric shock
Consult instructions for use
CE mark of compliance
Caution, hot surface
Handling mark on packaging – Fragile, handle with care
Handling mark on packaging –
This way up (Vertical position of
freight)
Handling mark on packaging – Protect against humidity
Mark on packaging – Recyclable material
Handling mark on packaging –
Temperature of storage and
transport
Handling mark on packaging – Limited stacking
Alternating current
Protective Earth (Ground)
Equipotentiality
Fuse

GENERAL INFORMATION
NP-eVENT-6_11-2010.doc 5 GB
USAGE ON PURPOSE
•The appliance can be installed and operated only in dry, ventilated and
dust-free area. Climatic conditions for operation - see Technical data.
•The compressor must stand on a flat, sufficiently stabile base with.
•The compressor must not be exposed to rain. The appliance must not be
used in humid or wet environments. Furthermore, it is forbidden to use it in
the presence of flammable liquids or gasses.
•Prior to the connection of compressor to the respiratory appliance, it is
necessary to assess whether the available medium meets the
requirements of the given appliance of use. Please, refer to the Technical
data for this purpose.
•Usage, other than the compressors intended use is not considered to be
safe. The manufacturer is not responsible for the damages implied if the
compressor is used for other uses. Such a risk is assumed only by
operator/user.
STORAGE AND TRANSPORT CONDITIONS
The compressor is dispatched from the factory in transport packing with the
pump fixed. Thus the appliance is protected from damage during transport. P
During transport, if it is possible, always use the original packaging of the
compressor. Always transport the compressor up right.
During transport and storage, protect the compressor against humidity,
contamination and extreme temperatures. Compressors that have original
packaging can be stored in warm, dry and dust-free areas.
Keep the packaging material, if possible. If it is not possible, dispose of the
packaging material in an environment-friendly way.
The compressor can only be transported pressure-free. It is necessary to
release the pressure from the pressure tank and pressure hoses prior to
transport, and to release any possible condensatet. Secure motor inside
before shipping!
Prior to transport it is necessary to fix motor inside the compressor
(Chapter 5.)

DEVICE DESCRIPTION
GB 6 NP-eVENT-6_11-2010.doc
2. DEVICE DESCRIPTION
1. PRESSURE - the output air pressure manometer (with accuracy ± 5%)
2. HUMIDITY - the humidity indicator (performance)
3. Cooling failure indicator
4. Power indicator
5. Hour meter
6. Main input, power switch, primary fuses
7. Equipotential pin
8. Socket for the supply lead
9. WALL - input air coming from outside pressure air source
10. OUT - output air from compressor
11. Pressure tank
12. Air intake filter
13. Pressure regulator with filter
14. Filter and water trap
15. Cooler
16. Control electronics
17. Safety valve
18. Internal back cover
19. Tube for supporting equipment
The appliance consists of an oil-free piston compressor driven by a single-
phase electric motor, of filtering and drying equipment, of a pressure tank
and of a pressure regulator. The compressor is placed in a box lined with
noise reducing material. The appliance thus produces filtered compressed air
without any traces of oil with reduced humidity contents.
The air compressor has an input, air fitting labeled WALL (9) that allows you
to connect to an outside air source. When an outside compressed air source
that is connected to the inlet WALL fitting supplies air above adjusted output
pressure the air pump will not be activated even though the power switch is
in the ON position. Instead, the air from the outside source will be directed to
the compressor's air output. When the outside air source pressure is less
than adjusted output pressure (or is not connected) and the power switch is
in the ON position, the air pump is activated and supplies compressed air
through the air output.
The air pump sucks the atmospheric air through air intake filter (12).
Compressed air is cooled in the cooler (15), continue in the filter (14) and
condensed liquid from the water trap is automatically released to the
evaporative tray. The air continues through the check valve to the pressure
tank (11) and through the pressure regulator with the output filter (13) to the
OUT (10). The fans operate while the air pump works, or also during the
pause, when the temperature in the cabinet is over 40°C (104°F). Any
increase of temperature in the cabinet over 80°C (176°F) - cooling failure - is
signalled by the red indicator (3) and by acoustic alarm. The Control
electronics (16) control running the air pump according to pressure in the
pressure tank (11). A safety valve (17) prevents the maximal allowable
pressure in the pressure tank.

DEVICE DESCRIPTION
NP-eVENT-6_11-2010.doc 7 GB

TECHNICAL DATA
GB 8 NP-eVENT-6_11-2010.doc
3. TECHNICAL DATA
TYPE DK50 D DK50 DM
Output flow at pressure
3.5 bar (51 psig)
Lit.min-1 40 60
Output flow max.
at pressure 3.5 bar (51 psig)
200 Lit.min-1 for 2 s *
Rated voltage / Frequency
V/Hz
230/50
230/60
USA
Model
120/60
100
/50-60
230/50
230/60
USA
Model
120/60
Nominal current A 2.8 2.8 5.6 5,6 3.4 4.3 8.6
Filtration of air to µm 5
Dew point depression at 40 Lit.min-1,
3 bar (43.5 psig), 20°C (68°F)
5°C (9°F) under the ambient temperature
Outlet connection
RECTUS 21KS KS08 MPC
At pleasure DISS 1160-A (3/4"-16 UNF)
Sound level dB(A) ≤49 ≤51 ≤51 ≤51 ≤50 ≤52 ≤52
Mode of the operation Continuous - S1
Release of condensed water Automatic
Indication of cooling failure Acoustic and optical by 80°C (176°F)
Output pressure
3.0 bar (43 psi)
Adjustable to max. 3.5 bar (51 psi)
Cut-in pressure (backup)
3.0 bar (43 psig)
Adjustable to max. 3.5 bar (51 psi)
Pressure tank capacity Lit 5
Working pressure of the pump 5.0 - 7.0 bar (72.5 - 101.5 psi)
Operation pressure of safety valve 8.0 bar (116 psi)
Adjustment of the output air pressure Pressure regulator
Dimensions of compressor
w x d x h 400x430x780 mm (16x17x31 in)
400x500x780 mm
(16x20x31 in)
Dimensions of packaging w x d x h 480x530x835 mm (19x20x33 in)
480x580x835 mm
(19x23x33 in)
Net weight 46 kg (101 lbs) 59 kg (130 lbs)
Gross weight 60 kg (132 lbs) 73 kg (161 lbs)
Implementation according
EN 60601-1, EN 12021
Appliance of type B class I.
Classification acc. to MDD 93/42
EEC, 2007/47 EC
II b
* With 0.6 bar (8.7 psi) drop
Climatic conditions for storage and transport
Temperature –25°C to +55°C (-13°F to +131°F), 24 hrs +70°C (+158°F)
Relative air humidity 10% to 90 % (no condensation)
Relative air humidity for seaworthy packing 10% to 100% (included condensation)
Climatic conditions for operation
Temperature +5°C to +40°C (+41°F to +104°F)
Relative air humidity up to +95%
IPX0 Rating

OPERATION
NP-eVENT-6_11-2010.doc 9 GB
4. OPERATION
INSTALLATION AND FIRST PUTTING INTO OPERATION
It´s forbidden to use compressor after unpacking as far as it doesn´t
adjust ambient temperature.
The compressor must be installed and put into operation for the first
time by a qualified expert. His obligation is to also train the operating
personnel about the usage and common maintenance of the appliance.
Installation and training of personnel should be acknowledged by his
signature in the certificate of installation.
Prior to first putting into operation, all securing fixings serving for the
fixation of the appliance during transport must be removed. In the case
of switching the compressor on without the prior removal of fixings,
there will be a risk of permanent damage to the product!
The compressor does not contain an alternate power supply (backup
supply).
This device can be used only with ventilator equipped with low
pressure alarm.
It is forbidden obstruct the air intake filter and the ventilating outlets on the
lower part of appliance. Forbidden to lift unit by handle! Handle is appointed
for moving unbraked product on the floor.
If the compressor is equipped with main source of air, standby source
of air must be available.
Unfixing of the air pump
After unpacking, place the compressor upright with the castor wheels firmly
on the ground.
•Remove the front and back cover unscrewing screws 6 pcs on the side of
cabinet.

OPERATION
GB 10 NP-eVENT-6_11-2010.doc
•Unscrew the four screws and remove the internal back cover (18).
•Remove all fixing elements (21) above and under the air pump (20).
•Screw the internal back cover, connect the ground wire, screw the front
and back cover and insert the air intake filter.
Please retain the fixing elements for future transportation of the compressor.
Compressed air connection
The medical compressor is equipped with fast-on couplings WALL (9) and
OUT (10) to the rear of the cabinet.
To the fast-on coupling OUT (10) - output compressed air - connect the
pressure hose leading to the applicable appliance / respiratory apparatus.
To the fast-on coupling WALL (9) - input compressed air - connect
pressurized air from a central distribution system, if necessary. The air of this
distribution system is automatically connected through the compressor to the
outlet OUT port. In such a connection, the compressor serves as back up
source of the compressed air. In the case of the reduction of the pressure of
air from central distribution system under adjusted output pressure,
compressor is automatically switched on and there is continuously
pressurized air at the output from compressor.
Please note that the air supply from the central distribution entering the
compressor must be medical grade air (dirt size, humidity). The
compressor not modify the air from central distribution!
The hose connecting the compressor to the breathing apparatus must
not pass through a cold environment i.e. placed on the ground. It
should be as short as possible with no kinks (it may have impact on
condensation of water inside the hose).
Electric connection
The compressor is delivered with a plug containing an appropriate
protective contact. It is essential to respect the local electrical
regulations. The mains voltage and frequency must comply with the
information on the Data Label.
The supply lead must not be stressed or have any tension exerted upon
it, and must always be free.
•The socket must be accessible due to safety reasons, in order for the
appliance to be safely disconnected from the mains supply in the case of
danger.
•The relevant current circuit must be safeguarded.
•Connection of the equipotential connection (7) with other appliances must
be completed according to local valid electrical regulations.
•Fasten down the supply lead through the socket (8).

OPERATION
NP-eVENT-6_11-2010.doc 11 GB
First putting into operation
•Check whether all fixing screws used during transport were removed.
•Check that the connections of the compressed air supplies are correct.
•Check for proper connection to the mains supply.
•Switch on the pressure switch (6) to position “I”.
After first putting the compressor into operation, the pressure tank of
compressor is pressurized to a ‘switching-off’ pressure and the compressor
will then be automatically switched off. During the following time period the
compressor works in an automatic mode, i.e. according to the consumption
of compressed air, the compressor is switched on and off by the pressure
switch.
During the operation, the appliance releases condensed water from the
condenser (filter) automatically to the evaporative tray.
Additive accessory
Tube for supporting equipment - art. Nr. 604011346
Tube (19) is suitable for gripping of respiratory apparatus with accessories.
Please remove the plug in the middle of the upper side before installation.
Screw the tube into the socket and tighten it fast.
Technical data:
diameter 25 mm
height 1100 mm above the floor
Max. tube loading accepted is 18 kg. The centre of gravity of supporting
equipment must be in the axis of the tube, max. 1100 mm above the floor.
Other connecting consults with manufacturer. Manufacturer recommends
supporting equipment disassemble before transport.
Set for higher relative air humidity - art. Nr. 604011497
1. Hose PUR 6/4-130 062000337 1 pc
2. Hose PUR 6/4-700 062000357 1 pc
3. Bottle LUH-1 062000333 1 pc
4. Holder 3KB-972 023000564 1 pc
5. Washer D5 043000002, 043000005 4 pcs
6. Screw M5 041000131 4 pcs
7. Reduction 10/6 062000339 1 pc
8. Connector L6/6 025400153, 025400154 1 pc
9. Clamp self-adhesive 033400011 2 pcs
Dismount hose (A) and plug (B). Install reduction (7), connector (8) and plug-
in hose (1). Screw holder (4), plug-in hose (2) and install bottle (3). Fix hose
with two clamps (9).

OPERATION
GB 12 NP-eVENT-6_11-2010.doc
Empty bottle regularly.
PERSONNEL
In the case of danger, switch the appliance off at the switch and pull out
the mains plug.
Automatic operation. When the pressure in pressure tank falls down to a
‘switch on’ pressure, the compressor is automatically switched on. The
compressor is automatically switched off when the pressure increases to the
‘switching off’ pressure in the pressure tank.
Switch on compressor
The compressor is switched on by mains switch (6) by putting it to position
„I“. Switching on of the compressor is signaled by the green indicator (4).
Running on compressor
When the pressure of the air at the ‘Inlet’ port is reduced or if there is a
reduction of pressure in the pressure tank, the compressor is switched on
and the pressure tank is filled with compressed air. After the ‘switching-off’
pressure is reached, the compressor is automatically switched off. Pressure
of the output air from compressor indicates the manometer (1).
During the operation of the compressor, the pointer of the humidity indicator
(2) should be in the green zone. If the consumption of air from an appliance
is larger that the maximal outflow, the pointer of indicator will move from the
green zone and the air from compressor will not reach the declarable
parameters (see Technical data).
The hour meter (5) indicates total running time of the air pump.

OPERATION
NP-eVENT-6_11-2010.doc 13 GB
Cleaning of air intake filter
At least, once a week remove and clean the air intake filter (12) located on
the front side. Wash the filter in warm soapy water, rinse thoroughly and
allow it to dry. Insert the clean filter until the sucking hole for filter is not
perfectly covered by filter.
Cooling failure alarm
Problems with the air pump cooling signalize the red indicator (3) and the
acoustic alarm.
In the event of cooling failure alarm is necessary ensure alternate air
pressure source and disconnect the compressor.
Cleaning the compressor
The product can be cleaned by the usual detergents. Please do not clean the
product using a solution containing abrasive components, chemical solvents
or another aggressive chemical.

MAINTENANCE
GB 14 NP-eVENT-6_11-2010.doc
5. MAINTENANCE
INFORMATION ON REPAIR SERVICE
The guarantee and extended guarantee repairs are to be completed by the
manufacturer, or an organization authorized by the manufacturer.
The manufacturer reserves the right to modify the appliance in a way
that will not impact substantially on the operation of the appliance.
Only a qualified expert or the Customer Service Dept. of the
manufacturer must perform repairs that exceed the framework of
common maintenance. Use only spare parts and accessories approved
by the manufacturer.
Prior to any maintenance or repairs, it is necessary to switch off the
compressor and disconnect it from mains (pull out mains plug). Remove the
front and back covers unscrewing screws on the side of the cabinet;
disconnect ground connecting on the cover.
INTERVALS OF MAINTENANCE
Maintenance range Page Time interval
To be
performed by
Cleaning and
replacement of air
intake filter
13
At least once a
week, replacement
after 4000 hours
personnel
Check of safety
valve 15 1 x per annum qualified expert
Replacement of
filters of air pump
(A, B)
15 2000 hours running qualified expert
Replacement of filter
in blow filter (C) 16 2000 hours running qualified expert
Replacement of filter
in the pressure
regulator (D)
16 2000 hours running qualified expert
Testing of the
tightness of joints
and inspection of
appliance
Service
documentation
2000 hours running
or after two years qualified expert
Replacement of
piston complete with
piston rings, O-rings
Service
documentation
4000 hours qualified expert
Bearing
replacement Service
documentation
4000 hours qualified expert

MAINTENANCE
NP-eVENT-6_11-2010.doc 15 GB
Check of safety valve
The safety valve is adjusted to 8 bars (116 psig) by the manufacturer,
tested and marked. It must not be readjusted.
•Turn the screw of the safety valve
(17) several rotations to left until
safety valve puffs.
•Let safety valve freely puff only for
a short period of time.
•Turn screw to the right until the
limit is reached; the valve must be
closed now.
The safety valve must not be used for depressurizing the pressure tank. It
could endanger the function of the safety valve.
Replacement of filters of air pump
Caution – hot surface! About disassembly the internal back cover can
be hot the internal surface.
Disassembly the internal back cover. These filter inserts are in the top cover
of crank case (20).
•Using screwdriver, remove the flexible guard.
•Remove the used and contaminated filters (A), (B).
•Insert a new set of input filter (B).
•Place prefilter (A) into the flexible guard (by plain side into the crank case)
and then to the opening.

MAINTENANCE
GB 16 NP-eVENT-6_11-2010.doc
Replacement of filter in blow filter
•Loosen lock on filter (14) by pulling it down.
•Slightly turn the cover o filter and pull it out.
•Unscrew the holder of filter.
•Replace filter (C), screw the holder of filter.
•Place the cover of filter and secure it by turning to right till locking.
Replacement of filter in pressure regulator
Prior the intervention to the appliance it is necessary to decrease the
pressure of air in pressure tank to zero and to disconnect the appliance
from mains.
•Unscrew the cover of filter regulator (13) and pull it out.
•Unscrew the holder of filter.
•Replace filter (D), screw the holder of filter.
•Screw the cover of filter regulator.
Set up output pressure air
Switch on the compressor and set the output pressure air flow until the
humidity indicator (2) remains in the green area. The control button of the
filter regulator (13) unlock, rotate to set the demand output pressure. After
setting the pressure, lock the control button of the regulator pushing down.

MAINTENANCE
NP-eVENT-6_11-2010.doc 17 GB
Checking of capacity
Before checking of capacity it is necessary to switch off compressor by
power switch, let pressure air out of pressure tank and unlink output hose
from fitting OUT (10). Next (Than) to switch compressor by power switch and
measure (record) the time before points start - stop (2). The capacity of
compressor is satisfied when the recorded time is not higher than 45 sec for
DK50 D or 30 sec for DK50 DM.
Fixing of compressor before shipping
Before shipping it is required to fix the compressor to prevent movement.
Procedure is illustrated on the page 9.
•Remove the front and back covers unscrewing screws on the side of the
cabinet, disconnect the ground connector on the covers.
•Disassembly the internal back cover (18) unscrewing four screws.
•Insert fixing elements (21) under and up the air pump.
•Assembly the internal back cover (18), connect the ground connector on
the covers, insert the covers and the air intake filter.
CUT-OFF
If the compressor is not going to be used for a long period of time, it is
recommended that the appliance be disconnected from the mains supply and
the air pressure in the pressure tank be released.
DISPOSAL OF THE APPLIANCE
•Disconnect the appliance from the mains supply.
•Release the air pressure in pressure tank.
•Dispose of the appliance according to local valid regulations.
The parts used in this product, when disposed, do not have negative impact
on the environment.

TROUBLESHOOTING
GB 18 NP-eVENT-6_11-2010.doc
6. TROUBLESHOOTING
Prior to repairing the appliance it is necessary to reduce the pressure
of the air in the pressure tank to zero and disconnect the appliance
from the mains supply.
Trained service personnel can only perform the activities connected to the
troubleshooting guide.
PROBLEM POTENTIAL CAUSE TROUBLESHOOTING
Compressor
does not start
No mains voltage
Switched off mains breaker in
distribution system
No current in pressure switch
Check Supply
Replace the defective fuse
Loose wire terminal – tighten
Power cord defective – replace
Interrupted winding of motor,
damaged thermal protection
Replace motor
Defective capacitor
Replace capacitor
Jammed piston or another parts
Replace damaged parts
Press. switch does not switch on
Change pressure switch
The humidity
indicator is out
of green zone
Leakage of air from pneumatic
distribution system
Control of pneumatic distribution system
– seal loose connection
Large consumption of
compressed air
Do not exceed max. flow (see Technical
data)
Compressor
often switches
on
Leakage of air from pneumatic
distribution system
Control of pneumatic distribution
system – seal loose connection
Leakage of check valve
Clean check valve, replace sealing,
replace check valve
The operation
of compressor
is extended
Leakage of air from pneumatic
distribution system
Control of pneumatic distribution
system – seal loose connection
Worn out piston rings
Replace worn out piston rings
Dirtly filter inserts Replace the dirty inserts
Red indication
lights – state
of overheating
Dirty air intake filter Clean or replace the dirty air intake filter
Dirtly filter inserts Replace the dirty inserts with new ones
Cooling fans don´ t work Replace fans or faulty thermo - switch
Unit is hot, unventilated area Relocate unit
Compressor is
noisy
(knocking,
metal noises)
Damaged piston bearing or
bearing on motor Replace damaged bearing
Loose (cracked) belt of the air
pump hanger
Replace damaged hanger
Water
comming out
of outlets
Functionless water trap (13) or
(14) Clean or replace the water trap
Other manuals for DK50 D
2
This manual suits for next models
1
Table of contents
Languages:
Other EKOM Medical Equipment manuals

EKOM
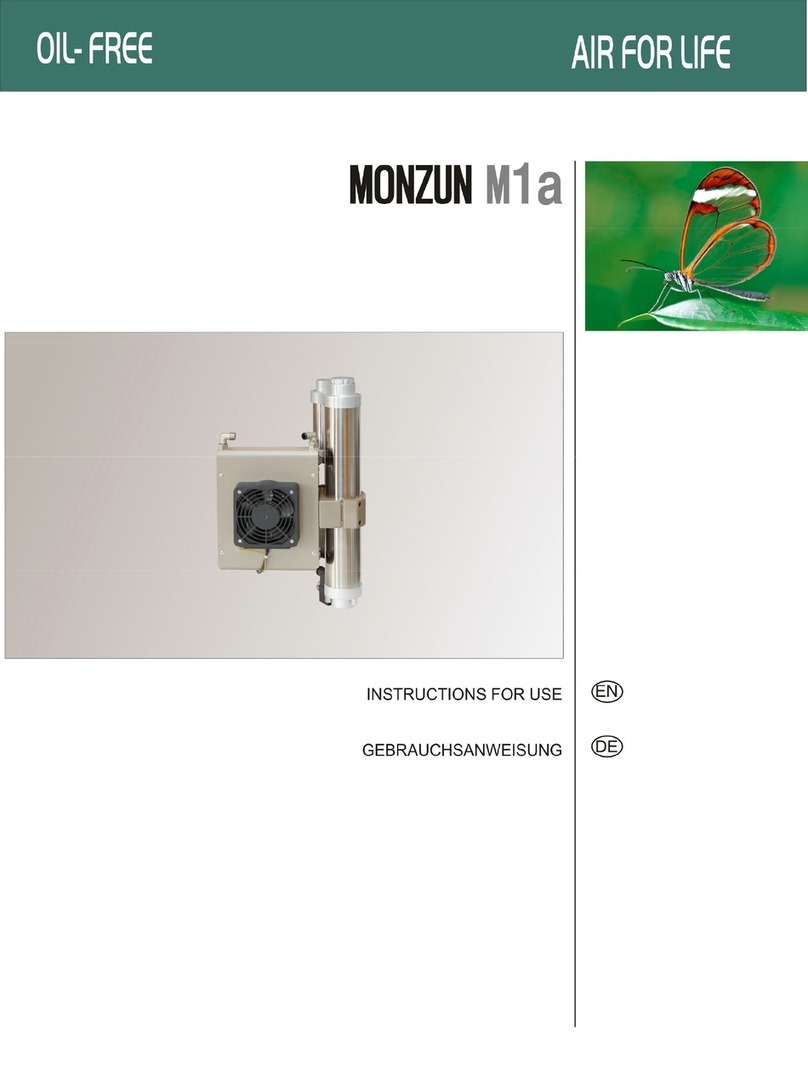
EKOM MONZUN M1a User manual

EKOM
EKOM DK50 PLUS/M MOBILE User manual

EKOM
EKOM DUO Owner's manual

EKOM
EKOM DK50 2V/110 User manual

EKOM
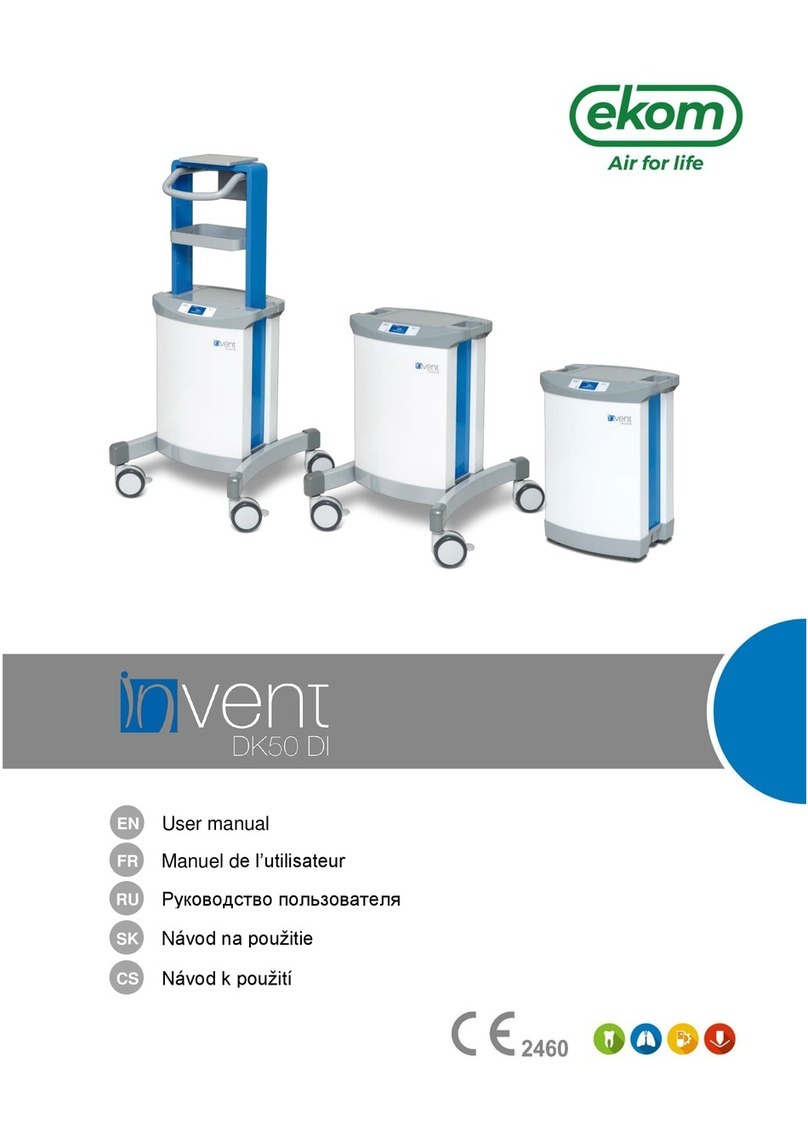
EKOM invent DK50 DI User manual

EKOM
EKOM DK50 2V S Owner's manual

EKOM
EKOM DK50 D User manual

EKOM
EKOM MEMBRANE DRYER User manual

EKOM
EKOM ASPINA DO M User manual

EKOM
EKOM DK50 DS User manual
Popular Medical Equipment manuals by other brands

Drive Medical
Drive Medical 15003 Owner's assembly and operating manual

Verathon
Verathon BladderScan BVI 9400 user manual

Ecleris
Ecleris STROBOLIGHT user manual

Amico
Amico ALERT- 2 Installation and maintenance manual

Med Systems
Med Systems Electro Flo 5000 user manual

Beurer
Beurer IH50 Instructions for use