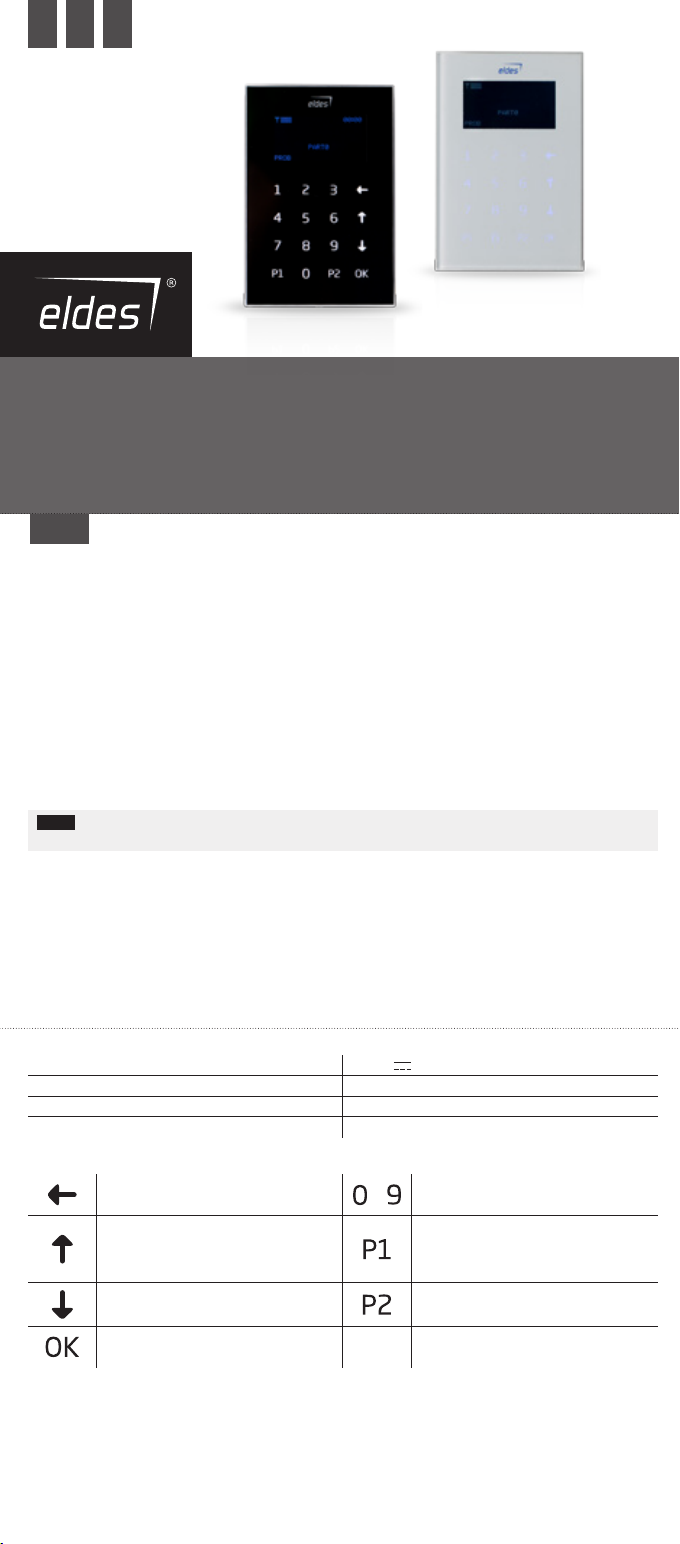
Eldes EKB2 User manual

EKB2
LCD KEYPAD/ LCD KLAVIATŪRA/ LCD КЛАВИАТУРА
EN LT RU
User Manual v1.2
Compatible with:
• ESIM264 v7.09.02 and up.
• ESIM364 all versions.
• ESIM384 all versions.
Main features:
• Alarm system arming & disarming;
• STAY-arming & disarming;
• System parameter conguration;
• PGM output control;
• System information display on LCD screen;
• Audio indication by built-in mini buzzer;
• Wireless device information display;
• Keypad partition switch (for ESIM264 v7.09.02 and
up; ESIM364 up to v02.06.20).
EKB2 is an LCD keypad intended for using with ELDES alarm systems. The system conguration is performed by
accessing EKB2 menu and entering the required values. ELDES alarm system allows to connect up to 4 EKB2 keypads.
NOTE: For complete system conguration & control using EKB2 keypad, please refer to ELDES alarm system
installation manual located at www.eldesalarms.com
1. CONTENTS OF PACK
Item Quantity
1. EKB2......................................................... 1
2. User manual............................................1
3. 5,6kΩ resistor............................ .............1
4. Jumper......................................................2
5. Screws................................ .....................4
2.TECHNICAL SPECIFICATIONS
2.1. Electrical & Mechanical Characteristics
Power Supply 12-14V 150mA max.
Maximum Keypad Connection Cable Length 100 m.
Dimensions 133 x 89 x 19 mm
Range of Operating Temperatures 0...+55ºC
2.2. Keys Functionality
One menu level back / cancel ... Value typing
Menu navigation – up
Keypad partition switch (for ESIM264
v7.09.02 and up; ESIM364 up to
v02.06.20) / minus character to enter
negative temp. value
Menu navigation – down Additional menu / minus character to
enter negative temp. value
Conrm (enter) value
Vartotojo vadovas v1.2
Suderinama su:
• ESIM264 v7.09.02 ir vėlesne.
• ESIM364 visomis versijomis.
• ESIM384 visomis versijomis.
Pagrindinės savybės:
• Apsaugos įjungimas ir išjungimas
• Apsaugos įjungimas ir išjungimas „Nakties” režimu
• Sistemos nustatymų kongūravimas
• PGM išėjimų valdymas
• Sistemos informacijo s atvaizdavimas
• Garsinė indikacija įmontuotu mini signalizatoriumi
• Belaidžio įrenginio informacijos atvaizdavimas
• Temperatūros atvaizdavimas
• Laiko atvaizdavimas
EKB2 – tai klaviatūra su LCD (skystųjų kristalų) ekranu, skirta naudoti kartu su ELDES apsaugos sistemomis. Sistemos
kongūravimas ir valdymas EKB2 klaviatūra yra atliekamas judant meniu skyrių sąrašu, vaizduojamu LCD ekrane, ir
įvedant reikalaujamas reikšmes. ELDES apsaugos sistema palaiko iki 4 EKB2 klaviatūrų.
PASTABA: Išsamiau apie sistemos kongūravimą ir valdymą naudojant EKB2 klaviatūrą, prašome skaityti ELDES
apsaugos sistemos montuotojo vadove adresu www.eldesalarms.com
1. PAKUOTĖS SUDĖTIS
1. EKB2......................................................... 1 vnt.
2. Vartotojo vadovas..................................1 vnt.
3. 5,6kΩ varža............................................. 1 vnt.
4. Trumpikliai ..............................................2 vnt.
5. Varžtai......................................................4 vnt.
READY
GARAGE
TBL
BYP
STAY
00:4520,20C
GSM signal
strength
System status
message
Home screen
view
Bypassed
violated zone
(-s)
Bypassed
violated zone
(-s)
System
STAY-armed
System
STAY-armed
Fire-type
zone violated
System
fault (-s) is
present
System
fault (-s) is
present
Custom
keypad
partition
title
Digital clock
Temperature
GARAGE
KITCHEN
BEDROOM
CORRIDOR
00:4520,20C
GSM signal
strength
System status
and alarm
indication
Home screen
view
Custom keypad
partition title
Digital clock
Temperature
1Valid for:
• ESIM264 v7.09.02 and up.
• ESIM364 up to v02.06.20.
Valid for ESIM364 v02.07.00 and up
2.3. Connector and Main Unit Functionality
Vin Positive 12-14V power supply terminal
Buzzer
VIN
COM
Z1
A0 A1
G
Y
COM
Tamper
2
COM Negative 12-14V power supply terminal
G RS485 interface for communication (green wire)
Y RS485 interface for communication (yellow wire)
COM Common terminal for Z1
Z1 Security zone terminal
A0 Keypad address pin
A1 Keypad address pin
Buzzer Mini buzzer providing sound signals
Tamper Tamper-button for EKB2 enclosure status monitoring
2.4. Keypad Address
A0 and A1 pins located on the back side of the keypad are intended to set keypad address. The keypad address is set
by putting the jumper (-s) on the pins. ELDES alarm system allows to connect up to 4 EKB2 keypads - each set under
dierent address. Jumper combinations for dierent keypad address conguration are indicated in the table below.
Address Conguration
Jumper
position
A0 A1 A0 A1 A0 A1 A0 A1
Address Keypad 1 Keypad 2 Keypad 3 Keypad 4
The address of each connected keypad is also indicated in ELDES Conguration Tool software.
3.INSTALLATION
1. Remove the screw located on the bottom side of the enclosure (see Fig. No. 3)
2. Detach keypad holder from EKB2 keypad by gently pulling theholder towards yourself (see Fig. No. 4).
3. Fix the keypad holder on the wall using the screws. (see Fig. No. 5)
4. Disconnect ELDES alarm system main power supply and backup battery.
5. Wire up keypad terminals to ELDES alarm system respectively – Vin to AUX+, COM to AUX-, Yto Y, Gto G(see
Fig. No. 6).
6. Connect a sensor and the resistor across Z1 and COM terminals in accordance with zone connection Type 1 or
Type 2 (see alarm system installation manual). As keypad zone Z1 is disabled by default, it can be enabled by
SMS, ELDES Conguration Tool, EKB2, EKB3 and EKB3W keypad. Keypad zone Z1 must be enabled and resistor
connected even if the tamper button alone is required (see Fig. No. 6).
7. Set the keypad address by putting the jumper on A0 and A1 pins (see chapter 2.4 Keypad Address).
8. Fix the keypad into the holder.
ATTENTION: Before xing the keypad into the holder please , make sure that the tamper button is properly
pressed (see Fig. No. 2).
9. Screw up the bottom side of the enclosure. (see Fig. No. 3)
10. Power up ELDES alarm system.
11. EKB2 keypad is ready.
3 4
5
VIN
YGAUX- AUX+
EKB2
COM
Z1
G
Y
COM
5,6kΩ
6
4.ADDITIONAL INFORMATION
Limited Liability
The buyer must agree that the system will reduce the risk of re, theft, burglary or other dangers but does not
guarantee against such events. “ELDES UAB” will not take any responsibility regarding personal or property or
revenue loss while using the system. “ELDES UAB” liability according to local laws does not exceed value of the
purchased system. “ELDES UAB” is not aliated with any of the cellular providers therefore is not responsible for the
quality of cellular service.
Manufacturer Warranty
The system carries a 24-month warranty by the manufacturer “ELDES UAB”. Warranty period starts from the day
the system has been purchased by the end user. The warranty is valid only if the system has been used as intended,
following all guidelines listed in the manual and within specied operating conditions. Receipt must be kept as a
proof of purchase date. The warranty is voided if the system has been exposed to mechanical impact, chemicals, high
humidity, uids, corrosive and hazardous environment or other force majeure factors.
SAFETY INSTRUCTIONS
Please read and follow these safety guidelines in order to maintain safety of operators and people around:
• DO NOT use the system where it can be interfere with other devices and cause any potential danger.
• DO NOT use the system with medical devices.
• DO NOT use the system in hazardous environment.
• DO NOT expose the system to high humidity, chemical environment or mechanical impacts.
• DO NOT attempt to personally repair the system.
Keypad EKB2 is a device mounted in limited access areas. Any system repairs must be done only by
qualied, safety aware personnel.
The system must be powered by 12-14V 150mA max power supply and must be approved by LST EN
60950-1 standard and be easily accessible.
Main power must be disconnected before any installation or tuning work starts. The system installation
or maintenance must not be done during stormy conditions.
EN
LT
The WEEE (Waste Electrical and Electronic Equipment) marking on this product (see left) or its documen-
tation indicates that the product must not be disposed of together with household waste. To prevent
possible harm to human health and/or the environment, the product must be disposed on in an approved
and environmentally safe recycling process. For further information on how to dispose of this product
correctly, contact the system supplier, or the local authority responsible for waste disposal in your area.
Copyright © “ELDES UAB”, 2017. All rights reserved
It is not allowed to copy and distribute information in this document or pass to a third party without
advanced written authorization by “ELDES UAB”. “ELSDES UAB” reserves the right to update or mod-
ify this document and/or related products without a warning. Hereby, “ELDES UAB” declares that
this LCD keypad EKB2 is in compliance with the essential requirements and other relevant provisions
of Directive 1999/5/EC. The declaration of conformity may be consulted at www.eldesalarms.com
2.TECHNINĖ SPECIFIKACIJA
2.1. Elektrinės ir mechaninės charakteristikos
Maitinimo įtampa 12-14V 150mA maks.
Maksimalus klaviatūros prijungimo laido ilgis 100m
Matmenys 133x89x19mm
Darbo temperatūros diapazonas 0...+55ºC
2.2. Mygtukų paskirtis
Grįžti vienu meniu lygiu atgal / atšaukti ... Įvesti reikšmę
Meniu navigacija – aukštyn
Klaviatūros srities jungiklis (ESIM264
v7.09.02 ir vėlesnė; ESIM364 iki
v02.06.20) / minuso ženklas neigiamai
temperatūros reikšmei
Meniu navigacija – žemyn Papildomas meniu / minuso ženklas
neigiamai temperatūros reikšmei
Patvirtinti įvestą reikšmę
(„Enter“ mygtukas)
PARUOŠTA
GARAGE
PROB
Z ATJ
NAKT
00:4520,20C
GSM signalo
stiprumas
Sistemos
būsena
Pagrindinis
ekrano
vaizdas
Laikinai
atjungta
viena arba
daugiau
pažeistų zonų
Laikinai
atjungta
viena arba
daugiau
pažeistų zonų
Vienoje arba
daugiau sričių
apsauga
įjungta
„Nakties”
režimu
Vienoje arba
daugiau sričių
apsauga
įjungta
„Nakties”
režimu
Pažeista viena
arba daugiau
„Gaisro” tipo
zonų
Yra viena
arba daugiau
sistemos
problemų
Yra
viena arba
daugiau
sistemos
problemų
Persona-
lizuotas
klaviatūros
srities pava-
dinimas
Laikrodis
Temperatūra
GARAGE
KITCHEN
BEDROOM
CORRIDOR
00:4520,20C
GSM signalo
stiprumas
Apsaugos bū-
senos ir aliarmo
indikacija
Pagrindinis
ekrano
vaizdas
Personalizuotas
klaviatūros
srities pavadi-
nimas Laikrodis
Temperatūra
1Galioja:
• ESIM264 v7.09.02 ir vėlesnei
• ESIM364 iki v02.06.20
Galioja ESIM364 v02.07.00 ir vėlesnei
2.3. Gnybtų ir pagrindinių mazgų paskirtis
Vin Teigiamas 12-14V maitinimo kontaktas
Buzzer
VIN
COM
Z1
A0 A1
G
Y
COM
Tamper
2
COM Neigamas 12-14V maitinimo kontaktas
G RS485 ryšio sąsaja (žalias laidas)
Y RS485 ryšio sąsaja (geltonas laidas)
COM Bendras Z1 zonos kontaktas
Z1 Apsaugos zona
A0 Klaviatūros adreso kontaktas
A1 Klaviatūros adreso kontaktas
Buzzer Mini signalizatorius
Tamper Tamperio jungiklis
2.4. Klaviatūros adresas
A0 ir A1 kontaktai, esantys klaviatūros nugarinėje pusėje, skirti nustatyti klaviatūros adresą. Klaviatūros adresas
nustatomas ant kontaktų uždedant trumpiklį (-ius). Prie vienos ELDES apsaugos sistemos galima prijungti iki keturių
EKB2 klaviatūrų, sukongūruotų skirtingais adresais. Galimos trumpiklių kombinacijos, skirtingo adreso nustatymui,
pateiktos lentelėje.
Adreso kongūracija
Trumpiklio
padėtis
A0 A1 A0 A1 A0 A1 A0 A1
Adresas Klaviatūra 1 Klaviatūra 2 Klaviatūra 3 Klaviatūra 4
Taip pat, kiekvienos prijungtos klaviatūros adresą galima pamatyti „ELDES Conguration Tool” programine įranga.
3.MONTAVIMAS
1. Atsukite varžtą, esantį klaviatūros korpuso apatinėje dalyje (žr. 3 pav.).
2. Atskirkite klaviatūros laikiklį nuo priekinės dalies, švelniai traukdami laikiklį nurodyta kryptimi (žr. 4 pav.).
3. Varžtais prisukite klaviatūros laikiklį prie sienos (žr. 5 pav.).
4. Išjunkite ELDES apsaugos sistemos pagrindinį maitinimą ir rezervinę bateriją.
5. Prijunkite klaviatūros kontaktus prie ELDES apsaugos sistemos gnybtų atitinkamai – Vin prie AUX+, COM prie
AUX-, Yprie Y, Gprie G(žr. 6 pav).
6. Prijunkite daviklį ir rezistorių prie Z1 ir COM gnybtų, vadovaudamiesi zonos jungimo „Tipu 1” arba „Tipu 2” (žr.
ELDES apsaugos sistemos montavimo vadovą). Kadangi pagal gamyklinę kongūraciją, klaviatūros Z1 zona yra
išjungta, ją įjungti galima SMS žinute, klaviatūra ir „ELDES Conguration Tool” programine įranga. Klaviatūros Z1
zona privalo būti įjungta ir rezistorius prijungtas, net jei naudojamas tik tamperio mygtukas.

EKB2
LCD KEYPAD/ LCD KLAVIATŪRA/ LCD КЛАВИАТУРА
EN LT RU
User Manual v1.2
Compatible with:
• ESIM264 v7.09.02 and up.
• ESIM364 all versions.
• ESIM384 all versions.
Main features:
• Alarm system arming & disarming;
• STAY-arming & disarming;
• System parameter conguration;
• PGM output control;
• System information display on LCD screen;
• Audio indication by built-in mini buzzer;
• Wireless device information display;
• Keypad partition switch (for ESIM264 v7.09.02 and
up; ESIM364 up to v02.06.20).
EKB2 is an LCD keypad intended for using with ELDES alarm systems. The system conguration is performed by
accessing EKB2 menu and entering the required values. ELDES alarm system allows to connect up to 4 EKB2 keypads.
NOTE: For complete system conguration & control using EKB2 keypad, please refer to ELDES alarm system
installation manual located at www.eldesalarms.com
1. CONTENTS OF PACK
Item Quantity
1. EKB2......................................................... 1
2. User manual............................................1
3. 5,6kΩ resistor............................ .............1
4. Jumper......................................................2
5. Screws................................ .....................4
2.TECHNICAL SPECIFICATIONS
2.1. Electrical & Mechanical Characteristics
Power Supply 12-14V 150mA max.
Maximum Keypad Connection Cable Length 100 m.
Dimensions 133 x 89 x 19 mm
Range of Operating Temperatures 0...+55ºC
2.2. Keys Functionality
One menu level back / cancel ... Value typing
Menu navigation – up
Keypad partition switch (for ESIM264
v7.09.02 and up; ESIM364 up to
v02.06.20) / minus character to enter
negative temp. value
Menu navigation – down Additional menu / minus character to
enter negative temp. value
Conrm (enter) value
Vartotojo vadovas v1.2
Suderinama su:
• ESIM264 v7.09.02 ir vėlesne.
• ESIM364 visomis versijomis.
• ESIM384 visomis versijomis.
Pagrindinės savybės:
• Apsaugos įjungimas ir išjungimas
• Apsaugos įjungimas ir išjungimas „Nakties” režimu
• Sistemos nustatymų kongūravimas
• PGM išėjimų valdymas
• Sistemos informacijo s atvaizdavimas
• Garsinė indikacija įmontuotu mini signalizatoriumi
• Belaidžio įrenginio informacijos atvaizdavimas
• Temperatūros atvaizdavimas
• Laiko atvaizdavimas
EKB2 – tai klaviatūra su LCD (skystųjų kristalų) ekranu, skirta naudoti kartu su ELDES apsaugos sistemomis. Sistemos
kongūravimas ir valdymas EKB2 klaviatūra yra atliekamas judant meniu skyrių sąrašu, vaizduojamu LCD ekrane, ir
įvedant reikalaujamas reikšmes. ELDES apsaugos sistema palaiko iki 4 EKB2 klaviatūrų.
PASTABA: Išsamiau apie sistemos kongūravimą ir valdymą naudojant EKB2 klaviatūrą, prašome skaityti ELDES
apsaugos sistemos montuotojo vadove adresu www.eldesalarms.com
1. PAKUOTĖS SUDĖTIS
1. EKB2......................................................... 1 vnt.
2. Vartotojo vadovas..................................1 vnt.
3. 5,6kΩ varža.............................................1 vnt.
4. Trumpikliai ..............................................2 vnt.
5. Varžtai......................................................4 vnt.
READY
GARAGE
TBL
BYP
STAY
00:4520,20C
GSM signal
strength
System status
message
Home screen
view
Bypassed
violated zone
(-s)
Bypassed
violated zone
(-s)
System
STAY-armed
System
STAY-armed
Fire-type
zone violated
System
fault (-s) is
present
System
fault (-s) is
present
Custom
keypad
partition
title
Digital clock
Temperature
GARAGE
KITCHEN
BEDROOM
CORRIDOR
00:4520,20C
GSM signal
strength
System status
and alarm
indication
Home screen
view
Custom keypad
partition title
Digital clock
Temperature
1Valid for:
• ESIM264 v7.09.02 and up.
• ESIM364 up to v02.06.20.
Valid for ESIM364 v02.07.00 and up
2.3. Connector and Main Unit Functionality
Vin Positive 12-14V power supply terminal
Buzzer
VIN
COM
Z1
A0 A1
G
Y
COM
Tamper
2
COM Negative 12-14V power supply terminal
G RS485 interface for communication (green wire)
Y RS485 interface for communication (yellow wire)
COM Common terminal for Z1
Z1 Security zone terminal
A0 Keypad address pin
A1 Keypad address pin
Buzzer Mini buzzer providing sound signals
Tamper Tamper-button for EKB2 enclosure status monitoring
2.4. Keypad Address
A0 and A1 pins located on the back side of the keypad are intended to set keypad address. The keypad address is set
by putting the jumper (-s) on the pins. ELDES alarm system allows to connect up to 4 EKB2 keypads - each set under
dierent address. Jumper combinations for dierent keypad address conguration are indicated in the table below.
Address Conguration
Jumper
position
A0 A1 A0 A1 A0 A1 A0 A1
Address Keypad 1 Keypad 2 Keypad 3 Keypad 4
The address of each connected keypad is also indicated in ELDES Conguration Tool software.
3.INSTALLATION
1. Remove the screw located on the bottom side of the enclosure (see Fig. No. 3)
2. Detach keypad holder from EKB2 keypad by gently pulling theholder towards yourself (see Fig. No. 4).
3. Fix the keypad holder on the wall using the screws. (see Fig. No. 5)
4. Disconnect ELDES alarm system main power supply and backup battery.
5. Wire up keypad terminals to ELDES alarm system respectively – Vin to AUX+, COM to AUX-, Yto Y, Gto G(see
Fig. No. 6).
6. Connect a sensor and the resistor across Z1 and COM terminals in accordance with zone connection Type 1 or
Type 2 (see alarm system installation manual). As keypad zone Z1 is disabled by default, it can be enabled by
SMS, ELDES Conguration Tool, EKB2, EKB3 and EKB3W keypad. Keypad zone Z1 must be enabled and resistor
connected even if the tamper button alone is required (see Fig. No. 6).
7. Set the keypad address by putting the jumper on A0 and A1 pins (see chapter 2.4 Keypad Address).
8. Fix the keypad into the holder.
ATTENTION: Before xing the keypad into the holder please , make sure that the tamper button is properly
pressed (see Fig. No. 2).
9. Screw up the bottom side of the enclosure. (see Fig. No. 3)
10. Power up ELDES alarm system.
11. EKB2 keypad is ready.
3 4
5
VIN
YGAUX- AUX+
EKB2
COM
Z1
G
Y
COM
5,6kΩ
6
4.ADDITIONAL INFORMATION
Limited Liability
The buyer must agree that the system will reduce the risk of re, theft, burglary or other dangers but does not
guarantee against such events. “ELDES UAB” will not take any responsibility regarding personal or property or
revenue loss while using the system. “ELDES UAB” liability according to local laws does not exceed value of the
purchased system. “ELDES UAB” is not aliated with any of the cellular providers therefore is not responsible for the
quality of cellular service.
Manufacturer Warranty
The system carries a 24-month warranty by the manufacturer “ELDES UAB”. Warranty period starts from the day
the system has been purchased by the end user. The warranty is valid only if the system has been used as intended,
following all guidelines listed in the manual and within specied operating conditions. Receipt must be kept as a
proof of purchase date. The warranty is voided if the system has been exposed to mechanical impact, chemicals, high
humidity, uids, corrosive and hazardous environment or other force majeure factors.
SAFETY INSTRUCTIONS
Please read and follow these safety guidelines in order to maintain safety of operators and people around:
• DO NOT use the system where it can be interfere with other devices and cause any potential danger.
• DO NOT use the system with medical devices.
• DO NOT use the system in hazardous environment.
• DO NOT expose the system to high humidity, chemical environment or mechanical impacts.
• DO NOT attempt to personally repair the system.
Keypad EKB2 is a device mounted in limited access areas. Any system repairs must be done only by
qualied, safety aware personnel.
The system must be powered by 12-14V 150mA max power supply and must be approved by LST EN
60950-1 standard and be easily accessible.
Main power must be disconnected before any installation or tuning work starts. The system installation
or maintenance must not be done during stormy conditions.
EN
LT
The WEEE (Waste Electrical and Electronic Equipment) marking on this product (see left) or its documen-
tation indicates that the product must not be disposed of together with household waste. To prevent
possible harm to human health and/or the environment, the product must be disposed on in an approved
and environmentally safe recycling process. For further information on how to dispose of this product
correctly, contact the system supplier, or the local authority responsible for waste disposal in your area.
Copyright © “ELDES UAB”, 2017. All rights reserved
It is not allowed to copy and distribute information in this document or pass to a third party without
advanced written authorization by “ELDES UAB”. “ELSDES UAB” reserves the right to update or mod-
ify this document and/or related products without a warning. Hereby, “ELDES UAB” declares that
this LCD keypad EKB2 is in compliance with the essential requirements and other relevant provisions
of Directive 1999/5/EC. The declaration of conformity may be consulted at www.eldesalarms.com
2.TECHNINĖ SPECIFIKACIJA
2.1. Elektrinės ir mechaninės charakteristikos
Maitinimo įtampa 12-14V 150mA maks.
Maksimalus klaviatūros prijungimo laido ilgis 100m
Matmenys 133x89x19mm
Darbo temperatūros diapazonas 0...+55ºC
2.2. Mygtukų paskirtis
Grįžti vienu meniu lygiu atgal / atšaukti ... Įvesti reikšmę
Meniu navigacija – aukštyn
Klaviatūros srities jungiklis (ESIM264
v7.09.02 ir vėlesnė; ESIM364 iki
v02.06.20) / minuso ženklas neigiamai
temperatūros reikšmei
Meniu navigacija – žemyn Papildomas meniu / minuso ženklas
neigiamai temperatūros reikšmei
Patvirtinti įvestą reikšmę
(„Enter“ mygtukas)
PARUOŠTA
GARAGE
PROB
Z ATJ
NAKT
00:4520,20C
GSM signalo
stiprumas
Sistemos
būsena
Pagrindinis
ekrano
vaizdas
Laikinai
atjungta
viena arba
daugiau
pažeistų zonų
Laikinai
atjungta
viena arba
daugiau
pažeistų zonų
Vienoje arba
daugiau sričių
apsauga
įjungta
„Nakties”
režimu
Vienoje arba
daugiau sričių
apsauga
įjungta
„Nakties”
režimu
Pažeista viena
arba daugiau
„Gaisro” tipo
zonų
Yra viena
arba daugiau
sistemos
problemų
Yra
viena arba
daugiau
sistemos
problemų
Persona-
lizuotas
klaviatūros
srities pava-
dinimas
Laikrodis
Temperatūra
GARAGE
KITCHEN
BEDROOM
CORRIDOR
00:4520,20C
GSM signalo
stiprumas
Apsaugos bū-
senos ir aliarmo
indikacija
Pagrindinis
ekrano
vaizdas
Personalizuotas
klaviatūros
srities pavadi-
nimas Laikrodis
Temperatūra
1Galioja:
• ESIM264 v7.09.02 ir vėlesnei
• ESIM364 iki v02.06.20
Galioja ESIM364 v02.07.00 ir vėlesnei
2.3. Gnybtų ir pagrindinių mazgų paskirtis
Vin Teigiamas 12-14V maitinimo kontaktas
Buzzer
VIN
COM
Z1
A0 A1
G
Y
COM
Tamper
2
COM Neigamas 12-14V maitinimo kontaktas
G RS485 ryšio sąsaja (žalias laidas)
Y RS485 ryšio sąsaja (geltonas laidas)
COM Bendras Z1 zonos kontaktas
Z1 Apsaugos zona
A0 Klaviatūros adreso kontaktas
A1 Klaviatūros adreso kontaktas
Buzzer Mini signalizatorius
Tamper Tamperio jungiklis
2.4. Klaviatūros adresas
A0 ir A1 kontaktai, esantys klaviatūros nugarinėje pusėje, skirti nustatyti klaviatūros adresą. Klaviatūros adresas
nustatomas ant kontaktų uždedant trumpiklį (-ius). Prie vienos ELDES apsaugos sistemos galima prijungti iki keturių
EKB2 klaviatūrų, sukongūruotų skirtingais adresais. Galimos trumpiklių kombinacijos, skirtingo adreso nustatymui,
pateiktos lentelėje.
Adreso kongūracija
Trumpiklio
padėtis
A0 A1 A0 A1 A0 A1 A0 A1
Adresas Klaviatūra 1 Klaviatūra 2 Klaviatūra 3 Klaviatūra 4
Taip pat, kiekvienos prijungtos klaviatūros adresą galima pamatyti „ELDES Conguration Tool” programine įranga.
3.MONTAVIMAS
1. Atsukite varžtą, esantį klaviatūros korpuso apatinėje dalyje (žr. 3 pav.).
2. Atskirkite klaviatūros laikiklį nuo priekinės dalies, švelniai traukdami laikiklį nurodyta kryptimi (žr. 4 pav.).
3. Varžtais prisukite klaviatūros laikiklį prie sienos (žr. 5 pav.).
4. Išjunkite ELDES apsaugos sistemos pagrindinį maitinimą ir rezervinę bateriją.
5. Prijunkite klaviatūros kontaktus prie ELDES apsaugos sistemos gnybtų atitinkamai – Vin prie AUX+, COM prie
AUX-, Yprie Y, Gprie G(žr. 6 pav).
6. Prijunkite daviklį ir rezistorių prie Z1 ir COM gnybtų, vadovaudamiesi zonos jungimo „Tipu 1” arba „Tipu 2” (žr.
ELDES apsaugos sistemos montavimo vadovą). Kadangi pagal gamyklinę kongūraciją, klaviatūros Z1 zona yra
išjungta, ją įjungti galima SMS žinute, klaviatūra ir „ELDES Conguration Tool” programine įranga. Klaviatūros Z1
zona privalo būti įjungta ir rezistorius prijungtas, net jei naudojamas tik tamperio mygtukas.
Other manuals for EKB2
3
Table of contents
Other Eldes Keypad manuals