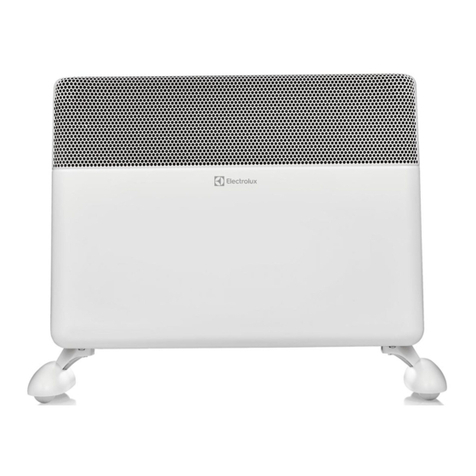
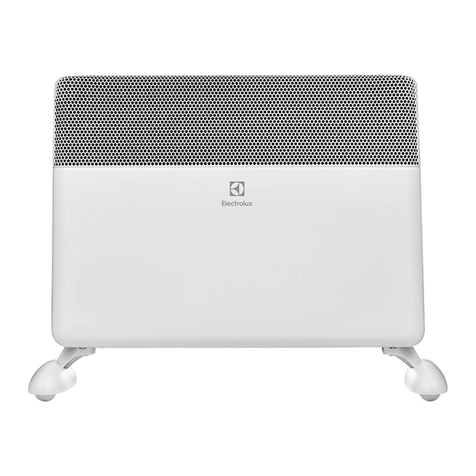
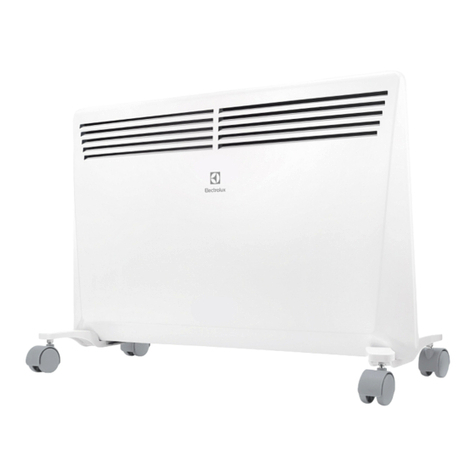
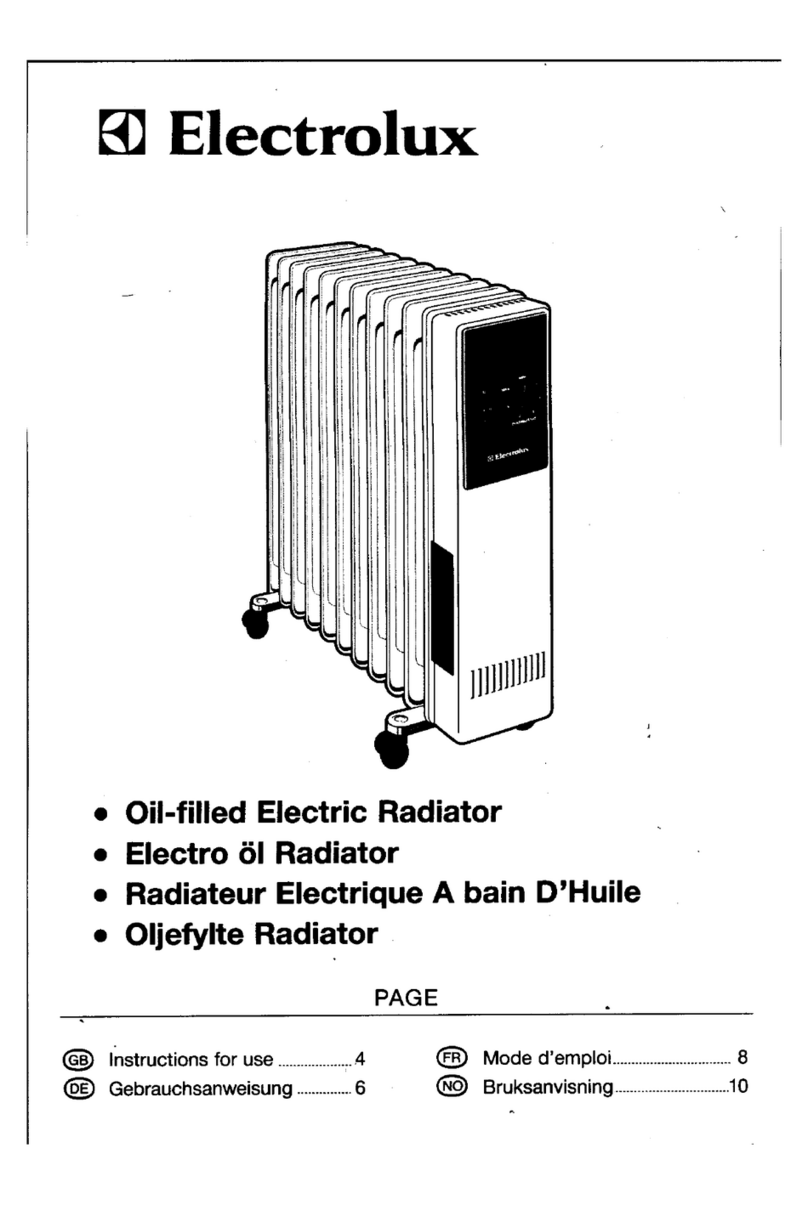
Electrolux ECH/AG2-1000 3BE EEC User manual

ECH/AG2-1000 3BE EEC
ECH/AG2-1500 3BE EEC
ECH/AG2-1800 3BE EEC
ECH/AG2-2200 3BE EEC
Fill your life with
comfort
Get quick access to instructions, additional
product information and support
at our website
home-comfort.com
GB Electric convection heater • User’s manual
PL • Elektryczny grzejnik konwekcyjny
• Instrukcja obsługi
SR • Električni konvekcioni grejač
• Korisnički priručnik
BG •
•
MK • ј ј
•
AL • Ngorhësi elektrik i llojit të konvektorit
• Manuali i përdorimit
CZ • Elektrické konvektory • Návod k použití
HU • Elektromos konvekciós melegítő
• Kezelési útmutató
SI • Električni konvekcijski grelec
• Navodila za uporabo
SK • Elektrické konvektory
• Používateľská príručka
RO • Încălzitor electric de convecție
• Instrucţiuni de exploatare
GR • Ηλεκτρική Θερμάστρα Συναγωγής
• Οδηγίες χρήσης
HR • Električni konvekcijski grijač
• Upute za uporabu

2www.home-comfort.com

3
1. ENGLISH................................................................................................................................... 4
2. SHQIP .......................................................................................................................................18
3. POLSKI ....................................................................................................................................32
4. ROMÂNĂ................................................................................................................................46
5. ..........................................................................................................................60
6. ΕΛΛΗΝΙΚΑ................................................................................................................................ 74
7. ČESKÝ......................................................................................................................................88
8. MAGYAR................................................................................................................................102
9. SRPSKI.....................................................................................................................................116
10. HRVATSKI..............................................................................................................................128
11. SLOVINSKÝ...........................................................................................................................142
12. SLOVENSKÝ........................................................................................................................ 156
13. ..................................................................................................................170

4www.home-comfort.com
Designation
Caution/Important safety information
Common information and recommendations
Warranty service is performed according to the terms specified in the “Warranty” section.
Note:
In the text of this manual, the electric convector may have such technical names as
appliance, device, vehicle etc.
This product is only suitable for well insulated spaces or occasional use.
CONTENT
1. INTRODUCTION................................................................................................................................................................5
2. SAFETY REGULATIONS ..................................................................................................................................................5
3. PURPOSE OF THE DEVICE............................................................................................................................................ 5
4. GENERAL VIEW OF THE DEVICE................................................................................................................................ 5
5. CONTROL UNIT DEVICE ............................................................................................................................................... 5
6. MEANING OF ICONS ON THE DISPLAY.................................................................................................................6
7. TURNING ON THE DEVICE........................................................................................................................................... 6
8. PROGRAM FUNCTION...................................................................................................................................................6
9. OVERHEATING PROTECTION FUNCTION............................................................................................................ 8
10. SWITCHING OFF THE APPLIANCE............................................................................................................................8
11. DEVICE CONTROL........................................................................................................................................................... 7
12. INSTALLATION OF THE DEVICE................................................................................................................................. 9
13. SPECIFICATIONS .............................................................................................................................................................10
14. CARE ......................................................................................................................................................................................11
15. TROUBLESHOOTING ......................................................................................................................................................11
16. COMPLETING UNITS.......................................................................................................................................................11
17. STORING THE APPLIANCE ...........................................................................................................................................11
18. RECYCLING.........................................................................................................................................................................11
19. WARRANTY..........................................................................................................................................................................11
20. DATE OF PRODUCTION ................................................................................................................................................11
WE THINK ABOUT YOU
Thank you for purchasing an Electrolux appliance. You have chosen a product, backed by
decades of professional experience and innovations. Unique and stylish, it was created with
care for you. Therefore, whenever you use it, you can be sure that the results will always be
excellent. Welcome to Electrolux!
On our website you can:
Find product recommendations, user manuals, maintenance information:
http://www.home-comfort.com/support/
Buy a product in your city:
http://www.home-comfort.com/search/find-a-store/
While selling this device, dealer must fill “Product details” section located on the
inside of the back cover of this manual.

5
Introduction
Please read and strictly follow the
requirements contained in this manual. Please
keep the manual and documents confirming
the date of purchase of the device in a safe
place for easy retrieval and use.
The device is intended for air heating
in household premises.
Safety regulations
Caution!
Non-following the manual can cause serious
injury or serious equipment damage.
When using the device, observe the general
safety rules when using electrical devices.
Failure to follow safety instructions and
instructions can result in electric shock,
fire and/or serious injury. Before using the
device, carefully read the following safety
rules:
• When the heater is turned on for the first
time, a characteristic smoke smell may
occur due to the burning of oil in
the heating elements. It is recommended
to turn on the heater for 10-20 minutes
in a well-ventilated area before installation.
• Any electrical appliance should be
supervised, especially if there are children
nearby. Make sure that children do not
touch the device with their hands.
• Do not use the convector with damaged
and/or damaged or frayed power cable.
• The mains cable must be positioned
so that it is not stepped on, that it is
not abraded, torn, kinked or otherwise
damaged.
• Do not allow foreign objects or liquids
to enter the inside of the device.
• Always place the appliance in such a way
in such a way as to prevent the possibility
of ignition of flammable materials
(for example, curtains). Make sure nothing
is blocking the inlet and outlet ducts.
To avoid fire, do not put clothing or other
items on the device.
• Make sure that the bodies of the device
and its heating element have cooled down,
before the device is dismantled
and packed for long-term storage.
• Do not use the device in open spaces
outdoors.
• Make sure that the mains voltage
corresponds to that indicated on the label
of the device.
• Do not try to repair the device yourself.
Please contact your dealer.
• Unplug the device from the mains when
not in use and before cleaning.
Purpose of the device
The device is designed for heating air in
the household premises.
General view of the device
1
2
3
4
Figure. 1
1. Control unit
2. Ventilation vents
3. Ventilation inlets
4. Chassis for floor installation (supplied
separately)
Control unit device
1
2
3
Figure. 2 Control unit
1. Protective cover
2. Control panel
3. Power cord
ENGLISH

6www.home-comfort.com
Heating power modes
Auto - the heating element is inversely
controlled.
Custom - the user himself limits the maximum
power of the heating element. A choice of
5 power levels.
”Program” function
This function allows the device to work on
a weekly schedule. For each day of the
week, you can select one option: Custom
(customizable) or P1, P2, P3, P4, P5, P6, P7
(presets with presets).
In the Custom 24h settings, the user selects
one of 4 options for each hour: Comfort
(orange) and Anti-Frost (blue), Off (standby,
black), by default all watches have Eco
(green). A maximum of 3 Comfort.
“Timer OFF” function
Allows you to automatically turn off the device
after a specified time. When the set time has
elapsed, the system will automatically turn off
the heater, putting it into standby mode with
heating off.
“Auto Restart Resume” function
In the event of a short-term power outage,
and its further inclusion, the convector
automatically switches to the operating mode,
while maintaining the last operating mode of
the device and the set temperature (if a timer
was set, the set shutdown time is saved). If the
device was in standby mode when the power
was turned off, it will remain in the same mode
when the power supply is restored.
“Open window” function
When this function is active, when the
temperature drops within 10 minutes (and then
up to 30 minutes) by 5 or more degrees -
the Anti-Frost mode is switched on the heater.
If in the time interval 10 - 30 minutes the
temperature continues to drop, the device
turns off. Further, the heater waits for the
stabilization of the decrease in the room
temperature, if it rises by 2 degrees, then
the last set mode is turned on.
1
2
34
5
6
7
Figure. 3 Control Panel
1. ON/OFF button.
2. Button ON/OFF function “Open window”.
3. OK button - command confirmation, MENU
- go to the device settings menu.
4. MODE button - switching between
temperature modes (Comfort, Eco, Anti-
Frost), - navigation in the menu, a step
back), — navigation in the menu, a step
back.
5. and 6. Increase and decrease of temperature
without further obligatory confirmation,
navigation in the menu, locking and
unlocking of controls.
7. Display.
Meaning of icons on the display
— Indication of temperature mode Comfort
— Indication of temperature mode Eco
— Indication of temperature mode Anti-Frost
— Display of the function “Open window”
— Indication of the “Timer Off” function
(to turn off)
— Indication of work on schedule
— Control lock indication
— Control Unlock Indication
— Display target temperature
Turning on the device
Insert the plug into a power outlet. Press the
button to turn on the device. The factory
set temperature is +24 º.
Operating modes and functions
There are 3 temperature operating modes
available for adjustment:
Comfort - range from 10 ºC to 35 ºC. Eco -
deviation range from Comfort from 3 ºC to
7 ºC. Anti-Frost - a range from 3 ºC to 7 ºC.

7
Set in the menu by
clicking on
Temperature
modes
Set
temperature
Set the difference
with Comfort
Set
temperature
Auto ON/OFF
timer
Castom Hours,
minutes
Date and
time
Date
Time
Brightness
Auto off
display
Display Set
Hours,
minutes
Day, month,
year
ON/OFF
Brightness
level
ON/OFF
Sound
Service
Info Firmware
version
Reset
Reset
ON/OFF
programs
Program status
ON/OFF
Schedule
settings
setting the heater operation
schedule for each day of the week
setting your own heater work
schedule for 24 hours
Custom
24
Heater setting
Programme
Timer setting
Settings menu diagram
ENGLISH

8www.home-comfort.com
Device control
Preparation for work
1. Carefully remove the heater from the
cardboard box.
2. Remove the colored stickers from the front
panel before use.
3. At the first start-up, some odor may
appear, which will disappear after the
convector starts to work.
4. Fix the device in a stable position
according to the assembly and installation
instructions.
5. After installing the convector, plug it into a
power outlet.
6. It is not recommended to use the same
electrical outlet for simultaneous plugging
in heater and other high power electrical
appliance.
Installation of the device
Recommended installation
The device must be fixed in accordance with
the regulations.
The switch and other mechanisms must
stay away from splashing water. It is strictly
forbidden to cover or plug the air inlets or
”Parental control” function
Locks all buttons on the control panel. While
the instrument is operating, press and hold the
left and right arrow buttons simultaneously for
a few seconds. The lock indicator lights up on
the display. The Parental Control function
is activated. To disable the function, repeat
the same operation as to enable.
”Overheating protection”function
The device is equipped with an automatic
switch that is activated when the upper
temperature limit is reached. The heater
switches off automatically in case of
overheating. After eliminating the source
of overheating, the heater will turn on
automatically.
Switching off the appliance
To turn off the device, press the button
in any operating mode.
Setting up the Program
Select the day of
the week for
settings
Schedule type
selection for
monday
Schedule
example P1
Command
confirmation
Setting up the Custom
Choice of hours for
settings (allocated
7 hours)
Work mode
selection for a
specific hour
Command
confirmation Set next hour for
settings

9
outlets (grilles), due to the risk of accident or
damage to the device. Do not place behind
curtains, doors, wall or air vents. Observe
the minimum installation distances on floors,
surfaces, furniture, etc.
100 mm
min.
100 mm
min.
100 mm
min.
100 mm
min.
Figure. 5
1. Wall mounted installation option
(bracket and mounting template
included)
Use the brackets to mount the heater on
the wall according to the pictures below.
The distance from the device to the floor
and surrounding objects must be at least 10
cm (Figure 5):
To install the bracket on a wall, follow these
steps:
• Attach the mounting template to the wall
in the place where you plan to place
the vector.
• Mark and drill holes.
• Place the bracket on the wall and secure
it with the fasteners.
Fix the device to the bracket as follows
(Figure 6):
• Place the lower part of the convector onto
the bracket using the special holes located
in the lower part of the convector.
• Slide the upper part of the convector onto
the bracket, fixing it with the latches on the
bracket.
a
b
Figure. 6
Figure. 7
2. Floor installation
Using the chassis (supplied separately), having
previously studied the mounting scheme
(Figure 7), install the device on the floor:
1. Carefully turn the convector upside down.
2. Take one of the chassis and attach to
the landing area on the right or left side
of the convector so that it fits snugly
against the convector body
3. Secure the chassis using the supplied
mount.
4. Repeat the same procedure for attaching
the second chassis.
ENGLISH

10 www.home-comfort.com
Troubleshooting
Malfunction
symptom Cause of malfunction Troubleshooting steps
No heating
1) There is no power supply.
2) The convector is in standby mode.
3) The actual room temperature is higher
than the thermostat setting.
1) Establish a reliable connection.
2) Set the convector to operating
mode.
3) Adjust the temperature mode of the
convector.
Smell of burnt dust
when first turned on Not a malfunction The smell disappears after a few
minutes of convector operation
If after trying all the troubleshooting steps, the problem is not resolved, contact an authorized service cen-
ter in your area or your sales representative.
Specifications
Model ECH/AG2-1000
3BE EEC
ECH/AG2-1500
3BE EEC
ECH/AG2-1800
3BE EEC
ECH/AG2-2200
3BE EEC
Power, W 900-1000 1350-1500 1600-1800 2000-2200
Rated power consumption, W 900-1000 1350-1500 1600-1800 2000-2200
Rated current, A 4.1-4.17 6.14-6.25 7.27-7.50 9.1-9.17
Rated voltage, V~Hz 220/240~50/60 220/240~50/60 220/240~50/60 220/240~50/60
Ingress protection class IP24 IP24 IP24 IP24
Electrical protection class I I I I
Heating area, m210-12 13-15 18-20 22-25
Appliance size (W×H×D), mm 480×413×129 560×413×129 640×413×129 800×413×129
Packing size (W×H×D), mm 575×445×157 655×445×157 735×445×157 895×445×157
Net weight, kg 3.44 4.1 4.33 5.13
Gross weight, kg 4.57 5.13 5.43 6.63
* Indicated is a guideline value and may differ depending on actual conditions of use
The convector is supplied with a sticker on
the front panel. Remove it before using the
device.

11
Care
The convector does not require any special
maintenance. Before servicing (leaving)
the convector must be disconnected from
the power supply.
The body of the device should be periodically
wiped with a soft, lint-free cloth or damp
sponge. Never use abrasive, foaming
detergents or solvents. It is quite easy to clean
the space behind a wall-mounted heater.
Press down the two latches on the back of
the heater and pull the heater forward. After
it is removed, you can wash the wall on which
it was installed.
After finishing cleaning, put the heater back
in its normal operating position.
Recommended indoor temperature
and humidity:
a) for the convector operation: from -25°
to + 30°, humidity from 40% to 90%;
b) for the storage of the convector: from -20°C
to + 80°, humidity from 40% to 90%.
Warranty
Warranty service is performed according
to the terms specified in the “Warranty”
section.
Warranty:
• Warranty period for the item is two years
from the purchase date. If any defects
occur due to defects in materials and/or
workmanship during this two-year warranty
period, the item should be repaired
or replaced.
• Free maintenance or replacement
is possible only in case if convincing
evidence is provided, for example a stub,
which confirms that the day when
the service is requested, is within the
warranty period.
• The warranty does not cover products
and/or parts of the product that
are subjects to deterioration, may
be considered as expendable supplies
or which are made of glass.
• The warranty is void if the defect
is caused by damage ensuing by misuse,
poor maintenance (for example, a failure
occurred due to ingress of foreign objects
or liquids) or if changes or repairs were
performed by persons not authorized
by the Manufacturer.
• For the correct use of the product,
the user must strictly follow all included
in the manual instructions, and also
must avoid any action or manipulation
described as unwanted or indicated so
in this manual.
• These warranty restrictions do not affect
your statutory rights.
Support:
The support during and after the warranty
period is available in all countries where
the product is officially distributed. Please
contact your dealer for help.
Date of manufacture
The date of manufacture is indicated on
a sticker on the body of the appliance,
and also encrypted in Code-128. The date
of manufacture is determined as follows:
month and year of production
Troubleshooting
E1 - temperature sensor malfunction
E2 - overheating in the room is more than
50ºC If these errors occur, contact your
dealer.
Completing units
1. Electric heater
2. Wall mounting bracket
3. Mounting template
4. A set of fasteners
5. Operation manual
Storing the appliance
Make sure the heater is cool before storing
it. It is recommended to clean the heater and
store (preferably in the original packaging) in
a cool dry place in case you plan not to use
device for a long time.
Recycling
The time-expired appliance can’t be
disposed with household waste (2012/19/EU).
ENGLISH

12 www.home-comfort.com
Do not remove and keep safe the serial
number on the device’s body. If the serial
number sticker is lost or damaged, it will
not be possible to restore the production date
if necessary.
Manufacturer/Importer: SIA “Green Trace”,
LV-1004, Biekensalas iela, 21, Riga, Latvia.
E-mail: info@greentrace.lv
Made in PRC
Electrolux is a registered trademark used
under license from AB Electrolux (publ.).
The manufacturer reserves the right to modify
the design and characteristics of the device.
This manual may contain technical and typing
errors. Changes to technical characteristics
and assortment are subject to change without
notice.
Mistakes and typing errors may be permitted
in texts and numeric notations.
Product design and technical data may vary
from the one pictured on the packaging.
Please refer to a sales consultant for more
detailed information.
For sale in Greece, Poland, Republic
of Serbia, Hungary, Slovenia, Croatia, Czech
Republic, Montenegro, Slovakia, Bosnia
and Herzegovina, Republic of Northern
Macedonia, Albania, Bulgaria, Romania only.

13
ENGLISH
Information requirment for thе electric local space heaters
Model identifier(s): ECH/AG2-1000 3BE EEC
ltem Symbol Value Unit ltem Unit
Heat output Туре of heat input, for electric storage local space
heaters only (select one)
Nominal heat
output Pnom 0.91 kW manual heat charge control, with inte-
grated thermostat NO
Minimum heat
output (indica-
tive)
Pmin 0.42 kW manual heat charge control with room
and/or outdoor temperature feedback NO
Maximum con-
tinuous heat
output
Pmax,c 0.98 kW
electronic heat charge control with room
and/or outdoor
temperature feedback
NO
Auxiliary electricity consumption fan assisted heat output NO
At nominal heat
output elmax 0kW Туре of heat output/room temperature control (select
one)
At minimum
heat output elmin 0kW single stage heat output and n room
temperature control NO
ln standby
mode elSB 0.00025 kW two r more manual stages, n room tem-
perature control NO
with mechanic thermostat room tempera-
ture control NO
with electronic room temperature control NO
electronic room temperature control plus
day timer NO
electronic room temperature control plus
week timer YES
Other control options (multiple selections possible)
room temperature control, with presence
detection NO
room temperature control, with open win-
dow detection YES
with distance control option NO
with adaptive start control NO
with working time limitation NO
with blk bulb sensor NO
Contact details Manufacturer/Importer: SIA “Green Trace”, LV-1004, Biekensalas iela, 21, Riga, Latvia.
E-mail: info@greentrace.lv

14 www.home-comfort.com
Information requirment for thе electric local space heaters
Model identifier(s): ECH/AG2-1500 3BE EEC
ltem Symbol Value Unit ltem Unit
Heat output Туре of heat input, for electric storage local space
heaters only (select one)
Nominal heat
output Pnom 1.4 kW manual heat charge control, with inte-
grated thermostat NO
Minimum heat
output (indica-
tive)
Pmin 0.7 kW manual heat charge control with room
and/or outdoor temperature feedback NO
Maximum con-
tinuous heat
output
Pmax,c 1.5 kW
electronic heat charge control with room
and/or outdoor
temperature feedback
NO
Auxiliary electricity consumption fan assisted heat output NO
At nominal heat
output elmax 1.351 kW Туре of heat output/room temperature control (select
one)
At minimum
heat output elmin 0.703 kW single stage heat output and n room
temperature control NO
ln standby
mode elSB 0.00031 kW two r more manual stages, n room tem-
perature control NO
with mechanic thermostat room tempera-
ture control NO
with electronic room temperature control NO
electronic room temperature control plus
day timer NO
electronic room temperature control plus
week timer YES
Other control options (multiple selections possible)
room temperature control, with presence
detection NO
room temperature control, with open win-
dow detection YES
with distance control option NO
with adaptive start control NO
with working time limitation NO
with blk bulb sensor NO
Contact details Manufacturer/Importer: SIA “Green Trace”, LV-1004, Biekensalas iela, 21, Riga, Latvia.
E-mail: info@greentrace.lv

15
ENGLISH
Information requirment for thе electric local space heaters
Model identifier(s): ECH/AG2-1800 3BE EEC
ltem Symbol Value Unit ltem Unit
Heat output Туре of heat input, for electric storage local space
heaters only (select one)
Nominal heat
output Pnom 1.6 kW manual heat charge control, with inte-
grated thermostat NO
Minimum heat
output (indica-
tive)
Pmin 0.8 kW manual heat charge control with room
and/or outdoor temperature feedback NO
Maximum con-
tinuous heat
output
Pmax,c 1.8 kW
electronic heat charge control with room
and/or outdoor
temperature feedback
NO
Auxiliary electricity consumption fan assisted heat output NO
At nominal heat
output elmax 1.625 kW Туре of heat output/room temperature control (select
one)
At minimum
heat output elmin 0.813 kW single stage heat output and n room
temperature control NO
ln standby
mode elSB 0.0003 kW two r more manual stages, n room tem-
perature control NO
with mechanic thermostat room tempera-
ture control NO
with electronic room temperature control NO
electronic room temperature control plus
day timer NO
electronic room temperature control plus
week timer YES
Other control options (multiple selections possible)
room temperature control, with presence
detection NO
room temperature control, with open win-
dow detection YES
with distance control option NO
with adaptive start control NO
with working time limitation NO
with blk bulb sensor NO
Contact details Manufacturer/Importer: SIA “Green Trace”, LV-1004, Biekensalas iela, 21, Riga, Latvia.
E-mail: info@greentrace.lv

16 www.home-comfort.com
Information requirment for thе electric local space heaters
Model identifier(s): ECH/AG2-2200 3BE EEC
ltem Symbol Value Unit ltem Unit
Heat output Туре of heat input, for electric storage local space
heaters only (select one)
Nominal heat
output Pnom 2.0 kW manual heat charge control, with inte-
grated thermostat NO
Minimum heat
output (indica-
tive)
Pmin 1.0 kW manual heat charge control with room
and/or outdoor temperature feedback NO
Maximum con-
tinuous heat
output
Pmax,c 2.2 kW
electronic heat charge control with room
and/or outdoor
temperature feedback
NO
Auxiliary electricity consumption fan assisted heat output NO
At nominal heat
output elmax 2.028 kW Туре of heat output/room temperature control (select
one)
At minimum
heat output elmin 1.051 kW single stage heat output and n room
temperature control NO
ln standby
mode elSB 0.00036 kW two r more manual stages, n room tem-
perature control NO
with mechanic thermostat room tempera-
ture control NO
with electronic room temperature control NO
electronic room temperature control plus
day timer NO
electronic room temperature control plus
week timer YES
Other control options (multiple selections possible)
room temperature control, with presence
detection NO
room temperature control, with open win-
dow detection YES
with distance control option NO
with adaptive start control NO
with working time limitation NO
with blk bulb sensor NO
Contact details Manufacturer/Importer: SIA “Green Trace”, LV-1004, Biekensalas iela, 21, Riga, Latvia.
E-mail: info@greentrace.lv

17
ENGLISH

18 www.home-comfort.com
Simbolet e përdorur
Kujdes/të dhënat e rëndësishme për rregullat e sigurisë
Informacioni i përgjithshëm dhe rekomandime
Shërbimi i garancisë kryhet në përputhje me kushtet e specifikuara
në seksionin “Detyrimet e garancisë”.
Shënim:
Në tekstin e këtij manuali, një konvektor elektrik mund të ketë emra teknikë, siç janë,
pajisja, aparati, etj.
Kjo pajisje është e përshtatshme vetëm për ambiente brendshëm të izoluara
ose për përdorim periodik.
PERMBAJTJE
1. HYRJE ....................................................................................................................................................................................19
2. RREGULLAT E SIGURISË................................................................................................................................................19
3. QËLLIMI I PAJISJES..........................................................................................................................................................19
4. PAMJA E PËRGJITHSHME E PAJISJES ......................................................................................................................19
5. BLLOKU I KONTROLLIT................................................................................................................................................20
6. KUPTIMIN E IKONAVE NË EKRAN ..........................................................................................................................20
7. NDIZNI PAJISJEN ............................................................................................................................................................20
8. REGJIMET TË PUNËS DHE FUNKSIONET..............................................................................................................20
9. FIKJE E PAJISJES...............................................................................................................................................................23
10. PËRDORIMI I PAJISJES..................................................................................................................................................23
11. INSTALIMI DHE MONTIMI ..........................................................................................................................................23
12. MIRËMBAJTJA ...................................................................................................................................................................24
13. ZGJIDHJA E DEFEKTEVE..............................................................................................................................................25
14. SPECIFIKIMET...................................................................................................................................................................25
15. ZGJIDHJA E PROBLEMEVE .........................................................................................................................................25
16. PËRMBAJTJA E PAKETIMIT..........................................................................................................................................25
17. RUAJTJE E PAJISJES ........................................................................................................................................................25
18. RICIKLIMI............................................................................................................................................................................25
19. DETYRIMET E GARANCISË.........................................................................................................................................25
20. DATA E PRODHIMIT.......................................................................................................................................................26
NE MENDOJMË PËR JU
Ju falënderojmë për blerjen e një pajisje Electrolux. Ju keni zgjedhur një produkt të
mbështetur nga dekada përvojë profesionale dhe inovacioni. Unike dhe me stil, ajo ishte
dizajnuar duke menduar për ju. Prandaj, sa herë që e përdorni, mund të jeni i sigurt
që rezultatet gjithmonë do të jenë të shkëlqyera. Mirë se vini në Electrolux!
Në faqen tonë të internetit ju gjeni:
Gjeni rekomandimet për perdorimin të produktit, manualet e, informacionin
e mirëmbajtjes: www.home-comfort.com/support/
Bleni një produkt në qytetin tuaj:
www.home-comfort.com/search/find-a-store/
Pas shitjes së paisjes, shitësi duhet te plotesoje pjesen “Product details”,
e cila ndodhet ne faqen e fundit të këtij manualit.

19
Hyrje
Ju lutemi lexoni dhe ndiqni me përpikëri
kërkesat e përmbajtura në këtë manual. Ruani
manualin dhe dokumentet që konfirmojnë
datën e blerjes së pajisjes në një vend të
sigurt, më qellim qe te merrni dhe të përdorni
këtë manual më lehtësi në të ardhmen.
Pajisja është konstruktuar për ngrohjen e ajrit
në ambientet shtëpiake.
Rregullat e sigurisë
Vëmendje!
Kërkesat të cilat, nëse nuk ndiqen, mund të
rezultojnë në trauma të renda ose dëmtim
serioz të pajisjeve.
Gjatë përdorimit e pajisjes, respektoni
rregullat e përgjithshme të sigurisë
të përdorimit të pajisjeve elektrike.
Mosrespektimi i rregullave dhe udhëzimeve
të sigurisë mund të rezultojë në goditje
elektrike, zjarr dhe/ose dëmtim serioz. Para
se të përdorni pajisjen, lexoni me kujdes
masat të sigurisë e mëposhtme:
• Kur ngrohës është ndezur për herë të parë,
mund të shfaqet një erë karakteristike tymi
për shkak të djegies së vajit në elementet
i ngrohësit. Rekomandohet të ndizni
ngrohësin për 10-20 minuta në një zonë të
ventiluar mirë para instalimit.
• Çdo pajisje elektrike duhet të mbikëqyret,
veçanërisht nëse përdoret ne prani të
fëmijëve. Sigurohuni që fëmijët të mos
prekin pajisjen me duart e tyre.
• Mos përdorni një konvektor të dëmtuar
dhe/ose me një kabllo energjie të dëmtuar
ose të prishur.
• Kabllo i korrentit duhet të jetë e
pozicionuar në atë mënyrë që të mos
shkelet më këmbë, që të mos fshihet, griset,
lakohet ose dëmtohet ndryshe.
• Mos lejoni që objektet e huaja ose lëngjet
të hyjnë brenda pajisjes .
• Gjithmonë vendosni pajisjen në mënyrë
që parandaloni ndezjen e materialeve të
ndezshme(p.sh. perde).Sigurohuni që asgjë
nuk bllokon kanalet. hyrëse dhe dalëse Për
të shmangur zjarrin, mos vendosni veshje
ose sende të tjera në pajisje.
• Sigurohuni që trupi i pajisjes dhe elementi
i tij i ngrohjes të jenë ftohur para se pajisja
të çmontohet dhe të vendoset paketimin
për ruajtje afatgjatë.
• Mos e përdorni pajisjen në hapësira jashtë.
• Sigurohuni që furnizimi më energjinë
elektrike të përputhet me të dhënat në
etiketën e pajisjes.
• Mos u përpiqni ta rregulloni pajisjen vetë.
Ju lutemi kontaktoni shitësin.
• Shkëputeni pajisjen nga rrjeti kur nuk
përdorni, dhe para se ta lani.
Qëllimi i pajisjes
Pajisja është dizajnuar për ngrohjen e ajrit në
ambientet të shtëpisë.
Pamja e përgjithshme e pajisjes
1
2
3
4
Figure 1
1. Blloku i kontrollit
2. Vendi i hyrjes se ajrit
3. Vendi i daljes se ajrit
4. Këmbët për të vendosur në dysheme (vijnë
veçmas)
Blloku i kontrollit
1
2
3
Figure 2 Blloku i kontrollit
1. Kapak mbrojtëse
2. Paneli i kontrollit
3. Kabllo të energjisë
SHQIP

20 www.home-comfort.com
Regjimet e fuqisë së ngrohjes
Auto - kryen kontrolli invert të elementit të
ngrohjes.
Custom - vetë përdoruesi kufizon fuqinë
maksimale të elementit të ngrohjes. Një
zgjedhje prej 5 niveleve të fuqisë.
Funksioni ”Programme”
Ky funksion lejon pajisjen të funksionojë në
një program javor. Për secilën ditë të javës,
ju mund të zgjidhni një mundësi funksionimi:
Custom (i personalizueshëm) ose P1, P2, P3,
P4, P5, P6, P7 (regjimet me paravendosje).
Në opsion Custom 24h, përdoruesi zgjedh
një nga 4 opsionet për çdo orë: Comfort
(portokalli) dhe Anti-Frost (blu), Off (stad by, i
zi), si parazgjedhje të gjitha orët kanë regjime
Eco (jeshile). Mund të vendosen një maksimum
prej 3 diapazone të Comfort gjatë ditës.
Funksioni ”Timer OFF”
Time OFF lejon pajisjen të fiket automatikisht
pas një kohe të caktuar. Kur të ketë mbaruar
koha e caktuar, sistemi automatikisht do të
fike ngrohësin, duke e vendosur atë në gjendje
pritjeje me ngrohjen e fikur.
Funksioni ”Dritare e hapur”
Kur ky funksion aktivizohet, kur temperatura
bie brenda 10 minutave (dhe më pas deri
në 30 minuta) me 5 ose më shumë gradë,
aktivizohet regjimi Anti-Frost. Nëse, brenda
një interval kohor prej 10 - 30 minutash,
vazhdon të bjerë temperatura , pajisja fiket.
Më tej, ngrohësi pret stabilizimin e uljes së
temperaturës së dhomës, nëse rritet me
2 gradë, atëherë ndizet regjimi i fundit e
vendosur.
1
2
34
5
6
7
Figure 3 paneli i kontrollit
1. Butoni i ndezjes On/Off.
2. Butonin i ndezjes On/Off për funksionin
«Dritarja e hapur».
3. butoni OK - konfirmimi i komandës, MENU -
shkoni te menyja e programeve të pajisjes.
4. Butoni MODE - kaloni midis regjimeve të
temperaturës (Comfort, Eco, Anti-Frost),
- navigimi në menynë, një hap prapa.
5. dhe 6. Rritja dhe ulja e temperaturës pa
mëtejshëm, pa konfirmim, lundroni në menu,
bllokoni dhe zhbllokoni kontrollin.
7. Ekrani.
Kuptimin e ikonave në ekran
— Shënimi i regjimit të temperaturës Comfort
— Shënimi i regjimit të temperaturës Eco
— Shënimi i regjimit të temperaturës i Anti-
Frost
— Funksioni Dritarja e hapur
— Treguesi i funksionit
— Shënimi i punës sipas orarit
— Shënimi i kontrollit të bllokimit
— Shënimi i kontrollit të shkyçjes
— Shënimi i temperaturës së dëshiruar
Ndizni pajisjen
Vendosni pajisjen në prizë. Klikoni butonin
për të ndezur pajisjen. Temperatura e
vendosur në fabrikë është +24 º.
Regjimet të punës dhe funksionet
3 regjime të temperaturës janë të disponueshme
për rregullim:
Comofort - shkon nga 10 ºC deri në 35 ºC.
Eco - devijimi nga Comforti nga 3 ºC në 7 ºC.
Anti-Frost - shkon nga 3 ºC deri në 7 ºC.
This manual suits for next models
3
Table of contents
Languages:
Other Electrolux Heater manuals

Electrolux
Electrolux EYE030S1WE User manual

Electrolux
Electrolux EIFH/C-2 EEC User manual

Electrolux
Electrolux ECH/AG2-1300 3BE EEC User manual

Electrolux
Electrolux ECH/BM-1200 3BI-W EEC User manual

Electrolux
Electrolux EOH/M-5105N EEC User manual

Electrolux
Electrolux ARH-8509 User manual

Electrolux
Electrolux EIFH/C-2 EEC User manual

Electrolux
Electrolux EOR211 User manual

Electrolux
Electrolux ECH/AT-1500 3AI-W EEC User manual

Electrolux
Electrolux EM40W060 User manual