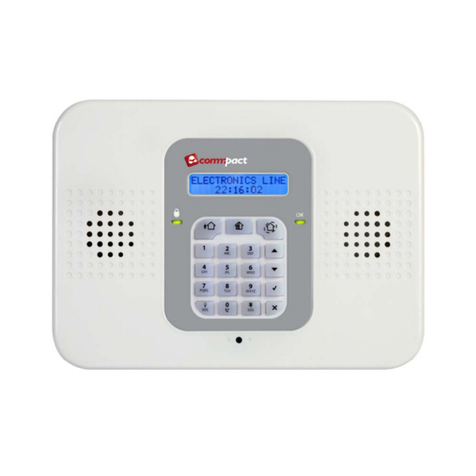
Electronics Line infinite prime User manual


-2-
infinite prime Installation Manual - Version 4.00
Catalog Number: ZI0644A (11/2008)
All data is subject to change without prior notice.
Hereby, Electronics Line 3000 Ltd. declares that this control system is in compliance with the essential
requirements and other relevant provisions of Directive 1999/5/EC.
Copyright © 2008 Electronics Line 3000 Ltd. All rights reserved.

-3-
Table of Contents
Chapter One: Introduction.............................................................................................................................5
1.1: Documentation Conventions ...........................................................................................................5
1.2: Specifications ..................................................................................................................................6
1.3: System Overview ............................................................................................................................6
1.4: Hardware Layout.............................................................................................................................8
Chapter Two: System Installation ...............................................................................................................13
2.1: Pre-Installation Planning ...............................................................................................................13
2.2: Installation Procedure ...................................................................................................................14
2.3: Back Tamper.................................................................................................................................17
2.4: Installing Hardwire LCD Keypads..................................................................................................18
Chapter Three: Basic System Operation ....................................................................................................20
3.1: Front Panel Layout........................................................................................................................20
3.2: System Status LEDs .....................................................................................................................20
3.3: Front Panel Keypad ......................................................................................................................21
3.4: LCD Display ..................................................................................................................................21
3.5: Vocal Message Annunciation........................................................................................................22
3.6: Hardwire LCD Keypad...................................................................................................................23
3.7: Arming/Disarming..........................................................................................................................24
3.8: Remote Arming/Disarming via SMS..............................................................................................26
3.9: Remote Arming/Disarming via DTMF............................................................................................27
3.10: Keypad Alarm Activation .............................................................................................................27
Chapter Four: Advanced System Operation ...............................................................................................29
4.1: Menu Navigation ...........................................................................................................................29
4.2: Stop Communications ...................................................................................................................29
4.3: Sensor Bypassing/Unbypassing....................................................................................................30
4.4: User Codes ...................................................................................................................................30
4.5: Follow Me......................................................................................................................................32
4.6: Event Log ......................................................................................................................................32
4.7: Service Menu ................................................................................................................................33
Chapter Five: Telecontrol and Two-Way Audio ..........................................................................................37
5.1: Incoming Calls...............................................................................................................................37
5.2: Outgoing Calls...............................................................................................................................39
Chapter Six: Home Automation and PGM Control......................................................................................42
6.1: Keypad Control .............................................................................................................................42
6.2: Keyfob Control ..............................................................................................................................42
6.3: Telephone Control.........................................................................................................................42
6.4: Scheduling (not relevant to PGM) .................................................................................................43
Chapter Seven: Devices .............................................................................................................................45
7.1: Device Registration .......................................................................................................................45
7.2: Device Descriptors ........................................................................................................................45
7.3: Device Deletion .............................................................................................................................45
7.4: Supervision Time ..........................................................................................................................46
7.5: Re-Synchronization.......................................................................................................................46
7.6: Zones ............................................................................................................................................46
7.7: Keyfobs .........................................................................................................................................49
7.8: Keypads ........................................................................................................................................50
7.9: Repeaters......................................................................................................................................51
7.10: Wireless Siren .............................................................................................................................51
7.11: Smartkeys ...................................................................................................................................52
Chapter Eight: Entry/Exit Timers and System Tones ..................................................................................53
8.1: Entry/Exit Delay.............................................................................................................................53
8.2: Arm on Exit....................................................................................................................................53
8.3: Supplementary Entry Delay...........................................................................................................53
8.4: Entry Deviation..............................................................................................................................54
8.5: Exit Restart....................................................................................................................................54
8.6: Arming Tones................................................................................................................................54
8.7: Home Automation Tones ..............................................................................................................55
8.8: System Trouble Tones ..................................................................................................................55
8.9: Tones Options...............................................................................................................................56
Chapter Nine: System Options....................................................................................................................57

-4-
9.1: Swinger Setting .............................................................................................................................57
9.2: Code Lockout ................................................................................................................................57
9.3: Arm/Disarm Options......................................................................................................................57
9.4: Panic Alarm...................................................................................................................................59
9.5: AC Loss Delay ..............................................................................................................................59
9.6: Display Options .............................................................................................................................59
9.7: PGM Output Options.....................................................................................................................60
9.8: Guard Code (future option) ...........................................................................................................62
9.9: “No Arm” Indication .......................................................................................................................62
9.10: Jamming Detection .....................................................................................................................62
9.11: “No Motion” Time ........................................................................................................................62
9.12: Microphone/Speaker Options......................................................................................................63
9.13: Vocal Messages..........................................................................................................................63
9.14: Installer Access ...........................................................................................................................63
9.15: Auto Log View (future option)......................................................................................................63
9.16: Daylight Savings..........................................................................................................................63
9.17: Report Fail Trouble .....................................................................................................................64
9.18: Cancel Alarm...............................................................................................................................64
9.19: Cross Zoning (future option) .......................................................................................................64
9.20: Verified Fire.................................................................................................................................64
9.21: Battery Type................................................................................................................................65
Chapter Ten: Communications ...................................................................................................................66
10.1: Central Station Reporting............................................................................................................66
10.2: General Options for Central Station Reporting ...........................................................................67
10.3: Vocal Message Dialer .................................................................................................................68
10.4: Remote Programming .................................................................................................................70
10.5: Service Call .................................................................................................................................71
10.6: Communications Options ............................................................................................................72
10.7: GSM Options...............................................................................................................................75
10.8: TWA Event Report Options.........................................................................................................77
10.9: Event Options for Central Station Reporting ...............................................................................77
10.10: Vocal Message Dialer Event Options........................................................................................78
Chapter Eleven: Home Automation Programming ......................................................................................80
11.1: X10 Overview..............................................................................................................................80
11.2: HA Units ......................................................................................................................................80
11.3: House Code ................................................................................................................................83
11.4: HA Control...................................................................................................................................83
Chapter Twelve: System Initialization .........................................................................................................84
12.1: Initialization .................................................................................................................................84
12.2: Default Program Restore ............................................................................................................84
12.3: Clear User Codes........................................................................................................................84
12.4: Clear Wireless Transmitters........................................................................................................85
12.5: Find Modules...............................................................................................................................85
Appendix A: Menu Structure .......................................................................................................................86
Appendix B: Transmitter Installation ...........................................................................................................93
PIR Sensors (EL-2600/EL-2600PI/EL-2645/EL-2645PI) .....................................................................93
Magnetic Contact (EL-2601) ................................................................................................................96
Universal Transmitter (EL-2602) ..........................................................................................................97
Glassbreak Sensor (EL-2606)..............................................................................................................98
Smoke Detector (EL-2603) ................................................................................................................101
Keyfobs (EL-2611/EL-2614/EL-2614E)..............................................................................................102
Wireless Keypads (EL-2620/EL-2640)...............................................................................................103
Transmitter Specifications..................................................................................................................105
Appendix C: Event Table ..........................................................................................................................107
Appendix D: Zone Types...........................................................................................................................109

-5-
Chapter One: Introduction
This manual is designed to help you install the infinite prime control system. We strongly
urge you to read through this manual, in its entirety, before beginning the installation
process so that you can best understand all that this security system has to offer. This
manual is not intended for end user use. End users are encouraged to read the user manual
provided with the system. If you have any questions concerning any of the procedures
described in this manual please contact Electronics Line 3000 Ltd. at (+972-3) 918-1333.
1.1: Documentation Conventions
Throughout the manual, we have tried to include all of the operating and programming
functions using a similar structure and order as they appear in the menu. A detailed
explanation of how to navigate the control system’s menu is included in section 4.1:
Menu Navigation. In order to simplify the procedures that appear in the rest of this
manual, the following conventions are used:
This… Means…
Select… Use the arrow keys to scroll through the options and press .
From the Event Log Menu,
select Clear Log.
Enter the main menu by pressing and entering your user
code. Using the arrow keys, navigate until you reach Event
Log and press . Using the arrow keys, navigate until you
reach Clear Log and press .
From the Service menu, select
Time/Date, Set Date.
The same as above only this time you are navigating through
three menu levels.
[7012] The shortcut to a specific menu item from the main menu. In
this case, this is the shortcut for Set Date. These appear in
the procedures as an additional aid to menu navigation.
[#5] A shortcut to a specific item in a sub-menu. For example, [#5] is
the shortcut to Bell enable disable in the sub-menu that is opened
once you have selected the sensor you want to program.
The symbol on a key that appears on the keypad
5. Interface Test The text that actually appears on the LCD display (bold italics).
,
Important note, please pay attention.
Table 1.1: Documentation Conventions

-6-
1.2: Specifications
General
Zones: 32 wireless zones (1 transmitter per zone), 1 hardwire zone (Zone 33)
Wireless Keyfobs: 19 (Controlled or Non-controlled)
Wireless Keypads: 4
Hardwire LCD Keypads: 2 (INFINITE-KPD/L), 3 (INFINITE-KPD/S)
Repeaters: 4
Smartkeys (future option): 16 (Controlled or Non-controlled)
Wireless Siren: 1 (1-way or 2-way)
User Codes: 32
Arming Methods: Full, Part or Perimeter
Event Log: 256 event capacity, time and date stamped
Communications
Central Station Event Reporting Accounts: 3 (8-digit account number)
Vocal Message Accounts: 3
Telephone Numbers: 3 regular, 3 Vocal Message, RP Callback and Service Call
(16-digits each)
Communication Interface Options: PSTN or GSM (optional expansion module required)
Home Automation
Control Medium: Power-line carrier
Protocol: X10
HA Units: 16 individually addressed
Receiver
Type: Super-heterodyne, fixed frequency
Frequency: 868.35, 433.92
or 418MHz FM
Data Encryption: SecuriCode™
Electrical
Power Input: 230VAC, 50Hz
Backup Battery Pack: 7.2V/1.5Ah
(6 x 1.2V Ni-MH rechargeable cells, size AA)
Fuse Ratings:
63mA/250V (AC protection fuse),
1A/250V (battery protection fuse)
PGM Relay Output Contact Rating: 100mA
(max. load)
Built-in Siren: 105dB or 85dB
Tamper Switch: N.C.
Operating Temperature: 0-60°C
1.3: System Overview
The infinite prime is a full-featured wireless control system that is expected to provide a
solution to the needs of most residential installations. This system has been developed
based upon a design concept geared towards easy installation and use. With this in mind,
the user interface is based on a simple, menu-driven model that suits the essential
requirements of both the user and installer alike. You can program the infinite prime on-site
using the on-board LCD keypad or off-site via a PC using the up/downloading software.
Power connection to the unit should
be according to the national electrical
code for permanent installation.
The power supply should be fed from a readily
accessible disconnect device.
If the unit is permanently wired to the mains
power, use a 2-pole disconnect device (15A
max.) and the wires should be min. 0.75mm2
in a conduit of at least 16mm.
If the mains power is connected with a plug,
the plug should be indicated as the
disconnecting device and the socket shall be
max. 2m from the control panel.
Batteries shall be provided by a distributor and
replaced by authorized service personnel.
The backup battery pack should be
replaced every five years.
Batteries should be stored in a cool, dry place.
!

-7-
Central station communication and up/downloading employ either regular PSTN or high-speed
cellular communication. SMS messaging provides an innovative method used for both central
station and Follow-me user monitoring. Additionally, SMS messages can be sent to the control
system enabling the user to send commands to the system from anywhere on the planet.
The control system’s home automation capabilities provide a wealth of features. The
Home Automation module interfaces with X10 units over the powerline network and
grants the user appliance control via a number of different media.
The following diagram shows the components that make up the system and the system’s
interaction with external communication networks.
Figure 1.1: System Architecture

-8-
1.4: Hardware Layout
The aim of this section is to acquaint you with the various circuit boards that make up the
system. Apart from the Main Board, each peripheral module is available as an optional
extra designed for installation inside the plastic housing.
Figure 1.2: System Layout
1. Main Board
2. PSTN dialer module (optional)
3. Home Automation module (optional)
4. Cellular communications module (optional)
5. Backup battery pack

-9-
1.4.1: The Main Board
The Main Board is the brain of the system and connects to various peripheral modules
using a number of interface connectors. Additionally, the Main Board includes a
programmable output, a hardwire zone input and a USB port for PC programming.
Figure 1.3: Main Board
1. USB port for connection to PC
2. DIP-switch for flash programming
3. Connector for on-board transmitter
4. Flat-cable interface connector to PSTN module
5. Auxiliary power output (AC Operated:10-15V, Battery Operated: 6-8V)
6. Programmable relay output (100mA max. load)
7. Hardwire zone (Zone 33)
8. Status LED
9. Interphone module connector
10. Flash programming connector for main board
11. Hardwire LCD keypad terminal block
12. Flat-cable interface connector to LCD keypad, built-in speaker,
microphone and siren
13. Front tamper switch
14. Not in use
15. Interface connector to Home Automation module
16. AC power terminal block
17. Home Automation module terminal block
18. AC power protection fuse
19. Backup battery protection fuse
20. Flat-cable interface connector to GSM module
21. Backup battery connector
22. Additional backup battery connector

-10-
1.4.2: PSTN Module
The PSTN module provides the system with a standard dialer for communication via the
Public Switched Telephone Network (PSTN).
,Do not use VoIP phone lines for communication to the central monitoring station. In certain
cases the system may not transmit alarm signals successfully over the VoIP network.
Figure 1.4: PSTN Module
1. Status LED
2. Flash programming connector
3. Telephone line terminal block (Terminals 1 & 2: Outgoing line to
telephone, Terminals 3 & 4: Incoming line from telephone company)
4. Flat-cable interface connector to Main Board
5. Telephone socket for outgoing line to telephone
6. Telephone socket for incoming line from telephone company
1.4.3: Home Automation Module
The Home Automation module provides the system with an interface to the power-line
network, enabling control over 16 home automation units employing the X10 protocol via
an external or internal Power-line Interface (PLI), depending on your system
configuration. If using the external PLI, connect it to the HA module as shown on figure
1.6, position 5, and figure 1.7, then plug it into power-line. For further information on the
X10 protocol and the choice of options that are available in programming, see Chapter
Eleven: Home Automation Programming. Figure 1.5 shows the HA module used in the
systems with internal PLI.
Alternative
Telephone
Line Socket
O
p
tion

-11-
Figure 1.5: Home Automation Module (with internal PLI)
1. Interface connector to Main Board
2. Flash programming connector
3. Power-line terminal connections to Main Board (1- Neutral; 2 - Live)
Figure 1.6 shows the HA module used in the systems with external PLI.
Figure 1.6: Home Automation Module (with external PLI)
1. Interface connector to Main board
2. Status LED
3. Flash programming connector
4. Jumper header
5. Connector to the external power-line interface
,For external X10 PLI, we recommend to use the two way TTL/CMOS interface such as XM10E
module connected to the HA module with an RJ11 cable wired as shown on figure 1.7.
Figure 1.7: RJ11 wiring diagram

-12-
1.4.4: Cellular Communications Module
The Cellular Communications module enables the control system to communicate via
cellular networks. This offers the ability to send or receive SMS messages, perform
up/downloading, implement cellular 2-way voice applications.
Figure 1.8: Cellular Communications Module
1. SIM card holder
2. SIM card release
3. Status LED
4. Flash programming connector
5. Flat-cable interface connector to Main Board
6. Internal Antenna
7. External Antenna Connector

-13-
Chapter Two: System Installation
The following chapter explains how to install the system and provides guidelines and tips
on how to optimize the installation. It is recommended that you familiarize yourself with
the various circuit boards that make up the system – see 1.4: Hardware Layout.
2.1: Pre-Installation Planning
Before starting the installation procedure, it is worthwhile to draw a rough sketch of
the building and determine the required position for the control system and each
wireless device.
When deciding on the placement for installation, consider the following:
•Mount the control system in a location with easy access to telephone
and power connections.
•If installing with the GSM Cellular Communications module, the
control system should be mounted in a position where the GSM
signal is strong.
•Refer to the following section in order to choose the optimal location
for wireless devices in relation to the control system.
2.1.1: Wireless Installation Guidelines
In order to optimize wireless communication, consider the following guidelines:
•Whenever possible, mount the control system centrally in relation to
wireless sensors.
•Avoid installation in close proximity to sources of high noise or radio
frequency interference. For example, metal air conditioner/heater ducts
and circuit breaker boxes.
•Minimize the distance between the control system and transmitters.
•Minimize the number of obstacles between the control system
and transmitters.
Figure 2.1: Minimizing Obstacles
•Metal based construction materials, such as steel reinforced concrete
walls, reduce the range of radio transmissions.

-14-
Figure 2.2: Considering Construction Materials
•The reduction of the RF signals’ strength is directly proportional to
the thickness of the obstacle, assuming that the obstacles are of
identical material.
Figure 2.3: Considering Thickness of Obstacles
2.2: Installation Procedure
After unpacking the kit and making certain that you have all the necessary equipment, it
is recommended that you install the system as follows:
STEP 1: Open the housing.
STEP 2: Temporarily power up the system.
STEP 3: Register the transmitters.
STEP 4: Test the chosen mounting location.
STEP 5: Permanently install the control system and transmitters.
2.2.1: Step 1 – Opening the Housing
To open the housing:
1. Remove the housing screw located
at the bottom of the front cover.
2. Using a screwdriver carefully
press the release tabs as shown
in Figure 2.4.
3. Lift the front cover away from the
back of the housing. You will
notice that the front cover is
attached to the back with
two fastening bands and the
keypad’s flat cable.
Figure 2.4: Opening the Housing
Housing
Screw

-15-
2.2.2: Step 2 – Powering Up the System
In order to register and test transmitters, it is necessary to temporarily power up the system
before installing the control system. At this stage, do not connect the backup battery.
Thread the power cable through the wiring hole on the back cover and connect the cable to
the AC power input on the Main board. For the exact location of the AC power input, see
1.4.1: The Main Board. Close the front cover and apply AC power. At this stage, ignore any
trouble conditions that may appear on the LCD display (e.g. Low Battery).
2.2.3: Step 3 – Registering Transmitters
For the control system to recognize a device, its transmitter must be registered. In general
terms, transmitter registration means sending two transmissions from a device when the
control system is in “Registration” mode.
To register a device:
1. Press .
2. Enter your Installer code (the default Installer code is 1111).
3. Enter 91 (Programming, Devices) to enter the Devices menu .
4. Press the menu navigation keys (/), until the type of device you
want to register appears on the LCD display (e.g. Zones or Keypads).
5. Press .
6. Press the menu navigation keys (/), until the exact device you want
to register appears on the LCD display (e.g. Zone 3 or Keypad 2).
7. Press . If a device has not been registered at the chosen location,
the control system initiates Registration mode. During Registration
mode, the system waits for two transmissions from the device.
,If a device has already been registered at the required location, the system will not initiate
Registration mode. If the device has already been registered at another location, attempts
to register are ignored by the system.
8. Send two transmissions from the device – refer to each device’s
installation instructions in Appendix B for further details.
9. When Save? is displayed on the control system’s LCD, press . The
display automatically switches to the next option for that device. For
example, pressing to confirm Zone registration automatically moves
you to the Zone Type option.
10. Continue entering other parameters for the chosen device.
,Pressing returns you to the previous menu level. Press when you are in the Main
menu (Menu Level 1) to exit menu mode.
2.2.4: Step 4 – Testing the Chosen Mounting Location
Once all of the transmitters are registered, it is recommended that you test the chosen
mounting locations before permanently mounting the control system and wireless devices.
You can test the transmitter signal strength using the TX Test feature.
To test transmitter signal strength.
1. Press .
2. Enter your Installer code.
3. Enter 7072 (Service, Transmitters, TX Test) to initiate TX Test mode.

-16-
4. Activate the transmitter you wish to test; the transmitter’s details appear
on the control system’s LCD. Additionally, between one and four tones
are sounded to indicate the transmitter’s signal strength. If four tones are
sounded, the transmitter is in the best possible location – see 4.7.7:
Transmitters for further information.
5. After you have tested each transmitter, press to exit TX Test mode.
If installing with the GSM Cellular Communications module, test the GSM signal strength
using the system’s RSSI meter.
To test the GSM signal strength:
1. Press .
2. Enter your Installer code.
3. Enter 709 (Service, GSM Signal); the signal strength of the
cellular network is displayed – see 4.7.9: GSM Signal Strength for
further information.
2.2.5: Step 5 – Installing the Control system and Transmitters
Having chosen and tested the mounting location of the control system and each
transmitter, you are now ready to permanently install the system.
To permanently install the transmitters, refer to each device’s installation instructions (in
Appendix B of this manual or supplied individually with each product).
To install the control system:
1. Disconnect AC power from the control system.
2. Open the housing as explained in section 2.2.1: Step 1 – Opening
the Housing.
3. Remove the backup battery pack. If you want to install the control
system with back tamper, it is also necessary to disconnect the flat
cable connecting the Main board to the front panel keypad and remove
the Main board. Figure 2.5 shows the control system with the Main
board and the battery pack removed.
Figure 2.5: Back Cover (Main Board and Battery Pack removed)
Lower
Mounting
Hole
Lower
Mounting
Hole
Location of
Back Tamper
Screw
Upper
Mounting
Hole
Upper
Mounting
Hole

-17-
4. Place the control system in position against the wall and mark the
upper and lower mounting holes. If using the back tamper, also mark
the hole for the back tamper screw.
5. Install wall anchors in the appropriate positions.
6. Thread any required cables through the wiring hole on the back
cover (e.g. AC power and telephone line) and make any
necessary wiring connections.
7. Connect the power cable to the AC power input on the Main board –
see 1.4.1: The Main Board.
8. Connect the telephone line to the Telephone Line terminal block on the
PSTN module – see 1.4.2: PSTN Module.
9. Connect any additional hardwire LCD keypads if required – see 2.4:
Installing Hardwire LCD Keypads.
10. Mount the control system to the wall using four screws and insert the
back tamper screw if required – see 2.3: Back Tamper.
,The control system shall be mounted so that it shall withstand a force of at least three
times its own weight.
11. Replace the Main Board and reconnect its peripheral modules.
12. Connect the flat cable connecting the Main board to the front panel
keypad and the replace the front cover’s fastening bands.
13. Apply AC power.
,Always connect AC power before connecting the battery pack. Batteries are supplied
uncharged. When you first connect the battery, it is probable that the system will display a
Low Battery condition. Allow the battery to charge for at least 18 hours before use.
14. Connect the battery pack to the connector on the Main Board.
15. Position the front cover’s top holding hooks onto the back cover and
snap the front cover closed.
16. After installing the control system, perform the Find Modules function –
see 12.5: Find Modules.
2.3: Back Tamper
The back tamper switch is an optional feature that provides an
extra safeguard in the event that the control system is removed
from the wall.
The back tamper switch is located on the rear side of the control
system’s Main Board and is constantly depressed by the section
of the back cover shown in Figure 2.6.
For this feature to operate, you must insert a screw into the back tamper mounting hole –
see 2.2.5: Step 5 – Installing the Control system and Transmitters. When the control system
is removed from the wall, the screw causes the perforated section of the plastic to break
and remain attached to the wall. As a result, the back tamper switch is released and an
alarm is generated.
Figure 2.6: Perforated
Back Tamper Release

-18-
2.4: Installing Hardwire LCD Keypads
The system supports hardwire LCD keypads that may be installed up to 300m from the
control system.
Figure 2.7: Hardwire LCD Keypad (back cover off)
To install hardwire LCD keypads.
1. Disconnect all power, both AC and battery, from the control system.
2. Remove the back cover of the keypad. To do so, press the two snaps
(located at the bottom of the keypad) using a small flat-head screwdriver
and carefully pull the back cover away from the front of the housing.
3. Place the back cover of the keypad in position against the wall and
mark the upper and lower mounting holes.
4. Install wall anchors in the appropriate positions.
5. Thread the cable from the control system through the wiring hole
on the back cover and attach the back cover to the wall using
four screws.
6. Connect the terminal block on the keypad to the appropriate terminal
block on the control system’s main board as shown in Figure 2.8.
Figure 2.8: Connections for Hardwire LCD Keypad
7. Reapply power to the control system.
8. Set the keypad address as follows:
LCD Contrast
Potentiometer
Flash
Programming
Connector
Terminal
Block Tamper
Switch

-19-
a. Make certain the keypad’s tamper switch is open.
b. On the keypad, press keys 1, 3 and 5
simultaneously.
c. Use the arrow keys (/) to select the keypad
address.
d. Press .
9. Position the front cover’s top holding hooks onto the back cover and
snap the front cover closed.
10. After installing hardwire keypads, perform the Find Modules function – see
12.5: Find Modules.

-20-
Chapter Three: Basic System Operation
3.1: Front Panel Layout
The front panel provides a detailed interface for operating and programming the system.
The following diagram will familiarize you with the various elements on the front panel.
Figure 3.1: Front Panel
3.2: System Status LEDs
The two LEDs, Armed and Power, provide essential information on the status of
the system.
If the Armed LED is… It means…
Off The system is disarmed.
On The system is armed.
Flashing An alarm has occurred. Alarm indication is cleared the next time that
an arming sequence is initiated or after the relevant event has been
viewed in the event log.
Table 3.1: Armed LED Indication
,Alarm indication is not displayed after a silent panic alarm.
If the Power LED is… It means…
Off Both AC and Battery power are disconnected.
On System Power is OK.
Flashing (slow) Backup battery low or low battery from transmitters.
Flashing (fast) AC loss.
Table 3.2: Power LED Indication
System
Status
LEDs
LCD
Display
Arming
Keys
Alpha-
numeric
Keypad
Menu
Navigation
Keys
Other manuals for infinite prime
2
Table of contents
Other Electronics Line Control System manuals
