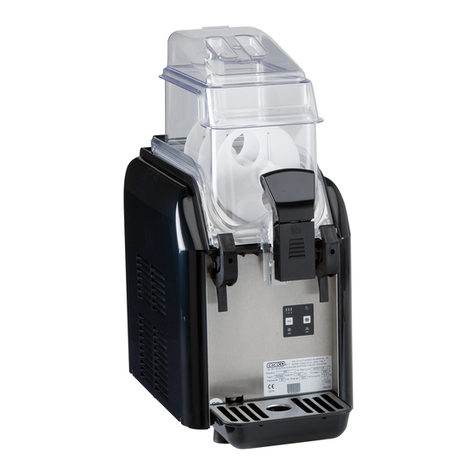
ELME BIG BIZ User manual

取扱説明書および
メンテナンスマニュ
アル


JP
目次
品質の選択…………………….
1
使用方法と注意事項
………………………………….
2
マシンの設置
…..……………………………...
3
洗浄方法……………………….
4
操作基板と信号表示…………
5
スラッシュ、シャーベット、
コールドドリンクを作る
………………….……………...
5
デフロストタイマー
………………..........................
6
安全上のご注意……………….
6
古いマシンの廃棄処分………
6
技術サポート………………….
7
圧力スイッチの修理手順
………………………………….
7
コッタ―ピンの代用……........
8
問題を解決する……………….
9
電気系統……………………….
20
冷却システム………………….
22
分解図………….…..................
24
コード一覧……………………
25
タイマー設定…………………
28
GB
Index
A quality choice……………..
10
General instructions and
warnings……………………..
11
Installing the new
machine…..………………….
12
Cleaning……………………..
13
Controls and signals………..
14
How to start the production
of slush, sherbets or cold
drinks………………….……..
14
Defrost timer………….……..
15
Important safety rules………
15
Old machine disposal………
15
Technical Assistance………
16
Pressure switch refit
procedure……………………
16
Cotter pin substitution……...
17
Problem Solving…………….
18
Electric System……………..
20
Refrigerating System……….
22
Exploded view………….…...
24
Codes description…………..
25
Timer setup………………….
30


- 1 -
英語
品質の選択
エルメコ社の事業は Vision
2000 および ISO14001 の規
則に準拠して経営していま
す。
エルメコを選び、中で
もとくに Big Bizという
複数の機能を持つ新し
い電気用品をお選び頂
いたことはイノベーシ
ョンへの高い注目度を
表しています。「品質」
という言葉を単なる抽
象的な言葉と考えない
弊社とのビジネスにご
理解いただき感謝しま
す。エルメコにとって
品質とは確固たる約束
です。初のスラッシュ
マシンメーカーであり
現在は技術面で業界を
リードする企業である
弊社のイノベーション
への注目を惹きつける
ことを意味します。弊
社にとって「品質」と
はISO 9001:2000認証に
則って常に組織の改善
を続けてこそ生まれる
ものであり、最終的に
はお客様のニーズに応
え続けるべく貢献する
ことを意味します。
また一方で、エルメコ
を選んだ方々にとって
品質とは信頼と製品寿
命ともにあるもので、
高い満足度と利益を得
るために正確かつ承認
されたサポートが重要
であることを表すもの
です。
このマニュアルは弊社
ウェブサイトから電子
データが入手可能です。

- 2 -
英語
使用方法と注意事項
本機は身体能力・感覚・精神
的能力ともに十分な方が使用
するように設計されており、
小さなお子様を含む知識や経
験に乏しい方のご使用はお控
えください。但し、安全につ
いて責任の持てる方がそばに
ついて、使用方法を監視・指
導できる場合はこの限りでは
ありません。
お子様が本機で遊ぶことのな
いようご注意ください。保護
者のいない場合のお子様によ
る洗浄やお手入れはお控えく
ださい。
本機の電源スイッチをONに
する前にこのサービスマニュ
アルを熟読してください。本
書にしたがって設置、使用、
メンテナンスを行なってくだ
さい。
使用方法と組み立てについて
のマニュアルは次に購入する
お客様のためにも保管してお
いてください。本書の指示に
沿っていない場合のダメージ
については製造者は責任を負
いかねます。
組み立てマニュアルに沿って
本機を設置してください。
電源仕様は、本機の正面側、
ドリップトレイの奥に貼って
ある定格銘板に記載の情報と
一致させてください。
(下図①参照)
メンテナンスや洗浄を行なっ
ている間、或いは不具合の起
きた場合は電源プラグを抜い
てください。 (コードではな
くプラグを引き抜いてくださ
い(写真②と③参照)
本機の修理は必ず専門技術者
あるいは有資格者が行なって
ください。不完全な修理はユ
ーザー様にとって危険です。
最寄りのサービスセンターに
ついてはエルメコまでお問い
合わせください。
本機を正しくお使いいただく
ために、室温24°C~32°Cの
間の環境下でご使用ください。
安全にご使用いただくために
本機を正面側に1.5°以上は
傾けないでください。
本機を水噴射が使用される場
所に設置することはお控えく
ださい。
本機の使用やメンテナンスが
適切な訓練を受けた人に限ら
れている場所でのみご使用く
ださい。

- 3 -
英語
マシンの設置
本機はコールドドリンク、ス
ラッシュ、シャーベットを作
る機械であり、その密度がム
ラなく均一に作れるのは、革
新的な電気系統のコントロー
ルによるものです。 本機を設
置する前に以下ご確認くださ
い:
Big Bizが熱源の付近に置
かれていないか;
本機が輸送中にダメージ
を受けていないか。疑わ
しい場合はサプライヤー
にご連絡ください;
供給電源システムには、
法律に従った適切なアー
スがあるか;
電源容量が本機の定格銘
板に記載されている最大
消費電力に対して適正か
(P.2の写真4 参照)
ご不明な点は有資格者スタッ
フにお尋ねください。
本機を設置する際には以下の
手順をよくお読みください。
警告
本機を本来の目的以外のため
にご使用にならないでくださ
い。本来の使用方法以外での
ご使用は不適切で危険である
と見なされます。
各部の名称
(P.2の写真1参照):
ランプ
容器
取出栓リングナット
取出栓
容器取り外し用フック
コントロール電子基板
メインスイッチ
ドリップトレイ
定格ラベル
設置
本機の設置は必ず有資格者に
よって行なってください。誤
った設置方法によって人や物
に損害が生じても製造者は責
任を負いかねます。
開梱したら、マシン本体に傷
がついていないかどうか確認
してください。梱包材(ビニ
ール袋、発砲スチロール、釘
など) は危険ですのでお子様
の手の届く場所に放置しない
でください。
グリッドの内側にあるプラス
チックの緩衝材(紐)も取り
外してください。
本機の電源コードをアダプタ
ーや複数プラグや延長コード
に接続することはご遠慮くだ
さい。
必要に応じて、有効な安全規
則に準拠した材料のみを使用
し、電流強度に関しては定格
銘板に記載の値を上限として
ください (P.2 写真4参照)。
グリッド付近、熱を発する場
所には本機を設置しないでく
ださい。本機の周囲に25 cm
以上のスペースを確保して設
置してください(P26の図5参
照)。
本機を電源に繋いだ後、メイ
ンスイッチをONにした時に
サイドグリッドから空気が出
てくるか確認してください
(P.26の図6参照)。
ご使用になる前に
本機の電源を入れる前に、次
章「洗浄方法」にしたがって
洗浄してください。

- 4 -
英語
洗浄方法
洗浄は製品の寿命とメンテナ
ンスにとって非常に重要です。
食品に触れる部品は以下の手
順にしたがって定期的に洗浄
してください。
警告!
ウォータージェットで本機を
洗わないでください。
警告!
洗浄を始める前に、まずメイ
ンスイッチをOFFにし、電源
コードは抜いてください
(P.26の図7参照)
水1Lに対し次亜塩素酸ソー
ダ(ブリーチ)10g(スプー
ン1/2杯)の割合で溶かした
水溶液を使います。すすぎは
ぬるま湯を使ってください。
警告!
ブリーチの量が多すぎると、
スクレーパー部分の材質を傷
めることとなります。
警告!
プラスチック部品を食器洗浄
機で洗う時には、水温60℃未
満で洗ってください。部品を
傷める原因となります。
研磨剤は使用しないでくださ
い。
警告!
本機の洗浄・洗剤については、
お使いになる地域の条例に従
ってください。
警告!
本機は毎日洗浄し、清潔に保
ってください。
容器の洗浄手順
本書の巻末にある図をご参照
ください。
- 取出栓を開け容器内を空
っぽにし、小さな文字を
左から右に動かしながら
ブロックします(P.26の図
8)。
- ランプを取り外し(P.26の
図9)、容器に水を注ぎ入れ、
また空っぽにします。
- ランプにキーロックがある
場合は、付属のキーを使用
してランプを取り外します
。
- 取出栓を外し (P.27の図
20, 21, 22, 23) 容器ガスケ
ットも外します。:
- 「PUSH」を下に押し
て、取り出しレバーの
カバーを外します(P.27
の図20) 。その後、レバ
ーも外します(P.27の図
21);
- リングナットを半時計
回しに回し(P.27の図22
と23) 取出栓を引きます。
- 取出栓リングナットを外し
ます(P.26の図10と11)。
- フックグリップのネジを緩
めて容器を取り外し(P26
の図12)、もしあればフッ
クをを開けます(P.26の図
13); P.26の図14と15のよ
うに容器を持ち上げます。
- リングナットのネジを緩め
(P.26の図16)、垂直方向の
スクレーパーを取り外しま
す(P.27の図17) 。
- 平行方向のスクレーパーを
取り外すと、容器のステン
レス側が完全に開き、洗浄
できます。(図18と19)
pag.27).
- 分解した各パーツをブリー
チ水溶液に漬ける。
- 洗って乾かす
- ガスケットは元の場所には
める前に濡らしておく。ガ
スケットジョイント(繋ぎ
目)を容器の後ろの角に入
れる時は正しい位置に入れ
るよう注意する。
- 全てのパーツを元通りに組
み立てる。
- 電源コードを接続する。
コンデンサー洗浄手順
サイドパネルの下方にあるネ
ジを緩めて取り外しラジエー
ターを柔らかいブラシまたは
(可能であれば)圧縮空気で
洗う。

- 5 -
英語
操作基板と信号表示
: 食品の密度レベル表示
LEDライト (レベル1~3);
: 食品の冷却レベル表示;
: “スラッシュ” モード表示;
: “コールドドリンク” モー
ド表示;
: マシンスイッチボタン;
: モード選択ボタン
自己診断
電子基板上でLEDがレベル1
や2、或いはスラッシュ、コ
ールドドリンクなどで点滅し
ていたら、本書の巻末にある
表を見るか、ウェブ上
www.elmeco.com の“問題解
決(Problem Solving)”を見る
か、サービスセンターにお問
い合わせください。
構成メモリ
設定したすべての機能モード
と規定は不変のメモリ内に登
録され電源が入っていない時
でもメモリは起動しています。
したがってマシンの電源を入
れた時、容器は前回電源を切
った時の状態をキープできま
す。
スラッシュ、シャーベ
ット、コールドドリン
クを作る
容器に入る最大容量は、グラ
ニータ5.5~6リットル、クリ
ーム 3/4リットル。
Big Bizの電源を入れた時はス
クレーパーだけが動き出し、
冷却システムはまだ動きませ
ん。
前項にしたがってマシンを
洗浄してください。
容器蓋を外し、容器にミッ
クスを入れます。警告:食
品を注入する時、温度は
5 °C 以上であることを確
認してください。電子基板
が正しく補正するためであ
りLED表示は3で点滅しま
す。
メインスイッチを入れます。
(P.26の図7)
撹拌スイッチを入れます
;
モード選択ボタンを押し
、冷凍off から“スラッ
シュ1”、つまり密度が一番
低い状態に変更します。容
器に入れた食品の温度が
5 °C 以上であれば自動的
にキャリブレーション(補
正)が始まりLEDは3で点
滅します。この間、マシン
に何も問題なく動けばキャ
リブレーションが完了し、
3で点滅していたLEDが止
まります(約2分間);
モード選択ボタン を
2回押すと “スラッシュ2”
つまり密度は中間レベルに
変更できます;
モード選択ボタン を
もう一度押すと、“スラッ
シュ3” つまり密度はBig
Bizで設定できる最高レベ
ルとなります;
さらにこのボタン を
もう一度押すとコールドド
リンクモードに移ります。
この時点で Big Biz は食品
を4°C +/- 1°Cで保冷でき
ます。
このボタン をもう一
度押すとスタート時に戻り、
冷却が止まって撹拌だけを
するモードに戻ります。

- 6 -
英語
警告: 撹拌の準備の際には飲
用水だけをご使用ください。
警告: スラッシュ、シャーベ
ット、コールドドリンクを作
るには1リットルごとに少量
の砂糖が必要です。推奨する
分量はご利用の手引きにレポ
ートされています。自然の食
品であれば12~22%の砂糖の
使用を推奨します。
砂糖が足りないため或
いは容器内の異物混入
などその他の要因によ
り平行方向のスクレー
パーが氷でブロックさ
れてしまうと、スクレ
ーパーが破損する場合
があります。
食品が完全に凍ってしまった
場合、マシンの電源を切り食
品が溶けて完全に液体になる
までお待ちください。その後、
容器を空けて、問題の原因を
ご確認ください。(例. 砂糖が
不足、電磁弁が閉じない、な
ど)
警告:食品は製造者による特
定の期間は 5°C 以下で保冷さ
れなければなりませんが、し
かし 5日以上は保冷できませ
ん。 冷蔵システムの不具合
が発生した場合、食品が劣化
していないか検査する必要が
あります。
警告:撹拌する食品にアルコ
ールが含まれる場合、内容
量全体の15%以下となるよ
うにご注意ください。アル
コールの割合がそれ以上に
なるとプラスチック部品に
接触できません。
デフロストタイマー
(BB2 のみ)
"デフロストタイマー"はオプシ
ョンです。タイマーを正しく設
定すると、時間が来ると"スラッ
シュ"モードと"コールドドリン
ク"モードを入れ替えられます。
この機能では冷たい食品を4°C
(+/-1°C)で保冷でき、夜間であっ
ても (ナイトモード)可能なので
乳製品などには最適です。
デフロストタイマーは起動さ
れません。
ナイト(夜間)モードとデイ
(昼間)モードの起動はマシ
ン設置時に以下の手順で設定
できます:
1. パネルを開ける;
2. タイマーで時間を合わせる
;
3. ナイトモードとデイモード
の時間数をセットする;
4. パネルを閉める
安全上のご注意
濡れた手や足が本機に触
れないようにご注意くだ
さい。
裸足で本機をご使用にな
らないでください。
お子様や無資格の人は本
機をご使用にならないで
ください。
本機を外気に晒したまま
放置しないでください。
本機の電源を抜く際、電
源コードを引っ張らない
でください。
本機を電源から抜くとき
にパネルを取り外さない
でください。
サービスエリアへの連絡
はマシンに詳しい、特に
安全と衛生面に関して実
践的な知識と経験のある
人に限ります。
本機は、家庭内および下
記に挙げるような環境で
の使用を意図して作られ
たものです:
- 店舗、事務所などの作業
環境にある従業員用キッ
チンエリア;
- 農家およびホテル、モー
テル、その他住居タイプ
の環境;
- B&B(朝食付きの宿)タイ
プの環境;
- ケータリングなど、小売
業ではない環境
A特性音圧レベルは70dB
以下です。
爆発物可燃性スプレー用
高圧ガスの入ったエアゾ
ール缶などのような爆発
物を本機の中に入れない
でください。
可燃性燃料を含むスプレ
ー缶のような爆発を誘発
するおそれのある物を本
機のそばで使用しないで
ください。
古いマシンの廃棄処分
ご使用にならない古いマシン
は廃棄してください。電源プ
ラグを抜き、ケーブルを切断
してください。

- 7 -
英語
環境保護のために
すべての冷却マシンは自治体
の廃棄処分サービス或いは同
等の民間企業のサービスによ
って適切に処分されなければ
なりません。慎重に、そして
環境に優しい方法で処分する
べく引き取られるまで、冷却
装置の堅いチューブなどを破
損しないようご注意ください。
また使用されている梱包材は
すべて安全に処分できます。
古いマシンの廃棄
環境に配慮した廃棄手順(推
奨)
エルメコ製の冷却マシンは、
フリーザーやエアコンなど冷
却マシンの大半がそうである
ように、冷媒ガスにフロンを
使用しています。フロンは他
の冷媒液と同様、オゾン層の
破壊の原因です。エルメコ製
品に使用されているフロンは
環境に優しいもの (R404 CE
01.01.2001 ルール)ですが、
企業としては購入者であるお
客様にもルールに準拠いただ
くことをお願いしなければな
りません。
スラッシュを作るマシンは自
治体の廃棄処分サービス或い
は同等の民間企業のサービス
によって適切に処分されなけ
ればなりません。
いかなる理由があっても、ガ
スを含んでいる冷却回路には
穴を開けないでください。
技術サポート
マシンの修理 (電源コードの
交換など) は承認を受けたサ
ービスセンターによって実施
され、純正品のパーツを使用
しなければなりません。
付属品のコードが破損してい
た場合は、危険防止のため、
製造者、サービス代理店、ま
たは同等の資格を持った人が
交換してください。
ご使用にならない古いマシン
は無効にしなければなりませ
ん。電源プラグを抜き、ケー
ブルを切断してください。
圧力スイッチの修理手順
スラッシュランプとコールド
ドリンクランプとレベル 1ラ
ンプが電子基板上で同時に点
滅している時、
この表示は圧力スイッチが干
渉してコンプレッサーの動き
を止めてしまっていることを
表しています。
この状態の機械を修理するに
は以下の手順に沿ってくださ
い:
1st. ドリップトレイを取り
外す。容器が 2連式の
場合は左側のドリップ
トレイを外す。
2nd. 下図のように黒いボタ
ンを押す。
同じことが再び起きないよう
にするため、P.26の図5にあ
るとおりマシンが正しい位置
にあるかどうか確認してくだ
さい。またP.4 の説明にした
がってコンデンサーを洗浄し
てください。

- 8 -
英語
コッターピンの代用
警告: 以下の作業は有資格者
が必ず実施してください。
本体は作動しているのにスク
レーパーだけが回らない場合、
ギアモーターとシャフトを繋
いでいるコッターピン(P.24
の分解図のアイテム35番) が
破損している可能性がありま
す。
まずは電源コードを抜
いてください。
バックパネルとサイドパネル
を外したら、垂直方向のスク
レーパーのリングを持ち上げ
る部分が 破損しているのが見
えるはずです(P.24の分解図
のアイテム14番)。
それはブロックされているか
或いは持ち上げると分かりま
すがシャフトケーシングをそ
れによって取り除いているか
もしれません(P.24の分解図
のアイテム15番)。
前者の場合は、シャフトベー
スがギアモーター(出口のシ
ャフト)と同じ高さになるよ
うコントロールする必要があ
ります。リフトピンがギアモ
ータースローシャフトの穴に
入ってしまい、変形したり破
損している可能性があります
(下図a) 参照)。
後者の場合は、ギアモーター
の穴が完全に開いており(下
図b) 参照) スプリットピンの
屑がマシンの中に入ってしま
います。
したがってこの場合は新しい
スプリットピンを設置する必
要があります。
- シャフトの穴をギアモータ
ー出口シャフト上に揃うよ
うにシャフトを挿す(下図
b) 参照);
- 下図c)およびd)にあるとお
り、スプリットピンを挿し
ます;
- スプリットピンが回転する
時に、そのてっぺんがギア
モーターに触れないよう最
小限の距離を空けてくださ
い。
警告: いかなる場合でも 古
いスプリットピンは再利
用しないでください;

- 9 -
英語
電子基板上でレベル “1”とス
ラッシュモードが点滅して
いる。
電子基板とギアモーター磁気性積算回転計の接続が双方ともしっかりと取り付けられて
いるか確認する。交換が必要な場合: 読み取り部と電子基板の双方から、古いコードの 2
つのコネクタを抜いてください。何らかの絶縁テープや絶縁バンドを、現存している(
そこにある)電気装置に着けてから新しいコードを取り付けてください。
電源コードを抜
く
電子基板上でレベル“2”が
点滅している。
サーモスタットプローブを電子基板に繋いでいるコードを交換し酸化物の付着が無いか
確認してください; もし酸化物の付着がある場合は接触部を洗浄し、落とせない場合はサ
ーモスタットプローブを交換する必要があります。
電源コードを抜
く
電子基板上でコールドドリ
ンクモードのランプが点滅
している。
デフロストタイマーが起動しています。それを止めるには、或いは設定を変更するには
、指示書をご参照ください。
電源コードを抜
く
容器内でスクレーパーが回
転しない。電子基板が正し
く機能しない。
スラッシュマシンのメインスイッチをOFFにする;
容器から食品を全て出し、もしそれが冷たければ15°C以上になってから食品をタン
クに入れる;
5分以上待ってからマシンの電源を再びONにしてください;
電子基板上でスラッシュモードを選択;
電子装置の補正モードが自動的に行われ、状態がレベル3でLEDが点滅して電子基
板上に表示されます。キャリブレーション(補正)が完了すると点滅が消えます。
容器内でスクレーパーが回
転しない。電子基板が正し
く機能しない。
コッターピン(分解図の部品 35) が故障しています。P.8をご参照の上、コッターピンを
交換してください。
電源コードを抜
く
スクレーパー回転中にきし
むような音がする。
この異音は垂直方向と平行方向のスクレーパーギアから生じます。この異音を防ぐには
マシンをただ使い続けるか、或いはプラスチックギアにワセリンを塗布することで防げ
ます。
マシンが冷却できず、スラ
ッシュ、コールドドリン
ク、レベル 1のLEDが点滅
している。
圧力スイッチが干渉されています。修理するには P.7をご参照ください。
電源コードを抜
く
スラッシュモード開始時に
レベル 3でLEDが点滅を始
める
マシンの電子基板を起動させるため、食品の温度が 5°C以上であればキャリブレーショ
ンを始めてください。トータルで 2分ほどかかり、その間レベル3で LED が点滅します
。
問題解決方法 Big Biz

- 10 -
ENGLISH
A quality choice
Elmeco business is
managed in according with
rules of Vision 2000 and
ISO 14001
Choosing Elmeco, and in
particular Big Biz, the
new and only
multifunctional electronic
machine, demonstrates
your attention to
innovation. Thanks for
understanding the
importance of working
with a company that does
not consider “quality” as
an abstract word. For
Elmeco quality is a
concrete commitment. It
actually means to clinch
the attention to the
innovation that
characterized us as the
creators of the first slush
machine and that today
confirms our leadership
in the technical forefront.
For our company
“Quality” also means
working trying to always
improve from a
management and
organizational point of
view following the ISO
9001: 2000 certification,
and it finally means to
care about the customers
and to dedicate
investments and
resources to continuously
meet their needs.
On the other hand, for
those who decided to
choose Elmeco, quality
means being able to work
with reliable and lasting
products, to count on a
precise and qualified
assistance in order to
work with increasing
satisfaction and earnings.
These instructions are
also available in
electronic format on our
website.

- 11 -
ENGLISH
General instruction
and warnings
This appliance is not intended
for use by persons (including
children) with reduced
physical, sensory or mental
capabilities, or lack of
experience and knowledge,
unless they have been given
supervision or instruction
concerning use of the
appliance by a person
responsible for their safety.
Children should be
supervised to ensure that
they do not play with the
appliance. Cleaning and user
maintenance shall not be
made by children without
supervision.
Before switching on the
machine carefully read the
information in this service
manual; this way you will be
able to install, use and
maintain the machine
Keep the use and assembly
instructions, even for the next
buyer. The manufacturer
declines any responsibility for
damages deriving from the
non-observance of the
following instructions.
Install the machine according
to the assembly instructions.
The power supply must
correspond to the data on the
plate on the front side of the
machine behind the drip tray
(pic.1).
During maintenance and
cleaning, or in case of bad
functioning, disconnect the
machine from the power plug
(by pulling the plug and not
the cable) (pic.2 and 3).
Only specialized and
authorized staff can repair the
machine. Not perfect
repairing can be dangerous
for the user. Contact Elmeco
for information concerning the
closer authorized assistance
centre.
For correct operation use the
machine at maximum
temperature of 32°C/89.6°F
and minimum 24°C/75.2°F.
For safe operation the
maximum tilt of the appliance
is 1,5 degree towards the
front side (outlet).
The appliance is not suitable
for installation in an area
where a water jet could be
used.
The appliance is only to be
installed in locations where its
use and maintenance is
restricted to trained
personnel.

- 12 -
ENGLISH
Installing the new
machine
This machine for the
production of cold drink,
slush, and slush grants the
absolute homogeneity of the
product and the possibility to
regulate its density thanks to
an innovative electronic
control. Before installing the
machine, verify that:
Big Biz is not placed by
an heat source;
The machine has not
been damaged during
transportation. In case of
doubt, contact the
supplier;
The power supply
system is endowed with
a grounding that
respects the rules of law;
The power supply
system capacity is
adequate to the
maximum power of the
machine, as indicated on
the plate (pic.4 pag.11).
In case of doubt, contact only
qualified staff.
In order to install the
machine, carefully read the
following instructions.
Warnings
This machine is only for the
use it has been manufactured
for. Any other usage is to be
considered as improper and
dangerous.
Machine description
(pic.1 pag.11):
Lamp
Transparent tank
Auger ring nut
Supply outlet
Hooks for the tanks
removal
Control electronic board
Main switch
Drip tray
Plate data
Installation
It is suggested that the
machine is installed only by
qualified staff. A wrong
installation can cause
damage to people or things,
for which things the
manufacturer declines any
responsibility.
Once the machine is
unpacked, verify the integrity
of the machine. The
packaging elements (plastic
bags, expanded polystyrene,
nails, etc.) must not be left at
children reach as they might
be dangerous.
Remove the protection
plastic stripes also from the
internal side of the grids.
We do not recommend to
plug the machine using
adaptors, multiple plugs
and/or extensions.
If necessary, use only
materials that conform to the
security rules in force, as for
the current intensity up to
what indicated on the plate
(pic.4 pag.11).
Place the machine so as to
avoid any heat source to be
close to the grids. Verify that
there is a free space of 25 cm
at least around the machine
(pic.5 pag.26).
After connecting the machine
to the power supply and
switching on the main switch,
verify that air comes out from
the side grids (pic.6 pag.26).
Right usage
Before switching on the
machine, it is necessary to
clean it as indicated in the
“Cleaning” paragraph.

- 13 -
ENGLISH
Cleaning
Cleaning is very important for
the life and maintenance of
the machine; we recommend
to periodically clean the parts
that are in contact with the
product using the following
procedure.
Warning!
The appliance must not be
cleaned by a water jet.
Warning!
Switch off the main switch
and disconnect the power
plug (pic.7 pag.26) before
starting any operation.
Use a solution of cold water
and sodium hypo chlorite
(bleach) with a 10 grams (1/2
spoon) for 1 liter of water
ratio. Rinse with lukewarm
water.
Warning!
A greater quantity of beach
could damage the material
of the auger.
Warning!
If the plastic parts are
washed in the dishwashing
machine, verify that the
temperature is not higher
than 60°C or 140°F,
because they could be
damaged.
Do not use any abrasive
powder.
Warning!
Always comply with the
provisions of the local
authorities in charge
regarding the cleaning of
the machine.
Warning!
Daily clean and sanitize the
machine.
Tank cleaning procedure
See the picture at the end of
this manual.
- Empty the tanks by
opening the outlets and
blocking them (pic.8
pag.26), moving the little
letter from the left to the
right.
- Remove the lamp (pic.9
pag.26), pour water in the
tanks and then empty
them.
- In the event the lamp has
a key lock, use the key
provided and remove the
lamp.
- Remove the outlet (pic.20,
21, 22 and 23 pag.27) and
the tank gasket :
- Remove the lever cover
(pic.20 pag.27) by
pushing “PUSH”
downward; and remove
the lever (pic.21
pag.27);
- Rotate the ring nut
counter clockwise
(pic.22 and 23 pag.27)
and pull the outlet.
- Remove the auger ring nut
(pic.10 and 11 pag.26).
- Remove the tank
unscrewing the hooks
grips (pic.12 pag.26), if
present, and opening the
hooks (pic.13 pag.26); lift
the tank as shown in
pic.14 and 15 pag.26.
- Unscrew the ring nut
(pic.16 pag.26) in order to
remove the vertical auger
(pic.17 pag.27).
- Remove the horizontal
auger; this way the
stainless steel side of the
tank is completely open
and ready to be cleaned
(pic.18 and 19 pag.27).
- Dip the dismantled parts in
the solution of water and
bleach.
- Wash and dry.
- Wet the gasket before
inserting it in place, be
careful to place the gasket
joint in one of the back
corners of the tank in the
proper allocation.
- Reassemble everything.
- Connect the machine to
the power supply.
Condenser cleaning
procedure
Remove the side panel
unscrewing the screws on the
bottom, and clean the radiator
with a soft brush or (if
possible) with compressed
air.

- 14 -
ENGLISH
Control and signals
: product density
indicator leds (min 1 max 3);
: product cooling activity
indicator;
: “slush” mode functioning
indicator;
: “cold drink” mode
functioning indicator;
: machine switch button;
: mode selection button
Self diagnostics
If the LED blinks on the
electronic board with the
value 1, 2 or with the slush
and cold drink value, see the
tables at the end of this
guide, the Web site “Problem
Solving” of www.elmeco.com,
or call the service centre.
Configuration memory
All the functioning modes and
the regulations set are
registered in a non-volatile
memory which is active even
without power; therefore,
when you switch on the
machine, the tank keeps the
configuration it had when you
switched it off.
How to start the
production of slush,
sherbets or cold
drinks
The maximum amount of
liquid that the tank can hold is
(granita 5.5 / 6lt - creams
3/4lt).
If you switch on Big Biz and
only the augers start moving
while the cooling system is
not working yet.
Clean the machine as
previously described.
Remove the cover and put
the mix in the tanks.
Warning: the temperature
of the poured product must
not be lower than 5 °C in
order to allow a correct
calibration of the electronic
board, this will be indicate
with blink of led 3.
Switch on the main switch
(see picture 7 pag.26).
Switch on the auger switch
;
by pressing the mode
selection button , you
can change from freezing
off to “1 slush” value, that’s
to say from the lowest
product density level. If the
product temperature is
higher than 5 °C, automati-
cally, will start the calibra-
tion procedure and the led
3 will blink. The blinking of
led 3 will stop when the
calibration procedure will
be finished (about 2
minutes), in this period of
time the machine can work
without any problem;
If you press the mode
selection button
twice, you change the
value to “2 slush” that’s to
say to the intermediate
product density level;
Pressing the mode
selection button again
, you change the value to
“3 slush” that’s to say to
the maximum product
density level that can be
set by Big Biz;
If you press this button
again , you pass to the
cold drink mode; at this
point, Big Biz will preserve
the product with a 4°C +/-
1°C temperature.
If you press this button
again , you go back to
the starting point, that’s to
say only with the active
augers but the cooling
system switched off.

- 15 -
ENGLISH
Warning: Use only potable
water for the preparation of
the mixtures.
Warning: in order to have
slush, sherbets or cold
drink, you need a small
quantity of sugar per liter.
The recommended quantity
is generally reported in the
usage instructions. In case
of natural products, we
suggest to use a quantity
that goes from 12 and 22%.
If the horizontal auger
is blocked because of
ice blocks due to a lack
of sugar or to other
reasons, such as
foreign bodies in the
tank, the auger can
undergo a break.
If the product freeze
completely turn off the
machine, wait until the
product becomes completely
liquid, empty the tank and
check the cause of the
problem (ie. Lack of sugar,
failure to close solenoid
valve, etc.).
Warning:The product must
be maintained at a
temperature not exceeding
5°C for periods specified by
the manufacturer, but for
not more than 5 days. In
case of failure of the
refrigerator system the
product should be
inspected to determine
whether it has deteriorated.
Warning: If the mixture
contains alcoholic product,
consider that 15% is the
maximum value, on total
mixture, that can come into
contact with plastic parts.
Timer defrost
(only BB2)
The " Timer Defrost" function
is optional. The machine is
endowed with a clock timer
that, if properly regulated,
changes the "slush" function
in "cold drink" and vice versa.
This function grants a cold
product with a 4°C
temperature (+/-1°C), even
during the night (Night Mode),
with a great advantage
especially for milk-based
products.
The Timer Defrost function is
not activated on the machine.
The setting and the activation
of the Night Mode and Day
Mode is done when the
machine is installed in the
following way:
1. panel opening;
2. local time setting on the
timer;
3. Night Mode and Day Mode
hour setting;
4. panel closing.
Important safety rules
Do not touch the
machine when you have
wet hands and/or feet.
Do not use the machine
with bare feet.
Do not allow children or
incompetent people to
use the machine.
Do not leave the
machine exposed to
atmospheric agents.
Do not pull the power
supply cable to
disconnect the machine
from the electric power.
Do not remove the
panels before
disconnecting the
machine from the
electric power.
The instructions shall
state that access to the
service area is restricted
to persons having
knowledge and practical
experience of the
appliance, in particular
as far as safety and
hygiene are concerned.
This appliance is
intended to be used in
household and similar
applications such as
- staff kitchen areas in
shops, offices and other
working environments;
- farm houses and by
clients in hotels, motels
and other residential type
environments;
- bed and breakfast type
environments;
- catering and similar non-
retail applications.
The A-weighted sound
pressure level is below
70 dB.
Do not store explosive
substances such as
aerosol cans with a
flammable propellant in
this appliance.
Do not use explosive
substances such as
spray cans containing
flammable fuel in the
vicinity of the appliance.
Old machine disposal
The out-of-use machines
must be disabled. Disconnect
the plug from the electrical
network and cut the cable.

- 16 -
ENGLISH
Ecological instructions
All refrigerating machines
must be disposed by the
communal disposal service or
by an equivalent private
authorized company. Take
care not to damage the rigid
tubes of the refrigerator until
they are taken back in order
to be carefully and
ecologically disposed. All
packaging materials used can
be discharged without any
danger.
Old machine discharge
Ecological instruction
(proposed).
The refrigerating machines
manufactured by Elmeco Srl,
like the greatest part of the
refrigerating machinery, like
freezers and air-conditioners,
use freon as refrigerating gas.
Freon, like other refrigerating
liquids, is responsible of the
damages to the ozone layer.
Even though the kind of freon
that Elmeco Srl use for the
production of its machines is
ecological (R404 CE
01.01.2001 rule), the
Company imposes the buyers
to be acquainted with what
follows and to conform to the
following rules.
The slush machines must be
discharged by the communal
discharge service or by an
equivalent private authorized
company.
Remember not to pierce, for
any reason, the refrigerating
circuit containing the gas.
Technical assistance
The repairing of the machine
(example: Replacing power
cord) must be carried out by
an authorized service centre,
using only original spare
parts.
If the supply cord is
damaged, it must be replaced
by the manufacturer, its
service agent or similarly
qualified persons in order to
avoid a hazard.
The out-of-use machines
must be disabled. Disconnect
the plug from the electrical
network and cut the cable.
Pressure switch refit
procedure
When the slush led, cold
drink led and led 1 blink on
the electronic board at the
same time,
This indicates that the
pressure switch intervened to
deactivate the compressor.
In order to refit this device, it
is important to follow the
instructions below:
1st. Remove the drip tray. In
case of 2 tanks slush
machine remove the
left drip tray.
2nd. Push the black button
as shown in the picture.
In order to avoid this
situation to happen again,
verify the correct position
of the machine as in the
pic.5 pag.26 and/or clean
the condenser as described
at pag.13.
Other manuals for BIG BIZ
3
Table of contents
Other ELME Commercial Food Equipment manuals
Popular Commercial Food Equipment manuals by other brands
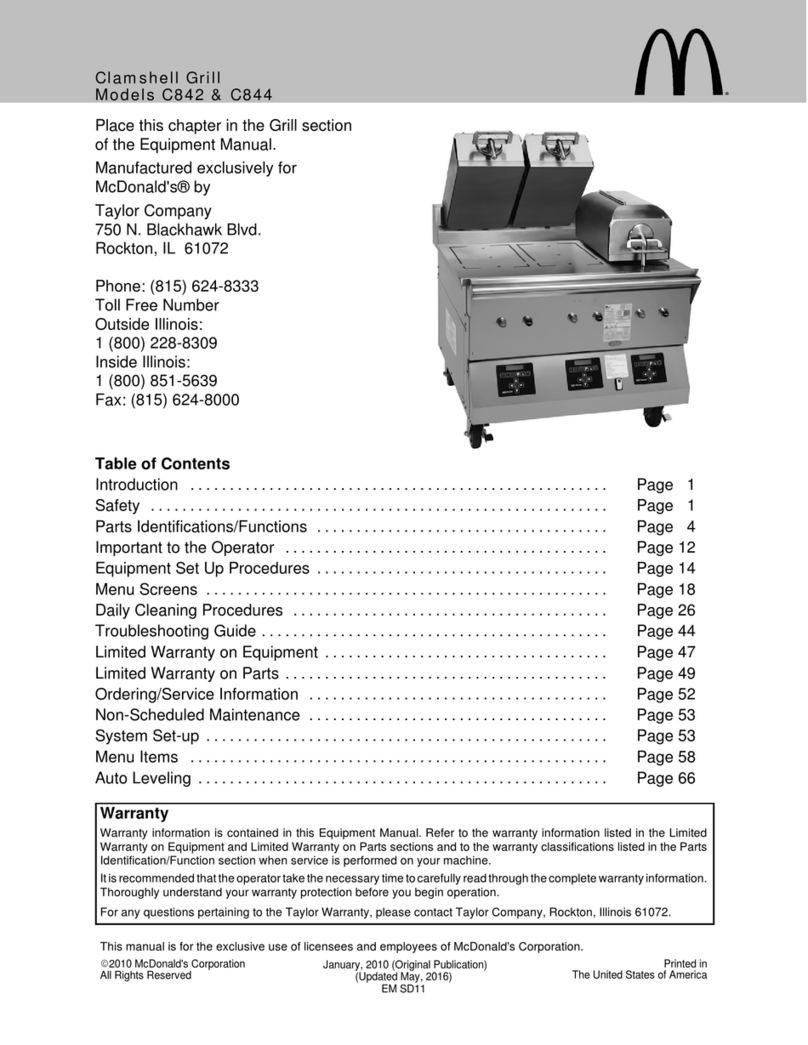
McDonald's
McDonald's C842 instructions
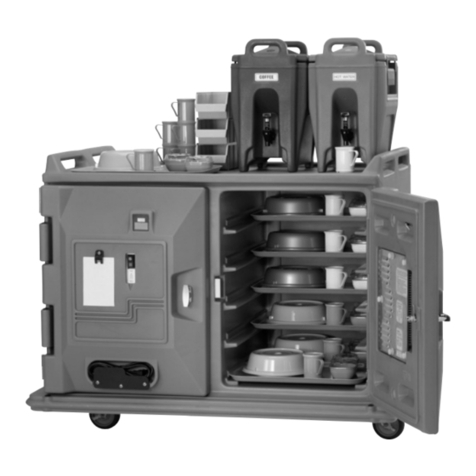
Cambro
Cambro MDCH1520S202 owner's manual
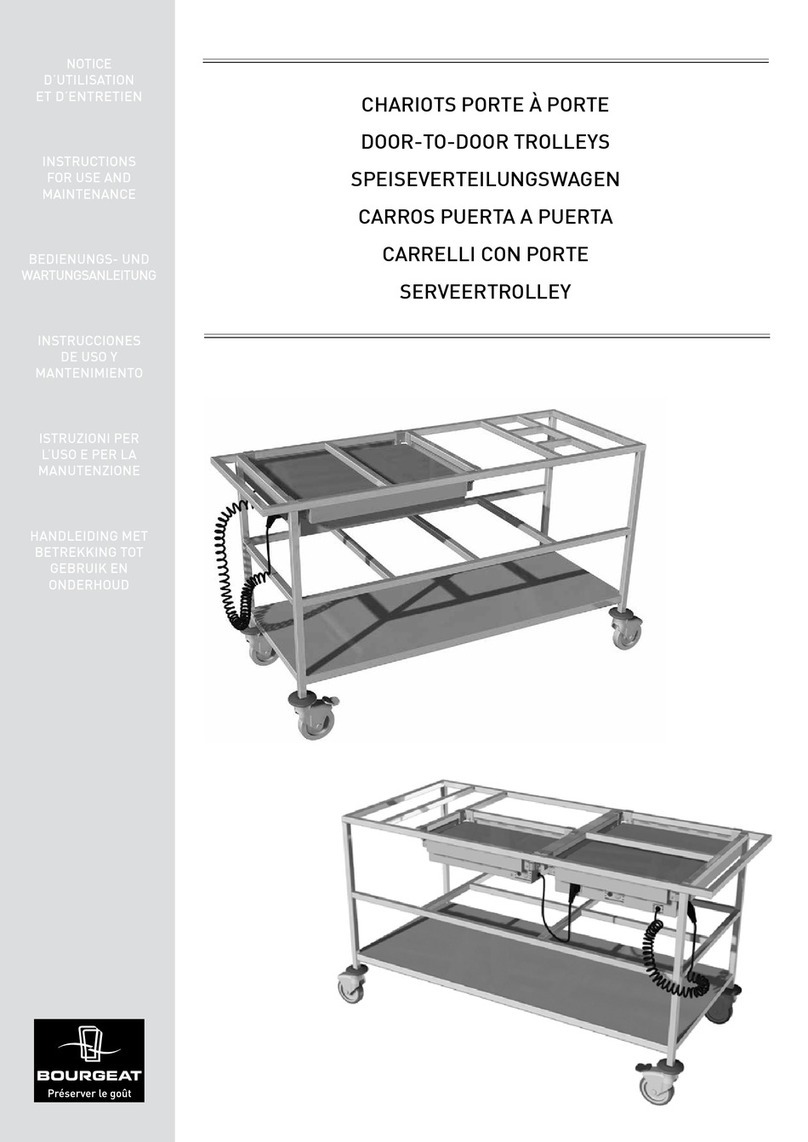
Bourgeat
Bourgeat 2GN Instructions for use and maintenance
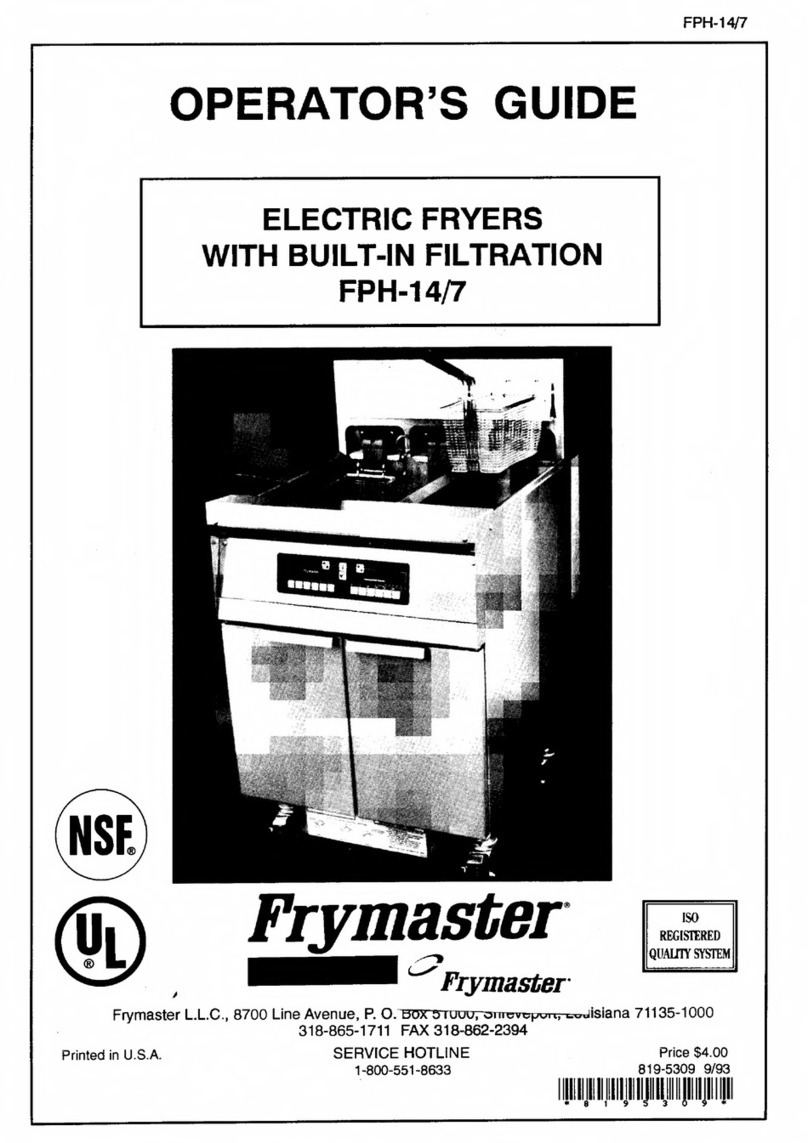
Frymaster
Frymaster FPH-14/7 Operator's guide
Electrolux Professional
Electrolux Professional LIBERO E1IREEOMCS Installation and operating manual
Ovention
Ovention Conveyor C2600 manual
