manuals.online logo
Brands
  1. Home
  2. •
  3. Brands
  4. •
  5. Emerson
  6. •
  7. Control Unit
  8. •
  9. Emerson KTM RICHARDS FIGURE R382 User manual

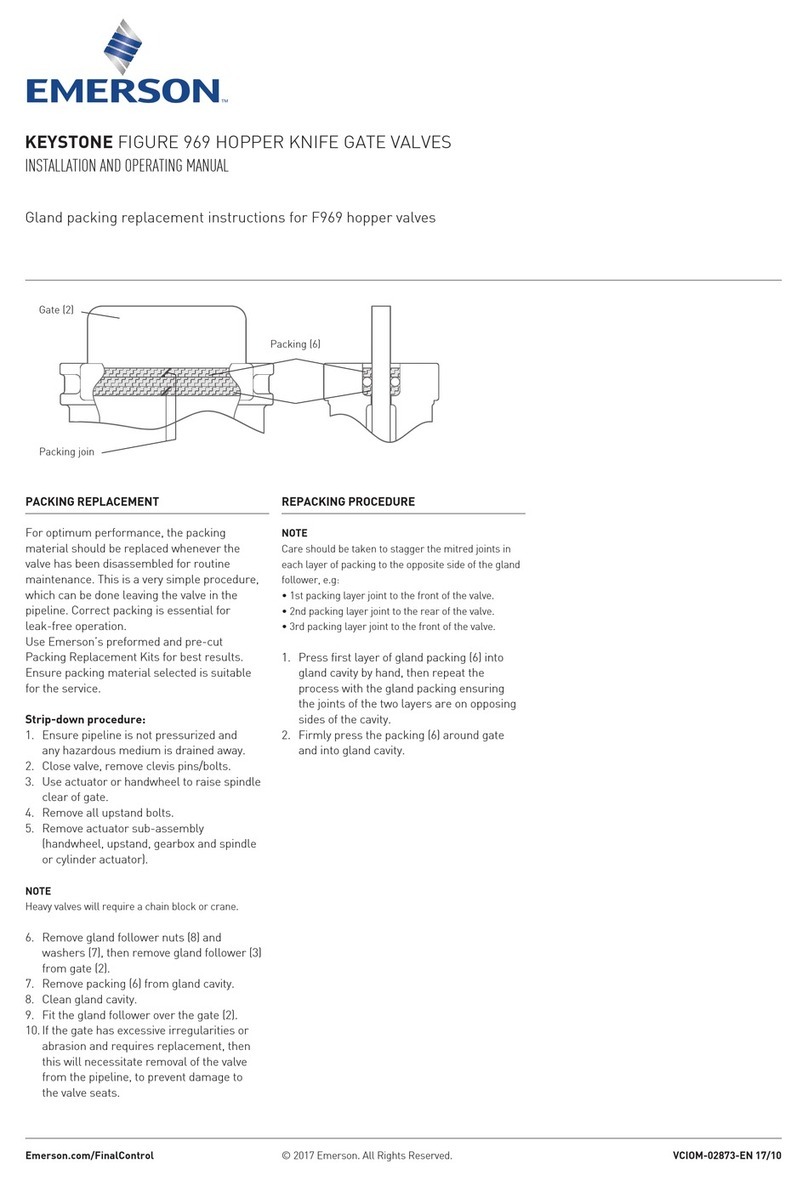
Emerson KTM RICHARDS FIGURE R382 User manual

KTM RICHARDS FIGURE R382/R392 BALL VALVES
INSTALLATION AND OPERATING INSTRUCTIONS
Installation and operating instructions for:
• R382, DN 65 - 100 reduced bore ball valves
• R392, DN 50 - 80 full bore ball valves
PIPE COMPATIBILITY
Emerson ball valves are suitable for installation
into most piping systems. The standard end
connections are:
• BSPT
• NPT
• Socket weld pipe Sch. 40
• Socket weld O/D Tube Sch. 10
• Butt weld pipe Sch. 40
Other end connections are available upon
request.
MAINTENANCE
The only routine maintenance required is
periodical checks and adjustment to the stem
assembly. Adjustment to the gland nut
is recommended after the first 5000 and
10000cycles; and every 10000 cycles thereafter
to compensate for the bedding of thrust and
gland seal and ensure leak free operation.
When tightening the gland nut, do not exceed
recommended torques, see table overleaf. After
reaching recommended gland nut torque, back
off to nearest flat on nut. Bend the lock washer
over the nut in this position.
When fitting actuators to valves, refer
to mounting Instructions supplied with
mountingkit.
STORAGE INSTRUCTIONS
The valves ball, seats and end connections
should be adequately protected against
damage.
The protective end covers should not be
removed until ready for installation.
GENERAL
The R382/R392 are bidirectional valves,
controlling flow in either direction. They can
be installed in any position, horizontally or
vertically.
Thread tape or sealant is recommended to
ensure effective sealing. Check that the tape/
sealant is suitable for the service.
INSTALLATION
Prior to leaving the factory each valve is
pressure tested, and to prevent damage to the
ball surface and seats protective covers will
have been fitted. Leave these in place until
such time as the valve is ready for installation.
On removal make sure the valve is in the open
position and free of foreign matter. When
installing valve, follow relevant standards
andstatutory regulations.
Examples:
Local gas fitting regulations, municipal building
codes or electrical wiring regulations.
a) Screwed valves: valves should not be
dismantled prior to fitting, and installed as
a unit following standard piping practice
(eg. using thread tape or pipe sealant).
When screwing the valve to the pipe DO NOT
OVERTIGHTEN.
b) Weld valves: follow instructions for weld
valves (see overleaf).
SAFETY PRECAUTIONS
Whenever a valve is being installed or removed
from the pipeline, ensure the line is not
pressurized and any hazardous medium is
drained away. Slowly cycle the valve several times
to relieve the cavity area and leave in the open
position.
Check that the seat and body pressure ratings are
suitable for the service prior to installation. These
ratings must not be exceeded.
© 2017 Emerson. All Rights Reserved.Emerson.com/FinalControl VCIOM-02972-EN 17/10
2
304
515
303
258
207
206
213
217
203
309
515
560
101
012
009
010
200
100
101
103
012
009
01 1
001
300
65 48
80 75
100 120
WELDING INSTRUCTIONS
CAUTION: failure to follow these instructions
could result in serious damage to the valve seats
and seals.
1. To prevent weld splatter damaging the ball
surface and to facilitate the later removal of
the center section, ensure the valve is in the
open position.
2. Locate the valve in the pipeline and
tackweldthe valve in position.
3. Loosen and remove the body bolts
(010) and nuts (011), allowing the body
(001) to be removed from between end
connectors(009).
When removing the body (001), ensure
the body seals (012), seats (101) and seat
retaining ring (103), remain in the original
locations.
4. Complete welding process, taking care
to protect the sealing faces of the end
connectors (009) from weld splatter. Allow
cooling of the ends before reassembly.
5. Reassembly:
a) Check the body seal (012), seats (101),
ball (100) and seat retaining ring (103)
making sure they are clean, undamaged
and in original locations and that the ball
is in the open position.
TORQUE VALUES (Nm)
Valve size DN Body bolts
Note: R382 DN 65 - 100 valve illustrated
b) Check sealing faces of end connectors
(009) to ensure the surface is clean and
not damaged by weld splatter.
c) Relocate the body (001) between end
connectors (009), taking care that the
pipe ends are sufficiently apart to provide
clearance to slide the center section into
position between the ends. Replace body
bolts (010) and nuts (011) and retighten to
recommended torques.
6. Inspect for leakage at plant start-up and
adjust if necessary.
CAUTION: if seats or seals are in any way
damaged, do not reassemble valve without
replacing damaged components.
OPERATION
All Emerson ball valves are quarter turn.
Handle operated valves provide visual indication
of the valve position. When the handle is across
the line of the valve, the valve is closed, and
when the handle is in line with the valve, the
valve is open.
Actuated valves are available and Emerson
has various options of pneumatic and electric
actuators.
For further details on fitting actuator, refer to
the mounting instruction sheet.
KTM RICHARDS FIGURE R382/R392 BALL VALVES
INSTALLATION AND OPERATING INSTRUCTIONS
Neither Emerson, Emerson Automation Solutions, nor any of their affiliated entities assumes responsibility for the selection, use or maintenance of any product.
Responsibility for proper selection, use, and maintenance of any product remains solely with the purchaser and end user.
KTM is a mark owned by one of the companies in the Emerson Automation Solutions business unit of Emerson Electric Co. Emerson Automation Solutions, Emerson and
the Emerson logo are trademarks and service marks of Emerson Electric Co. All other marks are the property of their respective owners.
The contents of this publication are presented for informational purposes only, and while every effort has been made to ensure their accuracy, they are not to be
construed as warranties or guarantees, express or implied, regarding the products or services described herein or their use or applicability. All sales are governed by
our terms and conditions, which are available upon request. We reserve the right to modify or improve the designs or specifications of such products at any time without
notice.
Emerson.com/FinalControl

This manual suits for next models

1

Other Emerson Control Unit manuals

Emerson Fisher HS User manual

Emerson

Emerson Fisher HS User manual

Emerson Fisher HP User manual

Emerson

Emerson Fisher HP User manual

Emerson ALCO CONTROLS FSE-0 User manual

Emerson

Emerson ALCO CONTROLS FSE-0 User manual

Emerson FRM-2 Manual

Emerson

Emerson FRM-2 Manual

Emerson Fisher 377 User manual

Emerson

Emerson Fisher 377 User manual

Emerson SI-PROFIBUS User manual

Emerson

Emerson SI-PROFIBUS User manual

Emerson numatics E22 User manual

Emerson

Emerson numatics E22 User manual

Emerson Fisher EAD User manual

Emerson

Emerson Fisher EAD User manual

Emerson Fisher D4 User manual

Emerson

Emerson Fisher D4 User manual

Emerson FISHER NotchFlo DST User manual

Emerson

Emerson FISHER NotchFlo DST User manual

Emerson Fisher EZL Series User manual

Emerson

Emerson Fisher EZL Series User manual

Emerson E2 User manual

Emerson

Emerson E2 User manual

Emerson Keystone K-Lok 360 Series Operating instructions

Emerson

Emerson Keystone K-Lok 360 Series Operating instructions

Emerson White-Rodgers 36H Series User manual

Emerson

Emerson White-Rodgers 36H Series User manual

Emerson Fisher 1808 User manual

Emerson

Emerson Fisher 1808 User manual

Emerson VS-FL Series User manual

Emerson

Emerson VS-FL Series User manual

Emerson E5 User manual

Emerson

Emerson E5 User manual

Emerson SAPAG 7700 Guide

Emerson

Emerson SAPAG 7700 Guide

Emerson Daniel 770 User manual

Emerson

Emerson Daniel 770 User manual

Emerson Fisher FLOBOSS 407 User manual

Emerson

Emerson Fisher FLOBOSS 407 User manual

Emerson Fisher OS2 User manual

Emerson

Emerson Fisher OS2 User manual

Emerson KEYSTONE DUBEX User manual

Emerson

Emerson KEYSTONE DUBEX User manual

Emerson XC1008D Wiring diagram

Emerson

Emerson XC1008D Wiring diagram

Emerson 740 Series User manual

Emerson

Emerson 740 Series User manual

Popular Control Unit manuals by other brands

Siemens Add 7 AddFEM manual

Siemens

Siemens Add 7 AddFEM manual

Bosch B426 installation guide

Bosch

Bosch B426 installation guide

Nil-Cor 310 Series Installation maintenance and operating instructions

Nil-Cor

Nil-Cor 310 Series Installation maintenance and operating instructions

Armstrong The Brain DRV80R manual

Armstrong

Armstrong The Brain DRV80R manual

Huawei SmartAX MA5600T Hardware description

Huawei

Huawei SmartAX MA5600T Hardware description

Siemens GAMMA instabus Touch control TC5 manual

Siemens

Siemens GAMMA instabus Touch control TC5 manual

Eaton BreakerVisu NZM-XMC-MDISP35-MOD manual

Eaton

Eaton BreakerVisu NZM-XMC-MDISP35-MOD manual

Johnson Controls H Series manual

Johnson Controls

Johnson Controls H Series manual

CHINT NP6 Series User instruction

CHINT

CHINT NP6 Series User instruction

Hayward PSV series owner's manual

Hayward

Hayward PSV series owner's manual

Yamaha disklavier DKC-850 Internet connection guide

Yamaha

Yamaha disklavier DKC-850 Internet connection guide

Eurotronic NOX WR manual

Eurotronic

Eurotronic NOX WR manual

HP 81533B user guide

HP

HP 81533B user guide

WAGO SPEEDWAY 767 Series manual

WAGO

WAGO SPEEDWAY 767 Series manual

jbc DDU instruction manual

jbc

jbc DDU instruction manual

ABB ACS850 series Quick installation guide

ABB

ABB ACS850 series Quick installation guide

schmersal AES 2355 operating instructions

schmersal

schmersal AES 2355 operating instructions

LOHSE CNA Series Operating and instruction manual

LOHSE

LOHSE CNA Series Operating and instruction manual

manuals.online logo
manuals.online logoBrands
  • About & Mission
  • Contact us
  • Privacy Policy
  • Terms and Conditions

Copyright 2025 Manuals.Online. All Rights Reserved.