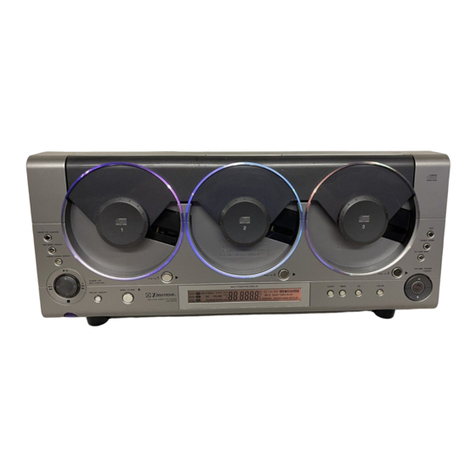
Emerson MS7622 User manual

OWNER'SMANUAL
MS7622
HOMEAUDIO SYSTEM
withCD PLAYER
and CASSETTERECORDER
Visitourweb siteatwww.emersonradio.com
MS7622_031504.p65 15/3/2004, 11:5427

1
TO PREVENT FIRE OR SHOCK HAZARD, DO NOT USE THIS PLUG WITH AN
EXTENSION CORD, RECEPTACLE OR OTHER OUTLET UNLESS THE BLADES
CAN BE FULLY INSERTED TO PREVENT BLADE EXPOSURE. TO PREVENT FIRE
ORSHOCKHAZARD,DONOTEXPOSETHISAPPLIANCETORAINORMOISTURE.
IMPORTANTSAFETYINSTRUCTIONS
1.) Read these instructions.
2.) Keep these instructions.
3.) Heed all warnings.
4.) Follow all instructions.
5.) Do not use this apparatus near water.
6.) Clean only with dry cloth.
7.) Do not block any ventilation openings. Install in accordance with the manufacturer’s
instructions.
8.) Do not install near any heat sources such as radiators, heat registers, stoves, or other
apparatus (including amplifiers) that produce heat.
9.) Do not defeat the safety purpose of the polarized or grounding-type plug. A polarized plug has
two blades with one wider than the other. A grounding type plug has two blades and a third
grounding prong. The wide blade or the third prong is provided for your safety. If the provided
plug does not fit into your outlet, consult an electrician for replacement of the obsolete outlet.
10.) Protect the power cord from being walked on or pinched particularly at plugs, convenience
receptacles, and the point where they exit from the apparatus.
11.) Only use attachments / accessories specified by the manufacturer.
12.) Unplug this apparatus during lightning storms or when unused for long periods of time.
13.) Refer all servicing to qualified service personnel. Servicing is required when the apparatus
has been damaged in any way, such as power-supply cord or plug is damaged, liquid has
been spilled or objects have fallen into the apparatus, the apparatus has been exposed to rain
or moisture, does not operate normally, or has been dropped.
14.) This appliance shall not be exposed to dripping or splashing water and no object filled with
liquids such as vases shall be placed on the apparatus.
15.) Do not overload wall outlet. Use only power source as indicated.
16.) Use replacement parts as specified by the manufacturer.
17.) The product may be mounted to a wall only if recommended by the manufacturer.
18.) Upon completion of any service or repairs to this product, ask the service technician to
perform safety checks.
!
CAUTION
RISK OFELECTRICSHOCK
DONOTOPEN
The lightning flashwitharrow-
head symbol,withinan equi-
lateraltriangleisintended to
alertthe usertothe presence
ofuninsulated‘dangerousvoltage’
withinthe product’s enclosure
thatmaybe ofsufficient
magnitude toconstitutearisk
ofelectricshock topersons.
The exclamation pointwithin
an equilateraltriangleisin-
tended toalertthe userto
the presenceofimportant
operating and maintenance
(servicing)instructionsin
the literatureaccompany-
ing the appliance.
WARNING:TOREDUCETHE
RISK OFELECTRICSHOCK
DONOTREMOVE COVER
(ORBACK),NOUSER
SERVICEABLEPARTSINSIDE
REFERSERVICINGTO
QUALIFIEDSERVICE
PERSONNEL.
CAUTION
MS7622_031504.p65 15/3/2004, 11:541

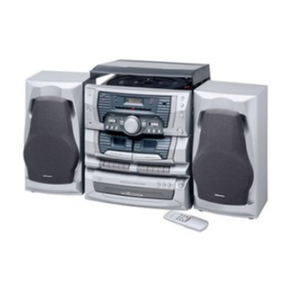
2
Thank you.........for purchasing this Emerson audio product. The Emerson
brand is your assurance of quality, performance and value.
Our engineers have included many useful and convenient features in this
product. Please be sure to read this Owner’s Manual completely to make
sure you are getting the maximum benefit from each feature.
This product was manufactured using the highest quality components and
standards of workmanship. It was tested by Emerson inspectors and found
to be in perfect working order before it left our factory. However, there is
alwaysthechancethatsomeproblemmayoccurbecauseofroughhandling
during shipment to the retail store or to the final consumer.
If,afterreadingthismanual,youexperienceanyproblemswiththeoperation
of this product, please refer to the instructions for obtaining service at the
end of this manual. Emerson and Emerson retailers are committed to your
satisfaction.
Once again, thanks for purchasing this Emerson audio product.
For future reference, record the serial number in the space provided.
Model No: MS7622
Serial No:
MS7622_031504.p65 15/3/2004, 11:542

3
•Operatecontrolsand switchesas
described inthe manual.
•Beforeturning ‘On’the power,make
certainthatpowercordisproperly
installed.
•StoreyourCDs,cassettesinacoolarea
toavoiddamage fromheat.
•When moving the set, be suretofirst
disconnectthe powercord.
•Avoidinstalling thisunitinplaces
exposed todirectsunlightorcloseto
heatradiating appliancessuchas
electricheaters,on top ofotherstereo
equipmentthatradiatestoo muchheat,
placeslackingventilationordustyareas,
placessubjecttoconstantvibrationand/
orhumidormoistareas.
•Donotattempttoclean thisunitwith
chemicalsolventsasthismightdamage
the finish.Useaclean drycloth.
CLASS 1LASERPRODUCT
CLASS 1LASERPRODUCT
APPAREILÁLASERDECLASSE 1
PRODUCTOLASERDECLASE 1
CAUTION
INVISIBLELASERRADIATION
WHENOPENAND INTERLOCKS
DEFEATED.
AVOIDEXPOSURETOBEAM
ThisproductcontainsalowpowerLaserDevice.
FCC INFORMATION
Thisequipmenthasbeen tested and found tocomplywiththe limitsforaClass Bdigital
device,pursuanttoPart15 ofthe FCC Rules.Theselimitsaredesigned toprovide
reasonableprotection againstharmfulinterferenceinaresidentialinstallation.This
equipmentgenerates,uses,and can radiateradiofrequency energyand,ifnotinstalled
and used inaccordancewiththe instructions,maycauseharmfulinterferencetoradio
communications.However,thereisno guarantee thatinterferencewill notoccurina
particularinstallation.Ifthisequipmentdoescauseharmfulinterferencetoradioortelevision
reception,whichcan be determined byturning the equipmentoff and on,the useris
encouraged totrytocorrectthe interferencebyone ormoreofthe following measures:
•Reorientorrelocatethe receiving antenna.
•Increasethe separation between the equipmentand receiver.
•Connectthe equipmentintoan outleton acircuitdifferentfromthattowhichthe receiver
isconnected.
•Consultthe dealeroran experienced radio/TVtechnician forhelp.
ThisdevicecomplieswithPart15 ofthe FCC Rules.Operation issubjecttothe following
twoconditions:
(1)Thisdevicemaynotcauseharmfulinterference,and
(2)Thisdevicemustacceptanyinterferencereceived,including interferencethat
maycauseundesired operation.
IMPORTANTNOTES
MS7622_031504.p65 15/3/2004, 11:543

4
UNPACKINGAND SETUP
•Carefullyremovethe unitfromthe carton and removeall packing materials
fromthe unit.
•TheACpowercordisseparatefromthe mainunit. Makesurethatthe power
cordisnotaccidentallythrownawaywiththe packing materials.
•Carefullyremoveanysmall stripsoftape whichmayhavebeen used tokeep
the CDand Cassettedoorsclosed during shipment.
•Open the CD compartmentbylifting the “OPEN”tab on top panel.Inside the
CDcompartmentyou will see awhitetransitcardwhichisused topreventthe
laserpick-up frommoving during shipment. Carefullyremovethiscardand
closethe CD compartmentdoor.
•Pleasesavethe carton and packing materialsinthe eventthatyourunitever
needstobe returned forservice.The originalcarton and packing materialsare
the onlywaytoprotectthe unitfromdamage during shipment.
•Unwind the FMlead wireantenna and extend ittoitsfull length.
•Removethe twist-tiefromtheACpowercordand extend ittoitsfull length.
PREPARATIONFORUSE
MS7622_031504.p65 15/3/2004, 11:544

5
AC Plug
AC Outlet
POWER SOURCE
This system is designed to operate on normal 120V 60 HzAC house current only.
Attempting to operate this system from any other power source may cause damage
to the system, and such damage is not covered by your warranty.
Plug the small end toAC socket on back panel, and Conect theAC plug to yourAC
outlet. See illustration below.
NOTE: This unit has a polarized AC plug with one wide blade and one narrow
blade. This plug will only fit into a matching polarized AC outlet. This is a safety
feature to reduce the possibility of electric shock. If this plug will not fit in your AC
outlet, you probably have an outdated non-
polarized outlet. You should have your
outdated outlet changed by a qualified,
licensed electrician. Do not file the wide
blade on the plug, or use an adapter to
make the plug fit into your outlet. This
defeats the safety feature and could
expose you to electric shock.
MS7622_031504.p65 15/3/2004, 12:095

6
+
R
L
+
Red Wire
Black Wire
PROTECTYOUR FURNITURE
Thismodelisequipped withnon-skidrubber'feet'topreventthe productfrom
moving when you operatethe controls.These'feet'aremade fromnon-migrating
rubbermaterialspeciallyformulated toavoidleaving anymarks orstainson your
furniture.Howevercertaintypesofoil based furniturepolishes,wood preservatives,
orcleaning sprays maycausethe rubber'feet'tosoften,and leavemarks ora
rubberresidue on the furniture.Topreventanydamage toyourfurniturewestrongly
recommend thatyou purchasesmall self-adhesivefeltpads,availableathardware
storesand homeimprovementcenterseverywhere,and applythesepadstothe
bottomofthe rubber'feet'beforeyou placethe producton fine wooden furniture.
SPEAKERCONNECTION
Connecteachspeakertothe corresponding speakerterminalson the back panel
ofthe mainunit. Makesurethat:
•The left speakerisconnected tothe (L)left pairofspeakerterminals,and the
rightspeakertothe (R)rightpairofspeakerterminals.
Alsomakesurethatthe speakerwiresarecorrectlyconnected:
•Thatthe red wiresareconnected tothe red (+)terminals,and the black wiresto
the black (–)terminals.
Depress the plasticlevertoopen the terminal,insertthe bareend ofthe speaker
wireintothe opening and release.
MS7622_031504.p65 15/3/2004, 11:546

7
LOCATION OFCONTROLS AND INDICATORS
FRONTPANEL
BACK PANEL
26
1
2
3
4
5
6
7
8
9
10
11 12
16
17
18
19
20
21
22
23
25
24
13 14 15
MS7622_031504.p65 15/3/2004, 11:547

8
FRONTPANEL
1.)CassetteDoor.
2.)BAND (FMST./FM/AM)SelectorSwitch.
3.)FUNCTION(RADIO/TAPE /CD)SelectorSwitch.
4.)PHONES Jack.
5.)CDSTOPButton.
6.)CD SKIPREV Button.
7.)CD SKIPFWDButton.
8.)POWER‘On’/PROGRAM/REPEAT/FMSTEREOLEDIndicators.
9.)TuningDial.
10.)POWERON/OFF Button.
11.)REMOTESENSOR.
12.)CD Track NumberDisplay.
13.)CD PLAY/PAUSE Indicator.
14.)CDDoor.
15.)CDDoorOPENtab.
16.)TUNINGControl.
17.)CD PROGRAMButton.
18.)CDREPEATButton.
19)VOLUMEControl.
20.)BBS(Bass Boost)ON/OFF Button.
21.)CD PLAY/PAUSE Button.
22.)CassetteDoorPUSHTOCLOSE Position.
23.)CassetteControlKeys
RECORD /PLAYY /REW/F.FWDD /STOP-EJECT/PAUSEAUSE .
BACK PANEL
24.)ExternalFMWireAntenna.
25.)SPEAKERTerminals.
26.)ACCordSocket.
MS7622_031504.p65 15/3/2004, 11:548

9
REMOTECONTROL(CD OperationsOnly)
1.)SKIPREV Button.
2.)SKIPFWDButton.
3.)PLAY/PAUSE Button.
4.)STOPButton.
5.)SEARCH ForwardButton.
6.)SEARCH ReverseButton.
7.)PROG (Program) Button.
8.)REPEATButton
9.)BatteryCompartment.
(Back Cabinet)
BATTERYINSTALLATION
1.) Open the battery door on the back of the remote control by sliding the battery
door in the direction of the arrow.
2.) Insert two “AA” alkaline batteries (not included) into the battery compartment.
Be sure the batteries are inserted according to the polarity markings inside
the battery compartment.
3.) Replace the battery door.
1
2
3
45
6
7
8
9
MS7622_031504.p65 15/3/2004, 11:549

10
BATTERYREPLACEMENT
When the batteriesbecometoo weak,the operating distanceofthe remotecontrol
isgreatlyreduced and you will need toreplacethe batteries.
USINGTHEREMOTECONTROLCORRECTLY
•Pointthe remotecontrolatthe REMOTESENSOR.
•The functionsofthe buttonson the remotecontrolarethe sameasthe
corresponding controlson the mainunit.
•When thereisastrong ambientlightsource,the performanceofthe infrared
RemoteSensormaybe degraded,causing unreliableoperation.
•The maximumeffectivedistanceforremotecontroloperation isabout15 feet.
BATTERYPRECAUTIONS
Followtheseprecautionswhen using batteriesinthisdevice:
1.)Useonlythe sizeand type ofbatteriesspecified.
2.)Besuretofollowthe correctpolaritywhen installing the batteriesasindicated inthe battery
compartment. Reversed batteriesmaycausedamage tothe device.
3.)Donotmixdifferenttypesofbatteriestogether(e.g.Alkaline and Carbon-Zinc)orold
batterieswithfreshones.
4.)If the deviceisnottobe used foralong period oftime,removethe batteriestoprevent
damage orinjuryfrompossiblebatteryleakage.
5.)Donottrytorecharge batteriesnotintended tobe recharged;theycan overheatand
rupture.(Followbatterymanufacturer’s directions.)
MS7622_031504.p65 15/3/2004, 11:5410

11
BBS (Bass Boost) Switch
This system includes a BBS (Bass Boost) button that provides increased bass
response, especially at lower listening levels. Press the BBS button once to turn
the Bass Boost circuit ‘ON ’. Press the BBS button again to turn the Bass
Boost circuit ‘OFF ’.
Note: If you experience any distortion when listening at high volume levels,
turn the Bass Boost ‘off’.
LISTENING TO THE RADIO
• Make sure that the FM Wire antenna is extended to its full length.
1.) Press the POWER button to turn the unit
“ON ”. The POWER indicator comes ‘on’.
2.) Slide the FUNCTION selector switch to
RADIO.
3.) Slide the BAND switch the FM ST., FM or
AM position to select the radio band as desired.
4.) Turn the TUNING control to tune to the desired radio station.
Note:
If you tune to an FM Stereo station and
the BAND selector is set to FM ST, the
FM STEREO indicator will light.
If the FM reception is noisy or weak you may be able to improve it by
sliding the BAND selector to the FM (Mono) position, however the sound
will no longer be in stereo.
5.) Adjust the VOLUME and BBS controls as desired.
6.) When you are finished listening press the POWER button to the “OFF ”
position. All indicators go ‘off’
OPERATING INSTRUCTIONS
MS7622_031504.p65 15/3/2004, 11:5411

12
HINTS FOR BETTER RECEPTION
FM:The FM lead wire antenna on the back panel should be extended to its full
length. You may also have to vary the direction of this antenna until you find
the position that provides the best reception.
AM:The AM bar antenna is inside the cabinet of the main unit. You may need to
change the position of the main unit until you find the position that provides
the best reception for your favorite AM stations.
MS7622_031504.p65 15/3/2004, 11:5412

13
PLAYINGCOMPACTDISCS
NOTE:Although thisportableCD playercan read CD-Rand CD-RWdiscs,in
addition tonormalCDs,the playabilityofCD-Rand CD-RWdiscs maybe effected
bythe type ofsoftwarethatwasused tocreatethe discs,aswell asthe qualityand
condition ofthe blankmediayou areusing.100%playabilitycannotbe guaranteed.
Thisisnotan indication ofaproblemwiththe player.
NORMALPLAYBACK
1.) Press the POWER button to turn the unit “ON ”. The POWER indicator
comes ‘on’.
2.) Slide the FUNCTION selector switch to CD position.
3.)Open the CD doorbylifting the OPENtab on top ofCD door.If you havenot
alreadyremoved the whitetransitcardfromthe CD player,pleaseremoveit
now.
4.)PlaceyourCDon the centerspindlewiththe
printed labelside facing up.Closethe CD
door.The playerwill read the Tableof
Contentsand the displaywill showthe total
numberoftracks on the disc.
If the disc isdamaged orup side down,displayshows“––”.
5.)Press the CD PLAY/PAUSE button to
beginplayback on Track 1.The PLAY/
PAUSE “Dot”Indicatorappearsinthedisplay.
6.) Adjust the VOLUME and BBS controls as desired.
7.) Playback will continue until the end of the disc. When the disc ends the display
again shows the total number of tracks on the disc. You may also stop playback
at any time by pressing the CD STOP button.
MS7622_031504.p65 15/3/2004, 11:5413

14
Pause Control
To pause momentarily during playback press the
CD PLAY/PAUSE button again. Playback
stops but the disc continues to spin and thePLAY
indicator flashes. Press the CD PLAY/PAUSE
button once more to cancel Pause and
resume playback. The PLAY/PAUSE indicator stops flashing.
Skipping Tracks and High Speed Music Search
During CD Playback, repeatedly press theSKIP FWD orSKIP REV buttons
to skip to higher or lower number tracks. When the desired track number appears
on the display release the buttons and playback will begin on the desired track.
To rapidly search forward or back within a track to locate a specific musical passage,
depress and hold either the / buttons on main unit, or /buttonsonson
remotecontrol. The player will move forward or backward at high speed as long as
thebuttons are depressed. When youhear the desired passage release thebuttons.
Normal playback will resume at that point.
Repeat Playback
This feature allows you to continuously repeat a single track or the entire disc.
To Repeat A Single Track
Press the REPEAT button once. The REPEAT
indicator flashes. Press the or buttons to
select the desired track, then press the CD
PLAY/PAUSE button to begin Repeat
Playback of the selected track.
To Repeat The Entire Disc
Press the REPEAT button twice. The REPEAT
indicator remains ‘on’. Press the CD PLAY/
PAUSE button to begin Repeat Playback of
the entire disc.
To cancel Repeat Playback press the REPEAT button until the REPEAT Indicator
goes ‘off’. Repeat Playback is also canceled by pressing the STOP button, or
setting the FUNCTION selector to the TAPE or RADIO position.
MS7622_031504.p65 15/3/2004, 11:5414

15
PROGRAMMED PLAYBACK
This feature allows you to program up to 20 tracks on a disc for playback in any
desired order.
Note: You cannot program tracks while a disc is playing. If the disc is playing
press the STOP button first before beginning the programming steps below:
1.) Press the PROGRAM button to enter the
Program Mode. The PROGRAM indicator
and Program Number ‘0’ flash.
2.) Press the SKIP or buttons to select
the first track number you wish to enter in
the program memory.
Example: Track Number 8.
3.) When the desired track number appears on
the display, press the PROGRAM button
again to enter that track in memory. The
Program Number display returns to “0”.
4.) Repeat Steps 2-3, selecting a different track number each time until you have
entered up to 20 tracks in the program memory.
Note: You may program the same track
number to play multiple times in the
program sequence if desired. When
programmed track is full, “– –” flashes in
the display.
5.) Press the PLAY/PAUSE button to begin
Programmed Playback. The PROGRAM
indicator flashes. Playback will begin with the
first track you programmed and will continue
until the last programmed track has played.
MS7622_031504.p65 15/3/2004, 11:5415

16
6.) After the last track has played the player stops and the display shows the total
number of tracks on the disc. However the program sequence remains in the
memory.
Press the PROGRAM button, then the PLAY/PAUSE button to play the
programmed sequence again.
7.) To cancel the programmed sequence from the memory press the STOP
button while in programming mode.
The programmed sequence may also be canceled by removing the disc,
changing function to TAPE, RADIO, or shutting the system ‘off’.
ProgramRepeatPlayback
You can usethe Programand Repeatfeaturestogethertocontinuouslyrepeata
programmed sequenceoftracks.
First, programthe desired tracks according toSteps1through 5on page 14.
When Programmed Playback beginspress the REPEATbutton twicetoactivate
theAll Tracks Repeatfeature.
The REPEATIndicatorlightsand all the tracks
inyourprogrammed sequencewill be repeated
continuously.
TocancelProgrammed RepeatPlayback press the STOPbutton until boththe
PROGRAMand REPEATIndicatorsgo ‘Off’.
MS7622_031504.p65 15/3/2004, 11:5416

17
PLAYINGCASSETTETAPES
1.) Press the POWER button to turn the unit “ON ”. The POWER indicator
comes ‘on’.
2.) Slide the FUNCTION selector switch to TAPE position.
3.)Open the cassettedoorbypressing the STOP/EJECTkey..
4.)Placeapre-recorded cassettetape intothe slotson the inside ofthe doorwith
the exposed tape facing downand the full reelon the left side.
5.)Press the cassettePLAYkeytobeginplayback.
6.)Adjustthe VOLUMEand BBScontrolsasdesired.
7.)Toadvancethe tape rapidlypress the F.FWDkey.Tostop the tape before
itendspress the STOP/EJECTkey..
8.)Torewind the tape rapidlypress the REWkey.Tostop the tape beforeit
endspress the STOP/EJECTkey..
MS7622_031504.p65 15/3/2004, 12:0417

18
9.)When the tape endsthe AutomaticStop Systemreleasesthe PLAYkey
and shutsoff the tape motor.You maythen open the cassettedoor,remove
yourtape,turnitoverand playthe otherside ifdesired.
10.)When you arefinished listening stop the tape,open the door,removethe tape
and closethe door.If you areplaying atape and then switchtothe RADIOor
CD function be suretopress STOP/EJECTkeytodisengage the tapepe
mechanism.Thispreventsexcess wearand tearon the mechanism.
IMPORTANT:
Always press the STOP/EJECTkeytoshutoff the tape motorbeforeopening
thecassettedoortoremoveyourtape.TheAutomaticStopSystemdoesnotfunction
inthe FastForwardand Rewind modes.When the tape endsinthe Fastst
Forwardand Rewind modesthe motorcontinuestorun.You mustpressss
the STOP/EJECTkeytoshutoff the motorbeforeopening the doortoremove
yourtape.
MS7622_031504.p65 15/3/2004, 11:5418

19
MAKINGATAPE RECORDING
Thismodelallowsyou tomaketape recordingsdirectlyfromthe CD player,orthe
radio.
•Referto“PLAYINGCOMPACTDISCS”ifnecessarytooperatethe CDplayer.
•Referto“LISTENINGTOTHERADIO”ifnecessarytotune inthe station you
wishtorecordfromradio.
1.)Press the STOP/EJECTkeytoopen the cassettedoor..
2.)Insertagood qualityblankcassettetape intothe slotson the cassettedoor
withthe open end facing downand the full reelon the left. Usenormaltape
only.Donotusetape identified as“CrO2”(Chrome)or“Metal”tape formulations.
Forbestresultsusetapesof60 minutes(C-60)orless.Donotuse90 minute
or120 minutetapesasthesethinnertapesaremorelikelytojaminthe
mechanism.
3.)Closethe cassettedoor.
4.)When you arereadytostartrecording press the RECORD key.The PLAYY
keywill alsoengage.The CDyou areplaying,orradioprogramyou selected
will be recorded directlyon tothe tape.
5.)Press the PAUSE keyduring recording tostop the tape temporarilyand
avoidrecording unwanted materialsuchasradiocommercials.
6.)When you havefinished recording press the STOP/EJECTkeytostop
and removethe tape.
AutomaticRecording VolumeLevelControl
ThisunithasanAutomaticLevelControl(ALC)circuitwhichcontrolsthe recording
volumeleveland preventsoverloaded and distorted recordings.The VOLUME
and BBScontrolshaveno effecton recording volumelevel.You maychange the
VOLUMEcontrolsetting during the recording oreven reducethe volumelevelto
“Minimum”.Thiswill noteffectthe levelofthe recording.
MS7622_031504.p65 15/3/2004, 11:5419
Table of contents
Other Emerson Stereo System manuals

Emerson
Emerson MS3103 User manual

Emerson
Emerson ES830 User manual

Emerson
Emerson MS9903TT User manual

Emerson
Emerson ES3 User manual

Emerson
Emerson ES79 User manual

Emerson
Emerson NR101TT User manual

Emerson
Emerson MS7625 User manual

Emerson
Emerson MS3100 User manual

Emerson
Emerson MS9923TT User manual

Emerson
Emerson CKD9906 User manual

Emerson
Emerson MS9600 User manual

Emerson
Emerson MS7616R User manual

Emerson
Emerson MS7630 User manual

Emerson
Emerson Research ES299 User manual

Emerson
Emerson NR305TT User manual

Emerson
Emerson Research iE600 User manual

Emerson
Emerson PD6511 User manual

Emerson
Emerson MS3111M User manual

Emerson
Emerson NR303TT User manual

Emerson
Emerson MS9933TT User manual