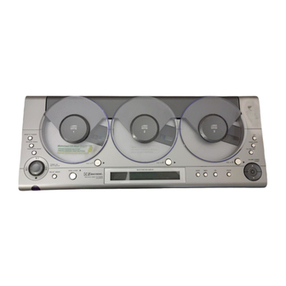
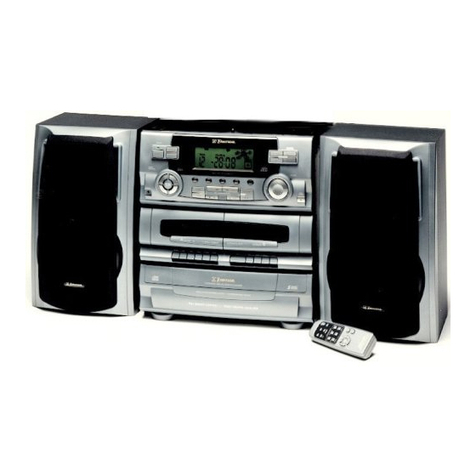
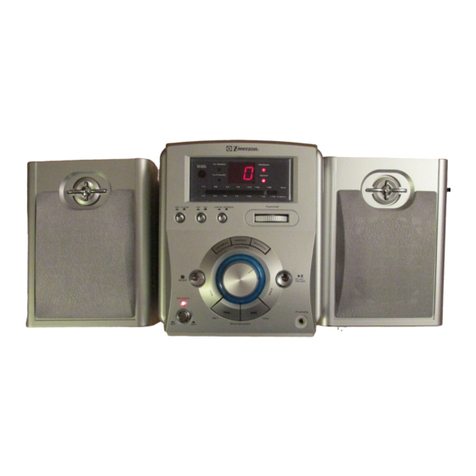
Emerson MS9600 User manual

OWNER'SMANUAL
MS9600
HOMEAUDIO SYSTEM
with6CD CHANGER
and DUALCASSETTE
Visitourweb siteatwww.emersonradio.com
MS9600_ib_0313.p65 25/3/2002, 15:2336

1
TOPREVENTFIREORSHOCKHAZARD,DO NOTUSETHISPLUG WITHAN
EXTENSION CORD,RECEPTACLE OROTHEROUTLET UNLESS THEBLADESCAN
BEFULLYINSERTEDTOPRESENTBLADEEXPOSURE.TOPREVENTFIREOR
SHOCKHAZARD,DO NOTEXPOSETHISAPPLIANCETORAINORMOISTURE.
IMPORTANTSAFETYINSTRUCTIONS
1.Readtheseinstructions.
2.Keeptheseinstructions.
3.Heedall warnings.
4.Followall instructions.
5.Donotusethisapparatusnearwater.
6.Cleanonlywithdrycloth.
7.Donotblockany ventilation openings.Install inaccordance withthemanufacturer’s
instructions.
8.Donotinstall nearany heatsourcessuchasradiators,heatregisters,stoves,orotherapparatus
(including amplifiers)thatproduce heat.
9.Donotdefeatthesafetypurposeofthepolarizedorgrounding-typeplug.Apolarizedplug has
twobladeswithonewiderthantheother.Agrounding typeplug hastwobladesand athird
grounding prong.Thewidebladeorthethirdprong areprovidedforyoursafety.If theprovided
plug doesnotfit intoyouroutlet,consult anelectricianforreplacementoftheobsoleteoutlet.
10.Protectthepowercordfrombeing walkedon orpinchedparticularlyatplugs,convenience
receptacles,and thepointwheretheyexit fromtheapparatus.
11.Onlyuseattachments/accessoriesspecifiedby themanufacturer.
12.Unplug thisapparatusduring lightning stormsorwhenunusedforlong periodsoftime.
13.Referall servicing toqualifiedservice personnel.Servicing isrequiredwhentheapparatushas
beendamagedinanyway,suchaspower-supplycordorplugisdamaged,liquidhasbeenspilled
orobjectshavefallenintotheapparatus,theapparatushasbeenexposedtorainormoisture,does
notoperatenormally,orhasbeendropped.
14.Thisappliance shall notbeexposedtodripping orsplashing waterand thatno object
filledwithliquidssuchasvasesshall beplacedon theapparatus.
!
WARNING
RISK OFELECTRICSHOCK
DONOTOPEN
The lightning flashwitharrow-
head symbol,withinan equi-
lateraltriangleisintented to
alertthe usertothe presence
ofuninsulated‘dangerousvoltage’
withinthe product’s enclosure
thatmaybe ofsufficient
magnitude toconstitutearisk
ofelectricshock topersons.
The exclamation pointwithin
an equilateraltriangleisin-
tended toalertthe userto
the presenceofimportant
operating and maintenance
(servicing)instructionsinthe
literatureaccompanying the
appliance.
CAUTION:TOREDUCETHE
RISK OFELECTRICSHOCK
DONOTREMOVE COVER
(ORBACK),NOUSER
SERVICEABLEPARTSINSIDE
REFERSERVICINGTO
QUALIFIEDSERVICE
PERSONNEL.
WARNING
MS9600_ib_0313.p65 25/3/2002, 15:221
2
Forfuturereference,recordthe serialnumberinthe spacebelow.
Model:MS9600
SerialNumber:
BEFOREWEBEGIN
Thankyou..................
forpurchasing thisEmerson product. The Emerson brand isyourassuranceof
quality,performanceand value.
Ourengineershaveincluded manyusefuland convenientfeaturesinthisproduct.
Pleasebe suretoread thisOwner'sManualcompletelytomakesureyou are
getting the maximumbenefitfromeachfeature.
Thisproductwasmanufacturedusingthehighestqualitycomponentsand standards
ofworkmanship.It wastested byEmerson inspectorsand found tobe inperfect
working orderbeforeitleft ourfactory.However,thereisalways the chancethat
someproblemmayoccurbecauseofrough handling during shipmenttothe retail
storeortothe finalconsumer.
If, afterreading thisManual,you experienceanyproblemswiththe operation of
thisproduct, pleaserefertothe instructionsforobtaining serviceatthe end ofthis
Manual.Emerson and Emerson retailersarecommitted toyoursatisfaction.Once
again,thanks forpurchasing thisEmerson audioproduct.
IMPORTANTNOTES
CLASS 1LASERPRODUCT
ThisproductcontainsalowpowerLaserDevice.
CAUTION
INVISIBLELASERRADIATION
WHENOPENAND INTERLOCKS
DEFEATED.
AVOIDEXPOSURETOBEAM
CLASS 1LASERPRODUCT
APPAREILÁLASERDECLASSE 1
PRODUCTOLASERDECLASE 1
MS9600_ib_0313.p65 25/3/2002, 15:222

3
FCC INFORMATION
Thisequipmenthasbeen tested and found tocomplywiththe limitsforaClass B
digitaldevice,pursuanttoPart15 ofthe FCC Rules.Theselimitsaredesigned to
provide reasonableprotection againstharmfulinterferenceinaresidential
installation.Thisequipmentgenerates,uses,andcanradiateradiofrequencyenergy
and,ifnotinstalledand usedinaccordancewiththeinstructions,maycauseharmful
interferencetoradiocommunications.However,thereisno guarantee that
interferencewill notoccurinaparticularinstallation.If thisequipmentdoescause
harmfulinterferencetoradioortelevision reception,whichcan be determined by
turning the equipmentoff and on,the userisencouraged totrytocorrectthe
interferencebyone ormoreofthe following measures:
•Reorientorrelocatethe receiving antenna.
•Increasethe separation between the equipmentand receiver.
•Connectthe equipmentintoan outleton acircuitdifferentfromthattowhich
the receiverisconnected.
•Consultthe dealeroran experienced radio/TVtechnician forhelp.
ThisdevicecomplieswithPart15 ofthe FCC Rules.Operation issubjecttothe
following twoconditions:
(1)Thisdevicemaynotcauseharmfulinterference,and
(2)Thisdevicemustacceptanyinterferencereceived,including interference
thatmaycauseundesired operation.
•Operatecontrolsand switchesas
described inthe manual.
•Beforeturning ‘On’the power,make
certainthatthe speakersareproperly
installed.
•Storeyourcassettetapesand CDs
inacoolarea toavoiddamage from
heat.
•When moving the set, be suretofirst
disconnectthe powercordand
removecordsconnected toother
equipment.
•Placesexposed todirectsunlightor
closetoheatradiating appliances
suchaselectricheaters,on top of
otherstereo equipmentthatradiates
too muchheat, placeslacking
ventilation ordustyareas,places
subjecttoconstantvibration and/or
humidormoistareas.
•Donotattempttoclean thisunitwith
chemicalsolventsasthismight
damage the finish.Useaclean dry
cloth.
Avoidinstalling theunitinlocationsdescribedbelow:
MS9600_ib_0313.p65 25/3/2002, 15:233

4
PREPARATIONFORUSE
UNPACKING
•Removethemainunitandthe speakersfromthe carton and removeallpacking
materialsfromthe components.
•Removeanydescriptivelabelsfromthe frontsofthe mainunitand speakers.
•Removeanysmallstripsoftapethatmayhavebeenusedtosecurethecassette
doorsorCD drawerintransit.
TRANSITSCREWREMOVAL–VERYIMPORTANT!!
Atransitscrewhasbeen installed tolock the CD changerinplaceand prevent
damage during transportation.The transitscrewmustbe removed beforeplugging
inoroperating yoursystem.
Turnthe mainunitaround sothatthe back cabinetisfacing you.You will see the
transitscrewatrightside ofthe transitscrewwarning label.
Useasmall coinoraflatblade screwdrivertocompletelyremovethe transitscrew
fromthe back cabinet. Turnthe screwcounter-clockwisetoloosen and remove.
Placethe screwinthe storage holeprovided sothatitisavailableforfutureuse.If
iteverbecomesnecessarytoreturnyourunitforservicethe transitscrewshould
be used tosecurethe CD changeragainbeforethe unitispacked forshipment.
Refertothe instructionsinthe WarrantyServicesection atthe end ofthismanual.
Note:
Failuretoremovethe transitscrewcouldresultindamage tothe CD changer
mechanism,and suchdamage isnotcovered byyourwarranty.
BEFORE TURNING POWER ON,
USE A COIN OR FLAT-BLADE
SCREW DRIVER TO REMOVE
THIS SCREW
IMPORTANT!
R
e
m
o
v
e
PLACE THE SCREW IN THIS
STORAGE HOLE FOR FUTURE USE.
MS9600_ib_0313.p65 25/3/2002, 15:234

5
PLACEMENT
•Placethe uniton astable,leveltable,shelforstand convenienttoan AC
outlet.
•The unitshouldnotbe exposed todirectsunlightorsourcesofexcess heat,
moisture,dust, vibration,orhumidity.
•The speakersmaybe positioned along side the mainunit, orseparated asfar
asthe cordswill allowformaximumstereo separation.You shouldmaintaina
gap ofatleastone inchbetween the mainunitand the speakerstopreventany
skipping ofthe CD playerwhen the unitoperated athigh volume.
SPEAKERCONNECTION
Connecteachspeakertothe corresponding speakerjack on the back panelofthe
mainunit. Makesurethatthe left speakerisconnected tothe left speakerjack and
the rightspeakertothe rightspeakerjack.
BEFORE TURNING POWER ON,
USE A COIN OR FLAT-BLADE
SCREW DRIVER TO REMOVE
THIS SCREW
IMPORTANT!
R
e
m
o
v
e
PLACE THE SCREW IN THIS
STORAGE HOLE FOR FUTURE USE.
MS9600_ib_0313.p65 25/3/2002, 15:235

6
AC Plug
AC Outlet
CONNECTINGTHEAC POWERCORD
IMPORTANT!!
BEFORECONNECTINGTHEAC POWERCORDMAKESURETHATYOUHAVE
REMOVEDTHECD TRANSITSCREWFROMTHEBACK PANELOFTHEMAIN
UNIT.REFERTOTHEINSTRUCTIONSONPAGE4.
Afterconnecting the speakersunwind the ACpowercordfullyand connectitto
anyconvenienthouseholdACoutlet. Thissystemisdesigned tooperateon 120V
60HzACpoweronly.Connecting thissystemtoanyotherpowersupplymaycause
damage tothe unitwhichisnotcovered byyourwarranty.
Thisunithasapolarized ACplug withone wide blade and one narrowblade.This
plug will onlyfitintoamatching polarized ACoutlet. Thisisasafetyfeatureto
reducethe possibilityofelectricshock.If thisplug will notfitinyourACoutlet, you
probablyhavean outdated non-polarized outlet. You shouldhaveyouroutdated
outletchanged byaqualified,licensed electrician.Donotfilethe wide blade on the
plug,orusean adaptertomakethe plug fitintoyouroutlet. Thisdefeatsthe safety
featureand couldexposeyou toelectricshock.
MS9600_ib_0313.p65 25/3/2002, 15:236

7
ANTENNA INFORMATION
FM
Thisunithasan externallead wireFMantenna permanentlyattached tothe back
ofthe maincabinet. Unwrap thisantenna wire,extend ittoitsfull length,and allow
ittohang downfromthe back ofthe set. Insomecasesyou mayhavetovarythe
direction ofthisantenna until you find the position thatprovidesthe bestreception,
and then useasmall pieceoftape tosecurethe antenna inthatposition.
AM
ThissystemhasabuiltinAMferritebarantenna.You mayhavetovarythe position
and direction ofthismainunituntil you find the position thatprovidesthe clearest
reception foreachofyourfavoriteAMstations.
FMWIREANTENNA
BEFORE TURNING POWER ON,
USE A COIN OR FLAT-BLADE
SCREW DRIVER TO REMOVE
THIS SCREW
IMPORTANT!
R
e
m
o
v
e
PLACE THE SCREW IN THIS
STORAGE HOLE FOR FUTURE USE.
MS9600_ib_0313.p65 25/3/2002, 15:237

8
LOCATIONOFCONTROLSAND INDICATORS
1.CDDIRECTACCESS Buttons.
2.Multifunction LCDDisplay.
3.STANDBY Indicator.
4.6CD ChangerTray.
5.POWER(On/Off)Button.
6.PROGRAM/CLOCKSETButton.
7.TUNER/BAND Button.
8.TAPE Button.
9.CD Button.
10.PHONES Jack.
11.DUBBINGButton.
(NORMAL/HIGHSPEED)
12.TIMERButton.
13.Deck ACassetteDoor.
14.Deck AControlKeys.
(RECORD-PLAY-REWIND-F.FWD
-STOP/EJECT-PAUSE)
15.Deck BCassetteDoor.
16.Deck BControlKeys.
(PLAY-REWIND-F.FWD
-STOP/EJECT-PAUSE)
17.DISCSCANButton.
18.CD ReverseSKIP/SEARCH
Button.
19.CD ForwardSKIP/SEARCH
Button.
20.CDSTOPButton.
21.CD PLAY/PAUSE Button.
22. INTRO/STEREOMODEButton.
23.EQ(Equalizer) Button.
24.VOLUME(UP/DN)Buttons.
25.BBS Button.
26.OPEN/CLOSE (FRONT)Button.
27.OPEN/CLOSE (REAR)Button.
28.REMOTESENSOR.
29.RANDOM/PRESETDN Button.
30.REPEAT/PRESETUPButton.
FRONTPANEL
17
18
19
20
21
22
23
24
25
26
27
28
29
30
16
15
14
13
12
11
9
10
8
7
6
5
4
3
2
1
MS9600_ib_0313.p65 25/3/2002, 15:238

9
30.FMWireANTENNA.
31.BEATCUTSwitch.
32.CDTransitScrewStorage Hole.
33.CD TransitScrew.
34.SpeakerJacks.
35.ACPowerCord.
BACK PANEL
31
34
35
32
33
BEFORE TURNING POWER ON,
USE A COIN OR FLAT-BLADE
SCREW DRIVER TO REMOVE
THIS SCREW
IMPORTANT!
R
e
m
o
v
e
PLACE THE SCREW IN THIS
STORAGE HOLE FOR FUTURE USE.
30
MS9600_ib_0313.p65 25/3/2002, 15:239

10
MULTIFUNCTIONLEDDISPLAY
Disc location indicators
IndicatesDisc 1isatback halfoftray.
IndicatesDisc 1isatfronthalfoftray.
IndicatesDisc 1isinplayposition.
IndicatesDisc 1isplaying.
MS9600_ib_0313.p65 25/3/2002, 15:2310

11
REMOTECONTROL
2
3
1
4
5
6
7
8
9
10
11
12
14
13
16
15
18
17
19
20
21
22
23
24
25
26
27
28
1.CD Button.
2.TUNERButton.
3.OPEN/CLOSE REARButton.
4.Disc 2Button.
5.Disc 1Button.
6.Disc 6Button.
7.DISCSCANButton.
8.CDSTOPButton.
9.PROG(Program)Button.
10.ST.MODE/INTROButton.
11.REPEAT/PRESETUPButton.
12.RANDOM/PRESETDN Button.
13.TIMERButton.
14.EQButton.
15.TAPE Button.
16.POWEROn/Off Button.
17.OPEN/CLOSE FRONTButton.
18.Disc 3Button.
19.Disc 4Button.
20.Disc 5Button.
21.TUNING–/SKIPReverseButton.
22.TUNING+/SKIPForwardButton.
23.CD PLAY Button.
24.CD PAUSE Button.
25.VOLUMEUP/DN Buttons.
26.MUTEButton.
27.BBS Button.
28.SLEEP Button.
MS9600_ib_0313.p65 25/3/2002, 15:2311

12
BATTERYINSTALLATION
Insert2‘AAA’sizealkaline batteries,notincluded,intothe batterycompartment
ofthe remotehandset, observing the batterypolarityand replacethe cover.
BATTERYREPLACEMENT
Whenthebatteriesbecometooweak,theoperatingdistanceoftheremotehandset
isgreatlyreduced and you will need toreplacethe batteries.
NOTES:
•Tomaintainthe accuracy and long lifeofthe transmitter,do notpress twoor
morebuttonssimultaneously.
•If the remotecontrolisnottobe used foralong time,removethe batteriesto
preventpossibledamage through leaking batteries.
•Donotmixdifferenttypesofbatteries,oroldbatterieswithnewones.
USINGTHEREMOTECONTROLLERCORRECTLY
•Pointthe remotehandsetatthe RemoteSensoron the frontpanel.
•The functionsofthe buttonson the remotehandsetarethe sameasthe
corresponding controlson the mainunit.
•When thereisastrong ambientlightsource,the performanceofthe infrared
RemoteSensormaybe degraded,causing unreliableoperation.
•The maximumeffectivedistanceforremotecontroloperation isabout16 feet
(Approx.5m)
MS9600_ib_0313.p65 25/3/2002, 15:2312

13
OPERATINGINSTRUCTIONS
SOUND CONTROLS
VOLUME
Press the VOLUMEUPorDN(Down)buttonson the frontpanel,oron the remote
controltoincreaseordecreasethe volumelevel.Thevolumelevelindicatorappears
inthe displaywhilethevolumeisbeing adjusted.Therangeisfrom“00”(minimum)
to“63”(maximum).The systemmemoryremembersthe volumelevelwhen the
powerisshutoff and automaticallyreturnstothe samelevelwhen the poweris
switched on again.
EQUALIZER
The electronicequalizerallowsyou toadjustthe tone settingsforthe mostpopular
typesofmusicsuchasPOP,ROCK,JAZZ,orCLASSIC.Oryou mayshutthe
equalizeroff and listen toyourmusicwiththe tone controlsintheir“flat”settings
(0db bass and 0db treble).
Press the EQbutton on the frontpaneloron the remotecontrolrepeatedlyto
selectthe desired EQsetting.The EQbutton on the frontpanellightswhen the EQ
is‘On’and the desired setting appearsinthe display.If the EQbutton isnotlighted
and no indicatorappearsinthe displaythe equalizerisinthe “flat”(Off)setting.
The systemmemoryremembersthe EQsetting when the powerisshut‘Off’and
automaticallyreturnstothe samesetting when the powerisswitched ‘On’again.
BASS BOOST
Press the BBS (Bass Boost)button on the frontpaneloron the remotecontrolto
enhancethe bass response.The BBS button on the frontpanellightswhen Bass
Boostis‘On’and the “BBS”indicatorappearsinthe display.
UseBass Boostwhen you arelistening atlowvolumelevelswherethe bass tends
todisappear.If you arelistening tomusicwithheavy bass athigh volumewiththe
EQsetto“ROCK”and the BBS ‘On’,you mayexperiencesomedistortion.If this
occurs,switchthe Bass Boost‘Off’,switchthe EQ‘off’,orreducethe volumelevel.
MS9600_ib_0313.p65 25/3/2002, 15:2313

14
The systemmemoryremembersthe Bass Boostsetting when the powerisshut
‘Off’and automaticallyreturnstothe samesetting when the powerisswitched ‘On’
again.
SETTINGTHECLOCK
Notes:
A.The timeappearson the displaywhen the systemisinthe Off/Standbymode
orthe TAPE function isselected.
B.The timecan be setusing the buttonson the frontpaneloron the remote
control.
1)Press the TAPE function button toselectthe Tape function.The displaylights
and the timeappears.
2)PressandholdthePROGRAM(CLOCKSET)buttonformorethan onesecond.
The Hourdigitsbegintoflash.
3)Press the SKIP/SEARCH /buttonstoadjustthe hour.Makesurethe
hourissetcorrectlyforAMorPM,and then press the PROGRAM(CLOCK
SET)button again.The Minutedigitsbegintoflash.
4)Press the SKIP/SEARCH /buttonstoadjustthe minutesand then
press the PROGRAM(CLOCKSET)button oncemoretoenterthe setting
and startthe clock.
Note:If you do notadjustthe timewithin20 secondsafterpressing the PROGRAM
(CLOCKSET)button the displaystopsflashing and the timecannotbe
adjusted.If thisoccursrepeatthe clock setting procedurestarting with
Step 2above.
MS9600_ib_0313.p65 25/3/2002, 15:2314

15
LISTENINGTOTHERADIO
1.)Press the TUNER/BAND button toturnthe system‘On’and selectthe Tuner
function.The displaylightsand aradiofrequencyappears.Press the TUNER/
BAND againbutton toswitchbetween AMand FMbandsifnecessary.
2.)Press the SKIP/SEARCH (TUNING+/–)buttonstotune tothe desired station
asfollows:
•AutoTuning
Depress and holdthe /buttonsuntil the displaybeginstomoveandnd
then releasethe buttons.The tunerwill searchforwardorbackwarduntil it
findsthe firststrong station and then stop.Repeatthisprocess until the tuner
stopson the desired frequency.
•ManualTuning
Repeatedlypress the /buttonstomovethe displayup ordownuntil you
reachthe desired frequency.Usemanualtuning toselectstationswithweaker
signalsthatarenotstrong enough tostop the autotuning.
3.)Adjustthe VOLUME,EQ,and BBS controlsasdesired.
4.)When you arefinished listening press the POWERbutton toshutthe system
‘Off’.The displaygoes‘Off‘and the STANDBY indicatorcomes‘On’.
Notes:
A.If youtune toan FMstation thatisbroadcastinginstereo,the STEREOindicator
will appearinthe display.
B.If the reception ofan FMStereo station isnoisy orweakpress the INTRO/
STEREOMODEbutton toselectthe Mono FMmode.The STEREOindicator
disappearsand reception becomesMono.Thiswill normallyprovide some
improvementinthe reception ofweakordistantstationsbutthe sound will no
longerbe instereo.
C.The systemmemoryautomaticallyremembersthe lastAMand FMstations
whichwereselected beforethe powerwasswitched ‘Off’and returnstothe
samestationswhen the powerisswitched ‘On’again.
MS9600_ib_0313.p65 25/3/2002, 15:2315

16
STORINGSTATIONSINTHETUNERMEMORY
The tunerinthissystemhasa40 station memory.You can storeup to20 AMand
20 FMstationsinmemoryforeasy recall atanytime.
1.)Press the TUNER/BANDbutton toturnthe system‘On’toTunerfunction,and
press againtoselectthe desired band ifnecessary.
2.)Tune tothe firststation you wishtostore
inmemory.
Example:FM98.7MHz
3.)Press the PROGRAM(CLOCKSET)
button.
The displaywill show“CH 01”and the
channelindicator(CH)will be flashing.
4.)Press the PROGRAM(CLOCKSET)
button again.Radiostation FM98.7will
be entered intomemory“01”and the
channeldisplaywill advanceto“CH 02”.
5.)Tune tothe nextstation you wishtostore.When the desired frequencyappears
inthe displaypress the PROGRAM(CLOCKSET)button tostoreitinmemory.
The channeldisplayadvancestothe nextchannel.
6.)RepeatStep 5until you haveentered up to20 stationson the firstband and
then press the TUNERbutton tochange bandsand enterup to20 stationson
the remaining band ifdesired.
7.)Afterall desired stationshavebeen stored inthe tunermemorypress the
STOPbutton toexitthe memorystorage mode.
STEREO
TUNER
FM
MHz
STEREO
TUNER
FM
MHz
CH
STEREO
TUNER
FM
MHz
CH
MS9600_ib_0313.p65 25/3/2002, 15:2316

17
RECALLINGSTATIONSINTHEMEMORY
Turnthe systemon and selectthe desired band,the press the PRESETUP
(REPEAT)orPRESETDN(RANDOM)buttonstoselectthe desired memory(CH)
number.
CHANGINGMEMORIZEDSTATIONS
Press PROGRAM(CLOCKSET)button toenterthe memorymode.Tune tothe
newstation you wishtomemorize,press PRESETUPorDNtoselectthe memory
(CH)numberyou wishtochange,and press PROGRAM(CLOCKSET)button
again.The newstation ismemorized and the previousstation isdeleted fromthe
memory.
PLAYINGCOMPACTDISCS
Thissystemfeaturesaunique “doubledecker”CDchangerthatholds3CDsinthe
uppertrayand 3CDsinthe lowertray.When 6CDsareloaded inthe changeryou
can enjoyover6hoursofuninterrupted music(depending on the lengthofthe
individualdiscs).
UNDERSTANDINGTHECD DISPLAY
Inaddition tothe normaltrack numberand elapsed timeinformation the CDdisplay
inthissystemincludesiconswhichshowyou the position ofeachdisc on the
platteratanygiven time,and whichofthe 6discs isinthe playing position.
Refertothe following illustration.
CD
TRACK
DISCSLOCATEDATFRONTHALFOFDRAWER.
DISCSLOCATED
ATBACKHALF
OFDRAWER.
FLASHINGNUMBER
INDICATES DISC1
INTHEPLAY
POSITION.
MS9600_ib_0313.p65 25/3/2002, 15:2317

18
Thisdiagramshowsthatthereare6CDsinthe changer.The halfcirclesabovethe
disc numbersindicatethatDiscs 1,2,and 6areatthe back halfofthe drawer.The
halfcirclesbelowthe disc numbersindicatethatDiscs 3,4,and 5areatthe front
halfofthe drawer.The flashing number1indicatesthatDisc 1isinthe playposition.
The displayalsoindicatesthatDisc 1has22 tracks and atotalplaying timeof
61 minutesand 14 seconds.If the PLAY button ispressed inthisillustration the
number1will stop flashing and the halfcircleabovethe numberwill begintoflash
indicating thatDisc 1isplaying.Refertothe following illustration:
Aseachdisc plays and the drawerrotatesthe disc location iconswill showwhich
discs areatthe back ofthe drawerand whichdiscs areatthe frontofthe drawer.
NORMALPLAYBACK
1.)Press the CDfunction button toturnthe power‘On’and selectthe CDfunction.
2.)Press the lowerhalf‘FRONT’ofthe OPEN/CLOSE button on the frontpanel,
orthe FRONTopen button on the remotecontrol,toopen the CD drawer
immediately.Asthe draweropensthe frontedge ofthe drawerdropsdown
slightlytoalloweasieraccess tothe lowertray.See following illustration.
CD
TRACK
LOWERTRAY LOWERTRAY
UPPERTRAY
MS9600_ib_0313.p65 25/3/2002, 15:2318

19
3.) Place 1, 2, or 3 CDs in the 3 pockets on the front of the tray.
IMPORTANT: Make sure that the discs are properly positioned in the center
ofeach pocket.If thediscs arenot centeredproperly theymay notbe recognized
by the player, or they could jam in the mechanism.
Disc pockets 1, 3, and 5 are in the upper tray. Disc pockets 2, 4, and 6 are in
the lower tray. The pockets in the lower tray are partially covered by the pockets
in the upper tray. To load CDs in the lower tray pick up the disc with your index
finger in the center and your thumb on the outer edge, as shown in the following
illustrations, and slide the disc into the desired pocket on the lower tray.Again,
make sure that the disc is properly centered in the pocket, otherwise it may
not be recognized by the player.
4.)Press the lowerhalf‘FRONT’ofthe OPEN/CLOSE button on the frontpanel,
orthe FRONTopen button on the remotecontrol,toclosethe CD drawer.
Afterthe drawerclosesthe traywill rotatesothatthe 3frontpocketswill move
tothe rear.The playerwill begintosearchforadisc.It will read the firstdisc
thatitfindsand the displaywill showthe totaltracks and playing timeofthat
disc.Also,the numberofthe disc inthe playposition will be flashing.
5.)If you wishtobeginplayback immediatelypress the PLAY/PAUSE button
on the frontpanelorthe PLAY button the remotecontrol.If you wishtoloadd
additionaldiscs press the lowerhalf‘FRONT’ofthe OPEN/CLOSE button on
the frontpanel,orthe FRONTopen button on the remotecontrol,toopen the
CD draweragain.The drawerwill open withthe 3remaining emptypockets
facing you.
Place1,2,or3additionaldiscs inthe emptypockets.
LOWERTRAY
UPPERTRAY
UPPERTRAY
MS9600_ib_0313.p65 25/3/2002, 15:2319
Table of contents
Other Emerson Stereo System manuals

Emerson
Emerson MS7609 User manual

Emerson
Emerson MS3105 User manual

Emerson
Emerson MS7616R User manual

Emerson
Emerson MS9933TT User manual

Emerson
Emerson Research iE600 User manual

Emerson
Emerson RS1008 User manual

Emerson
Emerson MS9904TTC User manual

Emerson
Emerson NR303TTC User manual

Emerson
Emerson MS9700 User manual

Emerson
Emerson ES830 User manual

Emerson
Emerson MS3103 User manual

Emerson
Emerson CKD9906 User manual

Emerson
Emerson ES58 User manual

Emerson
Emerson PD6511 User manual

Emerson
Emerson NR305TT User manual

Emerson
Emerson ES28 User manual

Emerson
Emerson MS9923TT User manual

Emerson
Emerson MS3111M User manual

Emerson
Emerson SpongeBob SquarePants SB230 User manual

Emerson
Emerson ES50 User manual