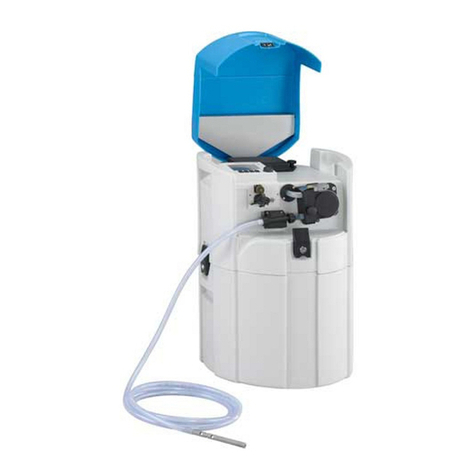
Endress+Hauser Liquiport 2010 CSP44 User manual

BA470C/07/EN/06.10
71118810
Valid as of:
Software version 01.01.00
Operating Instructions
Liquiport 2010 CSP44
Automatic sampler for liquid media
Maintenance & diagnostics

About this manual
This manual describes all the tasks you must perform for maintenance, diagnostics and
troubleshooting.
A description of the following is provided here:
• "Diagnostics" menu
– Diagnostics list
– Logbooks
– System information
– State of Outputs
– Systemtest/Reset
– Sensor change
– Manual hold
– Term information
– Simulation
– Sensor information
• Cleaning and maintenance
• Troubleshooting
• Accessories and spare parts
This manual does not include the following:
• Setup/General settings
--> Operating Instructions BA465C "Commissioning"
• Display/Operation
--> Operating Instructions BA465C "Commissioning"
• Inputs
--> Operating Instructions BA464C "Operation&settings"
•Outputs
--> Operating Instructions BA464C "Operation&settings"
• Sampling programs
--> Operating Instructions BA464C "Operation&settings"
• Additional functions
--> Operating Instructions BA464C "Operation&settings"
• Data management
--> Operating Instructions BA464C "Operation&settings"
• Calibration
--> Operating Instructions BA467C "Calibration"
• Expert
--> Internal Service Manual

Endress+Hauser
Liquiport 2010 CSP44
Table of contents
1 Maintenance. . . . . . . . . . . . . . . 4
1.1 Recommended maintenance . . . . . . . . . . . 4
1.2 Replacing the pump tube . . . . . . . . . . . . . . 5
1.3 Cleaning . . . . . . . . . . . . . . . . . . . . . . . . . . 6
1.4 Calibration . . . . . . . . . . . . . . . . . . . . . . . . . 9
1.5 Replacing the batteries . . . . . . . . . . . . . . . 10
2 Diagnostics menu . . . . . . . . . . 11
2.1 Diagnostics list . . . . . . . . . . . . . . . . . . . . . 11
2.2 Logbooks . . . . . . . . . . . . . . . . . . . . . . . . . 11
2.3 System information . . . . . . . . . . . . . . . . . 14
2.4 Status of inputs/outputs . . . . . . . . . . . . . . 15
2.5 Systemtest/Reset . . . . . . . . . . . . . . . . . . . 15
2.6 Sensor change (for version with sensors with
the Memosens protocol) . . . . . . . . . . . . . . 17
2.7 Manual hold (for version with sensors with the
Memosens protocol) . . . . . . . . . . . . . . . . . 17
2.8 Term information . . . . . . . . . . . . . . . . . . . 17
2.9 Simulation . . . . . . . . . . . . . . . . . . . . . . . . 18
2.10 Sensor information (for version with sensors
with the Memosens protocol) . . . . . . . . . . 18
3 Troubleshooting . . . . . . . . . . . 19
3.1 Troubleshooting . . . . . . . . . . . . . . . . . . . . 19
3.2 System error messages . . . . . . . . . . . . . . . 19
3.3 Device-specific errors . . . . . . . . . . . . . . . . 37
3.4 Process errors without messages . . . . . . . . 39
3.5 Return . . . . . . . . . . . . . . . . . . . . . . . . . . . 44
3.6 Disposal . . . . . . . . . . . . . . . . . . . . . . . . . . 44
3.7 Software history . . . . . . . . . . . . . . . . . . . . 44
4 Accessories. . . . . . . . . . . . . . . 45
4.1 Accessories for Liquiport 2010 CSP44 . . . 45
4.2 Measuring cable . . . . . . . . . . . . . . . . . . . . 45
4.3 Sensors . . . . . . . . . . . . . . . . . . . . . . . . . . 46
5 Spare parts . . . . . . . . . . . . . . . 48
Index . . . . . . . . . . . . . . . . . . . 50

Maintenance Liquiport 2010 CSP44
4Endress+Hauser
1 Maintenance
#Warning!
Process pressure and temperature, contamination, electrical voltage
Danger! Risk of serious or fatal injury!
• De-energize the device and disconnect the battery.
• If a sensor has to be removed during maintenance work, avoid hazards posed by pressure,
temperature and contamination.
"Caution!
Electrostatic discharge (ESD)
Risk of damaging the electronic components!
• For your own safety, only use genuine spare parts. With genuine parts, the function, accuracy
and reliability are also ensured after maintenance work.
• Take personal protective measures to avoid ESD.
1.1 Recommended maintenance
Maintenance work has to be carried out at regular intervals to ensure the efficient operation of
the sampler.
The maintenance work comprises:
• Replacing the wear parts
• Cleaning the device
The cleaning intervals depend heavily on:
• The medium
• The ambient conditions of the sampler (dust etc.)
• The programming intervals
For this reason, adapt the cleaning intervals to your specific requirements but always ensure that
these cleaning tasks are performed regularly.
Replacing wear parts
Wear parts are replaced by Endress+Hauser Service at one- and two-year intervals. Please
contact your local sales center in this regard.
Endress+Hauser offers its customers a maintenance contract. With a maintenance contract,
you can increase your level of operational safety and relieve your operating staff of some of
their workload. Ask your Endress+Hauser Service Organization for detailed information on
maintenance contracts.

Liquiport 2010 CSP44 Maintenance
Endress+Hauser 5
1.2 Replacing the pump tube
#Warning!
Danger! Rotating parts!
• Take the sampler out of service before opening the peristaltic pump.
• Safeguard the sampler against accidental operation while working on the open peristaltic
pump.
Open the peristaltic pump as follows:
1. Take the sampler out of service by pausing a program that is currently running.
2. Open the fastening clip (item 3) and push the pump bracket (item 4) upwards.
3. Remove the knurled head screw (item 7) and open the pump head cover (item 5)
downwards.
a0014202
Fig. 1: Opening the peristaltic pump
2
3
4
5
6
7
Pump tube
Fastening clip
Pump bracket
Pump head cover
Positioning pin
Knurled head screw
a0014203
Fig. 2: Replacing the pump tube
2
8
9
10
Pump tube
Clamp
Marking ring
Roller
23
4
5
6
7
2910
8

Maintenance Liquiport 2010 CSP44
6Endress+Hauser
1. Remove the clamp (item 8) and remove the pump tube (item 2) from the pump.
2. Remove any silicone deposits on the roller (item 10) and the flexible pump bracket.
3. Make sure the roller turns smoothly and evenly.
4. Apply some lubricant to the roller.
5. Secure the new pump tube to the pressure sensor with the clamp (item 8).
6. Guide the pump tube around the roller and insert the marking ring into the groove
(item 9), →å2.
7. Close the pump head cover and screw it tight. Close the pump bracket.
8. Under Menu/Diagnostics/Term information/Pump tube life reset the tube life to zero by
selecting "Reset".
Calibrate the sample volume each time you replace a pump tube. --> See Operating
Instructions BA467C "Calibration".
"Caution!
Incorrect sample volume
Only reset the tube life counter to zero once you have successfully replaced the pump tube in
order to avoid incorrect dosing of the medium.
1.3 Cleaning
1.3.1 Housing
Clean the housing with commercially available cleaning agents.
"Caution!
Danger of damaging the housing surface or housing seal!
Never use any of the following to clean the device:
• Concentrated mineral acids or bases
• Benzyl alcohol
• Methylene chloride
• Methanol
• Xylene
• Concentrated glycerol cleaner
• High-pressure steam

Liquiport 2010 CSP44 Maintenance
Endress+Hauser 7
1.3.2 Wetted parts
After cleaning, rinse all wetted parts thoroughly with clear water to ensure that all cleaning
agent residue has been removed so it cannot affect subsequent medium samples.
Peristaltic pump
a0014215
Fig. 3: Peristaltic pump
1 Suction line
2 Pressure sensor
Clean the wetted parts as follows:
1. Connect a container containing clear water to the suction line (item 1).
2. Remove the bottles from the sample compartment.
3. Rinse the wetted parts with clear water by taking a manual sample or by performing a
pump test (under Menu/Diagnostics/Systemtest/Reset/Peristaltic pump -> Pump
forward/Pump reverse).
4. Release the couplings to the left and right of the pressure sensor (item 2). Clean the tube
piece carefully with a bottle brush.
5. Reconnect the sample supply to the tube connection and put the bottles back in the sample
compartment.
2
1

Maintenance Liquiport 2010 CSP44
8Endress+Hauser
Interior of peristaltic pump
#Warning!
Danger! Rotating parts!
• Take the sampler out of service before opening the peristaltic pump.
• Safeguard the sampler against accidental operation while working on the open peristaltic
pump.
1. Take the sampler out of service by pausing a program that is currently running.
2. Open the peristaltic pump as described in the "Replacing the pump tube" section.
3. Remove the pump tube.
4. Remove any silicone deposits on the roller and the flexible pump bracket.
5. Make sure the roller turns smoothly and evenly.
Cleaning the distribution arm
Clean the distribution arm as follows:
1. Screw off the distribution arm.
2. Clean these parts with water or soapsuds. Use a bottle brush if necessary.
3. Reinstall the cleaned distribution arm.
1.3.3 Sample compartment
The sample compartment has a fully integrated plastic inner lining.
Clean the sample compartment as follows:
1. Remove the bottles.
2. Spray-clean the sample compartment with a water hose.
You can wash the PE and glass bottles in a dishwasher at 60 ˚C.
a0014029
Fig. 4: Interior view of the peristaltic pump
1
2
3
Pump rotor
Roller
Pump tube
1
2
3

Liquiport 2010 CSP44 Maintenance
Endress+Hauser 9
1.3.4 Digital sensors (for version with sensors with the Memosens protocol)
1. If an error occurs or the maintenance schedule stipulates that the sensor has to be replaced,
use a new sensor, or a sensor that has been precalibrated in the laboratory.
A sensor is calibrated in the laboratory under optimum external conditions, thereby
ensuring better quality of measurement.
2. Remove the sensor to be serviced and install the new sensor.
3. You must perform calibration if you use a sensor that is not precalibrated.
4. The sensor data are automatically accepted by the transmitter. A release code is not
required.
5. Measurement is resumed.
6. Take the used sensor back to the laboratory. In the laboratory you can get the sensor ready
for reuse while ensuring the availability of the measuring point.
– Clean the sensor. For this purpose, use the cleaning agent specified in the sensor
manual.
– Inspect the sensor for cracks or other damage.
– If no damage is found, regenerate the sensor. Where necessary, store the sensor in a
regeneration solution (--> sensor manual).
– Recalibrate the sensor for reuse.
1.3.5 Assemblies (for version with sensors with the Memosens protocol)
Refer to the assembly operating manual for information on servicing and troubleshooting the
assembly. The assembly operating manual describes the procedure for mounting and
disassembling the assembly, replacing the sensors and seals, and contains information on the
material resistance properties, as well as on spare parts and accessories.
1.4 Calibration
All information on calibration is provided in BA467C "Calibration".
The position of the distribution arm is set at the factory.
The sample volume of the peristaltic pump is also calibrated at the factory.
For version with sensors with the Memosens protocol:
Users must decide whether the process conditions present require calibration during initial
commissioning.
Additional calibration is not required in many standard applications.
Sensors with Memosens protocol are calibrated at the factory.
Calibrate the sensors at sensible intervals depending on the process.
Maintenance Liquiport 2010 CSP44
10 Endress+Hauser
1.5 Replacing the batteries
First remove the cover of the battery compartment to replace the batteries.
#Warning!
If a power supply unit or a charger is connected, disconnect it from the mains.
a0014207
Fig. 5: Cover of battery compartment
1Screws
2 Cover of battery compartment
1. Release the screws (item 1).
2. Remove the cover of the battery compartment (item 2).
3. Remove the old batteries and disconnect them.
4. Connect the new batteries. Make sure the polarity is correct.
5. Place the new batteries into the battery compartment and replace the battery compartment
cover.
Batteries must be replaced every 3 years by the following type of battery:
Panasonic LC-R127R2PG1.
121

Liquiport 2010 CSP44 Diagnostics menu
Endress+Hauser 11
2 Diagnostics menu
The Diagnostics menu contains all the information on the device status.
Furthermore, various service functions are available.
The following messages are directly displayed every time you enter the menu:
• "Most important message"
Diagnostics message recorded with the highest criticality level
• "Last message"
Last diagnostics message recorded
All the other functions in the Diagnostics menu are described in the following chapters.
Diagnostics messages associated with sampling are deleted under the following conditions:
• Diagnostics messages caused by sampling are deleted automatically with the next successful
sampling.
• Diagnostics messages caused by the level of medium in the bottle are deleted the next time
the program is started.
2.1 Diagnostics list
All the current diagnostics messages are listed here.
A time stamp is available for each message. Furthermore, the system also displays the
configuration and description of the message as saved in "Menu/Setup/General
settings/Diagnostics/Device behavior".
For this purpose, select the appropriate message and press the navigator.
2.2 Logbooks
Types of logbooks
• Logbooks physically available (all apart from the overall logbook)
• Database view of all logbooks (=overall logbook)
Logbook Visible in Max.
entries
Can be
disabled1)
Logbook
can be
deleted
Entries
can be
deleted
Can be
exported
Program logbook Program logbook 5000 Yes No Yes Yes
Overall logbook All events 1000 Yes No Yes No
Diagnostics logbook Diagnostic events 250 (Yes) No Yes Yes
Calibration logbook Calibration events 75 (Yes) No Yes Yes
Operation logbook Configuration events 250 (Yes) No Yes Yes
Version logbook All events 50 No No No Yes
Hardware version logbook All events 125 No No No Yes
Data logbook Data logbooks 150,000 Yes Yes Yes Yes

Diagnostics menu Liquiport 2010 CSP44
12 Endress+Hauser
Debugging logbook Only accessible with
the special activation
code (Service)
1000 Yes No Yes Yes
1) Data in brackets means this depends on the overall logbook
Diagnostics/Logbooks
Function Options Info
Program logbook Chronological list of the programming events.
Show Events are displayed Select a particular event to display more detailed
information.
Go to date User input
•Gotodate
•Time
Use this function to go directly to a specific time in
the list. In this way, you avoid having to scroll
through all the information. The complete list is
always visible, however.
Delete all entries Action You can delete all the program logbook entries
here.
All events Chronological list of all the logbook entries, with
information on the type of event.
Show Events are displayed Select a particular event to display more detailed
information.
Go to date User input
•Gotodate
•Time
Use this function to go directly to a specific time in
the list. In this way, you avoid having to scroll
through all the information. The complete list is
always visible, however.
Calibration events Chronological list of the calibration events.
Show Events are displayed Select a particular event to display more detailed
information.
Go to date User input
•Gotodate
•Time
Use this function to go directly to a specific time in
the list. In this way, you avoid having to scroll
through all the information. The complete list is
always visible, however.
Delete all entries Action You can delete all the calibration logbook entries
here.
Configuration events Chronological list of the configuration events.
Show Events are displayed Select a particular event to display more detailed
information.
Logbook Visible in Max.
entries
Can be
disabled1)
Logbook
can be
deleted
Entries
can be
deleted
Can be
exported

Liquiport 2010 CSP44 Diagnostics menu
Endress+Hauser 13
Go to date User input
• Go to date
•Time
Use this function to go directly to a specific time in
the list. In this way, you avoid having to scroll
through all the information. The complete list is
always visible, however.
Delete all entries Action You can delete all the calibration logbook entries
here.
Diagnostic events Chronological list of the diagnostics events.
Show Events are displayed Select a particular event to display more detailed
information.
Go to date User input
• Go to date
•Time
Use this function to go directly to a specific time in
the list. In this way, you avoid having to scroll
through all the information. The complete list is
always visible, however.
Delete all entries Action You can delete all the calibration logbook entries
here.
Data logbooks Chronological list of the data logbook entries.
Show Events are displayed Select a particular event to display more detailed
information.
Go to date User input
• Go to date
•Time
Use this function to go directly to a specific time in
the list. In this way, you avoid having to scroll
through all the information. The complete list is
always visible, however.
Delete all entries Action You can delete all the calibration logbook entries
here.
Save logbooks
File format Options
•CSV
•FDM
Save the logbook in the preferred file format.
The FDM format allows you to transmit
data to the PC in such a way that they
cannot be tampered with.
Options
• Program logbook
• All event logbooks
• Calibration logbook
• Diagnostic logbook
• Configuration logbook
• HW version logbook
• Version logbook
Use this function to save the logbook to an SD card.
You can then open the file you saved (.csv/.fdm) on
the PC and process it in MS-Excel for example.
Insert the SD card into the controller card reader
and select the logbook to be saved.
The file name is made up of the "Logbook ident" (Menu/Setup/General settings/Logbooks), an abbreviation for
the particular logbook and a time stamp.
Diagnostics/Logbooks
Function Options Info

Diagnostics menu Liquiport 2010 CSP44
14 Endress+Hauser
2.3 System information
Diagnostics/System information
Function Options Info
Device tag Read only Individual device tag, --> "General settings"
Order code Read only You can order identical hardware with this code.
This code changes on account of changes to the
hardware and you can enter the new code you
received from the manufacturer here1).
1) Provided you give the manufacturer all the information about changes to the hardware.
To find out what device version you have, enter the order code in the search screen at the following address:
www.products.endress.com/order-ident
Order code extended Read only Complete order code resulting from the product
structure.
This code changes on account of changes to the
hardware and you can enter the new code here.
Serial number Read only The serial number allows you to access device data
and documentation on the Internet:
www.products.endress.com/device-viewer
Software version Read only Current version
Sw version FMSY1 Read only Current version
FMSY1-proj. version Read only Current version
ENP version Read only Version of the electronic nameplate
System modules
Depends on the electronics
module available, e.g.:
Base
Read only
•Description
• Serial number
•Ordercode
• Hardware version
•Softwareversion
This information is provided for every electronics
module available. Specify the serial numbers and
order codes when servicing, for example.
Sensors
Depends on the sensors
connected
Read only
•Description
• Serial number
•Ordercode
• Hardware version
•Softwareversion
This information is provided for every sensor
available. Specify the serial numbers and order
codes when servicing, for example.

Liquiport 2010 CSP44 Diagnostics menu
Endress+Hauser 15
2.4 Status of inputs/outputs
The following measured values are listed (read only):
• Binary inputs
Current function state: on or off
• Current inputs
Actual current values of all the current inputs available
• Binary outputs
Current function state: on or off
• Temperature sensors
Current value is displayed:
• Current outputs (for version with sensors with the Memosens protocol)
Actual current values of the current outputs
2.5 Systemtest/Reset
Diagnostics/Systemtest/Reset
Function Options Info
Power supply Read only The current supply voltage is displayed.
Manual sampling
Bottle configuration Read only
Bottle volume Read only
Distributor position Options
•Bottle1
...
Select which bottle should be filled with the
sample.
Sample volume 10 to 10000 ml
Factory setting
100 ml
You can change the sample volume.
Start sampling Action
Peristaltic pump
Pump forward Action
Pump function forward, to
stop press ESC
Read only
Current pump run time Read only
Power supply Read only The current supply voltage is displayed.
With AC power supply: 24 V ±0.5 V
With DC power supply: 22 to 28 V
Current Read only The current consumption of the pump is displayed.
Vacuum Read only The vacuum is an indicator of the suction height.
-> 100 mbar is equivalent to a suction height of
approx. 1 m.

Diagnostics menu Liquiport 2010 CSP44
16 Endress+Hauser
Probe detected Read only Yes: the medium was detected
No: no medium was detected
Pump reverse Action
Pump function reverse, to
stop press ESC
Read only
Current pump run time Read only
Power supply Read only The current supply voltage is displayed.
With AC power supply: 24 V ±0.5 V
With DC power supply: 22 to 28 V
Current Read only The current consumption of the pump is displayed.
Vacuum Read only The vacuum is an indicator of the suction height.
-> 100 mbar is equivalent to a suction height of
approx. 1 m.
Probe detected Read only Yes: the medium was detected
No: no medium was detected
Distribution arm Action Only for bottle configurations with more than one
bottle.
Test distribution arm Read only When the menu item is activated, the distribution
arm undergoes a test run. Afterwards, the system
moves to each position in succession and the
position is displayed.
In the case of plate distribution, the arm moves left
and right to ensure the bottles are numbered
consecutively.
Calibrate the distribution arm if the arm is
not positioned precisely over the bottles.
Position Read only
Device Reset Options
•OK
•ESC
Restart and keep all the settings
Factory default Options
•OK
•ESC
Restart with factory settings
Settings that have not been saved are lost.
Diagnostics/Systemtest/Reset
Function Options Info

Liquiport 2010 CSP44 Diagnostics menu
Endress+Hauser 17
2.6 Sensor change (for version with sensors with the Memosens
protocol)
2.7 Manual hold (for version with sensors with the Memosens
protocol)
2.8 Term information
The following information is displayed:
•Operating hours device:
Displays the total operating hours of the device in days, hours and minutes
•Sample totalizer:
Number of all samples taken and sample errors
•Pump tube life:
Displays how old the tube is in days, hours and minutes
This counter must be reset when a tube is replaced.
Set the specific counter reading to zero with "Reset".
Diagnostics/Sensor change
Function Options Info
List of channels Options
•On
•Off
Factory setting
Off
If you set the function to "On", the measured value
at the current output is set to hold. In this way you
avoid an error being reported at the process control
system if the sensor is replaced on site.
You can set the hold individually for every
Memosens channel. Alternatively, you can set all
the Memosens channels simultaneously to hold, or
cancel the hold.
Once you have replaced the sensor, you have to
disable the hold at the same point.
All channels sensor change on Action
All channels sensor change off Action
Diagnostics/Manual hold
Function Options Info
List of channels Options
•On
•Off
Factory setting
Off
If you set the function to "On", the measured value
at the current output is set to hold.
You can set the hold individually for every
Memosens channel. Alternatively, you can set all
the Memosens channels simultaneously to hold, or
cancel the hold.
Once you have completed the maintenance task,
you have to disable the hold at the same point.
All channels manual hold on Action
All channels manual hold off Action

Diagnostics menu Liquiport 2010 CSP44
18 Endress+Hauser
2.9 Simulation
You can simulate values at inputs and outputs for testing purposes:
• Current values at current outputs
• Measured values at inputs
Only current values are simulated. It is not possible to use the simulation function to
calculate the totalized value for the flow or rainfall.
2.10 Sensor information (for version with sensors with the
Memosens protocol)
Select the channel you want from the list of channels.
Information in the following categories is displayed:
• Operating time
Sensor operation under extreme conditions
• Calibration
Calibration data of the last calibration
• Sensor specifications
Measuring range limits for main measured value and temperature
• General information
Sensor identification information
The specific data that are displayed depends on what sensor is connected.

Liquiport 2010 CSP44 Troubleshooting
Endress+Hauser 19
3 Troubleshooting
3.1 Troubleshooting
The sampler continuously monitors its own functions.
The color of the display background changes to red if a diagnostics message for error category
"F" occurs.
The LED beside the display flashes red if a diagnostics message for error category "M" occurs.
3.2 System error messages
System error messages are the controller diagnostics messages that are output on the display
or via the current output.
1. See the Diagnostics menu for details on the error message. Follow the instructions to
rectify the problem.
2. If this does not help:
a. Using the message number shown on the display, locate the diagnostics message in the
error tables in this manual. Ignore the letters indicating the Namur error category.
b. Follow the troubleshooting instructions provided in the last column of the error tables.
3. Contact the Service Department if you cannot rectify the error yourself. Only cite the error
number.
3.2.1 Classification of diagnostics messages
More detailed information on the current diagnostics messages displayed is provided in the
DIAG/Diagnostics list menu.
In accordance with Namur specification NE 107, the diagnostics messages are characterized by:
• Message number
• Error category (letter in front of the message number)
– F = Failure. A malfunction has been detected.
The cause of the malfunction is to be found in the sampling point/measuring point. Any
controller connected should be set to manual mode.
– M = Maintenance required. Action may have to be taken soon.
The device still measures/takes a sample correctly. Immediate measures must not be taken.
However, proper maintenance efforts would prevent a possible malfunction in the future.
– C = Function check. (No error)
Maintenance work is being performed on the device. Wait until the work has been
completed.
– S = Out of specification. The measuring point is being operated outside specifications.
Operation is still possible. However, you run the risk of increased wear, shorter operating
life or lower accuracy levels. The cause of the problem is to be found outside the measuring
point.
• Message text
If you contact the Service Department, please cite the message number only. Since you can
individually change the assignment of an error to an error category, the Service Department
cannot use this information.

Troubleshooting Liquiport 2010 CSP44
20 Endress+Hauser
3.2.2 Adjusting the device behavior
All the diagnostics messages are assigned to specific error categories at the factory. Since other
settings might be preferred depending on the application, error categories and the effect errors
have on the measuring point can be configured individually. Furthermore, every diagnostics
message can be disabled.
Example
The controller returns diagnostics message 531 "Logbook full". You want to change this message
so that an error is not indicated on the display for example.
1. Go to:
– Menu/Setup/General settings/Diagnostics/Device behavior
for device-specific diagnostics messages (as in this example)
– Menu/Setup/Inputs/../Diag. settings/Diag. behavior
for sensor-specific diagnostics messages.
2. Select the diagnostics message and press the navigator button.
3. Decide:
a. Should the message be deactivated?
b. Do you want to change the error category?
c. Should an error current be output?
d. Do you want to trigger a cleaning program?
4. Deactivate the message, for example (Diagnostics message to "Off").
Configuration options
This branch, along with the same functions, can be found in various parts of the menu.
The list of diagnostic messages displayed depends on the path selected. There are
device-specific messages, and messages that depend on what sensor is connected.
Paths: Menu/Setup/General settings/Diagnostics or
Menu/Setup/Inputs/Diag. settings/Diag. behavior (optional)
Function Options Info
List of diagnostic messages Select the message to be changed.
Diagnostic message Options
•On
•Off
Factory setting
Depends on the message
You can deactivate or reactivate a diagnostic
message here.
Deactivating means:
• No error message in the measuring mode
• No error current at the current output
Error class Options
• Maintenance (M)
• Out of specification (S)
• Function check (C)
• Failure (F)
Factory setting
Depends on the message
The messages are divided into different error
categories in accordance with NAMUR NE 107.
--> BA470C "Maintenance & diagnostics"
Other manuals for Liquiport 2010 CSP44
4
Table of contents
Other Endress+Hauser Sampler manuals

Endress+Hauser
Endress+Hauser Liquiport CSP44 Technical specifications

Endress+Hauser
Endress+Hauser ASP Station 2000 peristaltic User manual

Endress+Hauser
Endress+Hauser Liquistation CSF33 User manual

Endress+Hauser
Endress+Hauser asp-port d 2 se User manual

Endress+Hauser
Endress+Hauser Liquistation CSF48 User manual

Endress+Hauser
Endress+Hauser ASP Inline User manual

Endress+Hauser
Endress+Hauser Liquistation CSF48 Technical specifications

Endress+Hauser
Endress+Hauser Liquistation CSF34 Technical specifications

Endress+Hauser
Endress+Hauser Liquistation CSF28 Technical specifications

Endress+Hauser
Endress+Hauser Liquistation CSF48 User manual