Energic Plus MVX User manual

IN CHARGE OF YOUR BATTERIES
www.energicplus.com
Original
operating
manual
08/2021 – V01
OPERATING MANUAL
MULTIVOLTAGE CHARGER
MVX

2/36
© 08-2021. Energic Plus is a trademark of TVH Parts Holding NV, Brabantstraat 15, B-8790 Waregem. All rights reserved. No part of this publication may be
reproduced or communicated in any form or by any means, electronic or mechanical, including copying, recording or use in an information storage or
retrieval system, without prior and explicit permission of TVH Parts Holding NV. Printing errors reserved. Photographs and illustrations are included for
reference purposes only.
Responsible editor: TVH Parts Holding NV, Brabantstraat 15, BE-8790Waregem
TVH is a supplier of after-market spare parts and accessories that are suitable for the maintenance and repair of OEM equipment.

3/36
www.tvh.com/multivoltagecharge-MVX_RV01
BG Bulgarian Можете да намерите това ръководство на Вашия език чрез линка, посочен по – долу.
CS Czech Tento návod najdete ve svém jazyce prostřednictvím odkazu níže.
DA Danish Du kan finde denne vejledning på dit sprog via nedenstående link.
DE German Sie finden diese Bedienungsanleitung in Ihrer Sprache unter folgendem Link.
EL Greek Μπορείτε να βρείτε αυτό το εγχειρίδιο στη γλώσσα σας μέσω του παρακάτω συνδέσμου.
EN English You can find this manual in your language via below link.
ES Spanish Encontrarás este manual en su propio idioma a través del siguiente enlace.
ET Estonian Oma emakeelse juhendi leiate allolevalt lingilt.
FI Finnish Löydät tämän manuaalin omalla kielelläsi alla olevan linkin takaa.
FR French Vous trouverez ce manuel dans votre langue via le lien ci-dessous.
GA Irish Tá an lámhleabhar seo ar fáil i do theanga tríd an nasc thíos.
HR Croatian Ovaj prirucnik mozete pronaci na svom jeziku putem donjeg linka.
HU Hungarian Ez a kézikönyv az Ön nyelvén az alábbi link alatt található.
IS Icelandic Hægt er að finna þessa handbók á þínu tungumáli á tenglinum hér að neðan.
IT Italian Cliccando sul link sottostante troverai il manuale nella tua lingua.
LT Lithuanian Šį vadovlėlį savo kalba rasite spustelėję žemiau esančią nuorodą.
LV Latvian Rokasgrāmatu latviešu valodā Jūs varat atrast izmantojot zemāk esošo saiti.
MT Maltese Tista’ssib dan il-manwal bil-lingwa tiegħek permezz tal-link ta’hawn taħt.
NL Dutch Je vindt deze handleiding in jouw taal via onderstaande link.
NO Norwegian Du finner denne håndboken på ditt språk via linken nedenfor.
PL Polish Niniejsza instrukcja obsługi dostępna jest wTwoim języku za pośrednictwem poniższego linku.
PT Portuguese Pode encontrar este manual no seu idioma através do link abaixo.
RO Romanian Puteți găsi acest manual în limba dvs. prin link-ul de mai jos.
SK Slovak Manuál vo vašom jazyku môžete nájst v priloženom vysvietenom riadku.
SL Slovenian Ta priročnik najdete v svojem jeziku preko spodnje povezave.
SV Swedish Du kan hitta denna manual på ditt språk via länken nedan.
TR Turkish Bu kılavuzu aşağıdaki bağlantıdan kendi dilinizde bulabilirsiniz.

4/36
Thank you for using our product. For your safety and to ensure a correct operation, we would like to
bring to your attention some aspects of this manual:
• This booklet supplies useful instructions for the correct operation and maintenance of the product.
It is therefore necessary to pay the utmost attention to all of the paragraphs that illustrate the most
simple and secure way to operate and use this product.
• This booklet must be considered an integral part of the machine and must be included with the
deed of sale.
• Neither this publication, nor part of it, can be reproduced without written authorization on the part
of the manufacturer.
• All of the information reported herein is based on data available at the moment of printing; the
manufacturer reserves the right to carry out modifications to its own products at any moment,
without notice and without incurring in any sanction. It is therefore suggested to always check for
possible updates.
The person responsible for the use of the product must make sure that all of the safety rules in force in
the country of its use are applied, to guarantee that the equipment is used in conformity with the use
for which it is destined and to avoid any dangerous situation for the user.
The following warning signs are used in this manual to warn you about the dangers and risks:
Informative, be careful.
Warning, can lead to injury and damage if instructions aren’t followed.
Danger, can lead to serious or fatal injury and serious damage if instructions aren’t
followed.
The following conventions are used in this manual:
4
3
2
5
6
1
1 Right
2Left
3 Bottom
4Top
5 Back
6 Front

5/36
TABLE OF CONTENTS
1. INTRODUCTION...............................................................................................6
2. DESCRIPTION..................................................................................................8
2.1. Technical data......................................................................................................................8
2.2. Main components of the product .........................................................................................8
2.3. Placement of the decals. . . . . . . . . . . . . . . . . . . . . . . . . . . . . . . . . . . . . . . . . . . . . . . . . . . . . . . . . . . . . . . . . . . . . . . . . . . . . . . . . . . . . . . . . . . . . . . . . . . . . . . . 9
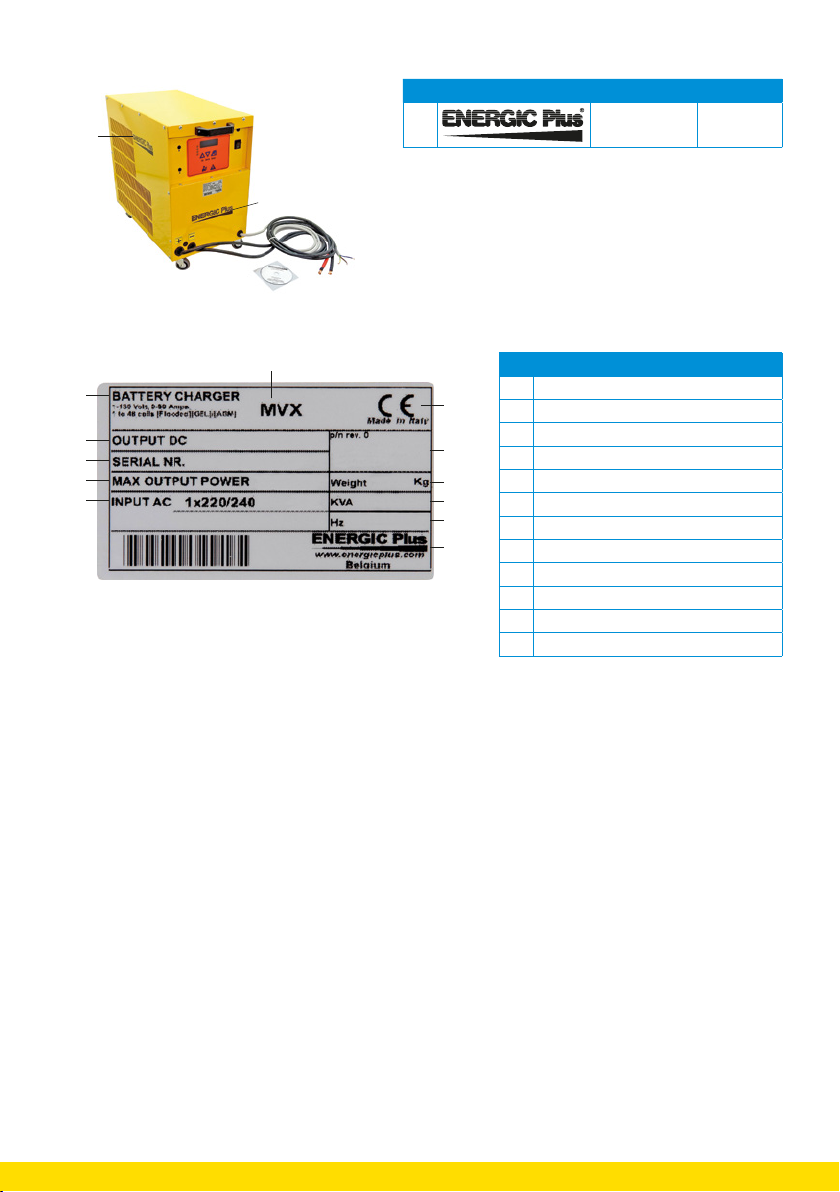
2.4. Type plate............................................................................................................................9
3. SAFETY INSTRUCTIONS.................................................................................. 10
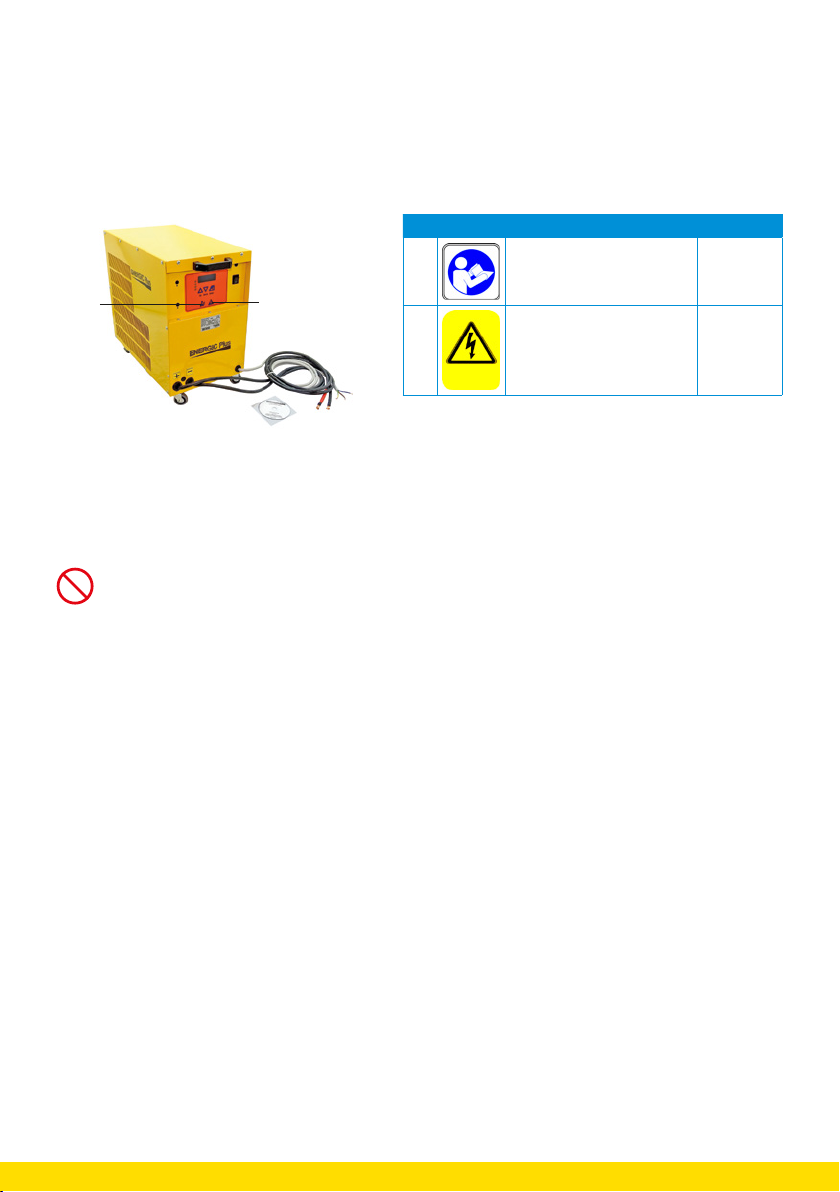
3.1. Explanation of the safety decals ..........................................................................................10
3.2. General safety instructions..................................................................................................10
4. TRANSPORT AND STORAGE............................................................................ 12
5. ASSEMBLY AND INSTALLATION....................................................................... 13
5.1. Packing list.........................................................................................................................13
5.2. Safety instructions..............................................................................................................13
6. COMMISSIONING........................................................................................... 14
7. OPERATION................................................................................................... 15
7.1. Safety instructions for operating the product.......................................................................15
7.2. Operating instructions. . . . . . . . . . . . . . . . . . . . . . . . . . . . . . . . . . . . . . . . . . . . . . . . . . . . . . . . . . . . . . . . . . . . . . . . . . . . . . . . . . . . . . . . . . . . . . . . . . . . . . . . 15
8. MAINTENANCE.............................................................................................. 18
8.1. Safety instructions for the repair of the product ...................................................................18
8.2. Maintenance schedule .......................................................................................................18
8.3. Maintenance instructions ...................................................................................................18
9. TROUBLESHOOTING ...................................................................................... 20
10. TEMPORARILY OUT OF ORDER ........................................................................ 22
11. FINAL DECOMMISSIONING AND DISPOSAL...................................................... 23
12. ANNEXES ...................................................................................................... 24
12.1. CE certificate......................................................................................................................24
12.2. Programs ...........................................................................................................................26
12.3. LED state. . . . . . . . . . . . . . . . . . . . . . . . . . . . . . . . . . . . . . . . . . . . . . . . . . . . . . . . . . . . . . . . . . . . . . . . . . . . . . . . . . . . . . . . . . . . . . . . . . . . . . . . . . . . . . . . . . . . . . . . . . . . 33

6/36
1. INTRODUCTION
This manual contains all the necessary information on operation of the Energic Plus multi-voltage
charger. The installation, comissioning and some of the maintenance operations should only be
carried out by professional technicians.
If you require this information and the maintenance steps, please contact your dealer.
Also included in this manual are a number of safety instructions to create a safe working environment.
Our multi-voltage chargers have a universal charging capability: multi-voltage, multi-capacity,
multi-chemistry ranging from single cells to full battery packs.
The multi-chargers are equipped with an electronic protection system including a soft start, polarity
reversal, an output short circuit protection and protection against overheating of both the charger
and the battery.
Each charger is equipped with pre-set charging curves or you can create and adjust the charging
curve yourself and save it.
Please read the manual thoroughly and observe the safety procedures before putting the unit into
operation. The operator and all persons who come into contact with the equipment should read it
carefully and regularly and have access to it at all times.
Keep this manual in a safe place for future reference.
Contact your dealer for any further questions or concerns you may have.
We hope you will enjoy working with your multi-voltage charger.
If you wish to use this multi-voltage charger in extreme conditions such as extreme heat,
extreme cold, extreme drought, etc. Please contact your dealer to discuss whether this
product is suitable for the activities you wish to undertake with the multi-voltage charger.
In the annexes of this template (see chapter 11.C) you can find a section on first aid.
Please read this chapter thoroughly before you start.

7/36
The multi-voltage charger may be unsafe if adequate maintenance is neglected.Therefore,
adequate maintenance facilities, trained personnel and procedures should be provided.
Maintenance and inspection shall conform to the following practices:
1. A scheduled planned maintenance, lubrication and inspection system should be followed
(see maintenance instructions chapter 8).
2. Only qualified and authorised personnel shall be permitted to maintain, repair, adjust and
inspect the multi-voltage charger.
3. Modifications and additions which affect capacity and safe operation shall not be
performed by the customer or user without the manufacturer’s prior written approval.
Capacity, operation and maintenance plates or decals shall be changed accordingly.
4. If modifications are made without written approval of the manufacturer, warranty will no
longer apply.
Any person in charge of putting the machine into operation, the operation itself or the
maintenance of the machine is urged to carefully read and observe the following instructions.
Make sure that the operators of this product are familiar with the safety instructions and follow
all the procedures. Neglecting these instructions can risk injury or death.
We guarantee a long period of trouble free operation if the unit is operated and maintained
correctly.

8/36
2. DESCRIPTION
2.1. Technical data
Always check the type plate for the correct information.
Type MVX S-100 MVX L-80 MVX M-50
Output voltage range VDC 2–35 2–65 2–130
Max output current A 100 80 50
Max output power kW 333
Width (mm) (A) 325 325 325
Height (mm) (B) 550 550 550
Length (mm) (C) 560 560 560
Weight (kg) 71 64 62
Reference 141TA6723 141TA6724 141TA6725
2.2. Main components of the product
1
2
3
4
5
76
9
11
10
8
N° Component
1 Handle
2On/off button
3Operating control panel
4Type plate
5Input cable
6CD-ROM manual
7Output cables (positive and negative)
8 Wheels
9 Brand
10 Ventilation slot
11 LED lights
C
B
A

9/36
2.3. Placement of the decals
1
1
N° Decal Explanation Reference
1Brand decal 166TA5423
2.4. Type plate
7
1
2
3
4
5
6
8
9
10
11
12
N° Explanation
1Product description
2Product type
3Output DC
4Serial number
5Maximum output power
6Input AC
7CE marking
8Additional information
9 Weight
10 KVA
11 Hz
12 Brand

10/36
3. SAFETY INSTRUCTIONS
3.1. Explanation of the safety decals
The safety symbols are printed on the charger. If you notice that the symbols are no longer clear,
we strongly recommend that you order decals with the symbols and hang them next to the type
plate. See chapter 3 for the explanation of the safety warnings.
1
2
N° Decal Explanation Reference
1Read the manual before
each use
163TA4191
2This installation is electrically
charged
163TA6970
3.2. General safety instructions
The power generator is reliable and designed with your safety in mind. It is important that you observe
the following precautions in order to avoid accidents and damage to the equipment:
• TVH Parts Holding NV cannot envisage each possible circumstance that may result
in danger. Therefore the warnings given in this publication and which appear on the
equipment are not exhaustive.
In the event that equipment, procedures, work methods or working techniques are used
that are not specifically advised by theTVH Parts Holding NV company, it is necessary to
make sure that there is no danger to the operator or other people
• Electrical equipment must be installed and maintained in accordance with all the applicable
national and local codes. A power disconnect switch must be located at the equipment.
Check the data label for voltage and phase requirements
• Battery chargers and dischargers can cause injury or death, damage to other equipment or
property, if the user does not strictly observe all safety rules and take precautionary actions.
• Bare conductors or terminals in the output circuit or underground and exposed live
equipment can fatally shock a person.
• Always keep sparks, flames, burning cigarettes and other sources of ignition away from the
battery charging area.

11/36
• Do not operate the product unless you are of age.
• Read this manual carefully. Make sure that the manual is available at all times and store it in a
dry, dark place near the unit.
• To prevent overheating, do not block any ventilation ports. Do not place the charger near
heat sources. A minimum distance of 3 meters is recommended. Make sure there is enough
free space around the equipment to allow adequate ventilation and easy access to the
cable connections.
• Ensure that no flammable materials are stored in the near surroundings of the charger.
• Protect the equipment against the ingress of water. Do not pour any liquids into the charger.
• Check that the available power supply voltage matches the voltage indicated on the
equipment’s nameplate. If in doubt, consult your dealer.
• The battery produces very high currents when short-circuited and will seriously burn the
skin if it comes into contact with a metal conductor carrying this current.
• Make sure that any kind of jewellery does not come into contact with the battery terminals
or the cell connectors on top of the battery.
• Ensure that the operator or user is not wearing any conductive materials.
• The cables must never be tensioned. Make sure there is always a little slack.
• Battery acid is very corrosive.The operator or persons using the multi-voltage charger and/
or battery must always wear protective gloves and eye protection.
• We strongly recommend to wear rubber aprons and face protection as well. If you do come
into contact with battery acid, follow the instructions in chapter 12.C.
• Protect the power cord from being walked on or pinched. If the power cord is damaged or
frayed, replace it immediately.
• If an extension cord or receptacle is used, ensure that the total amperage required for all
equipment on the extension is less than the rating of the extension.
• If you wish to charge lead-acid batteries, be warned that an explosive gas is released during
charging. Avoid flames and sparks. Place the battery in an open, well-ventilated area.
• Battery acid is very corrosive. Always wear the correct eye and body protection when you
are near batteries.
• Do not charge batteries on board of thermal engines.
• Never try to charge non-rechargeable batteries.
• Check that the selected charging curve is suitable for the type of battery to be recharged.
Take a good look at the rating plate of both the charger and the battery. If in doubt, contact
your dealer.
• Energic Plus is under no circumstances responsible if the charging curve selected is
incorrect and causes irreversible damage to the battery or the charger.
• In order to avoid a voltage drop, causing the battery to charge 100%, the output cables
should be as short as possible, and the diameter should be sufficient for the output current.
• Do not attempt to service the battery multi-voltage charger yourself. Opening the cover
may expose you to shock or other hazards. Only specialized persons can open it.
• If the battery multi-voltage charger does not work properly or if you notice that it is
damaged, immediately unplug it from the wall outlet and remove it from service.
Contact your dealer as soon as possible.

12/36
4. TRANSPORT AND STORAGE
4.2.1. Transport
The MVX multi-voltage charger is equipped with 4 wheels and a handle. Use the handle to pull the
charger forward or push it backwards.
Only roll the multi-voltage charger over smooth surfaces. When a surface contains too many potholes
or irregularities, this is harmful to the multi-voltage charger.
Shocks from the multi-voltage charger can also affect your physical condition.
If there are too many potholes or irregularities in the surface, we strongly recommend moving the
multi-voltage charger using a raised trolley or a pallet truck.
When you choose one of these two methods, make sure that the multi-voltage charger always
remains in an upright position.
Secure the multi-voltage charger by means of lashing straps or belts. Make sure that the straps/belts
are tensioned in such a way that the multi-voltage charger is secure but can’t be damaged.
Do not lay the charger flat, in a horizontal position. This will damage the instruments and pieces on the
inside of the multi-voltage charger with a risk of damaging the front panel.
4.2.2. Storage
If you wish to store the multi-voltage charger for a short period of time, make sure it is in a well-
ventilated room. Make sure that the multi-voltage charger is completely switched off and unplug it
from the wall socket.
Make sure that the multi-voltage charger is on a stable and flat surface.
Protect the multi-voltage charger from direct sunlight.

13/36
5. ASSEMBLY AND INSTALLATION
5.1. Packing list
Description Amount Reference
Charger with input and output cables mounted 1Check the type plate for the
correct reference of your
multi-voltage charger
CD-ROM manual 1 107TA8608
Manual 1 166TA9026
5.2. Safety instructions
• Electrical equipment must be installed and maintained in accordance with all the applicable
national and local codes. A power disconnect switch must be located at the equipment.
Check the data label for voltage and phase requirements
• Always keep sparks, flames, burning cigarettes and other sources of ignition away from the
battery charging area.
• Battery acid is very corrosive.The operator or persons using the multi-voltage charger and/
or battery must always wear protective gloves and eye protection.
We strongly recommend to wear rubber aprons and face protection as well. If you do come
into contact with battery acid, follow the instructions in chapter 11.D
• To prevent overheating, do not block any ventilation ports. Do not place the multi-voltage
charger near heat sources. A minimum distance of 3 meters is recommended. Make sure
there is enough free space around the equipment to allow adequate ventilation and easy
access to the cable connections.
• Ensure that no flammable materials are stored in the vicinity of the multi-voltage charger.
• Protect the equipment against the ingress of water.
• Do not install the unit in a place where there is direct sunlight, excessive dust, mechanical
vibration or shock.
• Make sure that the multi-voltage charger is installed as instructed in this manual and in
accordance with any applicable national or local norm.
• Check that the available power supply voltage matches the voltage indicated on the
equipment’s nameplate. If in doubt, consult your dealer.
• Protect the power cord from being walked on or pinched. If the power cord is damaged or
frayed, replace it immediately.

14/36
6. COMMISSIONING
Please read the warnings and dangers in chapter 5.2 before using the battery multi-voltage charger.
The multi-voltage charger must be connected to the AC input using an adequate cable and plug, with
disconnect switch and fuses.
The AC input wires have to be connected to the AC input terminal block, that is located on the internal
panel, just under the AC input contactor.
Make sure to tighten the terminal block screws with the proper torque, and pull each wire separately
in order to verify that they are mounted properly.
Output fuse
Auxiliary
transformer
Wire to be adjusted
for 208/240 or
480 VAC
AC input
terminal block
208/240 or 480 VAC
preset board
AC contactor
DC contactor
Auxiliary inputs
terminal block
(antiarc +
thermal probe
Replacement fuse
DC cables

15/36
7. OPERATION
7.1. Safety instructions for operating the product
• A damaged or malfunctioning machine must never be used. If damage or malfunctions are
discovered during pre-operation inspection or function tests, the machine must be tagged
and removed from service.
• For safety and electromagnetic compatibility, the charger has a 4-way plug as a safety
feature and only fits into an earthed socket. If you cannot insert the plug into the socket, you
may have an older, ungrounded socket. Contact an electrician to have the outlet replaced.
Do not use an adapter to ground the outlet.
• If you wish to charge lead-acid batteries, be warned that an explosive gas is released during
charging. Avoid flames and sparks. Place the battery in an open, well-ventilated area.
• Battery acid is very corrosive.The operator or persons using the discharger and/or battery
must always wear protective gloves and eye protection.
We strongly recommend to wear rubber aprons and face protection as well. If you do come
into contact with battery acid, follow the instructions in chapter 11.C.
• Check that the available power supply voltage matches the voltage indicated on the
equipment’s nameplate. If in doubt, consult your dealer.
• The battery produces very high currents when short-circuited and will seriously burn the
skin if it comes into contact with a metal conductor carrying this current.
• Do not permit rings on fingers to come in contact with battery terminals or the cell
connectors on top of the battery.
• Do not charge batteries on board of thermal engines.
• Do not charge non-rechargeable batteries.
• Check that the selected charging curve is suitable for the type of battery to be recharged.
Take a good look at the rating plate of both the charger and the battery. If in doubt, contact
your dealer.
• Energic Plus is under no circumstances responsible if the charging curve selected is
incorrect and causes irreversible damage to the battery or the charger.
• Only the person working with the battery multi-voltage charger should be in the vicinity of
the equipment and the battery. Persons not working with the multi-voltage charger have to
keep a minimum distance of 0,5 m.
7. 2 . Operating instructions
Please see chapter 8 for the daily maintenance schedule.
1. Connect the battery to the multi-voltage charger.
2. Switch the multi-voltage charger on by turning the
power button
3. The following screen appears:
A. Ampere-hour of the battery
B. Specific curve of charging
C. Battery type
D. Number of elements
AC
D B

16/36
4. If the operator doesn’t touch any button, after
15 seconds the display will show:
5. If you want to start charging, press the up or down
button.
6. If you want to start charging, press the up or down
button.
7. Use the up and down buttons to increase or decrease
the value.
7.2.1. Changing the curve
If you want to change the curve it is important to switch off your charger and disconnect your
battery.
Only expert users should modify the settings of the charger.
1. The display shows following:
2. Now press the down button for a couple of seconds.
The following screen appears:
3. Insert the following password: UP_DWN_UP_DWN_UP
4. In the next menu you can change the curve with the
u p and down buttons. If you want to select the curve,
press enter for two seconds.
If you wish to adjust a curve or create a new curve, please proceed to the next chapter.
7.2.2. Setting the curve
For each program, it is possible to adjust up to 6 different steps, and for each step it is possible to adapt:
• the type (current constant, voltage constant, pause cooling)
• the maximum time of each step (0–65 000 minutes)
• the current (constant current or minimum limit current)
• the voltage (maximum voltage or holding voltage)
For more information about each program, please go to annex 12.2.

17/36
For each program, the display shows this setting page:
Press enter to modify this particular program
1. Number of the program
2. Step of the program
3. Type of charging curves:
• I=K: current constant
• V=K: voltage constant
• PAU: pause/cooling
1
56
2 43
4. Maximum time of a SINGLE step
After the set time the charger closes the step and will begin the next step.
5. Current setting/limit
For every 100 Ah of battery capacity, the charger sets 18 Amps
If you have a battery of 500 Ah 18% Ah = 18 × 5 = 90 Amp
If you have a battery of 750 Ah 25% Ah = 25 × 7.5 = 187.5 Amp
If you have a battery of 1100 Ah 10% Ah = 10 × 11 = 110 Amp
In type of charging curves (I=K) I value is the current constant during this step
In type of charging curves (V=K) V value is the minimum limit of current before to end
this step of the program.
6. Voltage setting/limit
V/Cell – limit voltage for single elements
In type of charging curves (I=K) V value is the maximum limit of battery voltage before
to end this step of the program.
In type of charging curves (V=K) V value, the charger compensates the current to hold
voltage value.
It’s possible to scroll through programs using the up or down buttons, and press enter to modify or
skip each single parameter.

18/36
8. MAINTENANCE
8.1. Safety instructions for the repair of the product
• Repairs to the product may only be made by a qualified service technician and according to
the manufacturer’s instructions.
• Protect the equipment against the ingress of water. Do not pour any liquids into the multi-
voltage charger.
• If the battery multi-voltage charger does not work properly or if you notice that it is
damaged, immediately unplug it from the wall outlet and remove it from service.
Contact your dealer as soon as possible.
• No modifications or alterations to this multi-voltage charger shall be made without the prior
written approval of the original manufacturer, its authorized representative, or a successor
thereof which may affect capacity, stability or safety requirements of the multi-voltage
charger but not limited to these examples.
• Switch off the multi-voltage charger before doing maintenance activities.
• To reduce risk of electric shock, unplug the charger from the outlet before attempting any
maintenance or cleaning.Turning off the controls will not reduce this risk.
• Do not open the cabinet. Only qualified personnel is permitted to open this.
When carrying out maintenance on the battery or the high frequency charger, it is strongly
recommended to wear full body protection such as safety glasses, safety suit, safety shoes
and safety gloves. If you do come into contact with battery acid, follow the instructions in
chapter 11.D
8.2. Maintenance schedule
Task D M 6M
1. General checkup of the machine and accessories
2. Inspection of the cables
3. Inspect for loose screws
4. Check if there are no obstructions in the ventilation slots.
5. General cleaning of the appliance
D: daily, M: monthly, 6M: every 6 months
8.3. Maintenance instructions
1. General checkup of the machine and accessories
A daily check of the battery multi-charger can limit wear to a minimum:
• Be sure that the instruction manual is complete, legible and available for reference.
• Check the entire machine for damage, corrosion or cracks in structural components before each
use.
This maintenance may be carried out by the operator

19/36
2. Inspect the leads
If you see that the main line is damaged, remove the plug with great caution and remove the product
from operation.
Continuing to work with the device can cause electrocution which can lead to serious injury
or death.
This maintenance may be carried out by the operator
3. Inspect for loose screws
If you notice that the screws are loosened, tighten them again with the appropriate screwdriver.
This maintenance may be carried out by the operator
4. Check all ventilation slots for obstructions
Make sure that the ventilation holes are not blocked by excessive dust, objects … that prevent the
heat from dissipating sufficiently.
Do not use a high-pressure cleaner or a high-pressure air sprayer.
This will irreversibly damage the charger. Use a dry, non-electrostatic cloth to remove dust from
ventilation.
This maintenance may be carried out by the operator
5. General cleaning of the appliance
We recommend that you wipe the charger with a slightly damp cloth every six months.
Wring out your cloth well, do not use soaps, acids or greases to clean your charger.
This maintenance may be carried out by the operator

20/36
9. TROUBLESHOOTING
If the user does not enter the parameter(s) correctly when
setting internal programs (curves), the multi-voltage
charger will not start and the following display will appear:
You must check the parameters in the menu of your chosen program for errors, otherwise the multi-
voltage charger will not start.
The display shows ERROR SETTING, even if you are trying to work with a program that includes all the
steps.
N° Problem Cause Action
1The maximum voltage limit has
been reached
Check the parameter and adjust
it to the correct voltage
2The battery is not connected Connect your battery. When the
display shows:‘Time auto start’,
press the enter button to start the
last work parameter.
There is an error within the time
programming
Check your settings.You can
set the time to a maximum of
250 minutes.
3This parameter sets a maximum
limit for the battery temperature.
If this limit is reached,
then the charging is terminated
and this specific error message
appears. This functionality
requires the connection of an
optional temperature sensor.
• Check whether the battery is in
a place where it can cool down
sufficiently
• Check that the ventilation of
the battery is not blocked or
obstructed
• Make sure there are no objects
on top of the battery
• Check that the charger
settings are adjusted to your
battery. Incorrect setting may
cause the battery to overheat
due to excessive operation
4The battery voltage is higher
than the maximum threshold the
nominal voltage of the charger
Verify that the nominal battery
voltage matches
Table of contents
Other Energic Plus Batteries Charger manuals

Energic Plus
Energic Plus TSS-D User manual

Energic Plus
Energic Plus MVM User manual

Energic Plus
Energic Plus RX User manual

Energic Plus
Energic Plus RE Series User manual

Energic Plus
Energic Plus SMC User manual

Energic Plus
Energic Plus UBC Manual

Energic Plus
Energic Plus NG1 User manual

Energic Plus
Energic Plus AR-TOP User manual

Energic Plus
Energic Plus BC1 User manual

Energic Plus
Energic Plus 124TA1705 User manual