manuals.online logo
Brands
  1. Home
  2. •
  3. Brands
  4. •
  5. EnOcean
  6. •
  7. Transmitter
  8. •
  9. EnOcean Omnio WS-NASS-103 User manual

EnOcean Omnio WS-NASS-103 User manual

AWAG Elektrotechnik AG Sandbüelstrasse 2 CH-8604 Volketswil 1241000_Bd_Be.docx / 1876165
Tel. +41 44 908 19 19 Fax +41 44 908 19 99 i[email protected] www.awag.ch V01.001 / 31.03.2018 Seite 1 / 2
WS-NASS-103
Bedienungsanleitung Manual
Wandsender Nass Wall mounted transmitter wet
1-Kanal 1-channel
Bezeichnung
Typ / Type
Art.-No. / Item N°
Designation
Wandsender Nass 1-Kanal, reinweiss, Schutzart IP55
WS-NASS-103-RW
1241 153
Wall mounted transmitter wet 1-channel, pure white, protec-
tion class IP55
KURZANLEITUNG
•Omnio Aktor gemäss seiner Bedienungsanleitung in
den Einlernmodus versetzen
•Omnio Wandsender zweimal innerhalb einer
Sekunde betätigen.
Hinweis: Der Wandsender darf nicht weiter als 5 m
vom Omnio Aktor entfernt sein!
•Omnio Aktor wieder in den Standardmodus
versetzen
BRIEF INSTRUCTION
•Set the Omnio actuator in the programming mode
according to its instruction manual
•Press Omnio wall mounted transmitter twice within a
second.
Note: The transmitter must not be further away than
5 m from the Omnio receiver.
•Set the Omnio actuator in the operating mode
ALLGEMEIN
Die Omnio Aktoren (Empfänger) werden über Funksig-
nale der Omnio Sender angesteuert. Jeder Sender
kann eine unbegrenzte Anzahl von Aktoren ansteuern.
Die Funksender werden manuell durch ein einfaches
Verfahren auf den Aktor ein- und ausgelernt. Jedem
Sender können am Aktor eine Funktion und ver-
schiedenste Parameter zugeordnet werden.
Mit ARCO-Technologie (AWAG Remote Commissio-
ning for Omnio) lassen sich alle Omnio Aktoren voll-
ständig und ohne manuellen Zugriff zum Gerät per Funk
konfigurieren. Die leistungsstarke Software E-Tool bil-
det dabei das Herzstück, um Projekte beliebiger Grösse
bequem am Schreibtisch zu planen, konfigurieren und
dokumentieren.
GENERAL
The Omnio actuators (receivers) are controlled by radio
signals coming from the Omnio transmitters. Each
transmitter is able to control an unlimited number of ac-
tuators. The radio transmitter can be manually pro-
grammed and deprogrammed to an actuator by follow-
ing a simple procedure. Via actuator each transmitter
can be given a certain function and different parame-
ters.
With ARCO technology (AWAG Remote Commissio-
ning for Omnio), all Omnio actuators can be configured
completely by radio without manual access to the de-
vice. The powerful software E-Tool constitutes the key
component for convenient planning, configuring and
documenting projects right at your desk.
PRODUKTBESCHREIBUNG
Der Omnio Wandsender Nass 1-Kanal WS-NASS-103-RW ist ein batterieloser
und wartungsfreier Funksender mit einer Drucktaste in einem Gehäuse der Schal-
ter- und Steckdosenlinie «robusto» der Firma Hager AG. Er ist aufschraubbar und
dank Schutzart IP55 für den Nass- und Aussenbereich vorgesehen. Die Beschrif-
tung kann mittels auswechselbarer Papiereinlagen individuell gestaltet werden.
Eine Auswahl an bedruckten Papiereinlagen (blank, Klingelsymbol, Lichtsymbol) ist
im Lieferumfang enthalten.
PRODUCT DESCRIPTION
The Omnio wall mounted transmitter 1-channel wet WS-NASS-103-RW is a bat-
tery-less and maintenance-free transmitter including a push-button fitted in a cover
of the switch and socket line “robusto” of the company Hager AG. Thanks to IP55
protection class it is designed for the wet and outdoor area and can be installed with
screws. The labelling can be designed individually by using exchangeable paper
inlays. A variety of different printed inlays (blank, doorbell symbol, light symbol)
come with the delivery.
REICHWEITE
Die Signalstärke der Funktelegramme nimmt mit zunehmender Entfernung zwi-
schen Sender und Empfänger ab. Bei Sichtverbindung beträgt die Reichweite etwa
30 m in Gängen und bis zu 100 m in Hallen, während sie in Gebäuden sehr stark
vom Montageort, von den örtlichen Gegebenheiten sowie den eingesetzten Bau-
materialien abhängt. Die folgende Tabelle zeigt typische Richtwerte für die zu er-
wartende maximale Reichweite:
Gipskarton, trockenes Holz: 30 m (max. 5 Wände)
Mauerwerk: 20 m (max. 3 Wände)
Stahlbeton: 10 m (max. 1 Wand oder Decke)
Wärmeisolierende Fenster: 5 m (max. 1 Fenster)
TRANSMISSION RANGE
The signal strength of the radio telegrams decreases with increasing distance be-
tween transmitter and receiver. Line-of-sight connections are typically 30 m in cor-
ridors, and up to 100 m in halls, whereas in buildings the transmission range
strongly depends on the installation location, the local conditions and the building
materials used. The following figures for expected transmission range are consid-
ered, they should be treated as a rough guide only:
Plasterboard walls, dry wood: 30 m (max. 5 walls)
Masonry: 20 m (max. 3 walls)
Ferroconcrete: 10 m (max. 1 walls or ceilings)
Heat-insulating windows: 5 m (max. 1 windows)
INSTALLATION
Das Gerät ist für Installation im Nass- und Aussenbereich unter Einhaltung der tech-
nischen Daten und gängigen Sicherheitsvorschriften bestimmt. Es sollte nicht auf
Flächen aus Metall oder in deren Nähe angebracht werden, ebenso ist eine boden-
nahe Montage zu vermeiden. Zu hochfrequenten Störquellen wie Computer oder
elektronischen Vorschaltgeräten muss ein Mindestabstand von 0.5 m eingehalten
werden.
INSTALLATION
This device is suitable for mounting in the wet and outdoor area in compliance with
the technical data and common safety regulations. It should not be mounted on or
near metallic surfaces or close to the ground. A minimum distance of 0.5 m must
be kept to high frequency interference sources such as computers or electronic
ballasts.
EnOcean-Technologie (868 MHz)
AWAG Elektrotechnik AG Sandbüelstrasse 2 CH-8604 Volketswil 1241000_Bd_Be.docx / 1876165
Tel. +41 44 908 19 19 Fax +41 44 908 19 99 i[email protected] www.awag.ch V01.001 / 31.03.2018 Seite 2 / 2
MONTAGE
Der Omnio Wandsender WS-NASS-103-RW lässt sich mit der im
Lieferumfang enthaltenen UP-Montageplatte direkt auf Oberflä-
chen jeglicher Art schrauben.
•UP-Montageplatte mit vier Schrauben so an der Wand
befestigen, dass die schwarze Schaumstoffmatte wandseitig
aufliegt und allfällige Unebenheiten ausgleicht
•Gewünschte Papiereinlage in die graue Kunststoffhalterung
des Deckels legen
•Omnio Schaltermodul lose in die graue Kunststoffhalterung
des Deckels legen (siehe Bild)
•Durchsichtige Dichtung mit der flachen Seite nach oben in den
Deckel legen
•Deckel mit den vier beiliegenden Schrauben M3x16 an der
Montageplatte befestigen
MOUNTING
The Omnio wall mounted transmitter WS-NASS-103-RW can be
mounted on any kind of surface using the flush mountable plate
that comes with the delivery.
Fix the mounting plate using the four screws. Place the black
foam mat between the wall and the mounting plate in order to
level possible unevenness
•Place the required paper inlay in the grey plastic support of the
lid
•Place the Omnio switch module in the grey plastic support of
the lid (see picture)
•Place the transparent seal in the lid with the even side facing
upwards
•Fix the lid to the mounting plate using the four screws M3x16.
Montiert man den Omnio Wandsender WS-NASS-103-RW auf
ein AP-Gehäuse, muss das Omnio Schaltermodul an die graue
Kunststoffhalterung des Deckels angeschraubt werden.
•Vier Kreuzschlitz-Schrauben der grauen Kunststoffhalterung
des Deckels lösen
•Kunststoffhalterung entfernen und die zwei beiliegenden
Schrauben M3x8 in die dafür vorgesehenen Löcher auf der
Rückseite stecken (siehe Bild)
•Kunststoffhalterung wieder an Deckel montieren
•Gewünschte Papiereinlage in die graue Kunststoffhalterung
des Deckels legen
•Omnio Schaltermodul in die graue Kunststoffhalterung des
Deckels legen und mit den zwei beiliegenden Muttern M3
befestigen
•Durchsichtige Dichtung mit der flachen Seite nach oben in den
Deckel legen (siehe Bild)
•Deckel mit den vier beiliegenden Schrauben M3x16 am AP-
Gehäuse befestigen
If the Omnio transmitter WS-NASS-103-RW is placed in a hous-
ing for surface mounting, the Omnio switch module needs to be
mounted on the grey plastic support of the lid.
•Loosen the four crosshead screws on the grey plastic support
of the lid
•Remove the plastic support and place the two enclosed screws
M3x8 into the designated holes on the backside (see picture)
•Remount the plastic support on the lid
•Place the required paper inlay in the grey plastic support of the
lid
•Place the Omnio switch module in the grey plastic support of
the lid and fix it with the two enclosed nuts M3
•Place the transparent seal in the lid with the even side facing
upwards (see picture)
•Fix the lid to the housing using the four screws M3x16
TECHNISCHE DATEN
WS-NASS-103
TECHNICAL SPECIFICATIONS
Energieversorgung
Elektrodynamischer Energiegenerator
Electro-dynamic power generator
Power supply
Technologie
EnOcean 868.3 MHz
Technology
Funkmodul
EnOcean PTM210
Radio module
EnOcean Equimpent Profile (EEP)
F6-02-01
EnOcean Equipment Profile (EEP)
Reichweite
innen / indoor max. 30 m
aussen / free field max. 100 m
Transmission range
Umweltbedingungen
-25 … +65 °C
5 ... 90 % rH non condensing
Environment
Gehäuse
Thermoplast (ABS/PC), 86 x 86 x 21 mm
Housing
Schutzart
IP55
Protection class
EC-Direktiven
Radio Equipment Directive 2014/53/EU
Electromagnetic Compatibility Directive 2014/30/EU
Low Voltage Directive 2014/35/EU
Restriction of Hazardous Substances 2011/65/EU
EC-Directives
Normen
EN 60950, EN 61000, EN 62479,
EN 300220, EN 301489
Standards

Other EnOcean Transmitter manuals

EnOcean STM 330 User manual

EnOcean

EnOcean STM 330 User manual

EnOcean PTM 535Z User manual

EnOcean

EnOcean PTM 535Z User manual

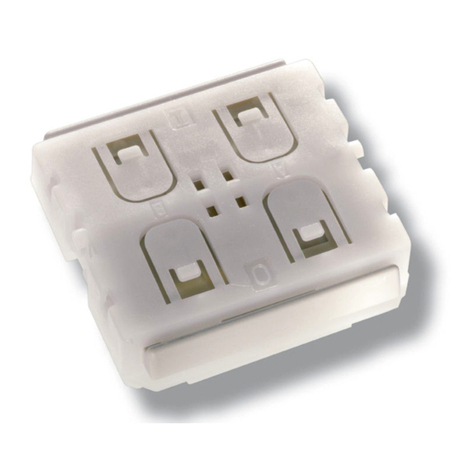
EnOcean PTM 210 User manual

EnOcean

EnOcean PTM 210 User manual

EnOcean PTM 535BZ User manual

EnOcean

EnOcean PTM 535BZ User manual

EnOcean PTM 215ZE User manual

EnOcean

EnOcean PTM 215ZE User manual

EnOcean PTM 210 User manual

EnOcean

EnOcean PTM 210 User manual

EnOcean PTM 535 User manual

EnOcean

EnOcean PTM 535 User manual

EnOcean PTM 215ZE User manual

EnOcean

EnOcean PTM 215ZE User manual

EnOcean PTM 230 User manual

EnOcean

EnOcean PTM 230 User manual

EnOcean STM 320 User manual

EnOcean

EnOcean STM 320 User manual

EnOcean PTM200 User manual

EnOcean

EnOcean PTM200 User manual

EnOcean PTM 216B User manual

EnOcean

EnOcean PTM 216B User manual

EnOcean PTM 216Z User manual

EnOcean

EnOcean PTM 216Z User manual

EnOcean PTM 216B User manual

EnOcean

EnOcean PTM 216B User manual

EnOcean PTM 535Z User manual

EnOcean

EnOcean PTM 535Z User manual

EnOcean easyfit PTM 250 User manual

EnOcean

EnOcean easyfit PTM 250 User manual

EnOcean STM 31 Series User manual

EnOcean

EnOcean STM 31 Series User manual

EnOcean PTM 215 ZGPGP User manual

EnOcean

EnOcean PTM 215 ZGPGP User manual

EnOcean PTM 33x User manual

EnOcean

EnOcean PTM 33x User manual

EnOcean PTM 210 User manual

EnOcean

EnOcean PTM 210 User manual

EnOcean PTM 200C User manual

EnOcean

EnOcean PTM 200C User manual

EnOcean Omnio FK101 Series User manual

EnOcean

EnOcean Omnio FK101 Series User manual

Popular Transmitter manuals by other brands

Vaisala HUMICAP HMT130 quick guide

Vaisala

Vaisala HUMICAP HMT130 quick guide

GF Signet 9900 operating instructions

GF

GF Signet 9900 operating instructions

Dwyer Instruments 650 Series Specifications-installation and operating instructions

Dwyer Instruments

Dwyer Instruments 650 Series Specifications-installation and operating instructions

API DuoPak APD 2037 instructions

API

API DuoPak APD 2037 instructions

E+E Elektronik EE375 Series manual

E+E Elektronik

E+E Elektronik EE375 Series manual

EMKO Pronem mini instruction manual

EMKO

EMKO Pronem mini instruction manual

FlowLine EchoPod UG06 Series quick start

FlowLine

FlowLine EchoPod UG06 Series quick start

Marksman M11RF-LCD user manual

Marksman

Marksman M11RF-LCD user manual

Air Monitor AUTO-purge III Installation, operation and maintenance manual

Air Monitor

Air Monitor AUTO-purge III Installation, operation and maintenance manual

Johnson Controls CD-W00-00-0 installation instructions

Johnson Controls

Johnson Controls CD-W00-00-0 installation instructions

aci B5 Installation, operation and maintenance manual

aci

aci B5 Installation, operation and maintenance manual

MTT MS3772 user manual

MTT

MTT MS3772 user manual

Bosch SE88 user guide

Bosch

Bosch SE88 user guide

Axel BoxTel operating manual

Axel

Axel BoxTel operating manual

Car and Driver CAD-9900 user manual

Car and Driver

Car and Driver CAD-9900 user manual

Powercast TX91513 user manual

Powercast

Powercast TX91513 user manual

Audiovox Prestige APS-2K4 Programming guide

Audiovox

Audiovox Prestige APS-2K4 Programming guide

Nice ON3ELR user manual

Nice

Nice ON3ELR user manual

manuals.online logo
manuals.online logoBrands
  • About & Mission
  • Contact us
  • Privacy Policy
  • Terms and Conditions

Copyright 2025 Manuals.Online. All Rights Reserved.