ENSONIQ ASR-X PRO User manual

TM
L
EADING THE
W
ORLD IN
S
OUND
I
NNOVATION
User's Guide

Grounding Instructions
This product must be grounded. If it should malfunction or break down, grounding provides a path of
least resistance for electric current to reduce the risk of electric shock. This product is equipped with a
cord having an equipment-grounding conductor and a grounding plug. The plug must be plugged into an
appropriate outlet that is properly installed and grounded in accordance with all local codes and ordi-
nances.
DANGER: Improper connection of the equipment-grounding conductor can result in the risk of electric
shock. Check with a qualified electrician or service personnel if you are in doubt as to whether the
product is properly grounded. Do not modify the plug provided with this product — if it will not fit the
outlet, have a proper outlet installed by a qualified electrician.
RISK OF ELECTRIC SHOCK
DO NOT OPEN
CAUTION : TO REDUCE THE DANGER OF ELECTRIC SHOCK
DO NOT REMOVE COVER (OR BACK)
NO USER SERVICEABLE PARTS INSIDE
REFER SERVICING TO QUALIFIED SERVICE PERSONNEL
READ THIS FIRST!
WARNING!!WARNING!!
This symbol is intended to alert the user to the
presence of uninsulated "dangerous voltage"
within the product's enclosure that may be of
sufficient magnitude to constitute a risk of elec-
tronic shock to persons.
This symbol is intended to alert the user to the
presence of important operating and mainte-
nance (servicing) instructions in the literature
accompanying the appliance.
CAUTION
SEE IMPORTANT SAFETY INSTRUCTIONS ON BACK COVER!

TM
UU
UUss
ssee
eerr
rrÕÕÕÕss
ss GG
GGuu
uuiiii dd
ddee
ee
VV
VVee
eerr
rrss
ssiiii oo
oonn
nn 33
33.... 00
0000
00

PP
PPaa
aarr
rrtttt NN
NNuu
uumm
mmbb
bbee
eerr
rr 99
9933
3311
1100
00 00
0022
2233
3311
11 00
0011
11--
--AA
AA MM
MMoo
oodd
ddee
eellll NN
NNuu
uumm
mmbb
bbee
eerr
rr MM
MMMM
MM--
--11
1166
6699
99
AA
AASS
SSRR
RR--
--XX
XX PP
PPrr
rroo
oo UU
UUss
ssee
eerr
rrÕÕÕÕss
ss GG
GGuu
uuiiii dd
ddee
ee
Written, designed, and illustrated by: Robby Berman
Thanks to: Jim Bryan
Copyright © 1998
ENSONIQ¨ Corp
155 Great Valley Parkway
Box 3035
Malvern, PA 19355-0735
USA
World Wide WebÑhttp://www.ensoniq.com
Printed in U.S.A.
All Rights Reserved
Please record the following information:
Your Authorized ENSONIQ Dealer:___________________________ Phone:_______________
Your Dealer Sales Representative:_________________________________________________
Serial Number of Unit:___________________________ Date of Purchase:_________________
Your Authorized ENSONIQ Dealer is your primary source for service and support. The above information will be
helpful in communicating with your Authorized ENSONIQ Dealer, and provide necessary information should you need
to contact ENSONIQ Customer Service. If you have any questions concerning the use of this unit, please contact your
Authorized ENSONIQ Dealer first. For additional technical support, or to find the name of the nearest Authorized
ENSONIQ Repair Station, call ENSONIQ Customer Service at (610) 647-3930 Monday through Friday 9:30 AM to 12:15
PM and 1:15 PM to 6:30 PM Eastern Time. Between 1:15 PM and 5:00 PM we experience our heaviest call load. During
these times, there may be delays in answering your call.
This manual is copyrighted and all rights are reserved by ENSONIQ Corp. This document may not, in whole or in part,
be copied, photocopied, reproduced, translated, or reduced to any electronic medium or machine readable form without
prior written consent from ENSONIQ Corp. The ASR-X Pro software/firmware is copyrighted and all rights are
reserved by ENSONIQ Corp.
Although every effort has been made to ensure the accuracy of the text and illustrations in this manual, no guarantee is
made or implied in this regard.
IIII MM
MMPP
PPOO
OORR
RRTT
TTAA
AANN
NNTT
TT::::
Note: This equipment has been tested and found to comply with the limits for a Class B digital device, pursuant to part
15 of the FCC Rules. These limits are designed to provide reasonable protection against harmful interference in a
residential installation. This equipment generates, uses and can radiate radio frequency energy and, if not installed and
used in accordance with the instructions, may cause harmful interference to radio communications. However, there is no
guarantee that interference will not occur in a particular installation. If this equipment does cause harmful interference
to radio or television reception, which can be determined by turning the equipment off and on, the user is encouraged to
try to correct the interference by one or more of the following measures:
* Reorient or relocate the receiving antenna.
* Increase the separation between the equipment and receiver.
* Connect the equipment into an outlet on a circuit different from that to which the receiver is connected.
* Consult the dealer or an experienced radio/TV technician for help.
Changes or modifications to the product not expressly approved by ENSONIQ could void the user's FCC authority to
operate the equipment.
In order to fulfill warranty requirements, your ASR-X Pro should be serviced only by an Authorized ENSONIQ Repair
Station. The ENSONIQ serial number label must appear on the outside of the unit, or the ENSONIQ warranty is void.
ENSONIQ, ASR-X Pro, Scratch Pad, Patch Selects and SoundFinder are trademarks of ENSONIQ Corp.
TT
TTee
eemm
mmpp
ppee
eerr
rraa
aattttuu
uurr
rree
ee GG
GGuu
uuiiii dd
ddee
eellll iiii nn
nnee
eess
ss
The ASR-X Pro contains a substantial amount of computerized and
electronic circuitry that can be susceptible to damage when exposed to
extreme temperature changes. When the ASR-X Pro is brought inside after
sitting in a cold climate (i.e., the back seat of your car), condensation builds
up on the internal circuitry in much the same way a pair of glasses fogs up
when you come inside on a cold day. If the unit is powered up as this
condensation occurs, components can short out or be damaged. Excessively
high temperatures also pose a threat to the unit, stressing both the internal
circuits as well as the case. With this in mind, it is highly advisable to follow
these precautions when storing and setting up your ASR-X Pro:
¥ Avoid leaving the ASR-X Pro in temperatures of less than 50 degrees
Fahrenheit or more than 100 degrees Fahrenheit.
¥ When bringing the ASR-X Pro indoors after travel, allow the unit at
least 20 minutes to reach room temperature before powering up. In
the case of excessive outdoor temperatures (below 50 degrees
Fahrenheit or above 100 degrees Fahrenheit), allow an hour or more
before power up.
¥ Avoid leaving the ASR-X Pro inside a vehicle exposed to direct
sunlight.
CC
CCaa
aarr
rree
ee aa
aann
nndd
dd FF
FFee
eeee
eedd
ddiiii nn
nngg
gg oo
ooffff tttthh
hhee
ee DD
DDiiii ss
sskk
kk DD
DDrr
rriiii vv
vvee
ee
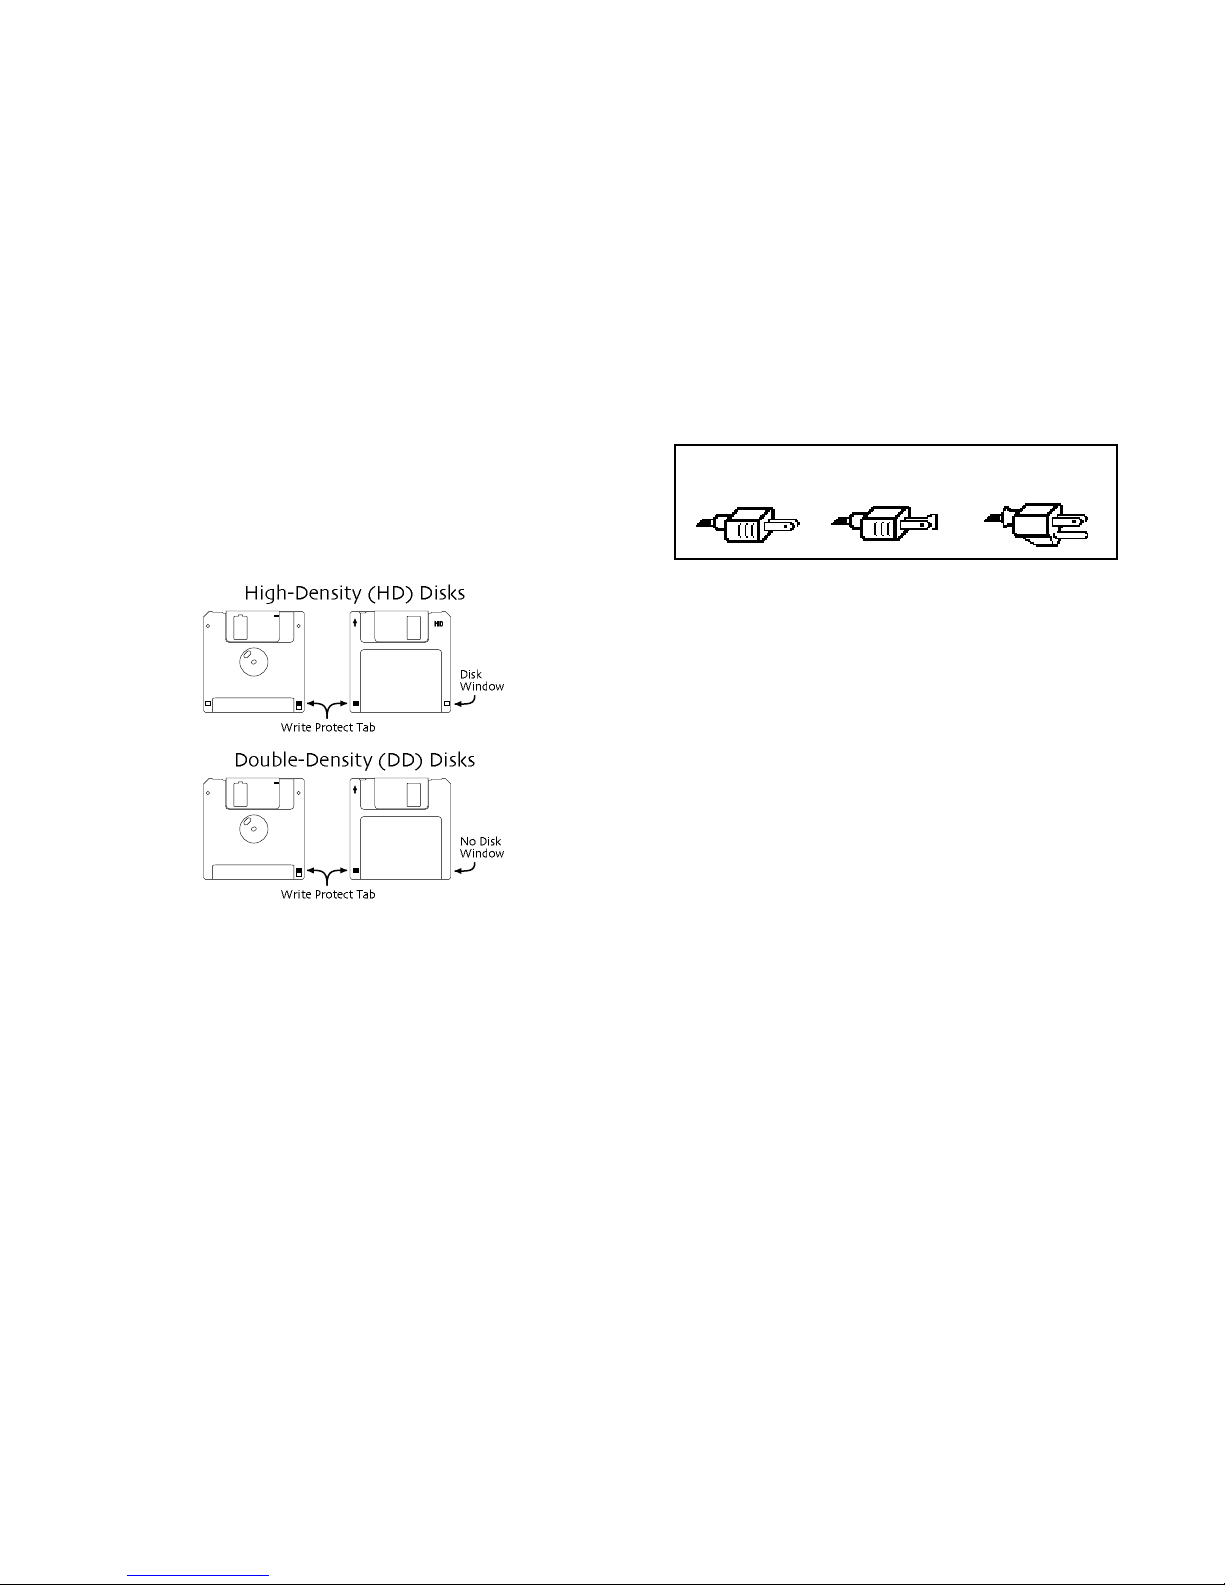
The ASR-X ProÕs disk drive is used to store sounds, rhythms, and sequencer
data. This quad-density disk drive will store your data on a high-density
(HD) 3.5Ó micro floppy disk. You can also store data on a DOS-formatted
double-density (DD) 3.5Ó micro floppy disk.
Disks have a sliding write-protection tab so that you can protect your data
against accidental erasure. When the write-protection tab covers the protect
window, you can store information on the disk. Sliding the tab so that the
window is open will protect the disk against being accidentally reformatted
or having files deleted. High density disks can be easily identified because
they have an additional disk window located on the lower right corner of
the disk.
Floppy disks are a magnetic storage medium, and should be treated with
the same care youÕd give important audio tapes. Just as you would use high
quality audio tapes for your important recording needs, we recommend
using high quality floppy disks for your ASR-X Pro. Here are a few DoÕs
and DonÕtÕs concerning disks and the disk drive.
DD
DDoo
ooÕÕÕÕss
ss::::
¥ Use either high-density (HD) or double-density (DD) 3.5Ó disks. Both
types are available from most computer stores.
¥ Keep your disks and the disk drive clean and free of dust, dirt, liquids,
etc.
¥ Label your disks and keep a record of what is saved on each.
DD
DDoo
oonn
nnÕÕÕÕttttÕÕÕÕss
ss::::
¥ DonÕt use single-sided (SD) disks. These disks have not passed testing
on both sides. While a single-sided disk might work with the ASR-X
Pro, it is possible that you will eventually lose important data to a
disk error if you try using single-sided disks.
¥ DonÕt put anything other than a disk into the disk drive.
¥ DonÕt transport the unit with a disk in the drive.
¥ DonÕt expose disks to temperature extremes. Temperatures below 50û
F and above 140û F can damage the plastic outer shell.
¥ DonÕt expose your disks to moisture.
¥ DonÕt dry your disks in a microwave oven.
¥ DonÕt subject disks to strong magnetic fields. Exposure to magnetic
energy can permanently damage the information on the disk. Keep
disks away from speaker cabinets, tape decks, power cables, airline x-
ray equipment, power amplifiers, TV sets, and any other sources of
magnetic energy.
¥ DonÕt eject the disk while the drive is operating (i.e., when the disk
drive light is on).
CC
CCllll ee
eeaa
aann
nn UU
UUpp
pp aa
aann
nndd
dd MM
MMaa
aaiiii nn
nnttttee
eenn
nnaa
aann
nncc
ccee
ee
Clean the exterior of your ASR-X Pro with a soft, lint-free, dry (or slightly
damp) cloth. You can use a slightly dampened cloth (with a mild neutral
detergent) to remove stubborn dirt, but make sure that the ASR-X Pro is
thoroughly dry before turning on the power. Never use alcohol, benzene,
volatile cleaners, solvents, abrasives, polish or rubbing compounds.
PP
PPoo
oollll aa
aarr
rriiii zz
zzaa
aattttiiii oo
oonn
nn aa
aann
nndd
dd GG
GGrr
rroo
oouu
uunn
nndd
ddiiii nn
nngg
gg
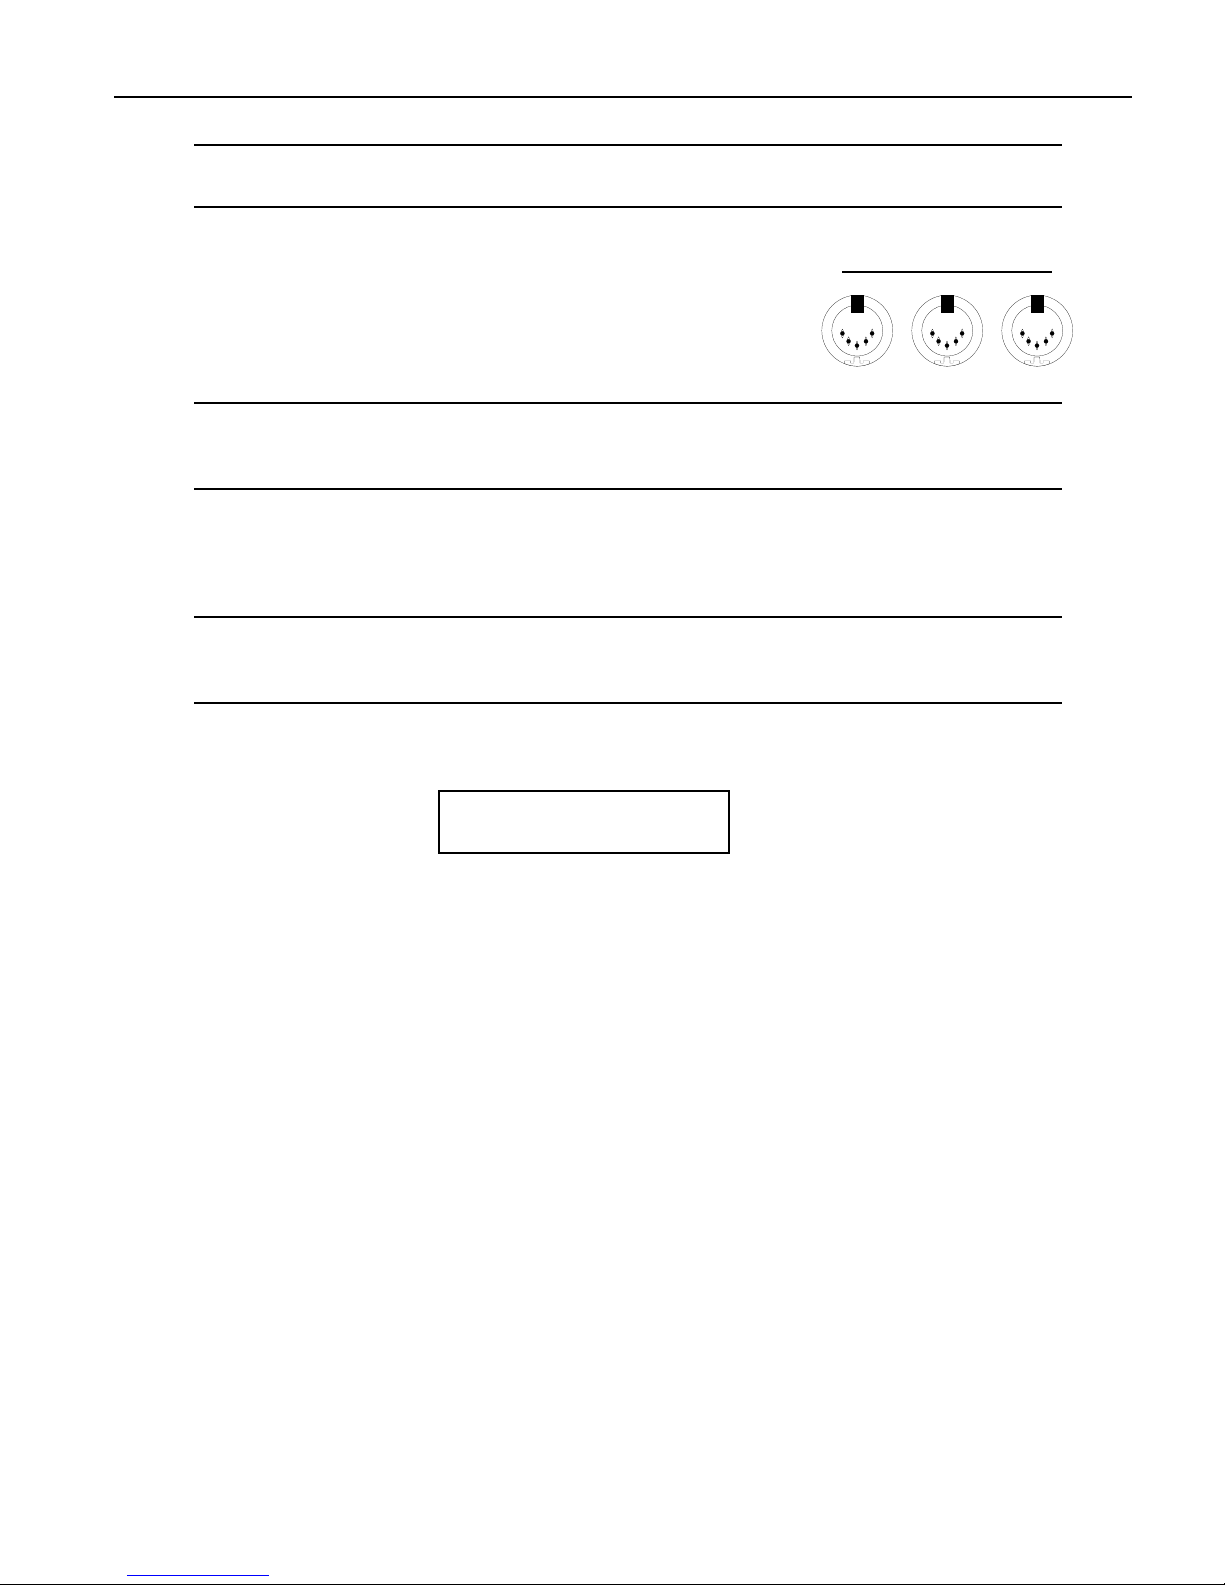
Like many modern electrical devices, your ENSONIQ product has a three-
prong power cord with earth ground to ensure safe operation. Some
products have power cords with only two prongs and no earth ground. To
ensure safe operation, modern products with two-prong power cords have
polarized plugs which can only be inserted into an outlet the proper way.
PolarizedNon-polarized Three-prong
with earth ground
Some products, such as older guitar amplifiers, do not have polarized plugs
and can be connected to an outlet incorrectly. This may result in dangerous
high voltages on the audio connections, which could cause you physical
harm or damage any properly grounded equipment to which they are
connected, such as your ENSONIQ product.
To avoid shock hazards or equipment damage, we recommend the
following precautions:
¥ If you own equipment with two-pronged power cords, check to see if
they are polarized or non-polarized. You might consider having an
authorized repair station change any non-polarized plugs on your
equipment to polarized plugs to avoid future problems.
¥ Exercise caution when using extension cords or plug adapters. Proper
polarization should always be maintained from the outlet to the plug.
The use of polarized extension cords and adapters is the easiest way
to maintain proper polarity.
¥ Whenever possible, connect all products with grounded power cords
to the same outlet ground. This will ensure a common ground level to
prevent equipment damage and minimize hum in the audio output.
AC outlet testers are available from many electronic supply and hardware
stores. These can be used to check for proper polarity of outlets and cords.
AA
AACC
CC LL
LLiiii nn
nnee
ee CC
CCoo
oonn
nndd
ddiiii ttttiiii oo
oonn
nniiii nn
nngg
gg
As with any computer device, the ASR-X Pro is sensitive to sharp peaks and
drops in the AC line voltage. Lightning strikes, power drops, or sudden and
erratic surges in the AC line voltage can scramble the internal memory, and
in some cases, damage the unitÕs hardware. Here are a few suggestions to
help guard against such occurrences:
¥ A surge/spike suppressor. A surge/spike suppresser absorbs surges
and protects your gear from all but the most severe over-voltage
conditions. You can get multi-outlet power strips with built-in
surge/spike suppressers for little more than the cost of unprotected
power strips, so using one is a good investment for all your electronic
equipment.
¥ A line conditioner. This is the best, but by far the more expensive way
to protect your gear. In addition to protecting against surges and
spikes, a line conditioner guards the equipment against excessively
high or low line voltages. If you use the ASR-X Pro in lots of different
locations with varying or unknown AC line conditions, you might
consider investing in a line conditioner.


Table of Contents
ENSONIQ ASR-X Pro UserÕs Guide
TT
TTaa
aabb
bbllll ee
ee oo
ooffff CC
CCoo
oonn
nnttttee
eenn
nnttttss
ss
TT
TTuu
uuttttoo
oorr
rriiii aa
aallll 11
11
LL
LLiiii ss
sstttt oo
ooffff RR
RROO
OOMM
MM SS
SSoo
oouu
uunn
nndd
ddss
ss 22
2233
33
IIII nn
nnss
ssee
eerr
rrtttt EE
EEffffffffee
eecc
cctttt PP
PPaa
aarr
rraa
aamm
mmee
eettttee
eerr
rrss
ss 22
2277
77


Tutorial
ENSONIQ ASR-X Pro UserÕs Guide 1
TT
TTuu
uuttttoo
oorr
rriiii aa
aallll
IIII nn
nnttttrr
rroo
oodd
dduu
uucc
ccttttiiii oo
oonn
nn
Welcome to the ASR-X Pro UserÕs Guide, and congratulations on your purchase of the ENSONIQ ASR-X
Pro. This book contains a step-by-step tour of the major features of the ASR-X Pro. For more detailed
information on the topics discussedÑand moreÑsee the ASR-X Pro Reference Manual.
The first part of the UserÕs Guide is structured as a tutorial, meant to be read and followed in the order in
which itÕs presented. This approach will allow you to become familiar with ASR-X Pro concepts and
procedures one at a time, and will let you build up your understanding ofÑand comfort withÑthe way
the ASR-X Pro works. The tutorial will only take about a half hour to complete. Along the way, youÕll get
a sense of how much fun it is to create music on your new ASR-X Pro. The remainder of the UserÕs Guide
contains a list of the sounds built into your ASR-X Pro, and a list of its insert effects and their parameters.
NN
NNoo
oottttee
ee:::: At the end of various sections of the tutorial, youÕll see a ÒBefore proceeding...Ó section. The
instructions in each these sections help set up the tutorials that follow.
WW
WWhh
hhaa
aatttt EE
EEllll ss
ssee
ee iiii ss
ss iiii nn
nn tttthh
hhee
ee AA
AASS
SSRR
RR--
--XX
XX PP
PPrr
rroo
oo BB
BBoo
ooxx
xx??
??
The following items are included with every ASR-X Pro shipped from the ENSONIQ factory:
¥ ENSONIQ X-Audio Sampling CD ¥ ENSONIQ ASR-X Pro UserÕs Guide
Volume 1ÑProducersÕ Mix ¥ ENSONIQ ASR-X Pro Reference Manual
¥ hex wrench ¥ AC power cable
GG
GGee
eettttttttiiii nn
nngg
gg AA
AArr
rroo
oouu
uunn
nndd
dd oo
oonn
nn tttthh
hhee
ee AA
AASS
SSRR
RR--
--XX
XX PP
PPrr
rroo
oo
TT
TThh
hhee
ee DD
DDiiii ss
sspp
ppllll aa
aayy
yy aa
aann
nndd
dd YY
YYee
eess
ss//
//NN
NNoo
oo BB
BBuu
uuttttttttoo
oonn
nnss
ss
The display located in the center of the ASR-X Pro front panel will always tell you
what you need to know as you do different things on the ASR-X Pro. Many ASR-X
Pro procedures will be presented as questions that you can answer by pressing the
No or Yes button.
TT
TTiiii pp
pp:::: When a question is being asked, the LEDs in the No and Yes buttons will flash.
Some activities involve a series of parameters and/or procedures. In such cases, youÕll begin by
answering ÒYesÓ to a top-level question. From there youÕll encounter parameters and/or further
questions presented on sub-displays that relate to what youÕre doing. To exit back out to the top level of
the ASR-X Pro, you can press the Exit/No button.
TT
TThh
hhee
ee KK
KKnn
nnoo
oobb
bbss
ss
Exit Enter
No Yes
MIDI Channel
01234
56789
Demo
Sound
Type
Select Track
Essentials
Sound
Name
Parameter Value
116

Tutorial
2 ENSONIQ ASR-X Pro UserÕs Guide
Below the display in the center of the front panel are two knobs used during most ASR-X Pro activities.
These knobs are known by two different sets of names, since they serve two general purposes.
When youÕre selecting sounds for tracks or for pads in the ASR-X Pro, the central knobs should be
thought of as the ÒSound TypeÓ and ÒSound NameÓ knobs.
For every other activity, the knobs will be referred to as the ÒParameter knobÓ and the ÒValue knob.Ó
Both sets of names are printed on the front panel, as you can see.
SS
SSoo
oomm
mmee
ee AA
AASS
SSRR
RR--
--XX
XX PP
PPrr
rroo
oo TT
TTee
eerr
rrmm
mmss
ss YY
YYoo
oouu
uu RR
RRee
eeaa
aallll llll yy
yy NN
NNee
eeee
eedd
dd ttttoo
oo KK
KKnn
nnoo
ooww
ww
ItÕs important that you understand the meaning of these terms as you use the ASR-X Pro:
¥ parameterÑThis is any characteristic of the ASR-X Pro software that can be changed.
¥ valueÑThis is the setting of a parameter.
¥ selectÑThis is the act of choosing a sound for playing or recording, or choosing a parameter to be
edited.
¥ standard soundÑA sound is a program that plays one or more digital audio recordings arranged in
layers. The recordings, or waves, can be data permanently stored in the ASR-X ProÕs ROM (for Òread-
only memoryÓ), or something youÕve sampled or loaded into the ASR-X Pro. Standard sounds based
on ROM waves can have up to 16 layers; sounds that play sampled waves use one layer for mono
waves, or two layers for stereo waves.
¥ kit soundÑA kit is a sound in which each of its 64 notes can play a different standard sound. Since
the ASR-X Pro is designed for beats and loops, kit sounds are its most potent sounds.
TT
TTiiii pp
pp:::: See Chapter 3 of the ASR-X Pro Reference Manual to learn more about standard and kit
sounds.
GG
GGee
eettttttttiiii nn
nngg
gg RR
RRee
eeaa
aadd
ddyy
yy ttttoo
oo GG
GGoo
oo
MM
MMaa
aakk
kkiiii nn
nngg
gg CC
CCoo
oonn
nnnn
nnee
eecc
ccttttiiii oo
oonn
nnss
ss
There are a few types of connections youÕll want to make as you set up the ASR-X Pro Ñall of the jacks
necessary for these connections are located on the rear panel of the ASR-X Pro. YouÕll want to set up:
¥ a way of listening to the ASR-X ProÑYou can connect the ASR-X
ProÕs Left and Right Main Out jacks to a mixer, amplifier or stereo
system. If youÕd like to use the ASR-X Pro in mono, connect only the
Left or Right Main Out jack to your mixer or amplifier, and make
sure nothing is plugged into the other Main Out jack. If youÕd rather
listen to the ASR-X Pro through headphones, you can plug yours in
to the ASR-X ProÕs Phones jackÑyour headphones will need to have
a 1/4Ó stereo plug or adapter to work correctly with the Phones jack.
Sound
Type Sound
Name
Parameter Value
Phones
Mono Mono
Right Left
Main Out
Tutorial
ENSONIQ ASR-X Pro UserÕs Guide 3
WW
WWaa
aarr
rrnn
nniiii nn
nngg
gg:::: If you connect the Main Outs to a stereo system, set your ASR-X Pro Volume level
carefully, or you risk damaging components of your stereo. See ÒSetting LevelsÓ below.
¥ If you plan to use any external MIDI devices with the ASR-X ProÑsuch as a keyboard, sequencer or
computerÑyouÕll need to connect:
¥ the MIDI In of the ASR-X Pro to the MIDI Out of the
external device.
¥ the MIDI OUT of the ASR-X Pro to the MIDI In of the
external device.
TT
TTiiii pp
pp:::: YouÕll be able to verify that your external MIDI device is properly connect to the ASR-X Pro
by transmitting some MIDI data to the ASR-X Pro Ñwhen the ASR-X Pro receives the data, its
front-panel MIDI LED will light.
¥ AC power for the ASR-X ProÑby connecting one end of the supplied power cord to the AC Line
jack on the back of the ASR-X Pro, and the other end to a grounded AC outlet.
PP
PPoo
ooww
wwee
eerr
rriiii nn
nngg
gg UU
UUpp
pp
WW
WWaa
aarr
rrnn
nniiii nn
nngg
gg:::: Before powering up your ASR-X Pro for the first time, turn its front-panel Volume knob
all the way down (counter-clockwise) before turning it on. This will help make sure that youÕve
set safe levels for all of your equipment before you make any sound on the ASR-X Pro.
To power up the ASR-X Pro, press in the top of its rear-panel power switch. When you do so, the ASR-X
Pro will start up and display:
ENSONIQ ASR-X PRO
Resampler w/ Effects
SS
SSee
eettttttttiiii nn
nngg
gg LL
LLee
eevv
vvee
eellll ss
ss
WW
WWhh
hhee
eenn
nn CC
CCoo
oonn
nnnn
nnee
eecc
ccttttee
eedd
dd ttttoo
oo aa
aa MM
MMiiii xx
xxee
eerr
rr oo
oorr
rr AA
AAmm
mmpp
ppllll iiii ffffiiii ee
eerr
rr
The ASR-X Pro will produce its best sound when its volume knob is turned all the way up, so the best
way to set up your ASR-X Pro levels is to:
1. Turn the volume of the channels to which youÕve connected the ASR-X Pro all the way down. If
youÕre connected to a mixer, turn down the channel preamps as well.
2. Turn the ASR-X Pro Volume knob all the way up.
3. Play the ASR-X Pro pads with a good amount of force.
4. Set the levels on your mixer or amplifier to a workable setting.
WW
WWhh
hhee
eenn
nn CC
CCoo
oonn
nnnn
nnee
eecc
ccttttee
eedd
dd ttttoo
oo aa
aa HH
HHoo
oomm
mmee
ee SS
SSttttee
eerr
rree
eeoo
oo SS
SSyy
yyss
ssttttee
eemm
mm
Since the dynamic range produced by the ASR-X Pro is greater than that of a CD, record or cassette, set
your levels carefully:
1. Set the stereo to your normal listening level.
2. Play the ASR-X Pro pads with a good amount of force.
3. While playing, slowly bring up the setting of the ASR-X Pro volume knob to an acceptable level that
doesnÕt cause your stereo to distort.
WW
WWhh
hhee
eenn
nn UU
UUss
ssiiii nn
nngg
gg HH
HHee
eeaa
aadd
ddpp
pphh
hhoo
oonn
nnee
eess
ss
1. Play the ASR-X Pro pads with a good amount of force.
2. Slowly bring up the setting of the ASR-X Pro volume knob to a comfortable listening level.
InOutThru MIDI

Tutorial
4 ENSONIQ ASR-X Pro UserÕs Guide
PP
PPllll aa
aayy
yyiiii nn
nngg
gg tttthh
hhee
ee AA
AASS
SSRR
RR--
--XX
XX PP
PPrr
rroo
oo DD
DDee
eemm
mmoo
ooss
ss
The ASR-X Pro contains demos to give you an idea of what it sounds like. To play the main demo:
1. Locate the Essentials buttons on the ASR-X Pro front panel.
2. Hold down the Essentials button with Ò5Ó printed beneath it.
3. While still holding the button down, press the Essentials button with Ò9Ó printed beneath it.
4. Release both buttons.
The display shows:
Start demo playback?
MAINDEMO: Internal
5. Press the Enter/Yes button to hear the demo.
6. To stop the demo, press the Track Sound button in the center of the ASR-X Pro front panel.
NN
NNoo
oottttee
ee:::: You can actually press any button to stop the demoÑthe Track Sound button was specified
for the purposes of this tutorial.
7. To listen to any of the other built-in demos, turn the Parameter knob to select a demo category, the
Value knob to pick an individual demo from the selected category, and press the Yes button.
SS
SSee
eellll ee
eecc
ccttttiiii nn
nngg
gg TT
TTrr
rraa
aacc
cckk
kkss
ss
The ASR-X Pro is organized into a framework of 16 tracks that play an important role in the ASR-X Pro:
¥ When youÕre playing sounds or sampling/resampling in the ASR-X Pro, you can think of each track
as being a container for the sound with which youÕre working.
¥ When youÕre recordingÑor sequencingÑeach track contains a recorded performance, as well as the
sound that plays it.
¥ The ASR-X Pro is a multi-timbral MIDI receiverÑthe 16 tracks correspond to MIDI channels 1-16.
Each track receives MIDI data on its like-numbered channel. You can play a trackÕs sound or record
on a track via MIDI at any time.
¥ Each track transmits MIDI data on its like-numbered channel when it uses a MIDI-OUT sound.
Whenever you do anything in the ASR-X Pro, youÕre always on one or another of these tracks, which is
referred to as Òthe currently selected track.Ó The ASR-X Pro display tells you which track is currently
selectedÑthat is, which track youÕre on.
01234
56789
Demo
Essentials
56789
Demo
56789
Demo

Tutorial
ENSONIQ ASR-X Pro UserÕs Guide 5
Since youÕve just powered up and played the demo, youÕre on Track 1:
This shows youÕre on Track 1
m
¦01 ROM10:000
DEMO-SND: Gizmo Kit
i
The sound on Track 1
TT
TTiiii pp
pp:::: The currently selected track is shown on the display during many ASR-X Pro activities.
TT
TToo
oo SS
SSee
eellll ee
eecc
cctttt OO
OOnn
nnee
ee oo
ooffff tttthh
hhee
ee 11
1166
66 TT
TTrr
rraa
aacc
cckk
kkss
ss
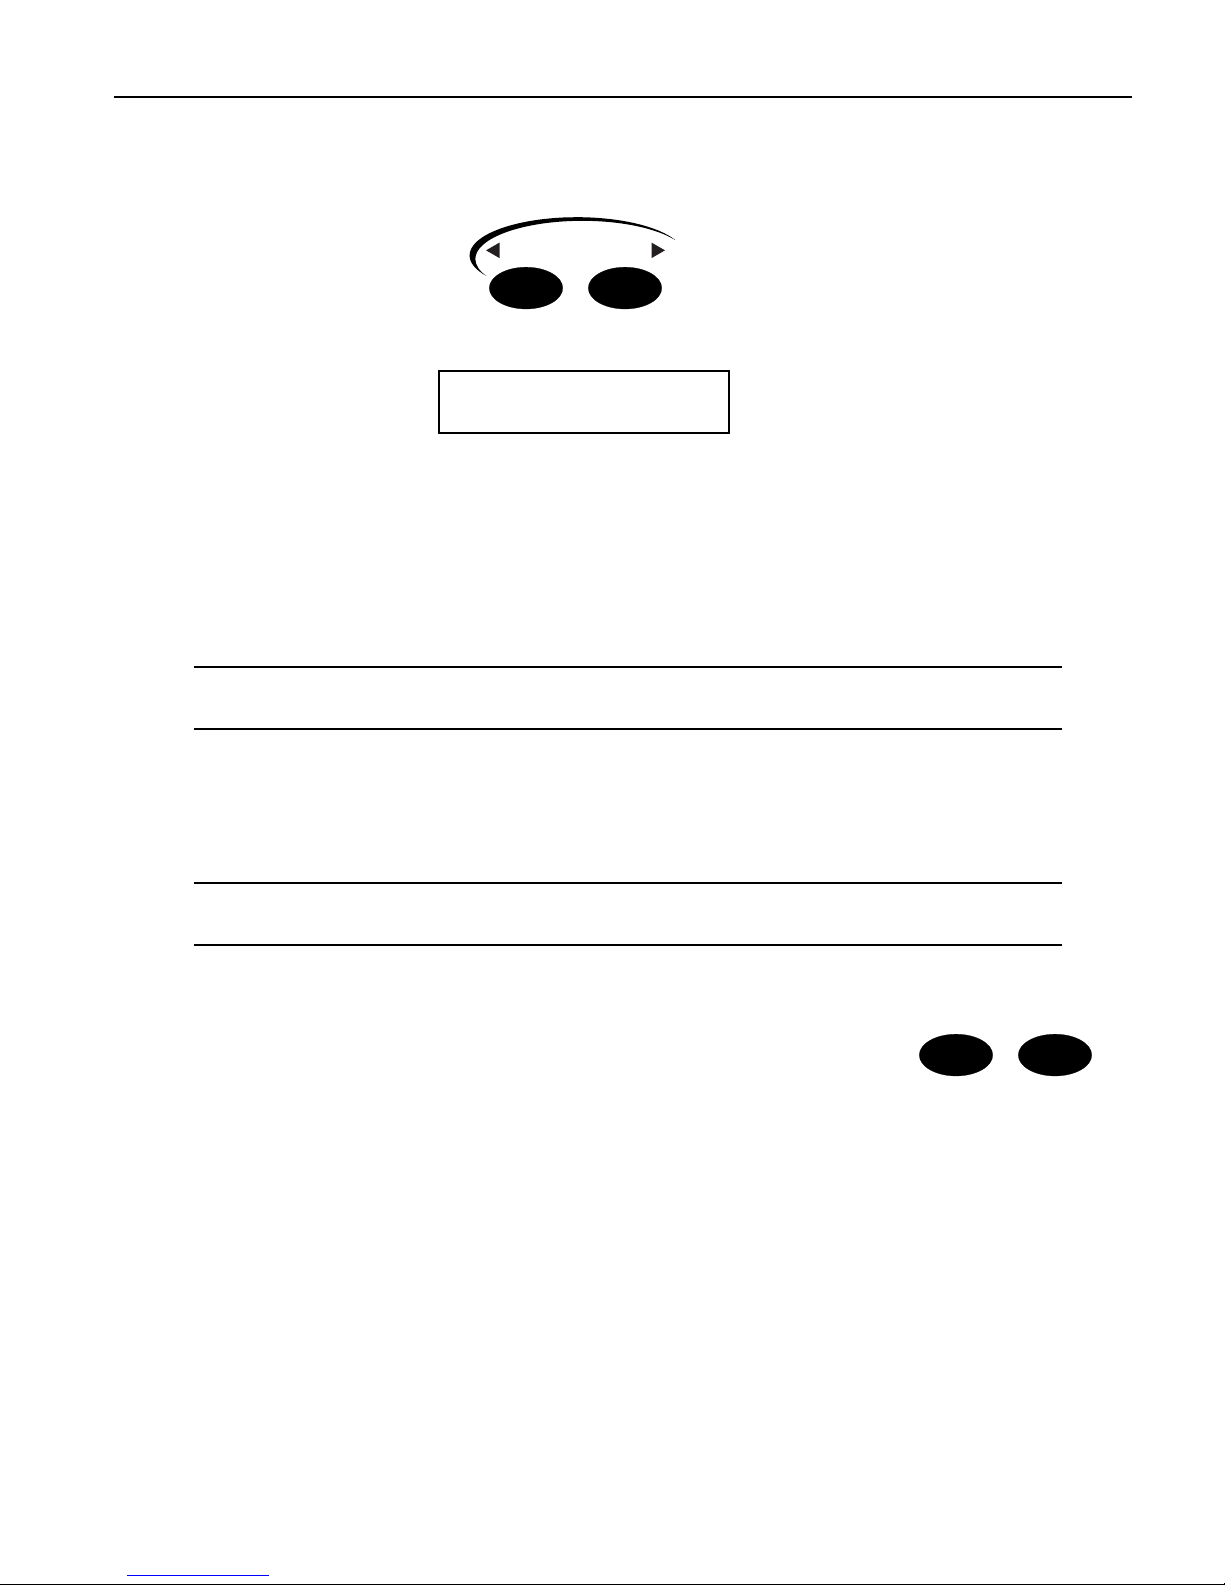
1. Locate the Select Track buttons.
2. Press the right-hand Select Track button once. The display shows that youÕve just selected the next
track, Track 2.
This shows youÕre now on Track 2
m
¦02 ROM09:011
BASS-SYN:Snot-T-Bass
i
The sound on Track 2
Higher-numbered tracks are selected by pressing the right-hand Select Track button, while lower
numbered tracks are selected by pressing the left Select Track button.
3. Press the left Select Track button to go back to Track 1.
SS
SSee
eellll ee
eecc
ccttttiiii nn
nngg
gg TT
TTrr
rraa
aacc
cckk
kk SS
SSoo
oouu
uunn
nndd
ddss
ss
Each track can play any of the sounds in the ASR-X Pro. Finding just the right sound is simple, thanks to
the ASR-X ProÕs SoundFinderª feature. With SoundFinder, you select the type of sound you want, and
then choose a specific sound of that type.
TT
TTiiii pp
pp:::: For a list of SoundFinder categories, see Chapter 9 of the ASR-X Pro Reference Manual. For a
list of all of the ASR-X ProÕs built-in sounds, see ÒList of ROM SoundsÓ later in the UserÕs Guide.
TT
TToo
oo SS
SSee
eellll ee
eecc
cctttt aa
aa SS
SSoo
oouu
uunn
nndd
dd ffffoo
oorr
rr aa
aa TT
TTrr
rraa
aacc
cckk
kk
1. Check the displayÕs upper left-hand corner to make sure that youÕve got the desired track
selectedÑfor this tutorial, youÕll use Track 1.
2. Press the Track Sound button.
(Later in this section you'll learn why "DEMO-SND" just changed to "DRUM-KIT" on the display.)
MIDI Channel
Select Track
116
Sound Edit Mute
Mix/FX Bus
Track
Solo

Tutorial
6 ENSONIQ ASR-X Pro UserÕs Guide
3. Turn the Sound Type knob to view the SoundFinder categories that are currently available.
SoundFinder categories are shown in the lower-left corner of the display. (When there are no sounds
in memory of a particular type, its SoundFinder category isnÕt shown. )
¦01 ROM08:000
PERCSOLO: Thump Kick
i
The currently selected SoundFinder type
4. Select the DRUM-KIT SoundFinder type.
5. Turn the Sound Name knob to view the various drum kits in the DRUM-KIT SoundFinder category.
¦01 ROM10:005
DRUM-KIT:OlÕSkoolKit
i
As you turn the Sound Name knob, the sounds in the selected SoundFinder category are displayed
You can also select sounds using the Essentials buttons. Each button can be pressed to instantly
place a favorite sound onto the current track. To learn more about the Essentials buttons, see
Chapter 2 of the ASR-X Pro Reference Manual
6. Press some of the Essentials buttons to see how they work, and to check out the sounds that
ENSONIQ assigned to the buttons at the factory. You can also press any upper Essentials button and
the button just beneath itÑan additional five sounds can be accessed in this manner.
7. Press the Essentials button with the Ò2Ó beneath it to select the sound HeavyDrmKit. The display
provides information about the sound youÕve selected:
The track youÕre on The soundÕs bank number The soundÕs program number
lmn
¦01 ROM10:002
DRUM-KIT:HeavyDrmKit
ii
The selected SoundFinder type The selected sound
Sounds are stored in groups called banks. Each bank can contain up to 127 sounds, each of which is
numbered. This system allows you to select sounds via MIDI, since each bankÕs number is also its MIDI
Bank Select number, and each soundÕs program number is also its MIDI Program Change number. By
sending the correct MIDI Bank select and Program Change values on a trackÕs MIDI channel, you can
select its sound from an external MIDI device.
TT
TTiiii pp
pp:::: Each sound can be found in the bank in which it's stored and in an instrument category. You
can press the Track Sound button to toggle between these. In Step 1, "DEMO-SND" changed to
"DRUM-KIT" on the display when we pressed Track Sound for the second time in this tutorial.
PP
PPllll aa
aayy
yyiiii nn
nngg
gg ww
wwiiii tttthh
hh tttthh
hhee
ee PP
PPaa
aadd
ddss
ss
Now that youÕve selected HeavyDrmKit for Track 1, why not play it? The pads on the ASR-X Pro are a
keyboard of sorts that plays the sound youÕve chosenÑitÕs a percussion-oriented keyboard perfect for a
groovestation like the ASR-X Pro. Bang out a few notes to hear some of the bass drum and snare sounds
in HeavyDrmKit. Since itÕs a kit sound, each pad can play a different standard sound.
ASR-X Pro sounds cover the entire pitch range typical of any modern MIDI instrument. The 13 ASR-X
Pro pads play a section of a sound at a timeÑan octave-plus-one-noteÕs worthÑin this case, the bass
drum and snare range of HeavyDrmKit. To the left of the pads are the Octave Buttons. These are used for
re-aiming the pads at different octaves within the currently selected sound.
Tutorial
ENSONIQ ASR-X Pro UserÕs Guide 7
TT
TToo
oo CC
CChh
hhaa
aann
nngg
ggee
ee tttthh
hhee
ee OO
OOcc
ccttttaa
aavv
vvee
ee PP
PPllll aa
aayy
yyee
eedd
dd bb
bbyy
yy tttthh
hhee
ee PP
PPaa
aadd
ddss
ss
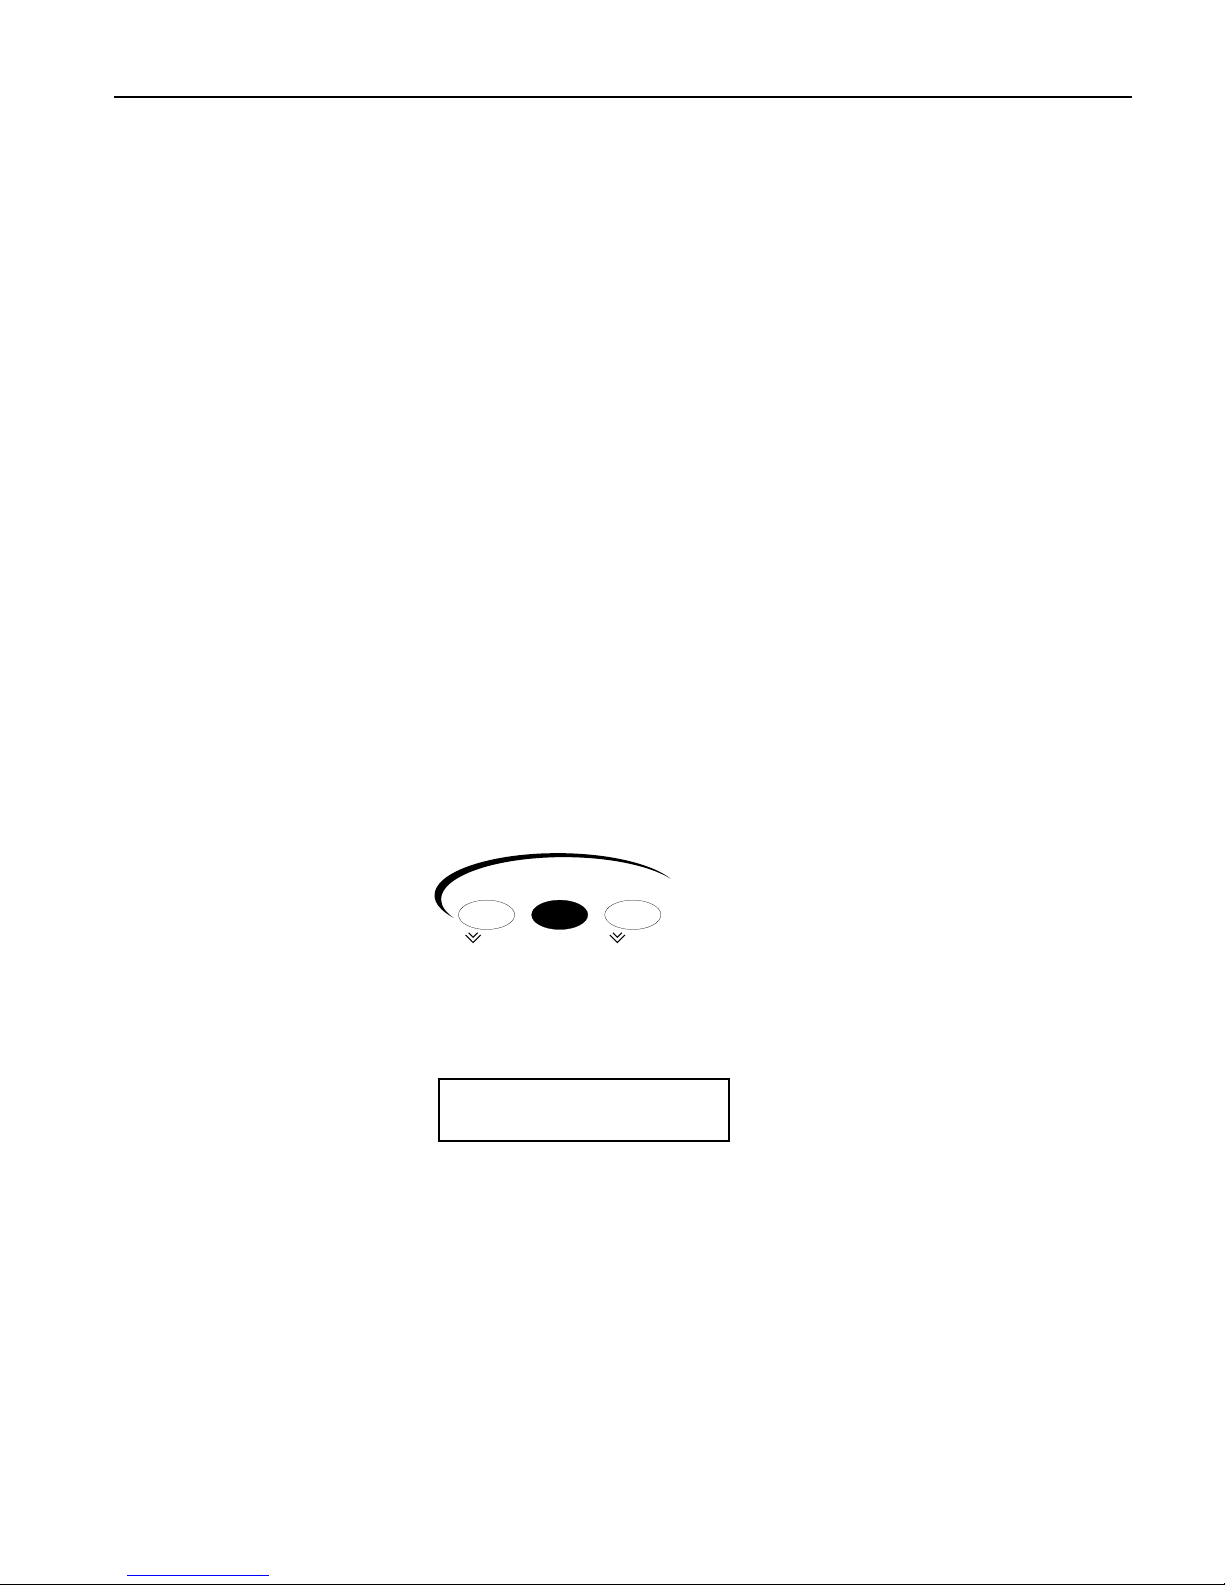
1. Locate the Octave Transpose buttons.
2. Press the right-hand Octave Transpose button once. The display briefly shows:
¦01 ROM10:002
Pad Xpose=0oct C2-C3
ii
The number of the octave being played by the pads The note range being played
The Octave Transpose display shows the octave the pads are currently playing. The pads can play
five different octaves, each of which has been assigned a number as shown below (Middle C is C4):
¥ Octave 0 plays C2-C3 ¥ Octave 2 plays C4-C5 ¥ Octave 4 plays C6-C7
¥ Octave 1 plays C3-C4 ¥ Octave 3 plays C5-C6
3. Tap the right-hand Octave Transpose button twice to set the pads to play Octave 1. The first tap
takes you to the Octave Transpose display, and the second tap raises the octave setting by one.
TT
TTiiii pp
pp:::: You can also select an octave by pressing either of the Octave Transpose buttons and turning
the Value knob.
4. Play the padsÑnow youÕre playing the sounds contained in the second octave of HeavyDrmKit.
5. Use the Octave buttons to find the other sounds in HeavyDrmKit.
BB
BBee
eeffffoo
oorr
rree
ee PP
PPrr
rroo
oocc
ccee
eeee
eedd
ddiiii nn
nngg
gg.... .... ....
1. Press the left Octave Transpose button to bring the pads down to Octave 0.
NN
NNoo
oottttee
ee:::: If you see ÒKit MapperÓ on the display, press the right-hand Octave Transpose button once.
The Kit Mapper is described in Chapter 3 of the ASR-X Pro Reference Manual.
UU
UUss
ssiiii nn
nngg
gg tttthh
hhee
ee PP
PPaa
aattttcc
cchh
hh SS
SSee
eellll ee
eecc
cctttt BB
BBuu
uuttttttttoo
oonn
nnss
ss
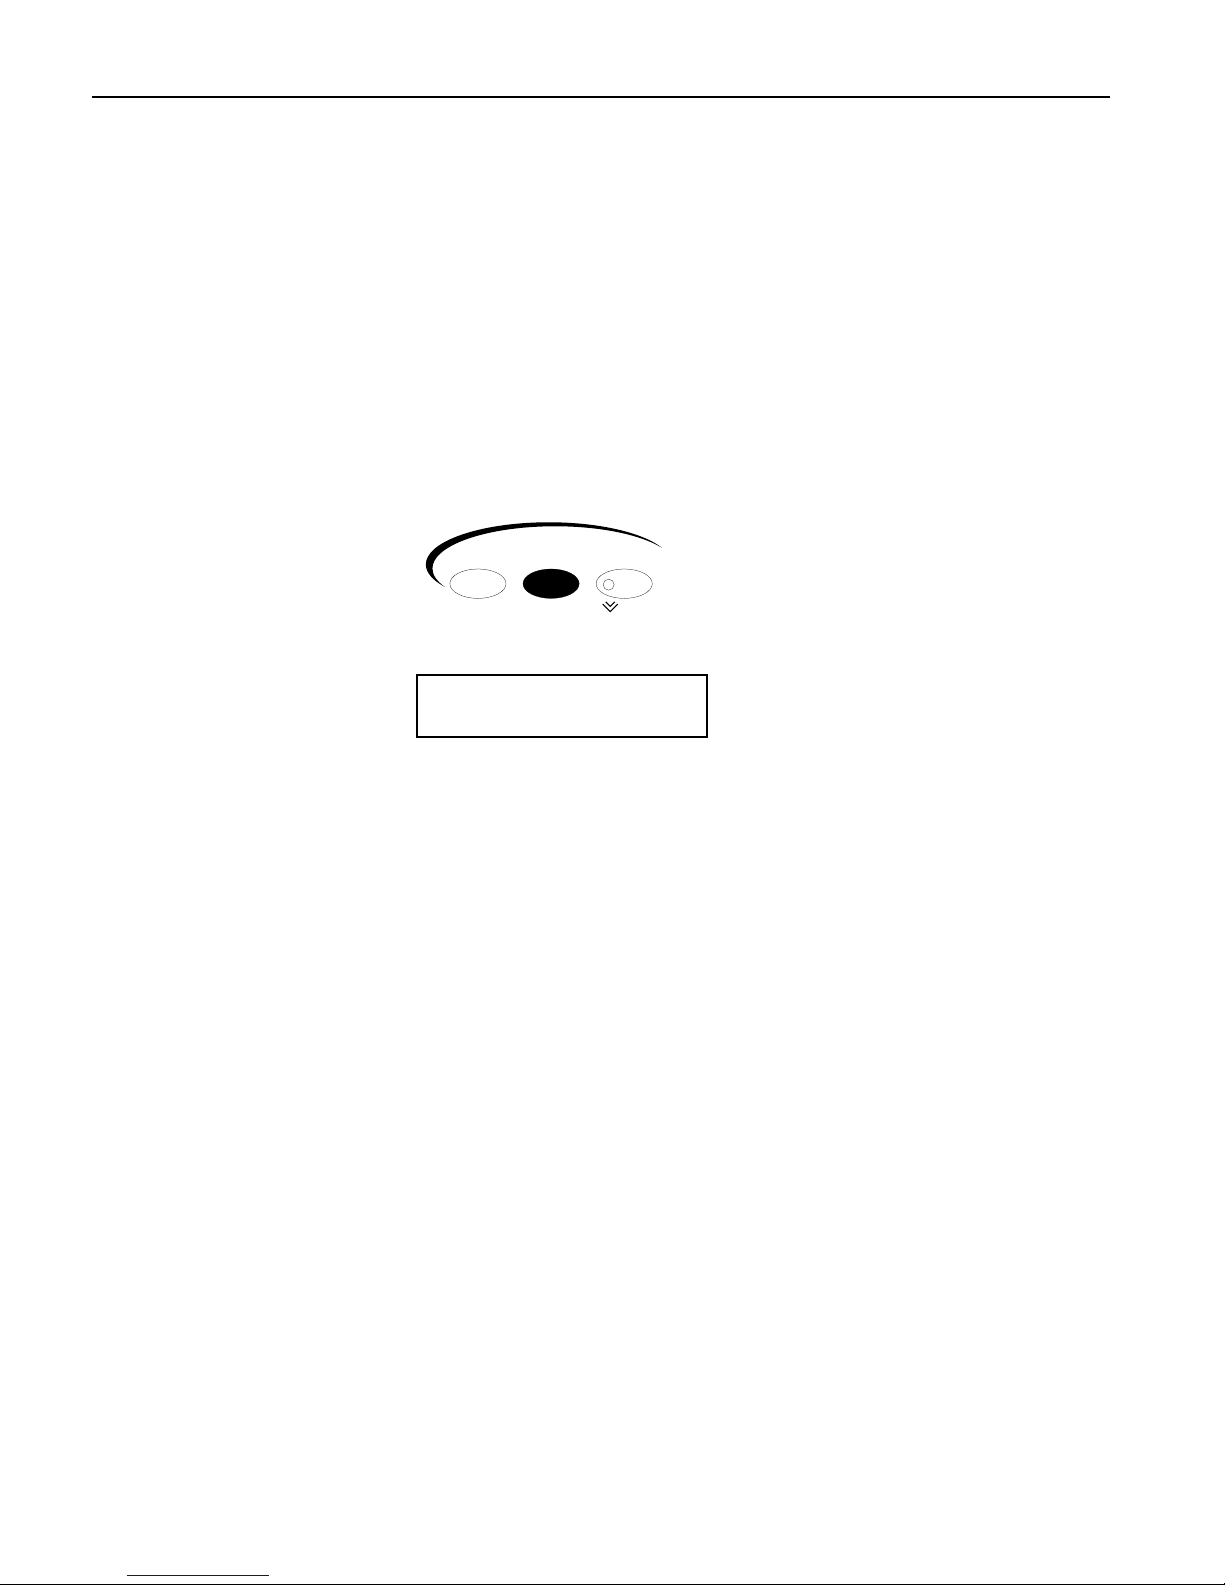
The Patch Select buttons call up variations of the currently selected sound.
Each sound is made up of layers of waves, and the Patch Select buttons are
programmed to turn layers or groups of layers on and off (see Chapter 3 in the
ASR-X Pro Reference Manual for more on layers). Depending on the nature of
the sound, this can lead to subtle or radical changes in the sound.
Patch Select buttons are able to operate in a couple of different ways. The default setting is for them to act
as switches that only work as long as theyÕre physically being held down. There are four possible
positions for the Patch Select buttons:
¥ left Patch Select button pressed ¥ both Patch Select buttons pressed
¥ right Patch Select button pressed ¥ neither Patch select button pressed
The Patch Select buttons can also be set to Òstick,Ó as described in Chapter 7 of the ASR-X Pro Reference
Manual.
As part of the demonstration of the Patch Select buttons, letÕs select a synthesizer bass sound for Track
2ÑweÕll need it later on anyway.
Octave Transpose
Patch Selects™

Tutorial
8 ENSONIQ ASR-X Pro UserÕs Guide
1. Press the right-hand Select Track button once to select Track 2.
2. Using the Sound Name knobs, select the sound BuzzSawBassÑsince the BASS-SYN category was
already selected, you didnÕt have to turn the Sound Type knob to select a SoundFinder category.
3. Play a few notes of BuzzSawBass to get an idea of its sound with no Patch Select buttons pressed.
4. Play the padsÑwith a standard sound such as BuzzSawBass, all the pads play the same basic sound
at different pitches.
BuzzSawBass is one of the sounds built into the ASR-X ProÕs permanent ROM. Since ROM sounds
can contain up to 16 layers of waves, the Patch Select buttons are most useful when used with these
sounds.
5. Hold down either of the Patch Select buttons and play some notes on the padsÑhear how that
sound has changed? You can release the button to return BuzzSawBass to its original sound.
6. Try the other Patch Select positions with BuzzSawBass.
TT
TTiiii pp
pp:::: Patch Select button-presses will be recorded if they occur during the recording of a sequence
track. TheyÕre also transmitted via MIDI so that they can be used for controlling other ENSONIQ
products that use Patch Select buttons, and so that they can be recorded in an external sequencer.
BB
BBee
eeffffoo
oorr
rree
ee PP
PPrr
rroo
oocc
ccee
eeee
eedd
ddiiii nn
nngg
gg.... .... ....
1. Press the left Select Track button to return to Track 1.
SS
SSee
eeqq
qquu
uuee
eenn
nncc
cciiii nn
nngg
gg iiii nn
nn tttthh
hhee
ee AA
AASS
SSRR
RR--
--XX
XX PP
PPrr
rroo
oo
The ASR-X Pro contains a recording device called a sequencer that is both powerful and easy to use. A
sequencer records the music you play on each of its 16 tracks. The music is recorded on each track as
MIDI data, and is therefore highly editable. Each segment of music you record is called a sequence. There
is always a sequence selected in the ASR-X ProÑeven when you havenÕt yet recorded anythingÑand the
track that youÕre on is in that sequence.
TT
TToo
oo RR
RRee
eecc
ccoo
oorr
rrdd
dd aa
aa SS
SSee
eeqq
qquu
uuee
eenn
nncc
ccee
ee TT
TTrr
rraa
aacc
cckk
kk
TT
TTiiii pp
pp:::: Read through Steps 1 through 4 once before actually doing them so that recording doesnÕt
sneak up on you before youÕre ready.
1. Press and hold down the Transport Record button.
2. While still holding the Record button, press the Play button, and
then release both buttons. The Record and Play button LEDs light to
show youÕre recording.
The sequencer begins counting off four beats before recording begins.
The display shows the countoff in negative numbers in the upper-right corner of the displayÑwhen
the numbers get to 0, recording actually starts.
The numbers count up to the first beat of actual recording
m
¦01 -1 .01
DRUM-KIT:HeavyDrmKit
TT
TTiiii pp
pp:::: This countoff can be customized or turned off. See Chapter 6 in the ASR-X Pro Reference
Manual.
YouÕll be recording two measures. On the first and third beats, play the lowest pad, a bass drum
sound. On the second and fourth beats, play the highest pad, a snare drum sound.
F Fwd
Scoop Locate Top
Rew
Record Stop Play
Transport

Tutorial
ENSONIQ ASR-X Pro UserÕs Guide 9
3. At the first beat after the countoff, play the pads as described above. The display will show you
where you are in each measure, in bars and beats.
This shows the bar youÕre in This show which beat youÕre on
mm
¦01 1 .04
DRUM-KIT:HeavyDrmKit
4. At the end of the second measure, press the Stop button.
YouÕve just recorded your first track in your first sequence.
TT
TToo
oo PP
PPllll aa
aayy
yy BB
BBaa
aacc
cckk
kk aa
aa SS
SSee
eeqq
qquu
uuee
eenn
nncc
ccee
ee TT
TTrr
rraa
aacc
cckk
kk
1. Hold down the Record button, press the Stop button, and then release both buttons to rewind to the
top of the sequence.
TT
TTiiii pp
pp:::: The Transport buttons perform many tasksÑsee Chapter 6 in the ASR-X Pro Reference
Manual to learn more.
2. Press the Play button.
The track youÕve just recorded plays backÑthe sequence loops, playing your recording over and
over (this default sequence setting can be changed; see Chapter 6 in the ASR-X Pro Reference
Manual).
3. Press the Stop button to end playback.
UU
UUnn
nndd
ddoo
oo
For situations in which youÕve recorded something youÕd like to get rid of, or when youÕve done
something to a track that you wish you hadnÕt done, the ASR-X Pro provides a handy Undo feature. As
long as you havenÕt yet recorded other tracks or performed other procedures, you can undo whatever
youÕve just done to a track.
TT
TToo
oo UU
UUnn
nndd
ddoo
oo aa
aa TT
TTrr
rraa
aacc
cckk
kk
1. Double-click the Sequence Process button.
The display shows:
The default name of the sequence youÕve been recording The location at which you stopped playback
mn
SEQ00001 1.04
Undo track 1?
The No/Yes LEDs flash to indicate that youÕre being asked a question.
2. If youÕd like to undo your recording and try again, press the Yes button and repeat the steps in ÒTo
Record a Sequence TrackÓ above. Press the No button if you're satisfied with your performance.
F Fwd
Scoop Locate Top
Rew
Record Stop Play
Transport
Select Edit Process
New Tap/Tempo Undo
Sequence

Tutorial
10 ENSONIQ ASR-X Pro UserÕs Guide
CC
CCoo
oorr
rrrr
rree
eecc
ccttttiiii nn
nngg
gg tttthh
hhee
ee TT
TTiiii mm
mmiiii nn
nngg
gg oo
ooffff aa
aa PP
PPee
eerr
rrffffoo
oorr
rrmm
mmaa
aann
nncc
ccee
ee
A sequencer such as the one in the ASR-X Pro can correct timing inconsistencies in a recorded
performanceÑthis process is called quantizing. The ASR-X Pro offers a sophisticated set of quantizing
tools, as well as quantizing templates, in which common types of quantization are already pre-
programmed, and that can hold your own favorite quantization settings.
TT
TToo
oo QQ
QQuu
uuaa
aann
nnttttiiii zz
zzee
ee aa
aa TT
TTrr
rraa
aacc
cckk
kk
1. WeÕll be quantizing the just-recorded Track 1, which is therefore already selected. Normally,
however, you'll want to make sure that the track you want to quantize is selected before proceeding.
2. Press the Sequence Process button. The display shows:
SEQ00001 1.01
Undo track 1?
In this case, you donÕt want to undo the track, so donÕt press the Yes button. The Undo function is
only one of the track and sequence operations accessed by pressing the Sequence Process button.
3. Turn the Parameter knob clockwise until the display shows:
SEQ00001 1.01
Quantize track 1?
4. Press the Yes button. The display now shows:
Quantize track 1?
Template=Strict 1/16
This display is presenting you one of the pre-programmed quantizing templates. However, the track
youÕve recorded contains 1/4 notes, not 1/16th notes.
5. Turn the Value knob counter-clockwise to select the Strict 1/4 template.
6. Press the Yes button.
7. Play back your trackÑthe timing of the quarter notes in your track is now perfect.
8. Press the Stop button to end playback.
TT
TTiiii pp
pp:::: To learn more about quantizing, see Chapter 6 of the ASR-X Pro Reference Manual.
AA
AAdd
dddd
ddiiii nn
nngg
gg ttttoo
oo aa
aann
nn AA
AAllll rr
rree
eeaa
aadd
ddyy
yy--
--RR
RRee
eecc
ccoo
oorr
rrdd
ddee
eedd
dd TT
TTrr
rraa
aacc
cckk
kk
The ASR-X Pro sequencer provides a variety of recording modes, described fully in Chapter 6 of the ASR-
X Pro Reference Manual. These modes change the way in which the sequencer records what you play. In:
¥ Replace mode, what you record replaces anything already on the track.
¥ Add mode, what you record is added to whatÕs already on the track. In this way, you can build up
complex recordings, an element at a time.
¥ Step mode, you can enter notes or chords one at a time with the sequencer at rest.
¥ Track Mix allows you to record volume, panning and other track setting changes on a track.
¥ Final Mix lets you to record whole-sequence volume changesÑsuch as fade-outsÑ and tempo
changes.
Since youÕre in Add mode (itÕs the default setting), you can now add hihat 1/8th notes to your track.
1. Pressing the right-hand Octave Transpose button twice to aim the pads at HeavyDrmKitÕs second
octave. Play the pads to locate a hihat sound you like.
2. Press the Record and Stop buttons to return to the beginning of the sequence.
3. Hold down the Record button, press Play and release both buttons when the countoff begins.
Tutorial
ENSONIQ ASR-X Pro UserÕs Guide 11
4. Record 1/8th notes on the hihat to accompany the two measures of bass drum and snare.
5. Press the Stop button at the end of the second barÑin Add mode, recording continues until you
press the Stop button.
6. Play back your track to hear the bass drum, snare and hihat playing together.
7. If youÕd like to redo the hihat, double-click the Sequence Process button, undo the track, and then
record it again.
8. Correct the hihatÕs timing by repeating the steps in "Correcting the Timing of a Performance." YouÕll
want to select the Strict 1/8th template this time, since you donÕt want your hihat 1/8th notes turned
into 1/4 notes.
BB
BBee
eeffffoo
oorr
rree
ee PP
PPrr
rroo
oocc
ccee
eeee
eedd
ddiiii nn
nngg
gg.... .... ....
1. Press the left Octave Transpose button twice to re-direct the pads back to the lowest octave.
RR
RRee
eecc
ccoo
oorr
rrdd
ddiiii nn
nngg
gg AA
AAnn
nnoo
ootttthh
hhee
eerr
rr TT
TTrr
rraa
aacc
cckk
kk
LetÕs record synth bass quarter notes on Track 2 to accompany the drums on Track 1. This time, however,
donÕt record any notes during the first measureÑwait until Bar 2 to begin playing. You can use any of the
pads to play your quarter notes.
1. Press the right-hand Select Track button to select Track 2.
2. Hold down Record, press Stop and let go of both buttons to make sure youÕre at the beginning of the
sequence.
3. Record your bass part using the same technique you used on Track 1.
4. Once youÕre satisfied with your performance, quantize the track using the Strict 1/4 quantization
template.
5. Play back your bass-and-drums sequence, and press the Stop button when youÕre done listening.
BB
BBee
eeffffoo
oorr
rree
ee PP
PPrr
rroo
oocc
ccee
eeee
eedd
ddiiii nn
nngg
gg.... .... ....
1. Locate and press the Sequence Edit button.
This button accesses various settings relating to the behavior of the sequence.
2. Turn the Parameter knob until the display shows:
The name of the sequence The current location in the sequence
mm
SEQ00001 1.01
Loop Playback= On
3. Turn the Value knob counter-clockwise to turn the playback looping off.
AA
AA FF
FFee
eeww
ww FF
FFiiii nn
nnaa
aallll SS
SSee
eeqq
qquu
uuee
eenn
nncc
cciiii nn
nngg
gg TT
TThh
hhoo
oouu
uugg
gghh
hhttttss
ss
The Sequence Select, Edit and Process buttons provide access to a wealth of tools used in sequencing,
from the creation and selection of sequences, to all of the settings that establish your recording
environment, to the various ways that recorded tracks and sequences can be manipulated and processed
after recording. You can also chain sequences together to try out arrangements, and create songs as well.
Sequencing is described in detail in Chapter 6 of the ASR-X Pro Reference Manual.
The Track buttonsÑSound, Edit and MuteÑprovide the means of setting up tracks and changing the
way they play their sounds, changes you can make even as sequences play back. You can also mute and
solo tracks using a highly musical Mute/Solo system. Chapter 2 in the ASR-X Pro Reference Manual is
the place to go for information relating to tracks.
Select Edit Process
New Tap/Tempo Undo
Sequence
Tutorial
12 ENSONIQ ASR-X Pro UserÕs Guide
EE
EEffffffffee
eecc
ccttttss
ss
The ASR-X Pro contains a powerful ENSONIQ ESP2 effect chip, capable of providing a variety of
exceptional effects. Each sequence contains its own:
¥ insert effectÑAn insert effect is one of a collection of 40 high-quality effects. Insert effects handle a
wide range of processing jobs.
¥ global reverbÑThe global reverb in each sequence is intended as the all-purpose reverb youÕll use
for the sequenceÕs tracks. Each sequence can use any one of the eight global reverbs available.
SS
SSee
eenn
nndd
ddiiii nn
nngg
gg aa
aa TT
TTrr
rraa
aacc
cckk
kk ttttoo
oo aa
aann
nn EE
EEffffffffee
eecc
cctttt
Tracks and their sounds are heard through one of their sequenceÕs effects when theyÕve been assigned to
an effect bus, which routes the track to the effect you want. Each track has a parameter for this purpose.
LetÕs change the effect through which weÕre hearing our bass.
1. Locate the Track Edit button.
2. Press the Track Edit button until the display shows:
¦02 BuzzSawBass
FX Bus= LightReverb
i
The currently selected effect bus
The FX Bus parameter assigns the selected track to an effect bus, and therefore, an effect. The values
available for this parameter vary slightly, depending on what kind of sound is on the selected track,
and whether or not youÕve added an X-8 output expander to your ASR-X Pro. You can select:
¥ ProgÑto retain each noteÕs individual effect bus in a kit sound. When a standard sound is on
the selected track, this setting causes the sound to use its Alt Bus setting, described in Chapter 4
of the ASR-X Pro Reference Manual.
¥ InsertÑto route the selected track and its sound to the sequenceÕs insert effect.
¥ LightReverbÑto apply a small amount of reverb to the trackÕs sound.
¥ MediumReverbÑto apply an average amount of reverb to the trackÕs sound.
¥ WetReverbÑto apply a large amount of reverb to the trackÕs sound.
¥ DryÑto leave the trackÕs sound un-effected.
¥ AuxOut1-4Ñto send the trackÕs sound out of one of the auxiliary output jacks provided by an
X-8 output expander. These values are only available when an output expander is installed.
3. Turn the Value knob to set the FX Bus parameter to each of the available settings, playing a few
notes on the pads with each setting to hear how the bass sound changes.
4. Set the FX Bus parameter to ÒInsert.Ó
Sound Edit Mute
Mix/FX Bus
Track
Solo
Table of contents
Other ENSONIQ Recording Equipment manuals


Popular Recording Equipment manuals by other brands


 Setup guide")


Agilent Technologies
Agilent Technologies 82357B user guide

esera automation
esera automation ESERA-Station 200 manual

Harman
Harman dbx go Rack quick start guide

SEW-Eurodrive
SEW-Eurodrive MOVIPRO Ethernet/IP manual

Zoom
Zoom MRS-802 Supplemental manual

Blackrock Microsystems
Blackrock Microsystems NeuroPlex E Instructions for use