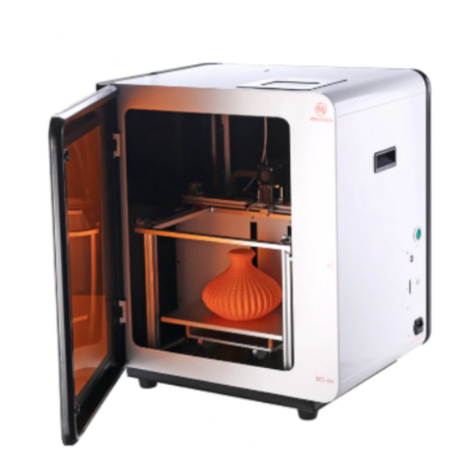
Mingda MD-16 User manual

DESKTOP 3D PRINTER
User Guide
MINGDA TECHNOLOGY CO.,LTD
MD-16

Legal Statement
Shenzhen MINGDA Technology Co., Ltd,
all rights reserved. It won't be informed if
the information in this article was
changed in the future. MINGDA doesn't
made any type of guarantee about this
information, including but not limited to
marketability and special-purpose
applicability of implied warranties.
MIINGDA Company won't be responsible
for the incidental or indirect damages
which was caused by the error of this text,
or due to providing, presentation or using
of this information.
MIGNDA is a registered trademark of
Shenzhen MINGDA Technology Co., Ltd.
The WindowsXP, WindowsVista and
Windows7, Windows8 is the registrar of
their respective owners.

Contents
◎Legal Statement
◎Contents
1 Brief Introduction ··········································································1
User-guide instructions········································································· 1
Learn more information········································································ 1
Safety precautions················································································· 1
2 Overview·······················································································2
Front view and left view of 3d printer ··················································3
Tool box accessories··············································································4
3 Installation ····················································································5
Install Machinery··················································································· 5
Install the Filament holder ···································································· 5
Dismantle the Model ············································································ 5
Paste the Masking Tape········································································· 6
Install the filament ················································································6
4 Manual Calibration ········································································7
Preparation for Calibrating···································································· 7
Adjusting the overall height of the printing platform ···························7
Fine tune the print platform ·································································8
Printing the Test Files ············································································ 8
5 Printing Operation ·········································································9
Display panel ························································································· 9
Display Panel HOME Overview······························································9
6 Software······················································································ 12
Download Printing Software ·······························································12
Install the Printing Software ( for example, Cura ) ······························ 12
Create STL file······················································································14
Cura over view ····················································································14

Open STL file with Cura ·······································································19
Model rotation, scaling, mirroring with Cura······································19
Transfer stl Model into gcode Document with Cura ···························21
Printing parts·······················································································22
Puuse of continue to pirint ·································································22
Power outages·····················································································23
7 General Maintenance··································································· 23
Daily preventive maintenance ····························································23
500 hours maintenance ······································································23
1000 hours maintenance ····································································24
8 Trouble Removal·········································································· 24
Trouble removal ··················································································24
9 Support ······················································································· 25
Customer support ···············································································25
Working computer specifications························································25
MINGDA limited warranty statement ·················································25
10 Quality Assurance·············································································26

- 1 -
MINGDA TECHNOLOGY CO.,LTD
www.md-3d.com
1 Brief Introduction
MD Series Industrial 3D Printers adhere to the design concept of the
simple to the extreme. It can print product quickly and easily, even if
you've never used a 3D Printer.
The printer prints the model with PLA or ABS, so the products will
be strong and durable. You can make drilling, tapping, grinding and
painting on the PLA or ABS models. MD Series 3D Printers combine
proprietary hardware, software and filaments technologies creatively.
Welcome to a new world of 3D printing!
User-Guide Instructions
This User Guide has been carefully organized into "Installation",
"Operation", "Maintenance" and "Troubleshooting" sections for client to
read and understand. Be sure to read the sections carefully to get the
best use of your 3D printer.
Learn More Information
SD card provides the electronic user guide. This guide provides
information as following topics:
1. troubleshooting information
2. important safety statements and regulatory information
3. Printing supplies related information
4. Detailed instructions for use
You can also find more information on the official website.
http://www.md-3d.com http://www.3dMINGDA.com
Safety Precautions
The following precautions ensure that the customer uses the printer
correctly and protects the printer from damage. Please always follow
these precautions.
1. Use the specified power supply voltage. Do not connect multiple
devices to the printer's power outlet to avoid overload.
2. Make sure the printer is properly grounded, Or it may cause
electric shock, fire or electromagnetic interference.
3. Contact your after-sales or local service before disassembling or
repairing the printer by yourself. Check the "Support" section in the User
Guide.
4. It is recommended to use the power cord that came with the
- 2 -
MINGDA TECHNOLOGY CO.,LTD
www.md-3d.com
printer. Do not damage, cut or repair the power cord. Damaged power
cords present a risk of fire or electric shock. Please replace the damaged
power cord with a quality-certified power cord. Do not allow metal or
liquid to come into the printer and contact with the internal parts of the
printer. It may cause fire, electric shock or other serious accident.
5. Turn off the printer and unplug the power cord from the electrical
outlet under the following conditions:
1) The printer emits smoke or emits an abnormal smell.
2) The printer emits abnormal noise that has never occurred
during normal operation.
3) Metal or liquid (not required for cleaning or routine
maintenance) come into the printer.
4) Thunderstorm weather.
5) Power off
This guide contains the following categories.
Note: potentially dangerous situation, if not avoided, may result in
minor or moderate injury.
Warning: potentially dangerous situation, if not avoided, may result
in serious injury.
High temperature surface: The high temperature surface symbol
indicates the presence of high temperature equipment. When
working near hot parts, be careful and wear safety gloves.
Gloves: When performing some maintenance procedures, the
machine may be hot, so need to use gloves to avoid burns.
Safety glasses: Please wear safety glasses to avoid eye injury.
Lifting hazard: Two or more people should cooperate when lifting,
so as not to cause serious injury.
Recovery: Use the correct method for recovering filaments and
packaging filaments.
ESD: Use standard electrostatic discharge (ESD) precautions when
working with or near electronic components.
2 Overview
The printing process of the MD series 3D printer is as follows: the
slicing software CURA convert the .stl document into a .gcode document,

- 3 -
MINGDA TECHNOLOGY CO.,LTD
www.md-3d.com
and 3D printer read the .gcode document and print the raw filament into
a 3D product.
Cura is a slicing software that runs on Windows XP, Windows Vista,
Windows 7, Windows 8, or Windows 10.
The product size and print size of MD series 3D printer are as
follows. Each filament holder can hold 1kg of printed filament, 1 kg
filament can continue to print for about 120 hours, you can also add a
second roll of filament for continuous printing.
Front View and Left View of 3D Printer
Model
Product Dimensions
(W×D×H)mm
The size can be made
(W×D×H)mm
MD-16
300
×
350
×
380
160
×
160
×
160
1. Filament holder
2. Print platform
3. Touching screen
4. SD card slot
5. USB port
5
4
2
3
1

- 4 -
MINGDA TECHNOLOGY CO.,LTD
www.md-3d.com
Filament holder and printer back view
Tool box accessories
1
2
1. Power Socket
2. ON-OFF switch

- 5 -
MINGDA TECHNOLOGY CO.,LTD
www.md-3d.com
3 Installation
Install Machinery
Take Out the Machine,can not pull the optical axis inside the
machine, otherwise it will cause deformation of the optical axis.
Dismantle the Model
1. Click “Application”on display panel, Enter the “Manual” control,
Choose “Z”(which means Heating bed move up and Down ), click on the
to let hot bed fell to a suitable height
2. Click BACK to return,then click on the hot bed pattern to BED
PREHEAT interface, input 80 and turn “on”, hot bed
temperature is automatically heated to 80°C.
Install the Filament holder
Note: Use the M3 screw, which
attached in the accessory box
Plugged in Turn on the power switch

- 6 -
MINGDA TECHNOLOGY CO.,LTD
www.md-3d.com
3. About 2 minutes heating,Gently take out the model with the
scraper knife.
Paste the Masking Tape
Remove the broken tapes and paste new ones, pay attention not to
overlap and too large clearance.(If the tape is not broken, it can be
reused)
Install the Filament ( for example, PLA filaments )
1. Click Control Panel from “Unload”to “ head preheat”, adjust the
extrusion nozzle temperature to 200°C. Turn "ON" ( left), extrusion
nozzle temperature is automatically heated to 200°C.
2. Insert the filament

- 7 -
MINGDA TECHNOLOGY CO.,LTD
www.md-3d.com
3. When the temperature rises to
200°C, press the filament at the
entrance of shrapnel, insert the
filament, the filament squeezing
down, if the filament is melted and
flow out from nozzle, and the
filament is inserted successfully.
4 ManualCalibration(Thisstepcanbeskipped)
Note: before calibration, you need to dismantle the model and put
a new tape.
Preparation for Calibrating
1. Click "Application" on the
display panel, Enter the Manual
control.
2. Click on the Z axis reset icon, the
hot bed will rose to the maximum
height.
3. Click on the red" "icon,the
motors will be unlocked..
Adjusting the overall height of the Printing Platform
Observe the distance/Gap between the printing nozzle and printing
platform.
If it is greater than 0.5 mm, you can rotate height regulation nut up
or down, and reset Z Axis Home until the gap about 0.1 mm (about one
A4 paper thickness). Before shipment, factory has adjusted height of
platform, you can get into the fine tuning steps directly.

- 8 -
MINGDA TECHNOLOGY CO.,LTD
www.md-3d.com
Fine Tune the Printing Platform
1. let the hot bed rose to
maximum height and Cancel the
motor lock, then the printing head
can be lightly pushed to everywhere
by hand. It can be moved by
Manual Control.
2. Observe the distance/Gap between the printing nozzle and printing
platform, it should be about 0.1 mm (about one A4 paper thickness). You
can check the gap by inserting a sheet of A4 into it, then move the
extruder head to the plate 4 corners in order, under this way.
Printing the Test Files
Click on the SD card icon, chose a gcode file which you want to print.
Click on print icon, the machine will automatically start to print.

- 9 -
MINGDA TECHNOLOGY CO.,LTD
www.md-3d.com
(When printing bottom layer, Observe the print nozzle. If the
filament can not pasted on the hotbed, you need to Adjusting nut
counter clockwise. If the tape was broken, you need to Adjust the nut
clockwise.
5 Printing Operation
Display Panel
The main user interface of the printer is a display panel.
Display Panel HOME Overview
1. ”Install filament”
1.1 Preset Head temperature:use to set up the nozzle temperature,
as for the different filaments need to set up the different temperature.
For example, ABS is set to 225°C, PLA is set to 185°C.
1. Install filament
2. Application
3. System
4. Printing
5. Temperature Display
6. SD card condition
MD Series Desktop 3D Printers display
panel is full touch screen resistive screen,
click the menu in the content items.
④
③
②
①
⑤
⑥
1. Temperature monitoring curve
2. Manually enter the temperature
3. Turn on or off the heating
4. Filament retraction ( Be careful)
5. Extruder Head “T0”
6. Extrusion
7. Return Back
Only if the nozzle is heated to
preset temperature can you extrude
the filament. Using retraction may
cause nozzle clogged.
②
⑦
③
⑥
⑤
④
①

- 10 -
MINGDA TECHNOLOGY CO.,LTD
www.md-3d.com
1.2 Value input
Such as input Printer Head
and Heating Bed Temperature
degree value, pls write and
confirm”OK”.
2. Application : Pre-heating
build plate ,Manual, Auto manual,
update, Fan and Return.
2.1 Auto calibrating: Without installation
2.2 Update. Update the display. Before updating, pls ensure have
insert SD card in case failure.
2.3 "Cooling fan"PWM speed adjust:When click this button, it will
appear value input interface, PWM (1-255). ‘255”is the fan fastest
speed
2.4. Pre-heating build plate. The operation is the same as the head
preheat, ABS is set to 80-110°C, PLA is set to 50°C).
2.5 "Manual":Click into “Manual”adjustment interface.
1) XYZ means X/Y/Z axis. “X/Y”which control Extruder Head move
Left and right, Front and Back. “Z”means build plate Up and Down.

- 11 -
MINGDA TECHNOLOGY CO.,LTD
www.md-3d.com
2) is move “X/Y/Z”move distance and speed.
3) is Direction:move toward Original Point,move
away from Original point. (The Original Point located at the Left Front corner)
* Pls select X、Y or Z Axis first,Then click or to move
4) Ruturn to the Original point. When Choose X、Y or Zaxis, “”
will move “X/Y/Z”back to Original Point accordingly. If not, It will
control ”X/Y/Z”axis all to the Original Point.
5) Unlock. Which control Motor Pause Working/ the movement Stop.
3. SD card file list
3.1 Choose and enter into SD cad file list. select file to print.
3.2 Printing Display
During printing, it shows printing position, Head/ build plate
temperature, File name, printing time and its printing bar. In addition,
you can click “Printing head””Heating bed”to adjust the real
temperature.
1)Cancel Printing and
Return X/Y axis
to the Original Position
2)Pause Printing, Printing
head will move away.
3)Continue Printing.
4)Adjust Printing speed,
100% is normal speed,200% means
Double speed.

- 12 -
MINGDA TECHNOLOGY CO.,LTD
www.md-3d.com
4. System
NOTICE :It contains three
function setting
“About”it contains the Firmware
information.
“Language”Alternative
We do not suggest changing at
will.
6. Software
Download Slicing Software
MD series 3D printers can support Cura, RepetierHost, Simplify 3D
and other slicing software for printing. You can get the latest installation
software in two ways:
1. Install from the included SD card
2. Download directly from MINGDA official website
http://www.md-3d.com/index.php?s=/products/software.html
Install the Printing Software (take Cura as an example) )
1. Double click Cura_XX.XX.exe to install
2. Install the software as follows, all installed by default.

- 13 -
MINGDA TECHNOLOGY CO.,LTD
www.md-3d.com
Here we need to wait
a few minutes to
install the program.

- 14 -
MINGDA TECHNOLOGY CO.,LTD
www.md-3d.com
Create STL File
The stl model can be
searched online for download or
modeled with 3D software
modeling.
Take the CAD software
Solidworks, the computer system
for Windows as an example, the
example to create an STL file
1. Launch Solidworks from
your computer.
2. Open the 3D map.
3. Click "File" - "Save As" and
select the "STL(*.stl)" format.
Cura Over view
Take the version Cura_15.02.1 and Windows 7 as an example to
illustrate the Cura software settings.
1. Add new machine
1) Start Cura
2) Click on "machine" - "add new machine."
3) Take “MD-16” as an example, set as follows. The "model name" can be
arbitrarily set, for example, set to "MD-16", the width is set to 160 mm,
the depth is set to 160 mm, and the height is set to 160 mm. The nozzle

- 15 -
MINGDA TECHNOLOGY CO.,LTD
www.md-3d.com
size is set to 0.4mm, select the hot bed, do not select the platform
center.

- 16 -
MINGDA TECHNOLOGY CO.,LTD
www.md-3d.com
2. Basic Set up
1) Layer height: The height of each layer is the important parameter
that determines the quality of side and printing time. The setting range is
0.05-0.3, the high quality setting is 0.1, and the medium quality setting is
0.2.
2) Shell Thickness: The thickness of the outer wall of the side of the
model is set to an integral multiple of the diameter of the nozzle. If the
nozzle is 0.4mm, the recommended wall thickness is 1.2.
3) Enable Retraction: MINGDA recommended to select.
4) Bottom /Top Thickness: The wall thickness above and below the
model is generally an integral multiple of the layer thickness. It is
recommended to be the same as the wall thickness and set to 1.2.
5) Fill Density: The filling density inside the model can be set to
10%~100% according to the actual situation. The larger the value, the
denser the interior.
6) Print Speed: The moving speed of the print head during printing.
It is recommended to set the low speed of the complicated parts and the
high speed printing of the simple parts. Generally set around 30-50,
recommended PLA setting 50, ABS setting 30. (Global speed defaults to
print speed).
7) Printing Temperature: the temperature used by the nozzle to
melt the consumables, the consumables of different manufacturers. The
melting temperature is different. It is recommended to set the PLA to
190 degrees and the ABS setting to 230.Excessive or too low
temperatures can cause plugging.
8) Bed Temperature: print platform temperature, recommended
PLA setting 50 °C, ABS setting 80-110 °C.
9) Support Type: support mode when printing a model with a
suspended part, “None” means no support, “Toutching buildplate”
means creating support that can reach the workbench part, “Everywhere”
means that all parts are suspended Create support. It is recommended to
select "Everywhere".
10) Platform Adhesion Type: None defaults to print one layer at a
minimum, Brim refers to a skirt, and Raft refers to a bottom plate. It is
recommended to select Raft, the PLA first layer Airgap is set to 0.15, and
the ABS first layer Airgap is set to 0.1 or lower.
Table of contents
Other Mingda 3D Printer manuals

Mingda
Mingda MD Series User manual

Mingda
Mingda MD-D01 User manual

Mingda
Mingda Magician X User manual

Mingda
Mingda MD-600D User manual

Mingda
Mingda Magician Pro User manual

Mingda
Mingda Goldfish X User manual

Mingda
Mingda MD-600 Pro User manual

Mingda
Mingda Magician X Assembly instructions

Mingda
Mingda Magician Pro User manual

Mingda
Mingda MD-A128 User manual