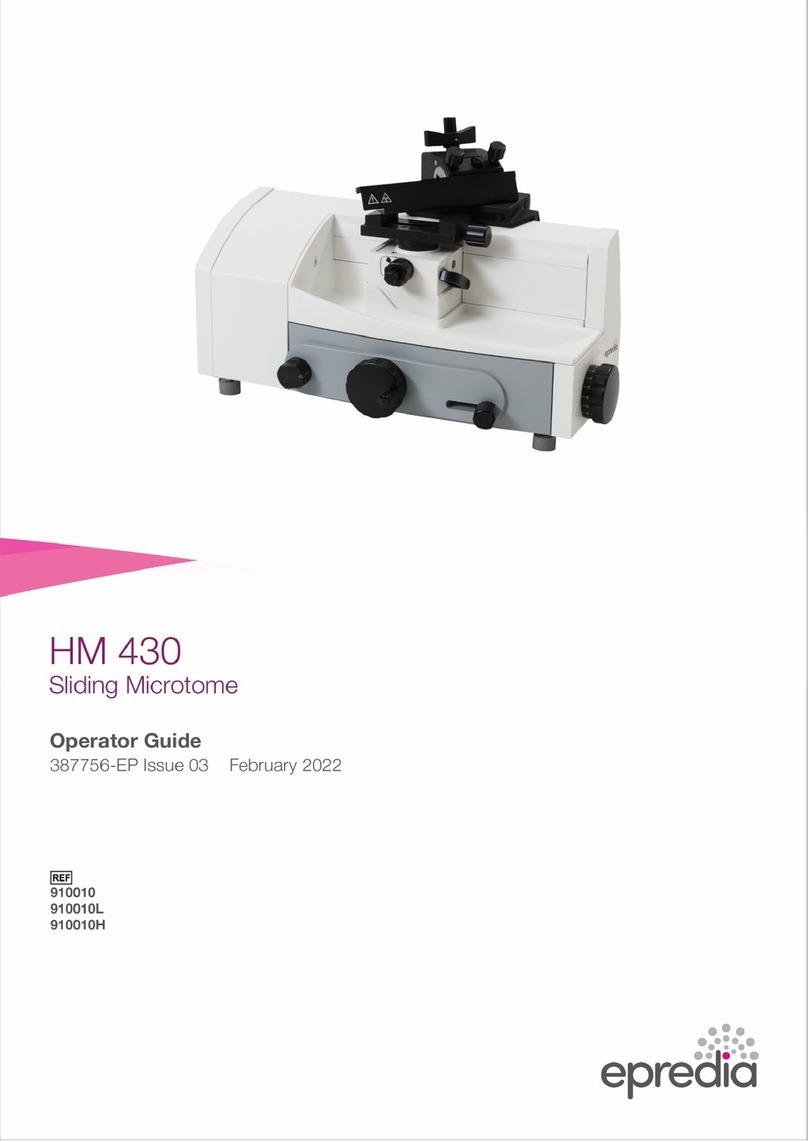
epredia HM 450 Manual


Company Information
© Copyright 2022. Epredia. All rights reserved.
Epredia makes every attempt to ensure that the information
contained in this supporting document is correct and clearly stated
but does not accept responsibility for any errors or omissions. The
development of Epredia products and services is an ongoing
process. Please ensure that any published information you use as
a reference is up to date and relates to the condition of the product.
If necessary, check with your local Epredia representative.
This document may not, in whole or in part, be copied,
photocopied, reproduced, translated, or converted to any electronic
or other form without prior written consent of Epredia. All
information contained in this manual is proprietary and confidential,
and the exclusive property of Epredia and is protected by copyright.
These instruments conform to the general safety and
performance of:
•In Vitro Diagnostics Regulation (IVDR) EU 2017/746
Symbols
The following symbols and conventions may be used
throughout this document and on the instrument:
This symbol is used on the equipment, or in a
document, to indicate that instructions must be
followed for safe and correct operation.
This symbol is also used
on the instrument, or in a
document, to indicate that irritants or potentially
harmful chemicals are present. Refer to the
Material Safety Data Sheets for the products, and
always use Good Laboratory Practice.
If this symbol appears on the instrument always
refer to the operator guide.
Contact address
Shandon Diagnostics Limited, a subsidiary of Epredia
Tudor Road, Manor Park, Runcorn
Cheshire, WA7 1TA, UK
Tel: +44 (0) 1928 534000
Fax: +44 (0) 1928 534001
Web: www. epredia.com
This symbol is utilised on the instrument, or in a
document, to indicate that there are potential
biological risks associated with the instrument and
/ or with instrument use. Always use Good
Laboratory Practice.
USA Distributor
Due to moving parts, in connection also with the
microtome knife, a danger area arises, which
might lead to hand injuries in case of non-
compliance with the safety features of the
microtome and when disregarding the instruction
manual
Richard-Allan Scientific LLC, a subsidiary of Epredia
4481 Campus Drive
Kalamazoo, MI 49008, USA
Tel: 1-800-522-7270
Fax: +1 269-372-2674
Web: www. epredia.com
Cutting hazard, sharp edges, watch your fingers
Separate taking back of electrical and electronic
instruments in the countries of the European
Union:
This is to be applied in the countries of the
European Union and other European countries
with a separate collecting system within the waste
management. This product, being an electro
and/or electronic instrument, must be treated
separately within the waste management process
(WEEE).
Manufacturer
This symbol is used on the instrument, or in the
document, to indicate that instructions for use
must be consulted
A warning is given in the documentation if there is a
potential risk of injury, equipment failure or poor tissue
sample processing outcome.
Note
Notes give additional information about a job or instruction,
but do not form part of the instruction.

HM 450 Operator Guide Issue 02
4
Contents
Company Information 3
Symbols......................................................... 3
Contact address............................................. 3
USA Distributor .............................................. 3
Contents 4
EMC Statement.............................................. 5
IVD Intended Purpose..................................... 5
Safety Information 6
Introduction.................................................... 6
General Safety................................................ 6
Chemical Safety ............................................. 7
Environment................................................... 7
Warranty Statement........................................ 7
Care in Using Microtome Knife ........................ 8
Introduction to the HM 450 9
Description of Sliding Microtome HM 450........ 9
Theory of Operation........................................ 9
Working with the Microtome 10
Preparation and Orientation .......................... 10
Coarse Feed and Trimming Function ............. 10
Sectioning Instructions.................................. 10
Technical Data HM 450 ................................ 11
Operating Instructions 13
Setting Up the HM 450................................. 13
Initial Turn-On............................................... 13
Cutting Movement and Retraction................. 14
Locking the Sledge....................................... 14
Setting Section Thickness and Trimming
Thickness .................................................... 15
Specimen Feed............................................ 16
Operating Panel ........................................... 18
Specimen Clamping ..................................... 22
Knife Carrier ................................................. 23
Standard Equipment 26
Additional Equipment (Optional)..................... 26
Troubleshooting 28
Preparation of the Specimen......................... 28
Temperature of the Specimen ....................... 28
Tightening the Clamping Screws ................... 28
Selection of the Knife .................................... 28
Adjustment of the Knife................................. 28
Cutting Speed .............................................. 28
Trimming...................................................... 28
Appendices 29
Appendix A – Maintenance............................ 29
Appendix B - Cleaning and Care ................... 29
Appendix C - Transportation of the Instrument30
Revision Control For This
Document 33

HM 450 Operator Guide Issue 02
5
EMC Statement
This IVD equipment complies with the emissions and
immunity requirements of IEC 61326-2-6.
This equipment has been designed and tested to
CISPR 11 Class A.
It is intended for use in a laboratory environment by
a trained and qualified professional. In a domestic
environment it may cause radio interference, in
which case it may be necessary to take measures to
mitigate the interference.
IVD Intended Purpose
The Epredia sliding microtome HM 450 is an in vitro
diagnostic device, designed to take precision
sections of tissue specimens including the
sectioning of paraffin embedded samples in medical,
pharmaceutical laboratories as necessary
preparation for their examination. Only qualified and
trained laboratory personnel may operate the HM
450
The instrument may only be operated within the
scope of its intended use as described above and as
per the instructions given in this manual.
Any other use of this instrument is considered as an
improper action.

HM 450 Operator Guide Issue 02
6
Safety Information
Introduction
Epredia instruments are designed for convenient
and reliable service; however, improper use or
handling by a user may damage the instrument or
cause a hazard to health. The instrument must not
be used in a manner not specified by Epredia.
Correct maintenance procedures are essential for
consistent performance. It is recommended that
users secure a maintenance contract with our
service department.
To remain compliant with regulatory requirements,
and to ensure that mandatory safety upgrades are
performed at the earliest opportunity, it is strongly
recommended that all service activities are
performed by Epredia-factory trained Engineers.
Warranty may be voided if service is performed by
non-factory trained Engineers.
Maintenance or repairs that are not performed by
Epredia trained Engineers with proven training may
affect the safety, performance and compliance of
the equipment.
Please consult your local sales or support teams for
more information about service contracts.
The following sections contain
important information for the safe
setup and use of the instrument, and
should be read and understood by
the user before using the instrument
General Safety
This instrument, as supplied,
conforms to IEC61010-1 and
IEC61010-2-
101; however, the
addition of chemicals introduces
potential hazards. Good Laboratory
Practice must be employed and
consideration must be given to the
potential for hazard when dealing
with these chemicals.
Do not use the instrument in close
proximity to strong electromagnetic
radiation, as these may interfere with
the proper operation. The
electromagnetic environment should
be evaluated prior to operation of the
device.
Good Laboratory Practice must be
used when handling tissue samples
to prevent cross contamination and
infection. The user should complete
a risk assessment to determine any
potential hazards related to tissue
handling.
•
Do not introduce any source of
ignition into, or near, the
instrument once it has been
loaded with reagents.
•
Do not remove any panels or
access covers, unless specifically
instructed to do so. The
instrument does not have any user
serviceable parts. Potentially lethal
voltages are present inside the
instrument.
•The instrument must be properly
connected to a good earth
(ground) via the Mains input
supply and positioned such that it
is possible to interrupt the Mains
supply at the source by removing
the plug from the socket.
•
Use only factory approved
accessories or replacement parts
within the instrument
•Only use reagents recommended
in the operator guide

HM 450 Operator Guide Issue 02
7
Chemical Safety
The introduction of chemicals creates potential
hazards. Epredia has adopted the following position
with regard to the subject of volatile chemicals used
in laboratories:
Customers using non-specified
chemicals in the instrument, do so at
their own risk.
All chemicals recommended by Epredia
have auto-
ignition temperatures
considerably above any surface
temperatures that can be reached during
a single fault failure on the instrument.
The instrument contains no source of
ignition in any areas of the instrument
where chemicals are stored, or likely to
leak into, in a single fault condition.
The operator is fully aware of the
contents of the specification documents
detailing the properties of the chemicals
they are using.
The operator has carried out any legally
required assessment of chemicals used
and is using Good Laboratory Practice.
Environment
This instrument is required to comply with the
European Union’s Waste electrical and Electronic
Equipment (WEEE) Directive 2012/19/EU. It is
marked with the following symbol:
Epredia has contracts with one or more recycling /
disposal companies in each EU Member State and
this product and packaging should be disposed of
or recycled through them. For further information,
contact your Epredia service representative.
Warranty Statement
Epredia is proud of their quality, reliability and of our
after-sales service. We continuously strive to
improve our service to our customers.
Please ask your distributor or Epredia representative
about service contracts which can help maintain
your instrument in an optimal operating condition.
Warranty provisions necessarily vary to comply with
differences in national and regional legislation.
Specific details can be found in the delivery
documentation or from your dealer or
representative.
Please note that your warranty may be invalidated
if:
•This instrument is modified in any way, or not
used as intended by Epredia.
•Accessories and reagents which have not been
approved by Epredia are used.
•The instrument is not operated or maintained in
accordance with instructions.
•The installation of the instrument was not
conducted by a certified Epredia representative.
Any serious incident that has occurred
in relation to the device shall be
reported to the manufacturer and the
competent authority of the Member
State in which the user/or the patient
is established.

HM 450 Operator Guide Issue 02
8
Care in Using Microtome Knife
To protect from the danger of being injured by the knife or blade, use the knife guard when
adjusting specimen and knife. If possible, the specimen should be clamped in before the knife is
inserted into the knife holder. The knife carrier is designed so that knives up to 16 cm long can be
easily clamped in place and adjusted. Before changing the knife holder, always remove blade or
knife. Unused knives should always be kept in a knife case. Never place the knife with the cutting
edge upwards. Never try to catch a dropping knife. Never check the sharpness of the cutting
edge with your fingers. The cutting edge is extremely sharp.
Fig 1: Epredia Sliding Microtome HM 450
1. Blade Holder
2. Display Screen
3. Specimen Head
4. Control Head
5. Specimen Advance Control
6. Removable Waste Tray

HM 450 Operator Guide Issue 02
9
Introduction to the HM 450
Description of Sliding Microtome
HM 450
The Epredia sliding microtome HM 450 can be
operated in either automatic or manual mode. The
HM 450 incorporates stepper motor technology to
enable precise, accurate specimen advancement
towards the blade. The use of cross roller bearings
results in a smooth, stable and non-tiring action for
the operator.
The HM 450 will cut sections from 0 µm to 100 µm.
The specimen clamping can be moved up and
downwards via the two arrow-shaped coarse feed
buttons on the left side of the instrument. This way,
specimen and knife edge distance can be adjusted
quickly. The knife carrier is designed so the knives
can be easily clamped in place and adjusted, and
the coaxial specimen orientation allows orientation
with one hand.
The HM 450 has a user-friendly display panel that
allows for program settings and sectioning
parameters, including, section counter, step sum,
remaining travel and specimen position memory
function.
Theory of Operation
Cutting Movement
The Epredia sliding microtome HM 450 has a linear
roller bearing (cross roller bearing) for the bearing of
the knife sledge and the block.
The cutting movement of the HM 450 is generated
by horizontally moving the sledge in the cross-roller
bearings. Here the knife, which is clamped into the
knife carrier, is horizontally drawn over the specimen
towards the user and away from them. This way,
sections are produced.
After having moved the knife sledge backwards into
the rear end position, a pre-selected section
thickness is carried out either manually by pressing
a button or automatically due to the alteration of the
direction of the knife sledge. The specimen is
delivered towards the knife with the pre-selected
section thickness in vertical direction and a new
section is produced.
Specimen Coarse Feed and Trimming
Function
After changing the specimen or moving the knife or
knife carrier, it is necessary to adjust the specimen
to the knife edge again. This can easily be done by
means of the specimen coarse feed and the defined
trimming values.
After the specimen and the knife are adjusted,
further gradual feed for trimming can be carried out.
Specimen Clamping System and
Specimen Orientation
According to the form and size of the specimens,
different specimen clamping systems are available
to carry the specimen. It is very easy to align the
specimen to the knife, using the orienting adapter.
Knife Carrier
The knife carrier is easy to use and allows the
microtome knives to be clamped and adjusted as
needed. Depending on application, knives or
disposable blades can be used.

HM 450 Operator Guide Issue 02
10
Working with the Microtome
Preparation and Orientation
Before sectioning, the specimens must
be prepared appropriately and
embedded in suitable media.
Cassettes as well as different forms for
round and rectangular specimens can
be used for embedding.
With the orienting adapter, the specimen can easily
be oriented to the knife.
Coarse Feed and Trimming
Function
To adjust approximately the space between
specimen and cutting edge, use the coarse feed or
the trimming function. Continue this to start
trimming the specimen, thus achieving the level of
interest. Any waste should be wiped away in a
forward direction with a brush.
Sectioning Instructions
Due to moving parts in connection with
the microtome knife, a danger area
arises, which might lead to hand
injuries in case of non-compliance with
the safety features of the HM 450 and
when disregarding the instruction
manual
To cut usable sections, the following points are of
utmost importance:
Condition of the Knife Edge
Only use a sharp knife. If the knife edge
is blunt, move the knife horizontally
either to the right or left side to
continue working with the sharp area
of the cutting edge, or have the knife
sharpened.
Clean Knife Surfaces
For optimal sectioning, front and back
of the knife must be clean. Especially,
paraffin waste must be removed
thoroughly.

HM 450 Operator Guide Issue 02
11
Technical Data HM 450
Microtome
Section thickness range 0 - 100 µm
Resolution
0,5 µm for 0...5 µm
1 µm for 5...20 µm
2 µm for 20...30 µm
5 µm for 30...60 µm
10 µm for 60...100 µm
Retract function for compensating thermal extension 2 µm
Trimming section thickness 5...500 µm
Resolution
5 µm for 5…30 µm
10 µm 30…100 µm
20 µm for 100…200 µm
50 µm for 200...500 µm
Specimen retraction during return travel 40 µm
Vertical feed range 40 mm
Horizontal knife stroke 190 mm
Cutting drive manual sliding movement
Coarse feed electronic via stepping motor
Feed automatic via sliding movement or
manual via feed button
Specimen size up to max. 80 x 60 mm
Specimen orientation x - and y - axes universal 8°

HM 450 Operator Guide Issue 02
12
Transportation- & storage conditions
Storage temperature range -20°C up to +50°C (at a max. rel. humidity of 60%)
Operating conditions
+5°C up to +35°C (at a max. rel. humidity of 60%)
altitude up to 2000 m M.S.L.
for indoor use only
Floor loading requirements: 150 kg/m2
Power requirements 100 V...240 V/0,5 A/50...60 Hz/+/-10%
Internal protections
Secondary circuits F1 on the power supply unit T 3,15 A
F2 on the power supply unit T 3,15 A
F1 on CPU board T2,5 AL
Primary circuits 2 x T 1 ,6 AH
Pollution degree 2
Protection Class 1
Overvoltage category II
Sound pressure 39 dB(A)
measured with 1 m distance to the instrument
Dimensions wide: 370 mm, deep: 460 mm, high: 320 mm
Weight 23 kg

HM 450 Operator Guide Issue 02
13
Operating Instructions
Setting Up the HM 450
Inspect the packaging. If it is damaged, or the
contents do not match the supplied packing list, or
both, inform your local Epredia Representative.
Unpack the HM 450 and remove the wrapping. Do
not discard the packing, store it flat for future use.
Use safe lifting practices when moving
the HM 450
To carry the instrument, lift it on the
front and rear side from the lower side.
Do not carry the instrument on the
handle of the knife sledge.
Always place the instrument on an even surface in a
way that the knife guidance is moved towards the
user and away from them.
The coarse feed arrow buttons and the display
should show to the left side, and the knife carrier
handle to the right side.
Choose the installation site so that the mains switch
for separating the instrument from the power supply
is accessible at any time.
Note
Sectioning can be influenced by nearby instruments
which generate vibrations. For this reason, the HM
450 should be placed on a stable and vibration free
table.
Note
The standard equipment provided with the HM 450
includes four rubber feet, which are smaller than the
ones that were installed in our factory. Should the
working height be too high when setting up the HM
450, unscrew the original feet and replace them with
these lower ones.
Initial Turn-On
Note
The operator is responsible for the correct
preparation of equipment and materials/samples for
the optimum performance of this instrument.
Before turnin
g on the instrument for
the first time, please check that the
power requirements indicated on the
type plate label affixed HM 450
corresponds to the power supply
voltage being used.
•Connect the power cord to the power socket Fig
3 (2) on the rear side of the instrument.
•Turn on the power switch Fig. 3 (1).
Fig 3
Whenever the instrument is turned on, the specimen
clamping moves to the lower end position for
initialization, here the
instrument type is shown. Afterwards, Feed and
Trim are shown in the normal display mode.
The insert for the two fuses is placed beside the
power switch. (Refer to the Maintenance section,
Exchange of fuses).
If desired, the user can change the language
himself.

HM 450 Operator Guide Issue 02
14
Cutting Movement and
Retraction
•To start the cutting movement of the microtome,
move the sledge horizontally.
•The knife (or blade) which is clamped into the
knife carrier is drawn horizontally over the
specimen towards the user. This way, sections
are produced.
•In the front reversal point of the sliding
movement, i.e. when the sledge is moved again
backwards, the specimen is retracted for the
protection of knife and specimen.
•If the function <retraction> is active, this is
shown by the message R:ON in the normal
display mode.
•If desired, the function <retraction> can be
turned off.
Locking the Sledge
For the protection against injury by unintended
movements of the knife sledge, the microtome is
equipped with a lock of the sledge in any position.
The sledge should be locked for the
user's personal safety, e.g. when new
specimens are clamped into position,
knives are exchanged, the instrument
is cleaned, or other adjustment
processes are carried out.
•The lock is released via a lever on the rear side
of the sledge and is easily accessible from the
right side behind the handle.
Locking the sledge
•Swivel the locking lever from the upper position
Fig 4 (1) into the lower position Fig 4 (2).
•For this, the red marked lever surface becomes
visible to show the clamped state.
Loosening the sledge
•Swivel the lever from the lower position Fig 4 (2)
into the upper position Fig 4 (1) until the red mark
cannot be seen anymore.
•The knife sledge can be moved again.
Fig 4

HM 450 Operator Guide Issue 02
15
Additional Ballast for Sledge
As required by users to vary the weight of the
sledge, we have included additional ballast Fig 4-3-
1 into the standard equipment.
To assemble the additional ballast, please proceed
as described below:
Additional Ballast
•Remove the two cover caps, located sideways
at the sledge Fig 4-3-2.
•Insert the ballast Fig 4-3-1 into the opening and
close it again by using the two cover caps Fig 4-
3-2.
Fig 4-3-2
•Fix the ballast with the laterally set-screw Fig 4-
3-3.
•To remove the ballast, please execute this
procedure in reverse order.
Fig 4-3-3
Setting Section Thickness and
Trimming Thickness
The required section thickness and trimming
thickness is set via the operating knob on the left
side of the instrument.
To choose between section thickness and trimming
thickness, press the operating knob Fig 5 (1) or the
button on the handle. The respective chosen value
is now shown with a frame on the display.
When the instrument is turned on again, the values
which were chosen when the instrument was turned
off, are shown again.
When turning the operating knob, slight resistances
can be felt.
Feed = selected section thickness
Trim = selected trimming thickness
The graduation of the section thicknesses is divided
into 5 ranges:
Range
Graduation
from 0 µm to 5 µm 0,5 µm
from 5 µm to 20 µm 1 µm
from 20 µm to 30 µm 2 µm
from 30 µm to 60 µm 5 µm
from 60 µm to 100 µm 10 µm
The graduation of the trimming thicknesses is
divided into 3 ranges:
Range
Graduation
from 5 µm to 30 µm 5 µm
from 30 µm to 100 µm 10 µm
from 100 µm to 200 µm 20 µm
from 200 µm to 500 µm 50 µm

HM 450 Operator Guide Issue 02
16
Fig 5
Specimen Feed
Coarse Feed and Speed for Coarse Feed
For the fast up and downward travel between
specimen and knife edge, the HM 450 has a coarse
feed with vertical direction.
•The specimen clamping can be moved 40 mm
vertically up or downwards via the two coarse
feed buttons Fig 6 (1).
•The specimen is moved upwards as long as the
arrow-up-button is being pressed.
•To move the specimen downwards, press the
arrow-down-button.
•If this button is pressed shorter than one second,
the specimen is moved downwards as long as
this button is being pressed.
•If this button is pressed for more than one
second, the specimen is moved downwards
even after releasing the button until lower end
position is reached.
•This mode is shown on the operating panel by
illuminating the red arrow-down.
•The movement is either automatically stopped
when reaching the lower end position or by
pressing again one of the two arrow buttons.
It is not recommended to carry out an
exact coarse feed on knife level while
the retraction indication lights up.
There is a risk of damage to the
specimen during the first cuts.
Three different speeds for the coarse feed are
available: 400, 700 and approx.1100 µm/s. The
three settings are shown on the display by the
following symbols:
* = 400 µm/s,
** = 700 µm/s
*** = approx.1000 µm/s.
Fig 6

HM 450 Operator Guide Issue 02
17
Trimming and First Cuts
After the specimen and the knife are adjusted,
further gradual feed for trimming may be carried out
using the function "trimming". For different
sectioning series, deeper layers of the specimen can
be reached with the function "trimming".
It is not recommended to carry out an
exact coarse feed on knife level while
the retraction indication lights up.
There is the risk of damage to the
specimen during the first cuts.
The function "trimming" can be activated by
pressing the operating knob or by pressing the
button on the handle.
If the HM 450 is in the manual feed mode, the
normal display mode shows “Man”.
The trimming thickness, which is actually on the
display, is delivered in each rear reversal point of the
sliding movement as long as the arrow-up-button is
briefly pressed.
If the instrument is in the automatic feed mode,
“Auto” is shown in the lower line of the display.
The actual thickness, which was selected on the
operating knob, is delivered in each rear reversal
point of the sliding movement.
Fine Feed, Manual
After having adjusted knife and specimen as well as
having trimmed the specimen, sectioning can be
started.
The fine feed can be carried out either manually or
automatically. The desired feed mode can be
selected via the submenu "Automatic/Manual".
When the manual feed mode is activated, “Man” is
shown in the lower line of the display.
The manual fine feed is carried out by briefly
pressing the arrow-up-button.
To generate sections, move the sledge towards the
front.
Fine Feed, Automatic
When the automatic feed mode is activated, “Auto”
is shown in the lower line of the display.
The feed of the pre-selected section thickness is
always automatically carried out in the rear reversal
point of the sliding movement, regardless of the
position at which the sledge is moved forwards
again.
Note
For optimal sections, always move the sledge
together with the knife to the rear side over the entire
specimen and then move it forwards.
Retract Function for Compensating the
Thermal Extension
Normally the ambient air slowly warms up the
paraffin specimen which was cooled down before.
Due to the rising temperature, the paraffin expands
and the achieved sections will be slightly thicker
than the pre-selected value.
Especially after longer breaks between the sections,
a thermal expansion becomes obvious resulting in a
thicker first cut at the same section thickness
setting. This thermal expansion of the specimen can
be compensated by using the retract function.
•Before starting cutting again, briefly press the
arrow-down-button of the coarse feed once.
•The specimen will be moved by 2 µm
downwards away from the knife.
•Now normal sectioning processes can be
started.

HM 450 Operator Guide Issue 02
18
Operating Panel
The ergonomically shaped operating panel has a
large, illuminated graphical display, Fig 7 (1) showing
clearly the respective operating states and settings.
Fig 7
The two arrow-shaped LEDs, Fig 7 (2) blink, when
the specimen is just in its upper or lower end
position.
Another LED, Fig 7 (3) shows that the specimen
clamping is just in its retraction (if retraction is turned
on) while the knife sledge is drawn backwards.
It is not recommended to carry out an
exact coarse feed on knife level while
the retraction indication lights up.
There is the risk of damage to the
specimen during the first cuts.
Keyboard
Below-mentioned the four buttons of the operating
panel and their meaning signification on the
operating panel are described.
Scroll Button
Via this button, Fig 8 different information, Fig 9 can
be called in the second line on the display:
•current time and date
•number of sections since the last reset.
•section thickness sum in µm since the last reset.
•available remaining travel in µm.
•blank line.
Fig 8
Time: 16:48
Date: 28.10.02
Counter = 235
Stepsum = 23510
Rem.Trav = 14490
Fig 9
Fig 10
Reset Button
Via this button, Fig 10 the section counter or the
section sum can be reset to zero.
•Select the desired number via the scroll button
so that it is shown on the display.
•Then press the reset button.
•The number on the display is reset.

HM 450 Operator Guide Issue 02
19
Memory Button
The memory function, Fig 11 is used to rapidly find
again a stored first cut position. Pre-condition for
this is that blocks are cut which have been
embedded in the same mold and always have
approximately the same height.
Fig 11
•To set the first cut position, press the MEMO
button longer until "Memo position saved!" is
shown on the display.
•Finish sectioning, remove the specimen and
clamp in a new one.
•Briefly press the MEMO button to reach the first
cut position again rapidly.
•An arrow symbol on the display shows the
direction of the movement.
•After having reached the stored first cut position,
the coarse feed turns off. And display “Memo
position reached”.
•Fast trimming without time-consuming, gradual
feed on the knife is now possible!
It is not recommended to carry out
an exact coarse feed on knife level
while the retraction indication lights
up. There is the risk of damage to the
specimen during the first cuts.
When changing the knife angle, a
new first cut position
must be
selected as otherwise the danger of
a collision with injuries might arise.
When turning on the instrument later
again, the first cut position must be
defined and stored again for safety
reasons.
Menu Button
Via the menu button, Fig 12 you have access to
further settings which are described below.
•Normally these settings are made when starting
to work and do not have to be altered while
sectioning.
•In the respective submenus, options can be
changed by turning the selection knob to the left
side or to the right side and can be confirmed by
pressing this knob (ENTER).
Fig 12
Automatic/Manual
Here the automatic feed is turned on or off. The
options are shown as in the list below, Fig 13.
Automatic/Manual
Automatic turned on Auto
Automatic turned off Man
Fig 13
Note
If the automatic feed is turned on (Auto), a feed of
the selected section thickness is delivered when the
knife sledge is moved from the return travel into
cutting direction.
•Press the menu button. The submenu is shown
on the display.
•Select "Mode", Fig 14 via the selection knob and
confirm it by pressing the knob.
•If the automatic feed is turned off (Man), briefly
press the arrow-up-button to release a manual
feed of the selected section thickness.
•The selected mode is permanently shown by
Auto or Man in the normal display mode.

HM 450 Operator Guide Issue 02
20
Fig 14
Retraction On/Off
The instrument is equipped with an electronic
retraction which can be turned off.
During the return travel of the knife, the specimen is
drawn back (away from the knife). This way, the
knife does not touch the specimen surface during
its return travel.
When the knife movement is reversed for the return
travel, the retraction is released without having to
pass a certain point. To activate the retraction, just
alter the direction.
The retraction process can be heard during each
direction alteration by a short click of the stepping
motor. It can also be seen via the retraction LED.
•Press the menu button. The submenu (fig. 15) is
shown on the display.
•Select "Retraction on/off" via the selection knob
and confirm it by pressing this knob.
Fig 15
RETRACTION
Retraction turned on R:ON
Retraction turned off R:OFF
Fig 16
Speed for Coarse Feed
In this menu, the speed for the coarse feed can be
selected in three different settings.
•Turn the selection knob to alter the number of
the indicated stars, Fig 17. They correspond to
the different speeds according to the opposite
list, Fig 18.
•Press the selection knob to confirm the indicated
setting.
Fig 17
SPEED FOR COARSE FEED
Coarse feed speed 400 µm/s *
Coarse feed speed 700 µm/s **
Coarse feed speed
approx.1100
µm/s ***
Fig 18
Language Selection
Here the respective language of the display
messages can be selected, Fig 19.
Fig 19
The following languages are available:
•German •Chinese
•English •Japanese
•French •Norwegian
•Spanish •Swedish
•Italian •Finnish
This manual suits for next models
3
Table of contents
Other epredia Medical Equipment manuals