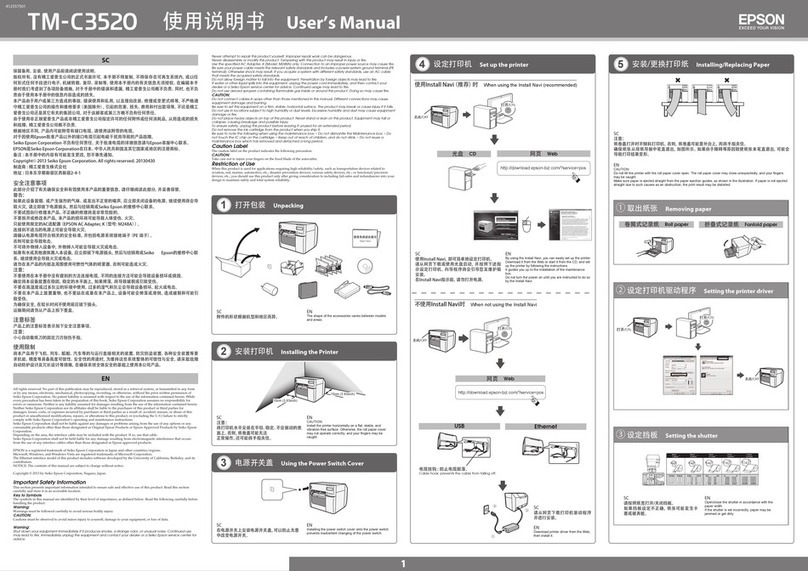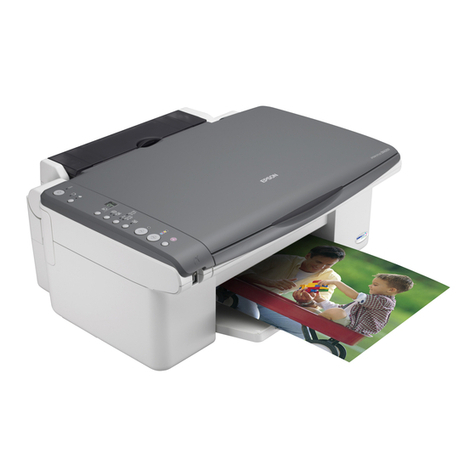
Guide to Control Panel
a b c d e
Network status light (green) Network status light (orange) Power light Ink light Paper light
Turns the product on/o. Establishes a Wi-Fi connection when pressed for 3 seconds. Prints a network status sheet.
Starts monochrome or color copy. To increase the number of monochrome or color copies (by up to 20 copies),
press the same button within one second intervals. Press both buttons simultaneously to scan your original and
save it as PDF on your PC.
Cancels the operation.
Special Operations
+
To perform print head cleaning, press for 3 seconds until the power light is ashing. The
cleaning uses some ink from all tanks, so run the cleaning only if quality declines like when you
see missing segments on your prints.
While pressing , turn on the product to print the nozzle check
pattern shown below.
(a)
(b)
(a): OK.
(b): Needs a head cleaning.
+ +
While pressing , turn on the product to return the network settings to their
defaults.
While pressing or , press within 3 seconds to copy in draft mode.
: on
The paper is jammed in the rear paper feed. Remove the jammed paper from the rear paper feed, load paper correctly, and press or .
No paper is loaded, or multiple sheets were fed at the same time. Load paper in the rear paper feed correctly and press or .
It is nearly time to reset the ink levels. Ink level may be low. You may continue printing. However, prepare new ink bottles soon. Epson
recommends the use of genuine Epson ink bottles. See the table in the“Relling Ink”section for the ink bottle part numbers. To conrm the
actual ink remaining, visually check the ink levels in the product’s ink tanks. Continued use of the product when the ink level is below the
lower line on the tank could damage the product.
It is time to reset the ink levels. Ink level may have reached the lower line. See the “Relling Ink” section to ll all ink tanks with ink to clear
the error.
Fatal error. Turn the product o and then back on. If this does not clear the error, turn the product o and check inside the product for
jammed paper or foreign objects. For instructions on how to remove jammed paper, see the troubleshooting section of the online
User’s Guide.
The product’s ink pads are nearing or at the end of their service life. Contact Epson Support to replace ink pads. When the product’s ink pads
are nearing the end of their service life, you can resume printing by pressing or . The paper light and the ink light ash alternately.
An error occurred while establishing the Wi-Fi connection. Press to clear the error and try again. For more details, see the online
Network Guide.
The rmware update has failed. You will need to re-attempt the rmware update. Ready a USB cable and visit your local Epson website for
further instructions.
Reading the Indication Lights
: ashing
Use only the power cord that
comes with the product. Use
of another cord may cause re
or shock. Do not use the cord
with any other equipment.
Place the product near a wall
outlet where the power cord
can be easily unplugged.
Use only the type of
power source indicated on
the product.
Make sure the power cord
meets all relevant local
safety standards.
Do not let the power cord
become damaged or frayed.
Keep the product away from
direct sunlight or strong light.
Do not open the scanner
unit while copying, printing,
or scanning.
Do not use aerosol products that contain
ammable gases inside or around the product.
Doing so may cause re.
Except as specically explained in your
documentation, do not attempt to service the
product yourself.
Keep ink bottles and the ink
tank unit out of the reach of
children and do not drink
the ink.
Do not tilt or shake an ink
bottle after removing its seal;
this can cause leakage.
Be sure to keep the ink bottles upright and
do not subject them to impacts or temperature
changes.
If ink gets on your skin, wash the area
thoroughly with soap and water. If ink gets into
your eyes, ush them immediately with water. If
discomfort or vision problems continue after a
thorough ushing, see a doctor immediately. If
ink gets into your mouth, spit it out immediately
and see a doctor right away.
Safety Instructions
Getting More Information
Relling Ink
Unhook. Open and remove.
Snap o, remove, and then install. Rell the ink up to the upper line.
Install securely. Close. Hook onto.
Epson Ink
Color Part numbers
Black T6641
Cyan T6642
Magenta T6643
Yellow T6644
If is on, press .
Install.
Install the ink bottle cap tightly;
otherwise ink may leak.
To conrm the actual ink remaining,
visually check the ink levels in the
product’s ink tanks.
Continued use of the product when
the ink level is below the lower
line on the tank could damage the
product.
Repeat steps to for each
ink bottle.
Genuine Epson ink, other than those specied here, could cause
damage that is not covered by Epson’s warranties.
You can see three online manuals. See the User’s Guide (PDF le) for detailed
instructions on using the product.
https://www.epsonconnect.com/
Your product supports the Epson Connect service. This service allows you to print from your smartphone or tablet to your Epson
product.
