XXXXXXX Rev.0 XXXXXXX Rev.0 XXXXXXX Rev.0 XXXXXXX Rev.0
1-F C 1-F M 1-F Y 1-F K
continuecontinue continuecontinue
Consulte estas fuentes para más información:
Look here for answers:
Guía de referencia rápida • Quick Guide
Incluye información sobre cómo utilizar la Stylus CX.
Basic steps for using the Epson Stylus CX.
Manual del usuario en formato electrónico • On-screen User’s Guide
Haga clic en el icono de escritorio para acceder información sobre
el producto.
Click the desktop shortcut for easy access to Epson Stylus CX information.
Ayuda electrónica del software • On-screen help with your software
Haga clic en Ayuda o en ?cuando utilice el software.
Select Help or ?when you’re using your software.
Soporte técnico de Epson • Epson Technical Support
• Internet
http://www.latin.epson.com
• Soporte telefónico • Telephone Services
Argentina (54-11) 5167-0300
Chile (56-2) 230-9500
Costa Rica (506) 210-9555
1-800-377-6627
Colombia (57-1) 523-5000
México
México D.F. (52 55) 1323-2052
Resto del país (01-800) 087-1080
Perú (51-1) 224-2336
Venezuela (58-212) 240-1111
¿Preguntas?
Any Questions?
6Instale el software
Install Software
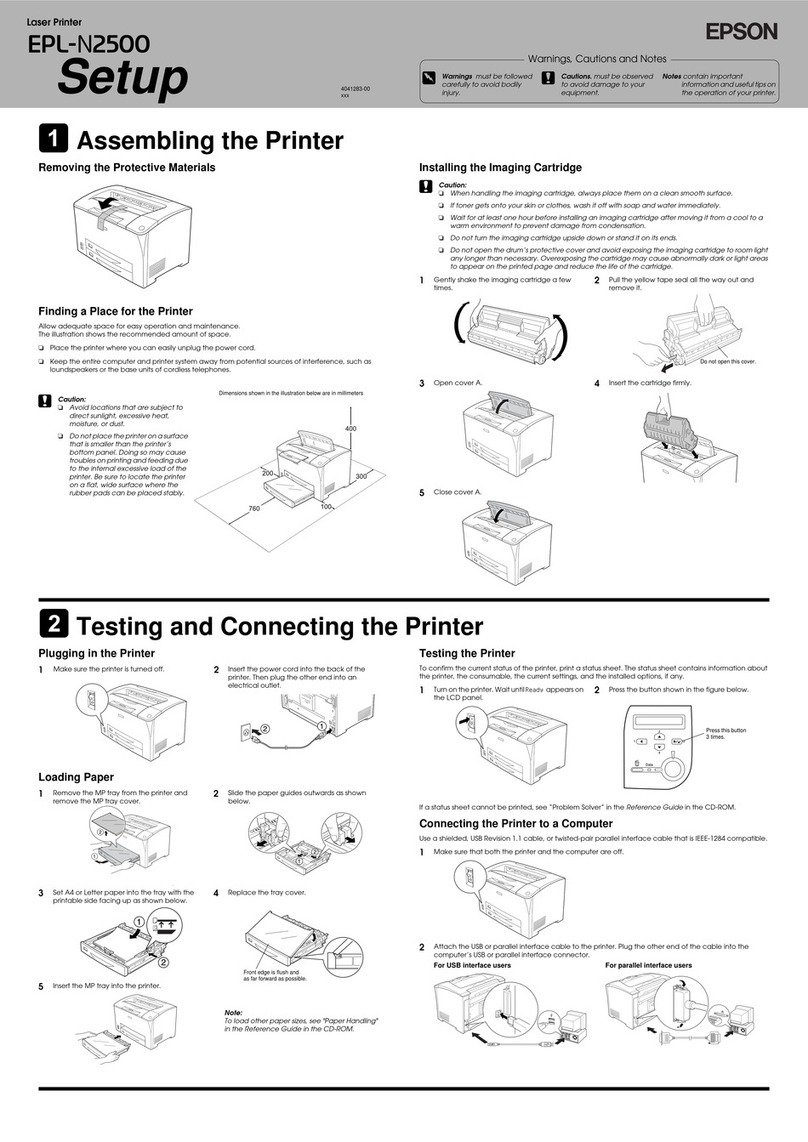
El software funciona con Windows®98SE, Me, 2000 y XP y
Macintosh®OS X 10.2.x y superior.
Your software works with Windows®98SE, Me, 2000, and XP, and
Macintosh®OS X 10.2.x and later.
Windows
1Verifique que la Stylus CX NO ESTÉ
CONECTADA a la computadora.
Make sure the Epson Stylus CX
is NOT CONNECTED to your computer.
Nota: si ve una pantalla como esta,
haga clic en Cancelar y desconecte
el cable USB. No puede instalar el
software de esta manera.
Note: If you see a screen like this,
click Cancel and disconnect the
USB cable. You can’t install your
software that way.
2Coloque el CD de la Stylus CX en la
unidad de CD-ROM.
Insert the Epson Stylus CX CD.
3Seleccione Español.
Select English.
4Haga clic en Instalar y siga las
instrucciones que aparezcan en
pantalla. La instalación del
software se tarda varios
minutos.
Click Install and follow the
on-screen instructions.
Software installation takes
several minutes.
5Haga clic en Acepto.
Click Agree.
6Cuando el sistema se lo indique, conecte el cable USB. Utilice
cualquier puerto USB disponible.
Nota: si la instalación no continúa después de unos momentos,
verifique que la Stylus CX está encendida y conectada.
When prompted, connect the USB cable. Use any open USB
port on your computer.
Note: If installation doesn’t continue after a moment, make sure you
securely connected and turned on the Epson Stylus CX.
7Cuando termine, retire el CD y reinicie su computadora.
When you’re done, remove the CD and restart your computer.
Está listo para hacer fotocopias, imprimir y escanear. Consulte la Guía de
referencia rápida o el Manual del usuario de la impresora.
You’re ready to copy, print, and scan! See the Quick Guide or your on-screen
User’s Guide.
Macintosh
1Coloque el CD de la Stylus CX en la
unidad de CD-ROM.
Insert the Epson Stylus CX CD.
2Haga clic en el icono de CD Epson y
haga clic en el icono .
Open the Epson CD-ROM desktop
icon and double-click the Epson
icon.
3Seleccione Español.
Select English.
4Haga clic en Instalar y siga las
instrucciones que aparezcan en
pantalla. Haga clic en Salir para
continuar con la instalación. La
instalación del software se tarda
varios minutos.
Click Install and follow the
on-screen instructions. Click
Quit to continue the installation.
Software installation takes several
minutes.
5Haga clic en Acepto.
Click Agree.
6Conecte el cable USB. Utilice cualquier puerto USB disponible.
Connect the USB cable. Use any open USB port on your computer.
7Retire el CD y reinicie la Macintosh.
Remove the CD and restart your Macintosh.
8Abra la Utilidad Configuración Impresoras o el Centro de Impresión
ubicada en Aplicaciones > Utilidades.
Access Print Center or the Printer Setup Utility in
Applications > Utilities.
9Siga las instrucciones que aparezcan en pantalla para añadir
la Stylus CX a la utilidad de impresión.
Follow any on-screen instructions to add the Epson Stylus CX
printer.
10 Cuando vea esta pantalla, seleccione
EPSON USB en la parte superior de la
pantalla, luego haga clic en Stylus
CX4100 o Stylus CX4700.
At this screen, select EPSON USB at
the top and Stylus CX below.
11 Haga clic en Añadir.
Click Add.
12 Cierre el Centro de Impresión o la Utilidad Configuración Impresora.
Quit Print Center or the Printer Setup Utility.
Está listo para hacer fotocopias, imprimir y escanear. Consulte la Guía de
referencia rápida o el Manual del usuario de la impresora.
You’re ready to copy, print, and scan! See the Quick Guide or your on-screen
User’s Guide.
¿Problemas?
Any Problems?
Epson y Epson Stylus son marcas registradas de Seiko Epson Corporation. DURABrite es marca
registrada de Epson America, Inc.
Aviso general: los otros nombres de productos utilizados en el presente se utilizan con fines de
identificación solamente y pertenecen a sus respectivos propietarios. Epson niega todo y cualquier
derecho sobre dichas marcas.
Epson and Epson Stylus are registered trademarks of Seiko Epson Corporation. DURABrite is a
registered trademark of Epson America, Inc.
General Notice: Other product names used herein are for identification purposes only and may be
trademarks of their respective owners. Epson disclaims any and all rights in those marks.
© 2005 Epson America, Inc. 5/05
Impreso en XXXXXX
Printed in XXXXXX
XX.XX-XX XXX CPD-20155
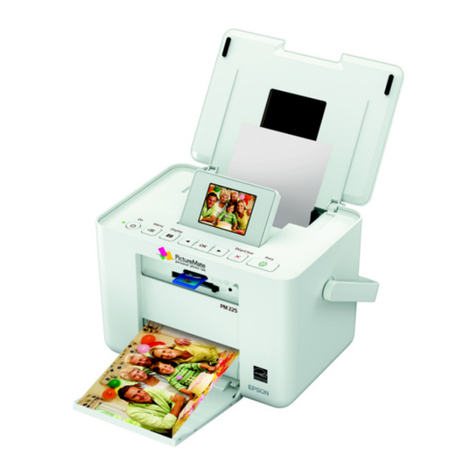
Para los mejores resultados, utilice tinta y papel Epson auténticos.
Adquiéralos en tiendas locales o comuníquese con Epson para localizar un
distribuidor.
For the best prints and copies, use genuine Epson ink and paper. Get them
from your local store or contact Epson for dealer referral.
Premium Glossy Photo Paper
Papel de alto gramaje de un acabado
altamente brillante que le ayudará a
obtener bellísimas fotografías en una
distinta variedad de tamaños, con o sin
márgenes.
Epson ofrece una selección de excelentes
papeles. Consulte el listado includo en la
Guía de referencia rápida.
Premium Glossy Photo Paper
Heavyweight paper with a high gloss finish
for beautiful photographs in a variety of
sizes, with borders or borderless.
Other fine Epson papers are available.
See your Quick Guide for details.
Papel y tinta Epson
Need Paper and Ink?
T063120
Negro
Black
T063320
Magenta
T063420
Amarillo
Yellow
T063220
Cian
Cyan
Luz de encendido
On light
Indicador de error
Error light
Ventanilla de copiado
Copy window
Botón Start Color
(Iniciar/Color)
Start Color button
CX4100 Series CX4700 Series
•Si la luz de encendido (On) verde destella, espere hasta que deje de
destellar antes de oprimir los botones del panel de control.
If the green On light is flashing, just wait until it stops before pressing any
control panel buttons.
•Si el indicador de error rojo está encendido, apague y encienda la
Stylus CX para despejar el error.
If the red Error light is on, turn the Epson Stylus CX off and then on to
clear the error.
•Si el indicador de error rojo está encendido o destellando, revise que el
papel se encuentre en la posición correcta y que la tinta esté bien
instalada y sin remanentes del envoltorio original.
If the red Error light is still on or flashing, check your paper loading and
ink installation, and look for remaining packing material.
•Si el indicador rojo de error destella rápidamente y la letra Haparece
en la ventanilla de copiado, la palanca de ajuste de grosor está en la
posición H. Consulte las instrucciones de la Guía de referencia rápida
para ajustar correctamente la palanca.
If the red Error light is flashing rapidly and an Happears in the Copy
window, the paper thickness lever is in the Hposition. See the Quick
Guide for instructions on setting the lever position.
•Si piensa que existe una obstrucción de papel, oprima el botón Start
Color (Iniciar Color) para expulsar el papel obstruido, luego retire las
hojas del alimentador de papel o la bandeja de salida. Consulte la Guía de
referencia rápida.
If you suspect a paper jam, press the Start Color button to eject the
paper, then pull out the jammed sheets from the sheet feeder or output
tray. See the Quick Guide for details.
Consulte la Guía de referencia rápida o el Manual del usuario de la impresora
para más información sobre cómo resolver problemas.
See your Quick Guide and on-screen User’s Guide for more problem-solving
information.
