manuals.online logo
Brands
  1. Home
  2. •
  3. Brands
  4. •
  5. Epson
  6. •
  7. Printer
  8. •
  9. Epson Stylus Office TX300F Series How to use

Epson Stylus Office TX300F Series How to use

9Oprima el botón OK para cargar la tinta. La carga tarda
aproximadamente 2 minutos.
Press the OK button to charge the ink. Charging takes about 2 minutes.
Precaución: no apague la impresora TX300F mientras esté cargando la tinta
o desperdiciará tinta.
Caution: Don’t turn off the TX300F while it is charging or you’ll waste ink.
3Pulse el botón o para seleccionar
Language (Idioma), luego oprima el botón OK.
Press or to select Language,
then press OK.
4Pulse el botón o para seleccionar Español,
luego oprima el botón OK.
Press or to select English, then press OK.
Seleccione su país/Select your country:
1Pulse el botón o para seleccionar País/Región, luego oprima el
botón OK.
Press or to select Country/Region, then press OK.
2Pulse el botón o para selecciónar su País, luego oprima
el botón OK. (Si no aparece su país, seleccione USA).
Press or to select your Country, then press OK. (If your country
does not appear, select USA.)
3Si cambia la región, confirme su selección
en la próxima pantalla presionando la tecla 1
(para indicar que sí) en el teclado numérico.
If you change the region, confirm your selection at the next screen by
pressing the 1key (for yes) on the numeric keypad.
Introduzca la fecha y la hora/Enter the date and time:
1Pulse el botón o para seleccionar Horario de verano, luego oprima
el botón OK.
Press or to select Daylight Saving Time, then press OK.
2Pulse el botón o para seleccionar Verano,
si en su región se utiliza el Horario de verano y
actualmente está vigente. (El Horario de verano
está en vigencia durante la primavera y todo el verano). De lo contrario,
seleccione Invierno para desactivar este ajuste.
Press or to select Summer, if your region uses Daylight Saving
Time and it’s currently in effect. (DST is effective from spring to summer.)
Otherwise select Winter to turn off the setting.
3Oprima el botón OK.
Press OK.
4Pulse el botón o para seleccionar Fecha/hor,
luego oprima el botón OK.
Press or to select Date/Time, then press OK.
5Pulse el botón o para seleccionar el
formato de la fecha, luego oprima el botón OK.
Press or to select the type of date display,
then press OK.
6Utilice el teclado numérico para cambiar la fecha,
luego oprima el botón OK.
Use the numeric keypad to change the date, then press OK.
7Pulse el botón o para seleccionar un
formato de 12 horas o 24 horas, luego oprima
el botón OK.
Press or to select a 12-hour or 24-hour display, then press OK.
8Utilice el teclado numérico para fijar la hora.
Use the numeric keypad to set the time.
9Si seleccionó 12h, pulse el botón o para
seleccionar AM o PM.
If you selected 12h, Press or to select AM or PM.
10 Oprima el botón OK.
Press OK.
Cuando termine de seleccionar los ajustes que desea, pulse el
botón Ajustes para salir.
When you’re finished choosing your settings, press Ajustes (Menu)
to exit.
*411426300*
*411426300*
Si falta alguna pieza, comuníquese con Epson como se indica al dorso de
este póster, en la sección “¿Preguntas?”.
If anything is missing, contact Epson as described on the back in “Any
questions?”.
Precaución: no saque los cartuchos de tinta de su envoltorio hasta que esté listo
para instalarlos. Los cartuchos están embalados herméticamente para garantizar su
fiabilidad.
Caution: Do not open the ink cartridge package until you are ready to install the ink.
Cartridges are vacuum packed to maintain reliability.
Desembale la impresora
Unpack
1
Guía de instalación
Start Here
Lea esta instrucciones antes de utilizar la impresora.
Please read these instructions before using the printer.
Instale los cartuchos
Install ink cartridges
4
1Conecte el cable
de alimentación.
Connect the power cable.
Precaución: no conecte la
impresora a la computadora todavía.
Caution: Do not connect to your
computer yet.
2Pulse el botón Encender .
Press the On button.
Encienda la TX300F
Turn on the TX300F
2
Encender
Precaución: mantenga los cartuchos fuera del alcance de los niños y no ingiera
la tinta.
Nota: los cartuchos de tinta incluidos tienen un menor rendimiento debido al
proceso de inicialización. Este proceso se realiza sólo la primera vez que enciende el
producto y garantiza un mejor rendimiento.
No cargue papel antes de instalar los cartuchos de tinta.
Caution: Keep ink cartridges out of the reach of children and don’t drink the ink.
Note: The ink cartridges that came with your printer have a lower yield due to the
ink charging process. This process is carried out the first time you turn on the printer
and guarantees better performace.
Don’t load paper before installing the ink cartridges.
1Levante la unidad del escáner.
Open the scanner.
2Abra la tapa del compartimiento de cartuchos.
Open the cartridge cover.
3Agite los cartuchos de tinta, luego
desembálelos.
Shake the ink cartridges, then
unpack them.
4Retire la cinta amarilla de cada cartucho.
Remove only the yellow tape from each
cartridge.
Precaución: no retire ninguna otra
etiqueta de los cartuchos.
Caution: Don’t remove any other seals
from the cartridges.
5Instale los cartuchos en el soporte
que corresponde a su color.
Insert the cartridges in the holder
for each color.
6Empuje cada cartucho hacia abajo hasta que se
encaje en su lugar.
Press each cartridge down until it clicks.
7Cierre la tapa del compartimiento de cartuchos
y presiónela hacia abajo hasta que escuche un
clic.
Close the ink cartridge cover and press it down
until it clicks.
8Baje la unidad del escáner.
Close the scanner.
Cargue papel
Load paper
5
1Abra el soporte del papel y extiéndalo
hacia arriba.
Open the paper support and pull up
the extension.
2Abra la bandeja del
papel, extiéndala y
levante el parador
de papel.
Open the output tray,
pull out the extension,
and raise the paper
stopper.
3Deslice la guía lateral hacia la
izquierda mientras sostiene
el protector del alimentador
hacia adelante.
Slide the edge guide to the
left while holding the feeder
guard forward.
4Cargue el papel con la cara
imprimible hacia arriba, contra la
guía lateral derecha y detrás de
la lengüeta.
Load paper against the right
edge guide and behind the tab,
with the printable side face up.
Nota: no cargue el papel en posición horizontal;
siempre cárguelo en posición vertical.
Note: Don’t load the paper sideways; always
load it short edge first.
5Deslice la guía lateral hacia
el papel.
Slide the edge guide over.
Seleccione los ajustes
Choose your settings
3
Seleccione su idioma/Select your language:
1Pulse el botón Ajustes para entrar en modo de configuración.
Press Ajustes (Menu) to enter the setup mode.
2Pulse el botón o para seleccionar Maintenance (Mantenimiento),
luego oprima el botón OK.
Press or to select Maintenance, then press OK.
Epson y Epson Stylus son marcas registradas y “Epson Exceed Your Vision” es un logotipo registrado de
Seiko Epson Corporation. DURABrite es una marca registrada de Epson America, Inc.
Aviso general: el resto de productos que se mencionan en esta publicación pueden ser marcas
comerciales de sus respectivos propietarios. Epson renuncia a cualquier derecho sobre dichas marcas.
La información contenida en el presente está sujeta a cambios sin previo aviso.
Epson and Epson Stylus are registered trademarks, and Epson Exceed Your Vision is a registered
logomark of Seiko Epson Corporation. DURABrite is a registered trademark of Epson America, Inc.
General Notice: Other product names used herein may be trademarks of their respective owners. Epson
disclaims any and all rights in those marks. This information is subject to change without notice.
© 2008 Epson America, Inc. 6/08 CPD-25644
Cartuchos de la Epson Stylus®Office TX300F
Epson Stylus®Office TX300F Ink Cartridges
Recorte esta tarjeta y
llévesela con usted cuando
compre cartuchos de tinta
de repuesto.
Cut out the card to the
right and keep it with
you when purchasing
replacement ink cartridges.
Impreso en: XXXXXX
Printed in XXXXXX
4Haga clic en Instalar y
siga las instrucciones
en pantalla.
Click Install and follow the
on-screen instructions.
5Cuando se lo indique el sistema, conecte el cable USB. Utilice cualquier
puerto USB disponible de la computadora.
When prompted, connect the USB cable. Use any open USB port on
your computer.
Nota: si la instalación no continúa después de unos instantes, compruebe que
haya conectado bien la impresora y que esté encendida.
Note: If installation doesn’t continue after a moment, make sure you securely
connected and turned on the TX300F.
6Siga las instrucciones en pantalla para instalar el resto del software y
registrar la impresora TX300F.
Follow the on-screen instructions to install the rest of the software and
register your TX300F.
7Cuando termine, expulse el CD.
When you’re done, eject the CD.
¡Está listo para imprimir, hacer fotocopias, escanear y mandar faxes! Consulte
las instrucciones de la Guía de referencia rápida o del Manual del usuario en
formato electrónico.
You’re ready to print, copy, scan, and fax! See your on-screen User’s Guide
for instructions.
Macintosh®
1Asegúrese de que la impresora
TX300F NO ESTÉ CONECTADA
a la computadora.
Make sure the TX300F is NOT
CONNECTED to your computer.
2Introduzca el CD del software de la
TX300F en el lector de CDs/DVDs
de la computadora.
Insert the TX300F software CD.
3Seleccione Español.
Select English.
4Haga doble clic en el icono Epson.
Double-click the Epson icon.
5Haga clic en Instalar y siga las
instrucciones en pantalla.
Click Install and follow the
on-screen instructions.
¿Preguntas?
Any questions?
Guía de referencia rápida
Contiene instrucciones generales para imprimir.
Basic instructions for printing. (Available only in Spanish.)
Manual del usuario en formato electrónico •
On-screen User’s Guide
Haga clic en el icono del manual situado en elHaga clic en el icono del manual situado en elHaga clic en el icono del manual situado en el
escritorio de la computadora.
Click the desktop shortcut.Click the desktop shortcut.Click the desktop shortcut.
Ayuda en pantalla del software • On-screen help
with your software
SeleccioneSeleccioneSeleccione Ayuda o ?cuando esté utilizando el software.
SelectSelectSelect Help or ?when you’re using your software.
73HN
73HN
o/or
73N
73N
Negro/Black
73N
73N
Cian/Cyan
73N
73N
Magenta
73N
73N
Amarillo/Yellow
6Cuando se lo indique el sistema, conecte el cable USB. Utilice cualquier
puerto USB disponible de la computadora. Compruebe que la impresora
TX300F esté conectada bien y encendida.
When prompted, connect the USB cable. Use any open USB port on your
computer. Make sure the TX300F is securely connected and turned on.
7Usuarios de Mac OS X 10.5: ver el paso 11.
Usuarios de otras versiones: continuar con el paso 8.
Mac OS X 10.5 users: skip to step 11.
Other users: continue with step 8.
8Cuando vea esta pantalla, haga clic en
el botón Abrir lista de impresoras.
When you see this screen, click Open
the Printer List.
9Siga los pasos que aparecen
a la derecha de la pantalla
para añadir la TX300F a la
lista de impresoras.
Follow the steps on the right
side of the screen to add the
TX300F.
10 Si es necesario, haga clic en Siguiente otra vez.
Click Next again, if necessary.
11 Siga las instrucciones en pantalla para instalar el resto del software y
registrar la impresora TX300F.
Follow the on-screen instructions to install the rest of the software and
register your TX300F.
12 Cuando termine, expulse el CD.
When you’re done, eject the CD.
¡Está listo para imprimir, hacer fotocopias, escanear y mandar faxes! Consulte
las instrucciones de la Guía de referencia rápida o del Manual del usuario en
formato electrónico.
You’re ready to print, copy, scan, and fax! See your on-screen User´s Guide
for instructions.
¿Necesita papel y tinta Epson?
Need paper and ink?
¿Quiere obtener los mejores resultados? Es fácil: simplemente utilice papel y tinta
Epson originales. Adquiéralos en tiendas o comuníquese con Epson para localizar
un distribuidor de productos Epson autorizado.
Want great results? Simple. Use genuine Epson paper and ink. For the right
supplies at the right time, you can purchase them from an Epson authorized
reseller. To find the nearest one, call your nearest Epson sales office.
Presentation Paper Matte
Papel ultrasuave, sin brillo y de secado instantáneoPapel ultrasuave, sin brillo y de secado instantáneo
para álbumes de recortes, boletines informativos y
presentaciones de gráficos.
Ultra smooth, non-glare, instant-drying paper for
scrapbooks, newsletters and graphical presentations.
Tinta Epson genuina
Genuine Epson Inks
Busque los números que se
enumeran abajo para encontrar los
cartuchos de tinta que necesita
para su producto. ¡Es tan fácil como
recordar su número!
Look for the numbers below to find your cartridges.
It’s as easy as remembering your number!
73HN
73HN
o/or
73N
73N
Negro/Black
73N
73N
Magenta
73N
73N
Cian/Cyan
73N
73N
Amarillo/Yellow
Conecte el cable telefónico
Connect the phone cord
6
Si desea utilizar la impresora TX300F para enviar faxes, conecte un extremo
del cable telefónico que vino incluido a un enchufe telefónico de pared y el
otro extremo al puerto LINE situado en la parte posterior de la unidad. Para
conectar un teléfono o un contestador, consulte las instrucciones en la Guía
de referencia rápida o el Manual del usuario en formato electrónico.
To use the TX300F for faxing, connect the included phone cord from a
telephone wall jack to the LINE port on the TX300F. To connect a telephone
or answering machine, see the User’s Guide for instructions.
Nota: si va a conectar una línea telefónica DSL, debe usar un filtro DSL o no podrá
mandar faxes. Póngase en contacto con su proveedor de servicios DSL para adquirir
el filtro necesario.
Note: If you’re connecting to a DSL phone line, you must use a DSL filter or you
won’t be able to fax. Contact your DSL provider for the necessary filter.
Instale el software
Install software
7
El software funciona con Windows®2000, XP, XP Professional x64 Edition,
Windows Vista®y con Mac OS®X 10.3.9, 10.4.x y 10.5.x.
Your software works with Windows®2000, XP, XP Professional x64 Edition,
Windows Vista®, and Mac OS®X 10.3.9, 10.4.x, and 10.5.x.
Windows
1Asegúrese de que la impresora
TX300F NO ESTÉ CONECTADA
a la computadora.
Make sure the TX300F is NOT
CONNECTED to your computer.
Nota: si aparece la pantalla Nuevo
hardware encontrado, haga clic en
Cancelar y desconecte el cable USB.
No puede instalar el software de
esta manera.
Note: If you see a Found New Hardware
screen, click Cancel and disconnect the
USB cable. You can’t install your software
that way.
2Introduzca el CD del software de la
TX300F en el lector de CDs/DVDs de
la computadora.
En Windows Vista, si aparece la ventana
Reproducción automática, haga clic en
Ejecutar Epsetup.exe. Cuando aparezca
la pantalla Control de cuentas de usuario,
haga clic en Continuar.
Insert the TX300F software CD.
With Windows Vista, if you see the AutoPlay window, click Run
Epsetup.exe. When you see the User Account Control screen,
click Continue.
3Seleccione Español.
Select English.
Soporte técnico • Technical Support
Soporte en Internet
Visite el sitio Web de soporte técnico de Epson en www.latin.epson.com y
seleccione su producto para obtener soluciones a problemas comunes.
Internet Support
Visit Epson's support website at www.latin.epson.com and select your
product for solutions to common problems. (Site available only in Spanish
and Portuguese.)
Soporte telefónico • Telephone Support
Argentina (54-11) 5167-0300 México 01-800-087-1080
Chile (56-2) 230-9500 México D.F. (52-55) 1323-2052
Colombia (57-1) 523-5000 Perú (51-1) 418-0210
Costa Rica (50-6) 2210-9555 Venezuela (58-212) 240-1111
800-377-6627
Puede incurrir en costos de llamada interurbana o de larga distancia.
Toll or long distance charges may apply.

Other manuals for Stylus Office TX300F Series

1

Other Epson Printer manuals

Epson 790 User manual

Epson

Epson 790 User manual

Epson SureColor S40600 User manual

Epson

Epson SureColor S40600 User manual

Epson TM-T88V-DT User manual

Epson

Epson TM-T88V-DT User manual

Epson WF-3520 Series Instruction Manual

Epson

Epson WF-3520 Series Instruction Manual

Epson Stylus Photo RX700 Series Instruction Manual

Epson

Epson Stylus Photo RX700 Series Instruction Manual

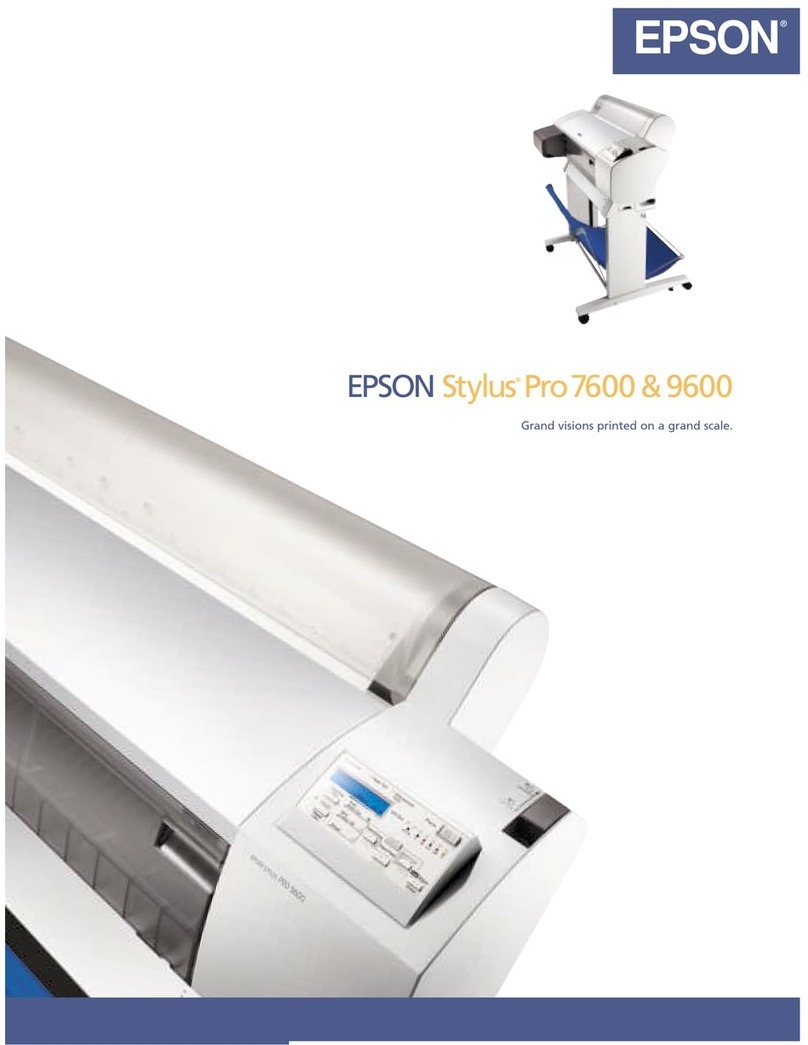
Epson Stylus Pro 7600 User manual

Epson

Epson Stylus Pro 7600 User manual

Epson Stylus Color 400 User manual

Epson

Epson Stylus Color 400 User manual

Epson Stylus C44 User manual

Epson

Epson Stylus C44 User manual

Epson EPL-N1200 User manual

Epson

Epson EPL-N1200 User manual

Epson Stylus TX420W User manual

Epson

Epson Stylus TX420W User manual

Epson TM-U950P - B/W Dot-matrix Printer User manual

Epson

Epson TM-U950P - B/W Dot-matrix Printer User manual

Epson LQ-510 User manual

Epson

Epson LQ-510 User manual

Epson TM-J7100 Instruction Manual

Epson

Epson TM-J7100 Instruction Manual

Epson Stylus 400 - Ink Jet Printer Installation and operation manual

Epson

Epson Stylus 400 - Ink Jet Printer Installation and operation manual

Epson LQ-2180 User manual

Epson

Epson LQ-2180 User manual

Epson STYLUS PHOTO RX585 Series User manual

Epson

Epson STYLUS PHOTO RX585 Series User manual

Epson DLQ-3000 Minerva+ User manual

Epson

Epson DLQ-3000 Minerva+ User manual

Epson TM-T58 User manual

Epson

Epson TM-T58 User manual

Epson Expression Premium XP-6005 User manual

Epson

Epson Expression Premium XP-6005 User manual

Epson Stylus Photo 750 User manual

Epson

Epson Stylus Photo 750 User manual

Epson ColorPage EPL-C8200 User manual

Epson

Epson ColorPage EPL-C8200 User manual

Epson Stylus TX410 Series Assembly instructions

Epson

Epson Stylus TX410 Series Assembly instructions

Epson LQ-630 User manual

Epson

Epson LQ-630 User manual

Epson WorkForce 60 Reference guide

Epson

Epson WorkForce 60 Reference guide

Popular Printer manuals by other brands

Hitachi PH instruction manual

Hitachi

Hitachi PH instruction manual

Jay 6220 installation instructions

Jay

Jay 6220 installation instructions

Oki C8600 user guide

Oki

Oki C8600 user guide

Centronics 101A Technical manual

Centronics

Centronics 101A Technical manual

Astro Machine ASTROJET 2650P quick start guide

Astro Machine

Astro Machine ASTROJET 2650P quick start guide

ITW Transtech AERO 60 Operation manual

ITW

ITW Transtech AERO 60 Operation manual

Printek Interceptor 800 Series Integrator's manual

Printek

Printek Interceptor 800 Series Integrator's manual

Monarch 9825 Reference manual

Monarch

Monarch 9825 Reference manual

Ricoh Aficio GX e3300N user guide

Ricoh

Ricoh Aficio GX e3300N user guide

Canon PIXMA E3300 Series Getting started

Canon

Canon PIXMA E3300 Series Getting started

Seiko IP-7900 Operation guide

Seiko

Seiko IP-7900 Operation guide

Canon MK5000 user guide

Canon

Canon MK5000 user guide

Samsung ML-2165W Remanufacturing instructions

Samsung

Samsung ML-2165W Remanufacturing instructions

Cashino KMP-II user manual

Cashino

Cashino KMP-II user manual

Kodak 9810 - PRINTING IMAGES FROM PHOTOSHOP 7 AND... user guide

Kodak

Kodak 9810 - PRINTING IMAGES FROM PHOTOSHOP 7 AND... user guide

Intermec PB40 quick start guide

Intermec

Intermec PB40 quick start guide

Panasonic KX-PX20M - Photo Printer - 20 Sheets quick guide

Panasonic

Panasonic KX-PX20M - Photo Printer - 20 Sheets quick guide

Lexmark MS610 Series Specfications

Lexmark

Lexmark MS610 Series Specfications

manuals.online logo
manuals.online logoBrands
  • About & Mission
  • Contact us
  • Privacy Policy
  • Terms and Conditions

Copyright 2025 Manuals.Online. All Rights Reserved.