manuals.online logo
Brands
  1. Home
  2. •
  3. Brands
  4. •
  5. Epson
  6. •
  7. Printer
  8. •
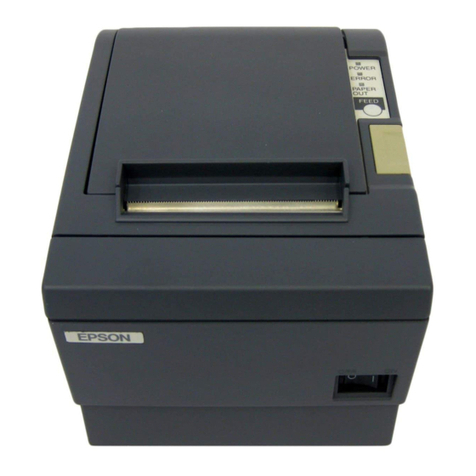
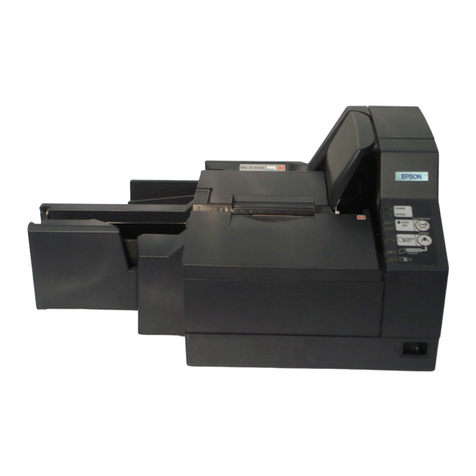
  9. Epson TM-S9000MJ Instruction Manual

Epson TM-S9000MJ Instruction Manual

©Seiko Epson Corporation 2012-2016.
All rights reserved.
Printed in China
1/4
*1
*2
*3
ON
1 2
1 2 3
123
EN Start Here IT Inizia qui
FR Commencer Ici ES Inicio aquí
DE Schnellstart PT Inicar Aqui
NL Begin hier AR ﺎﻨﻫ أﺪﺑا
1Unpacking/Déballage/Auspacken/Uitpakken/Disimballaggio/Desembalaje/Desembalar/ةﻮﺒﻌﻟا غاﺮﻓإ
3
Connecting the Product to Your Computer/Connexion du produit à votre ordinateur
/Anschluss des Produkts an Ihren Computer/
Het product op de computer aansluiten/Collegamento del prodotto al computer/Conexión del producto al ordenador/
Ligar o produto ao computador/ﺮﺗﻮﻴﺒﻤﻜﻟﺎﺑ ﺞﺘﻨﳌا ﻞﻴﺻﻮﺗ
2Installing the Product/Installation du produit/Installieren des Produkts/Het product installeren/
Installazione del prodotto/Instalación del producto/Instalar o produto/ﺞﺘﻨﳌا ﺐﻴﻛﺮﺗ
4Connecting the Power Cord
/Connexion du cordon d’alimentation
/Anschließen des Netzkabels/Het netsnoer aansluiten/
Collegamento del cavo di alimentazione/Conexión del cable de alimentación/Ligar o cabo de alimentação/ﺔﻗﺎﻄﻟا ﻚﻠﺳ ﻞﻴﺻﻮﺗ
EN
• Use only the specied AC adapter (PS-180 [Model: M159D]). Use of an
improper power source may cause re.
• If you notice anything abnormal with the AC adapter, immediately
turn the product o and disconnect the AC cable from the wall socket.
IT
• Utilizzare esclusivamente l’adattatore CA specicato (PS-180 [Modello: M159D]).
L’uso di una sorgente di alimentazione non corretta può causare incendi.
• Se si riscontrano anomalie con l’adattatore CA, spegnere
immediatamente il prodotto e scollegare il cavo CA dalla presa elettrica.
FR
• Utilisez uniquement l’adaptateur secteur spécié (PS-180 [modèle:
M159D]). L’utilisation d’une source d’alimentation inappropriée peut
provoquer un incendie.
• Si l’adaptateur secteur semble anormal, mettez immédiatement le produit
hors tension et débranchez le cordon d’alimentation de la prise murale.
ES
• Utilice solo el adaptador de CA indicado (PS-180 [modelo: M159D]). Si
se utiliza una fuente de alimentación no adecuada, puede producirse
un incendio.
• Si nota alguna anomalía en el adaptador de CA, apague de inmediato
el producto y desconecte el cable de CA del zócalo mural.
DE
• Verwenden Sie nur das angegebene Netzteil (PS-180 [Modell: M159D]). Die
Verwendung einer ungeeigneten Stromquelle kann einen Brand verursachen.
• Wenn Sie etwas Ungewöhnliches in Verbindung mit dem Netzteil
feststellen, schalten Sie das Produkt sofort aus und trennen Sie das
Netzkabel von der Wandsteckdose ab.
PT
• Utilize apenas o transformador CA especicado (PS-180 [Modelo:
M159D]). Utilizar uma fonte de alimentação inadequada pode
provocar um incêndio.
• Se notar qualquer anormalidade com o transformador CA, desligue
imediatamente o produto e desligue o cabo CA da tomada.
NL
• Gebruik alleen de gespeciceerde netvoedingsadapter (PS-180 [model:
M159D]). Gebruik van een verkeerde voedingsbron kan brand veroorzaken.
• Als u iets ongewoons opmerkt aan de netvoedingsadapter, zet het
product dan onmiddellijk uit en haal de stekker uit het stopcontact.
AR
•ماﺪﺨﺘﺳا يدﺆﻳ ﺪﻘﻓ ؛([M159D :زاﺮﻄﻟا] PS-180) دﺪﺤﻤﻟا ددﺮﺘﻤﻟا رﺎﻴﺘﻟا لﻮﺤﻣ ﻻإ مﺪﺨﺘﺴﺗ ﻻ
.ﻖﻳﺮﺣ بﻮﺸﻧ ﻰﻟإ ﺐﺳﺎﻨﻣ ﺮﻴﻏ ﺔﻗﺎﻃ رﺪﺼﻣ •ﻰﻠﻋ ﺞﺘﻨﻤﻟا ﻞﻴﻐﺸﺗ ﻒﻗوﺄﻓ ،ددﺮﺘﻤﻟا رﺎﻴﺘﻟا لﻮﺤﻣ ماﺪﺨﺘﺳا ﺪﻨﻋ ﻲﻌﻴﺒﻃ ﺮﻴﻏ ءﻲﺷ يأ ﺖﻈﺣﻻ اذإ
.ﻂﺋﺎﺤﻟا ﺲﺒﻘﻣ ﻦﻣ ددﺮﺘﻤﻟا رﺎﻴﺘﻟا ﻞﺒﻛ ﻞﺼﻓاو رﻮﻔﻟا
EN
• Place the product on a horizontal at surface.
• Avoid placing the product near sources of magnetic noise, otherwise
the MICR recognition rate may drop.
• Make sure cords and foreign objects are not caught in the product.
IT
• Collocare il prodotto su una supercie piana e orizzontale.
• Non collocare il prodotto in prossimità di fonti di interferenza magnetica.
In caso contrario, la precisione di riconoscimento MICR potrebbe diminuire.
• Controllare che cavi e oggetti estranei non rimangano incastrati nel prodotto.
FR
• Placez le produit sur une surface plane horizontale.
• Évitez de placer le produit à proximité de sources de bruit magnétique, faute
de quoi le taux de reconnaissance de caractères magnétiques pourrait baisser.
• Assurez-vous qu’aucun cordon ou corps étranger n’est coincé dans le produit.
ES
• Coloque el producto en una supercie plana horizontal.
• Evite colocar el producto cerca de fuentes de ruido magnético. De lo
contrario, puede caer la tasa de reconocimiento MICR.
• Procure que no queden atrapados en el producto cables ni objetos extraños.
DE
• Stellen Sie das Produkt auf eine waagrechte, ebene Fläche.
• Vermeiden Sie es, das Produkt in der Nähe von magnetischen Störungsquellen
aufzustellen, da andernfalls die MICR-Erkennungsrate reduziert werden könnte.
• Stellen Sie sicher, dass sich keine Kabel oder Fremdkörper in diesem
Produkt verfangen.
PT
• Coloque o produto numa superfície horizontal e plana.
• Evite colocar o produto próximo de fontes de ruído magnético; caso
contrário, a percentagem de reconhecimento MICR pode baixar.
• Certique-se de que os cabos e objectos estranhos não cam presos
no produto.
NL
• Zet het product op een horizontaal en vlak oppervlak.
• Zet het product niet dicht bij een bron van magnetische ruis omdat
daardoor de MICR-herkenning negatief kan worden beïnvloed.
• Zorg dat er geen kabels en vreemde voorwerpen in het product terechtkomen.
AR
•.ٍﻮﺘﺴﻣ ﻲﻘﻓأ ﺢﻄﺳ ﻰﻠﻋ ﺞﺘﻨﻤﻟا ﻊﺿ •ﻰﻠﻋ فﺮﻌﺘﻟا لﺪﻌﻣ ﺾﻔﺨﻧا ﻻإو ،ﻲﺴﻴﻃﺎﻨﻐﻤﻟا ﺶﻳﻮﺸﺘﻟا ردﺎﺼﻣ ﻦﻣ بﺮﻘﻟﺎﺑ ﺞﺘﻨﻤﻟا ﻊﺿو ﺐﻨﺠﺗ
.(MICR) ﻲﺴﻴﻃﺎﻨﻐﻤﻟا ﺮﺒﺤﻟﺎﺑ ﺔﺑﻮﺘﻜﻤﻟا فﺮﺣﻷا •.ﺞﺘﻨﻤﻟا ﻞﺧاﺪﺑ ﺔﺒﻳﺮﻏ مﺎﺴﺟأو كﻼﺳأ رﺎﺸﺤﻧا مﺪﻋ ﻦﻣ ﺪﻛﺄﺗ
EN
Install the necessary drivers on your host computer before setting up the product.
IT
Installare i driver necessari sul computer host prima di congurare il prodotto.
FR Installez les pilotes nécessaires sur l’ordinateur hôte avant de congurer le
produit. ES Instale los controladores necesarios en el ordenador host antes de
congurar el producto.
DE Installieren Sie die erforderlichen Treiber auf dem Host-Computer, bevor
Sie das Produkt einrichten. PT Instale os controladores necessários no computador principal antes de
congurar o produto.
NL Installeer de benodigde stuurprogramma’s op het hostcomputer voordat u
dit product instelt. AR .ﺞﺘﻨﻤﻟا داﺪﻋإ ﻞﺒﻗ ﻒﻴﻀﻤﻟا ﺮﺗﻮﻴﺒﻤﻜﻟا ﻰﻠﻋ ﻞﻴﻐﺸﺘﻟا ﺞﻣاﺮﺑ ﺖﻴﺒﺜﺘﺑ ﻢﻗ
EN
*1. Remove the packing materials and tape. The product in the illustrations may slightly
dier from your product, but the operations are the same.
*2. Sheets of paper for test print.
*3. May not be supplied in some countries or regions.
FR
*1. Retirez les matériaux d’emballage et le ruban adhésif. Le produit représenté sur les
illustrations peut légèrement diérer de votre produit, mais les opérations sont identiques.
*2. Feuilles de papier pour test d’impression.
*3. Peut ne pas être fourni dans certains pays ou régions.
DE
*1. Entfernen Sie das Verpackungsmaterial und Band. Das in den Illustrationen
dargestellte Produkt könnte geringfügig von Ihrem Produkt abweichen, aber die
Bedienvorgänge sind gleich.
*2. Papierbögen für den Testdruck.
*3. Wird in einigen Ländern oder Regionen möglicherweise nicht mitgeliefert.
NL
*1. Verwijder het verpakkingsmateriaal en de tape. Het product in de afbeeldingen kan er
iets anders uitzien dan uw product maar de werkwijze is hetzelfde.
*2. Vellen papier voor testafdrukken.
*3. Worden in sommige landen of gebieden mogelijk niet meegeleverd.
IT
*1. Rimuovere i materiali di imballaggio e il nastro. Anche se il prodotto nelle illustrazioni
potrebbe risultare leggermente diverso da quello eettivo, le operazioni sono identiche.
*2. Fogli di carta per le stampe di prova.
*3. Potrebbe non essere in dotazione in alcune nazioni o aree geograche.
ES
*1. Retire los materiales de embalaje y la cinta. El producto de las ilustraciones puede
diferir ligeramente de su producto, pero las operaciones son las mismas.
*2. Hojas de papel para una impresión de prueba.
*3. Puede que no se suministre en algunos países o regiones.
PT
*1. Retire os materiais de embalagem e a ta adesiva. O produto das ilustrações pode
diferir ligeiramente do seu produto mas as operações são as mesmas.
*2. Folhas de papel para o teste de impressão.
*3. Pode não ser fornecido em alguns países ou regiões.
AR
*1.ﺪﺟﻮﻳ ﻻ ﻦﻜﻟو ،ﻚﺠﺘﻨﻣ ﻦﻋ ًﻼﻴﻠﻗ ﺔﻴﺤﻴﺿﻮﺘﻟا تﺎﻣﻮﺳﺮﻟا ﻲﻓ ﻦّﻴﺒﻤﻟا ﺞﺘﻨﻤﻟا ﻒﻠﺘﺨﻳ ﺪﻗ .ﻂﻳﺮﺸﻟاو ﻒﻴﻠﻐﺘﻟا داﻮﻣ لزأ
.ﻞﻴﻐﺸﺘﻟا تﺎﻴﻠﻤﻋ ﻲﻓ فﻼﺘﺧا *2..ﺔﻋﺎﺒﻄﻟا رﺎﺒﺘﺧﻻ قاروأ *3..ﻖﻃﺎﻨﻤﻟا وأ ناﺪﻠﺒﻟا ﺾﻌﺑ ﻲﻓ ﻚﻟذ ﺪﻳرﻮﺗ ﻢﺘﻳ ﻻ ﺪﻗ
http://download.epson-biz.com/?service=pos
5Installing the Roll Paper
/Installation du rouleau de papier
/Einlegen des Rollenpapiers/De papierrol installeren/
Installazione del rotolo di carta/Instalación del rollo de papel/Instalar o papel em rolo/قرﻮﻟا ةﺮﻜﺑ ﺐﻴﻛﺮﺗ
Nozzle check pattern
ON
12
4
12
3
5
6
Installing the Ink Cartridge
/Installation de la cartouche d’encre/Installieren der Tintenpatrone/De inktpatroon installeren/
Installazione della cartuccia dell’inchiostro/Instalación del cartucho de tinta/Instalar o tinteiro/ﱪﺤﻟا ﺔﺷﻮﻃﺮﺧ ﺐﻴﻛﺮﺗ 7
Test Printing/Test d’impression
/Testdruck/Een testafdruk maken/Stampa di prova/Impresión de prueba/Teste de impressão/
رﺎﺒﺘﺧا ﺔﻋﺎﺒﻃ
EN For detailed information on operation and safe use of the product, refer
to the other manuals included with the product. IT Per informazioni dettagliate sul funzionamento e sull’uso sicuro del
prodotto, vedere gli altri manuali in dotazione con il prodotto.
FR
Pour plus d’informations sur le fonctionnement et une utilisation sans
danger du produit, reportez-vous aux autres manuels fournis avec le produit.
ES Para más información sobre el funcionamiento y el uso seguro del
producto, consulte los otros manuales suministrados con el producto.
DE
Nehmen Sie für detaillierte Informationen zur Bedienung und sicheren Verwendung
des Produkts auf die anderen dem Produkt beiliegenden Anleitungen Bezug.
PT
Para obter informações pormenorizadas sobre o funcionamento e a utilização
segura do produto, consulte os outros manuais fornecidos com o produto.
NL Raadpleeg de andere handleidingen van het product voor details over
de bediening en veilig gebruik ervan. AR ىﺮﺧﻷا ﺔﻟدﻷا ﻰﻟإ ﻊﺟرا ،ﺞﺘﻨﻤﻠﻟ ﻦﻣﻵا ماﺪﺨﺘﺳﻻاو ﻞﻴﻐﺸﺘﻟا لﻮﺣ ﺔﻴﻠﻴﺼﻔﺘﻟا تﺎﻣﻮﻠﻌﻤﻟا ﻦﻣ ﺪﻳﺰﻤﻟ
.ﺞﺘﻨﻤﻟا ﻊﻣ ﺔﻘﻓﺮﻤﻟا
EN Do not tilt the product, turn o the product, or open
the covers while (Power) LED is ashing.
FR
N’inclinez pas le produit, ne mettez pas le produit
hors tension ou n’ouvrez pas les capots lorsque le
voyant (alimentation) clignote.
DE
Kippen Sie das Produkt nicht, schalten Sie es nicht aus
und önen Sie die Abdeckungen nicht, während die
(Strom) LED blinkt.
NL Het product niet kantelen of uitschakelen en geen
kappen openen terwijl de LED (aan/uit) knippert.
IT Non inclinare o spegnere il prodotto e non aprire gli
sportelli mentre il LED (Alimentazione) lampeggia.
ES
No incline el producto, apague el producto ni
abra las tapas mientras parpadee el indicador
(alimentación).
PT
Não incline o produto, não o desligue nem abra as
tampas enquanto o LED (Alimentação) estiver
intermitente.
AR ﺮﺷﺆﻣ ﺾﻴﻣو ءﺎﻨﺛأ ،ﺔﻴﻄﻏﻷا ﺢﺘﻓ وأ ،ﻪﻠﻴﻐﺸﺗ فﺎﻘﻳإ وأ ،ﺞﺘﻨﻤﻟا ﺔﻟﺎﻣﺈﺑ ﻢﻘﺗ ﻻ
.(ءﺎﺑﺮﻬﻜﻟا) LED
EN Install the ink cartridge in the correct direction,
and push it until it clicks in place.
FR Installez la cartouche d’encre dans le bon sens
et enfoncez-la jusqu’à ce qu’elle s’enclenche.
DE
Installieren Sie die Tintenpatrone in der
korrekten Ausrichtung und drücken Sie sie, bis
sie mit einem Klickgeräusch einrastet.
NL Installeer de inktpatroon in de juiste richting
en duw hem aan tot hij op zijn plaats vastklikt.
IT
Installare la cartuccia dell’inchiostro nella
direzione corretta e premerla no a farla
scattare in posizione.
ES
Instale el cartucho de tinta en la dirección correcta
y empújelo hasta que haga clic en su sitio.
PT Instale o tinteiro na direcção correcta e exerça
pressão até o encaixar.
AR ﺮﻘﺘﺴﺗ ﻰﺘﺣ ﺎﻬﻌﻓداو ﺢﻴﺤﺼﻟا هﺎﺠﺗﻻا ﻲﻓ ﺮﺒﺤﻟا ﺔﺷﻮﻃﺮﺧ ﺐﱢﻛر
.ﺎﻬﻧﺎﻜﻣ ﻲﻓ
EN Use the supplied new ink cartridge. Do not install a
used one.
FR Utilisez la cartouche d’encre neuve fournie. N’en
installez pas une usagée.
DE Verwenden Sie die beiliegende neue Tintenpatrone.
Installieren Sie keine gebrauchte.
NL Gebruik de meegeleverde nieuwe inktpatroon. Plaats
geen exemplaar dat reeds gebruikt is.
IT Utilizzare la cartuccia dell’inchiostro nuova in
dotazione. Non installarne una usata.
ES Utilice el cartucho de tinta nuevo suministrado. No
instale uno usado.
PT Utilize o tinteiro novo fornecido. Não instale um
usado.
AR ﺮﺒﺣ ﺔﺷﻮﻃﺮﺧ ﺐﱢﻛﺮُﺗ ﻻ .ﺔﻘﻓﺮﻤﻟا ةﺪﻳﺪﺠﻟا ﺮﺒﺤﻟا ﺔﺷﻮﻃﺮﺧ مﺪﺨﺘﺳا
.ﺔﻣﺪﺨﺘﺴﻣ
4 min
EN Make sure all the covers are closed. Then hold down the
cleaning button and turn on the product.
FR
Assurez-vous que tous les capots sont fermés. Ensuite,
maintenez le bouton de nettoyage enfoncé et mettez le
produit sous tension.
DE
Vergewissern Sie sich, dass alle Abdeckungen
geschlossen sind. Halten Sie dann die Reinigungstaste
gedrückt und schalten Sie das Produkt ein.
NL
Controleer of alle kappen zijn gesloten. Druk op de knop
voor reiniging en zet het product aan terwijl u de knop
ingedrukt houdt.
IT
Vericare che tutti gli sportelli siano chiusi. Quindi, tenere
premuto il pulsante di pulizia e accendere il prodotto.
ES
Asegúrese de que todas las tapas estén cerradas. A
continuación, mantenga pulsado el botón de limpieza y
encienda el producto.
PT
Certique-se de que todas as tampas estão fechadas. Em seguida,
mantenha o botão de limpeza premido e ligue o produto.
AR .
ﺞﺘﻨﻤﻟا ﻞﱢﻐﺷو ﻒﻴﻈﻨﺘﻟا رز ﻰﻠﻋ ًﻻﻮﻄﻣ ﻂﻐﺿا ،ٍﺬﺋﺪﻌﺑو .ﺔﻴﻄﻏﻷا ﻊﻴﻤﺟ قﻼﻏإ ﻦﻣ ﺪﻛﺄﺗ
EN
When the printout is faint, press the cleaning button for at least 3 seconds to run print head cleaning.
FR Lorsque l’impression est pâle, appuyez sur le bouton de nettoyage pendant au moins 3 secondes
pour eectuer un nettoyage de la tête d’impression.
DE Wenn das Druckbild blass ist, halten Sie die Reinigungstaste mindestens 3 Sekunden gedrückt, um
eine Druckkopfreinigung durchzuführen.
NL
Als de afdruk zwak is, druk dan drieseconden of langer op de knop voor reiniging om de printkop te reinigen.
IT Se la stampa è sbiadita, premere il pulsante di pulizia per almeno 3 secondi in modo da eseguire la
pulizia della testina di stampa.
ES Si el documento impreso sale pálido, pulse el botón de limpieza durante al menos 3 segundos para
ejecutar la limpieza de los cabezales de impresión.
PT Quando a impressão estiver esbatida, prima o botão de limpeza durante, pelo menos, 3 segundos
para executar a limpeza da cabeça de impressão.
AR .ﺔﻋﺎﺒﻄﻟا سأر ﻒﻴﻈﻨﺗ ﻞﻴﻐﺸﺘﻟ ﻞﻗﻷا ﻰﻠﻋ ٍناﻮﺛ 3 ةﺪﻤﻟ ﻒﻴﻈﻨﺘﻟا رز ﻰﻠﻋ ﻂﻐﺿا ،ﺔﺘﻫﺎﺑ ﺔﻋﺎﺒﻄﻟا نﻮﻜﺗ ﺎﻣﺪﻨﻋ

Other manuals for TM-S9000MJ

5

This manual suits for next models

3

Other Epson Printer manuals

Epson Stylus Color 800 User manual

Epson

Epson Stylus Color 800 User manual

Epson 3880 - Stylus Pro Color Inkjet Printer User manual

Epson

Epson 3880 - Stylus Pro Color Inkjet Printer User manual

Epson CW-C4030 Instruction Manual

Epson

Epson CW-C4030 Instruction Manual

Epson R300 - Stylus Photo Color Inkjet Printer User manual

Epson

Epson R300 - Stylus Photo Color Inkjet Printer User manual

Epson PM-400 User manual

Epson

Epson PM-400 User manual

Epson LQ-1070+ User manual

Epson

Epson LQ-1070+ User manual

Epson SC-F100 Series User manual

Epson

Epson SC-F100 Series User manual

Epson EasyFlow WorkForce 30 User manual

Epson

Epson EasyFlow WorkForce 30 User manual

Epson CR-420i Dimensions

Epson

Epson CR-420i Dimensions

Epson Stylus Pro 9900 User manual

Epson

Epson Stylus Pro 9900 User manual

Epson Stylus Pro 7500 User guide

Epson

Epson Stylus Pro 7500 User guide

Epson WF-2110 Series User manual

Epson

Epson WF-2110 Series User manual

Epson Stylus CX5500 Series User manual

Epson

Epson Stylus CX5500 Series User manual

Epson Stylus COLOR 1160 Instruction Manual

Epson

Epson Stylus COLOR 1160 Instruction Manual

Epson Stylus S21 Series Instruction Manual

Epson

Epson Stylus S21 Series Instruction Manual

Epson SEIJ98006 User manual

Epson

Epson SEIJ98006 User manual

Epson STYLUS CX4500 User manual

Epson

Epson STYLUS CX4500 User manual

Epson Stylus Color 660 User manual

Epson

Epson Stylus Color 660 User manual

Epson 3880 - Stylus Pro Color Inkjet Printer Programming manual

Epson

Epson 3880 - Stylus Pro Color Inkjet Printer Programming manual

Epson Stylus Color 760 Installation guide

Epson

Epson Stylus Color 760 Installation guide

Epson SureLab D870 User manual

Epson

Epson SureLab D870 User manual

Epson Stylus Pro 9600 Photographic Dye Ink User manual

Epson

Epson Stylus Pro 9600 Photographic Dye Ink User manual

Epson 480SX User manual

Epson

Epson 480SX User manual

Epson H6000III - TM Two-color Thermal Line Use and care manual

Epson

Epson H6000III - TM Two-color Thermal Line Use and care manual

Popular Printer manuals by other brands

Emaar EP-360 user manual

Emaar

Emaar EP-360 user manual

Addressograph 871 Adjustment instructions

Addressograph

Addressograph 871 Adjustment instructions

BIXOLON SRP-352plusIIA&C installation guide

BIXOLON

BIXOLON SRP-352plusIIA&C installation guide

Ricoh SG 7100DN installation guide

Ricoh

Ricoh SG 7100DN installation guide

Samsung ML-2165W Remanufacturing instructions

Samsung

Samsung ML-2165W Remanufacturing instructions

Brother MFC MFC-5440CN user guide

Brother

Brother MFC MFC-5440CN user guide

TSC TA300 Series Quick installation guide

TSC

TSC TA300 Series Quick installation guide

Xerox Phaser 7750 Quick reference guide

Xerox

Xerox Phaser 7750 Quick reference guide

Brother MFC-7320 Quick setup guide

Brother

Brother MFC-7320 Quick setup guide

Samsung CLP-36x Series user guide

Samsung

Samsung CLP-36x Series user guide

Konica Minolta magicolor 3730DN Firmware update guide

Konica Minolta

Konica Minolta magicolor 3730DN Firmware update guide

Ricoh Aficio BP20N Administrator's guide

Ricoh

Ricoh Aficio BP20N Administrator's guide

MUTOH Rockhopper II Series Maintenance manual

MUTOH

MUTOH Rockhopper II Series Maintenance manual

Lexmark MS810 Series Product specifications

Lexmark

Lexmark MS810 Series Product specifications

Kodak ESP C310 user guide

Kodak

Kodak ESP C310 user guide

Oce CS9065 Features & specifications

Oce

Oce CS9065 Features & specifications

Avery Dennison Monarch 9419 manual

Avery Dennison

Avery Dennison Monarch 9419 manual

MIMAKI TS34-1800A Note

MIMAKI

MIMAKI TS34-1800A Note

manuals.online logo
manuals.online logoBrands
  • About & Mission
  • Contact us
  • Privacy Policy
  • Terms and Conditions

Copyright 2025 Manuals.Online. All Rights Reserved.