ERA Invincible User manual

SMART HOME SECURITY
0345 257 2500
Customer Helpline
Instruction Manual
Dual Network Communicating
Alarm System with RFID
INVINCIBLE

Kit Contents ---------------------------------------------------------------------
Control Panel Layout ------------------------------------------------------------
Getting Started -----------------------------------------------------------------
Power on --------------------------------------------------------------------------
Connect PSTN Landline ---------------------------------------------------------
Insert a SIM Card -------------------------------------------------------------------
Control Panel Operation ---------------------------------------------------------
Access Control ---------------------------------------------------------------------
Making Phone Calls ----------------------------------------------------------------
Voice Memo -----------------------------------------------------------------------
Function Setting---------------------------------------------------------------------
Alarm Functions -----------------------------------------------------------------
Remote Control ----------------------------------------------------------------
Door/Window Sensor---------------------------------------------------------------
Pet Friendly PIR Motion Sensor -------------------------------------------------
LCD Display Contents ------------------------------------------------------------
LCD Display Menu ---------------------------------------------------------------
Settings --------------------------------------------------------------------------
Alarm Phone Number Setup ------------------------------------------------------
Add/Delete/Edit Accessories ------------------------------------------------------
System Settings -------------------------------------------------------------------
Check Event Logs ------------------------------------------------------------------
Connect to Electronic Lock -----------------------------------------------------------
Connect to CMS ---------------------------------------------------------------------
Add CMS Phone Number ---------------------------------------------------------
Delete CMS Phone Number ------------------------------------------------------
User ID ---------------------------------------------------------------------------
Upload Arm/ Disarm Report to CMS Center --------------------------------------
Table of Contents
01-02
03-04
05-06
05
05
06
07-08
07
07
08
08
09-17
09-10
11
12-17
18-19
20-22
23-35
23
24-26
27-35
35
35
36
36
36
36
37

Remote Phone Control ----------------------------------------------------------
Answering Alarm Phone Call to Start Remote Control -----------------------------
Remote Control by Calling Landline Telephone Number --------------------------
Remote Control by Calling SIM Card Number -------------------------------------
SMS Operation-------------------------------------------------------------------
Disarm -----------------------------------------------------------------------------
Arm (Away Arm) ------------------------------------------------------------------
Part Arm (Home Mode) -----------------------------------------------------------
Monitor ---------------------------------------------------------------------------
Recording Voice Memo ------------------------------------------------------------
37-38
37
38
38
39-42
39
39
40
40
40
41
41
41
42-47
42
43-44
45-47
48-50
48
49
50
50
51
52
53-54
55
System Enquiry ---------------------------------------------------------------------
Turn off arm/disarm message notice -----------------------------------------------
Turn on arm/disarm message notice -----------------------------------------------
App Operation ------------------------------------------------------------------
Download and Install the FREE APP ------------------------------------------------
Control through SMS-----------------------------------------------------------
Control through GPRS Data ---------------------------------------------------
Installation ------------------------------------------------------------------------
Maintenance -------------------------------------------------------------------------
Door/Window Sensor --------------------------------------------------------------
Pet Friendly PIR Motion Sensor -----------------------------------------------------
Testing -----------------------------------------------------------------------------
FAQ ----------------------------------------------------------------------------------
Specifications ---------------------------------------------------------------------
Available Accessories-----------------------------------------------------------------
Adjusting the Detection Range -----------------------------------------------------

PLEASE READ THIS MANUAL CAREFULLY BEFORE OPERATING THE SYSTEM
AND RETAIN FOR FUTURE REFERENCE.
All devices, with the exception of the External Siren are suitable for mounting in dry
interior locations only.
Any repairs must be carried out by an ERA Authorised Repair Centre. Misuse or
attempted repairs to a component part of the product will invalidate the warranty.
The photocopying, copying, reproduction, translation to any language, modification,
storage in a retrieval system or retransmission, in whole or in part, in any form or by
any means, electronic, mechanical or otherwise of this manual, is strictly prohibited
without the prior written permission of ERA Home Security.
Disposal and Recycling
Disposal of this product is covered by the Waste Electrical or Electronic Equipment
(WEEE) Directive. It should not be disposed of with other household or commercial
waste.
At the end of the product's useful life, the packaging and product should be disposed
of via a suitable recycling centre. Please contact your local authority or the retailer
from where the product was purchased for information on available facilities.
Declaration of Conformity
This equipment complies with the essential requirements of the Radio and
Telecommunications Terminal Equipment Directive, 1999/5/EC.
Additional Accessories:
This system can easily be extended at any time with the range of ERA Wireless Alarm
Accessories, for details visit www.eraeverywhere.com or call our Customer Support
team on 0345 257 2500 (local call rate).
IMPORTANT

FEATURES
Wireless 433MHz frequency
Built-in 1,000,000 RF codes combination maintains high reliability
LCD Screen Touch Keypad with RFID Reader
Guide menu on screen for ease of programming
Supports up to 10 Remote Controls, 50 Wireless Sensors, and 50 RFID Contactless Tags
Stores up to 6 alarm phone numbers
10 second voice memo and alarm voice message
RFID Tag disarm. Unlocks an electronic lock (not included)
Event Log - stores up to 150 events
Make phone calls directly from the Control Panel
Duress code silently sends out alarm notifications
Timed Arm / Disarm option - set your own daily entry/exit schedule
Exit and Entry delay
Name all Zones and RFID Tags
Arming, disarming and voice memo recording via App, SMS or GPRS
Push notifications for alarm and low battery conditions
Wide range of wireless accessories available including Smoke & Flood detection/alerts

Kit Contents
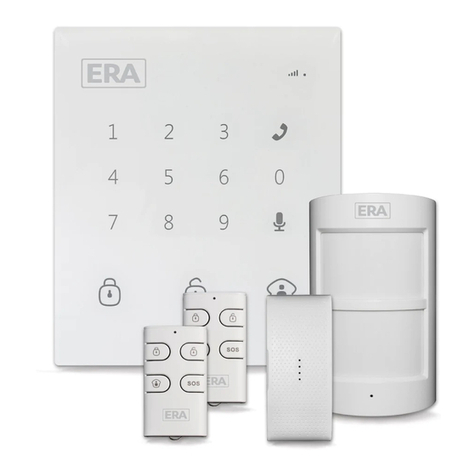
The Dual Network Control Panel receives and
processes signals from wireless Sensors and Remote
Controls. Settings can easily be changed following
the quick programming guide displayed on the LCD
screen. When users pick up an alarm notification call
they will hear the pre-recoded alarm voice message,
from which they can choose to either monitor on-site
or to disarm the system.
Control Panel
01
Should the PSTN network be unavailable, the E11 panel will automatically switch to the
GSM network..
Sensors are triggered or the SOS button
on the Remote Control is activated
Control Panel alarms and
the built-in siren sounds
Notification cycle :
Users receive push notifications and
SMS Messages if a SIM Card is installed
Control panel will dial the pre-stored alarm
phone numbers automatically

Pet Friendly
PIR Motion Sensor x 1
Brackets (Wall-Mounted and
Desktop) for Control Panel x 2
Wall Bracket for PIR
Motion Sensor x 1
Double-Sided Tape for
Door/Window Sensor x 2
Screws and Wall
Plugs x 4
Instruction Manual x 1
Wireless
Door/Window Sensor x 1
Wireless
Remote Control x 2
RFID Tag x 2
AC Adapter x 1 Telephone Cable x 1
02

RFID Tag Reader /
Play Voice Memo
Home Arm (Par t Arm)
Disarm
Arm
Voice Memo Button
LED Indicator
LCD Display
Escape
Up/Down
Enter
SOS
Clear
Call
Panel Front
Control Panel Layout
GSM Network LED
03

Tamper Switch Speaker
Backup Batteries
Power
On/Off
PSTN Landline
Socket
Microphone
SIM Card Slot
NC Input for
Wired Sensor
(Normal Zone)
Wired Siren Output
(≤500mA)
Output for
Electronic Lock
AC Adapter
Jack
Terminals for
Wired Sensors
04
Panel Back

Tamper Switch Speaker
Backup Batteries
Power
On/Off
PSTN Landline
Socket
Microphone
SIM Card Slot
NC Input for
Wired Sensor
(Normal Zone)
Wired Siren Output
(≤500mA)
Output for
Electronic Lock
AC Adapter
Jack
Terminals for
Wired Sensors
04
Panel Back

2
1
Getting Started
Plug the AC Adapter output connector into the AC Adapter Jack in the Control Panel.
Plug the AC adapter into a wall outlet.
Switch the ON/OFF switch to ‘ON’
Upon alarm activation the dual network Control Panel will auto dial out to the pre-
stored phone numbers via PSTN landline, or if unavailable for any reason will
automatically switch-over to dialling out to the stored numbers via the GSM network.
Connect the smaller connector of telephone cable supplied to the
PSTN land line socket at the back of the panel.
Connect the other end of the telephone cable to the signal output
provided by PSTN land line operator.
1
2
Connect PSTN Landline
Note: The built-in
rechargeable battery
should be used only in
the case of AC power
failure.
1.
2
3..
1.
2.
05
Note: If the Control Panel isn't
connected to the landline, when in
an alarm condition, it will dial out to
the pre-stored phone numbers via
the GSM network.
The GPRS network is not available
until the Control Panel stops calling
all numbers.

Note: A GSM SIM Card with basic functions (calling, answering, SMS and caller display) is
required. If an App is used to control the alarm system via the GPRS network, it is
recommended that you sign up to a GPRS data plan in order to minimise running costs.
If no SIM card is inserted, the Control Panel can only send alarm notifications by telephone calls
via the landline (PSTN) and users cannot remotely control the Control Panel with the App. All
other functions will be fully operable.
SIM Card requirement: 2G GSM SIM Card with calling, SMS, GPRS data and caller display
functions.
Insert a SIM Card
1. Switch off the Control Panel.
2. IMPORTANT: Remove the (default) code permanently from the SIM Card
3. Turn off the Voicemail function (if it is enabled)
4. Insert the SIM Card (with credit) into the card slot taking care to note the orientation
of the SIM Card as shown.
5. Switch the Control Panel back on, it will now search for a GSM signal.
This step can be ignored if the GSM function is not required...
06
1. SOS:When pressed, the System will alarm immediately
2. Arm: [ ]Press to arm your system. All the Sensors are now armed.
3. Disarm: [ ]Enter the password (default setting: 1234) and press . All Sensors except those
set to a 24-H zone are now inactive.
4. Home Arm: [ ]Press to part arm the system. All Sensors will be active except those set to
home mode allowing freedom of movement in selected areas
5. Call: For Making Phone Calls, please refer to Page 7.
6. Record Voice Memo: [ ]Press and hold for 3 seconds. A voice memo of up to 10-seconds
can be left. Press once to listen to the recorded voice memo.

The Control Panel’s RFID Reader enables quick
system disarming by RFID Contactless Tag. RFID
Tag disarming also unlocks an electronic door
strike if fitted (not supplied).
Pass the RFID Tag across the RFID Reader, the
blue LED indicator will flash once and the
system will disarm.
Access Control
Making Phone Calls
When the Control Panel is in Disarm or Home Mode state, press , input the[Call ]
phone number and press again, the panel will start dialling out to the[Call ]
telephone number.
The Control Panel has a built-in communication module. If the PSTN landline is
connected or a SIM card is in use (with sufficient credit), the Control Panel can be used
to make outbound telephone calls. The panel will firstly attempt dialling out via the
landline, if unavailable it will automatically switch to dialling out via the GSM network.
If a number is entered incorrectly press to clear the call down and enter the[Esc]
correct number. Press to cancel an unanswered call. Press to end a[Esc] [Call ]
conversation.
Note: If the Control Panel is connected to an extension line (not the main line), 0# or 9# will
need to be added as a pre-fix to the telephone number being dialled. If the landline is
unavailable and the system switches over to the GSM network, calls can be made without
pre-fixing the number.
07
Control Panel Operation

Voice Memo
1
3
2
4
Function Setting
Input the admin code (Default: 123456), then press to enter the Setting Menu. [Enter]
Up
Down
Enter Confirm
Back to last stepEsc
To record a Voice Memo of up to 10 seconds press the [Record Voice Memo ]
button for 3 seconds. The ‘Play Voice Memo’ circle will flash to indicate that a message
has been recorded. To listen to a Voice Memo touch the center of the circle. The LED
indicator will clear down once the voice memo has been played. The voice memo can
be replayed by touching the centre of the circle again. Voice Memos are not stored, a
new Voice Memo will over-write the previous Voice Memo
08

Alarm Functions
Remote Control
The Remote Control allows you to quickly and conveniently Arm and Disarm your
Alarm System.
In the event of an emergency (when in or near your property), pressing the SOS
button will trigger an alarm condition on the Control Panel and external Siren (if fitted).
Overview
09
Disarm
SOS
Part Arm
(Home Arm)
Arm
Status Indicator
1. If GSM/GPRS functionality is enabled, when the system is disarmed by an RFID Tag,
the Alarm will send an SMS/Push notification to the first stored Phone Number i.e.
“TAG 01 Disarm”.
2. The Alarm System Settings can be viewed via the E11 App or by sending an SMS
“00" to the SIM card in the Control Panel.
3. The Alarm can send an Arm/Disarm/Part-Arm notification via SMS to the first stored
number. To enable this function, which by factory default is ‘disabled’, send an SMS “21"
to the SIM card in the Control Panel. To revert to this function being ‘disabled’ send an
SMS .“20"

10
D
D

The Door/Window Sensor comprises of a transmitter and a magnet. The Sensor can be
mounted on doors, windows and any other object that can be opened or closed. When
the transmitter and magnet are separated by more than 2 cm, the Sensor will send a
signal to the Control Panel to trigger an alarm.
Overview
Door/Window Sensor
PCB Layout
11
Note:When the tamper switch is pressed the system will alarm immediately
Battery
Tamper
Switch Zone
Setting
Transmitter Magnet
Status Indicator
The supplied Door/Window Sensor is set to Normal Zone by default, the PIR Motion
Sensor is set to Home Mode zone. You can change their zone type by following the
steps on page 25.
Status Indicator
Test
1. Remove the battery compartment cover (push down and slide away)
2. Pull out the battery isolation strip. The Sensor will work immediately.
3. Press the button on the Remote Control to arm the system. Move the[Arm ]
magnet away from the transmitter, the LED will light up and the Control Panel will
alarm indicating that the Sensor is operating.
Note: The distance between the transmitter and the magnet must not exceed 1 cm when
in the closed position.
Blinks once: Door/window is opened
Blinks once per 3 seconds: Low battery - battery replacement required

12

13

14
Table of contents
Other ERA Security System manuals

ERA
ERA Protect Replica Siren User manual
ERA
ERA Nu Mail Shield TS008 User manual
ERA
ERA miGuard A105 User manual

ERA
ERA HomeGuard User manual
ERA
ERA Protect User manual

ERA
ERA WIRELESS HD CCTV SYSTEM User manual
ERA
ERA Protect SALAPWHESSU User manual

ERA
ERA ADDMORE WS280 User manual
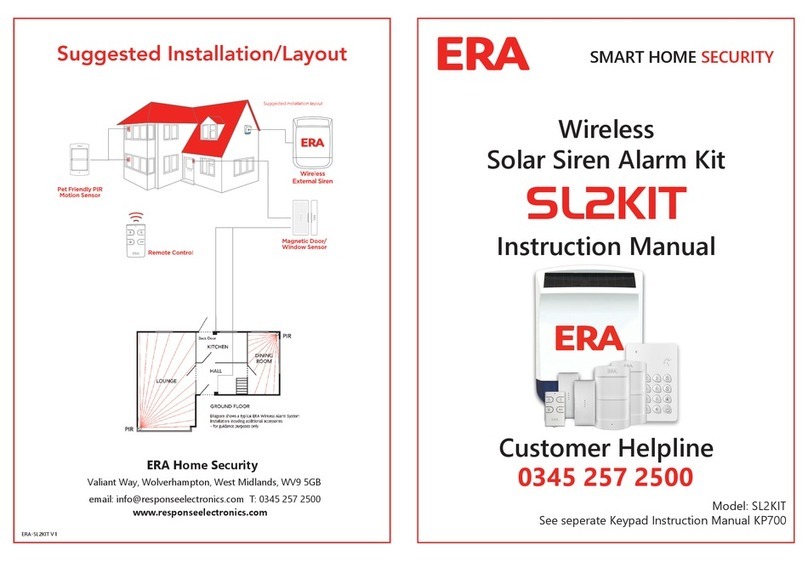
ERA
ERA SL2KIT User manual
ERA
ERA SL2KITA User manual
Popular Security System manuals by other brands

CSL
CSL DUALCOM PRO Fittings guide

NUUO
NUUO G3 Card Hardware & software installation

Evolve
Evolve Detective instruction manual

SVAT
SVAT CLEARVU9 instruction manual
M-system
M-system 48NDVA instruction manual
Alderon Industries
Alderon Industries Vizzyalarm VZW-02 Operation, maintenance and installation manual
