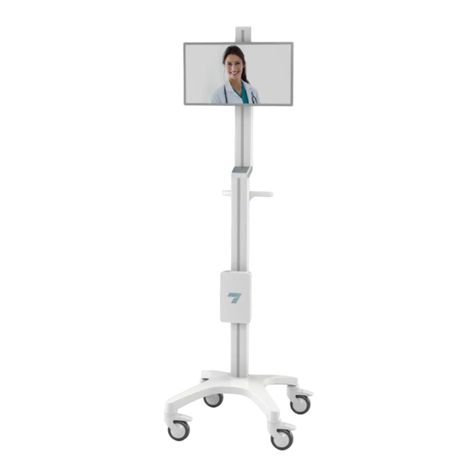
Ergonomic products Safe-T-Shield User manual

Specication and User Guide
Product ID: T1B1
Manual 950-104 version: B
Mobile
Safe-T-Shield


950-104revBergonomic products • 198 Airport Rd • Fall River, MA 02720 • 866-374-6487
Safe-T-ShieldTM - Mobile
Item T1B1
3
Thank you for purchasing the Ergonomic Products Safe-T-ShieldTM.
The well-being of you, your team and patients is our paramount concern. We stand behind
our equipment, and genuinely believe it to be the best available on the market.
Should you have any questions regarding the product’s installation or use, please don’t
hesitate to call our customer service specialists at 1-866-ERGO-4-US. We may also be
reached via email at equip@ergonomic-products.com.
We hope you enjoy the benets and quality of your new equipment and look forward to
handling your future needs as you and your practice continue to grow!
- The Ergonomic Products Team
CONTENTS:
1. Introduction ................................................................................................4
2. Cautions and Safety Information................................................................5
3. Components and Assembly Instructions....................................................6
4. Operating Instructions..............................................................................12
5. Positioning for Treatment .........................................................................14
6. Procedure Techniques and Suggestions..................................................16
7. Cleaning and Disinfection.........................................................................18
8. Maintenance Replacement Schedule.......................................................21
9. Troubleshooting........................................................................................22
10. Specications.........................................................................................23
11. Warranty .................................................................................................25
QUESTIONS?
Call our Customer Service Specialists at:
1-866-ERGO-4-US.

950-104revB ergonomic products • 198 Airport Rd • Fall River, MA 02720
4
1 - INTRODUCTION
The Safe-T-ShieldTM represents the next generation in extraoral
aerosol control for dentists, medical professionals and anyone with
a high exposure to oral vapor.
The Safe-T-Shield provides both a physical barrier to droplet, spray & bio-burden ejection as well
as aerosol evacuation via a patent pending laminar ow air manifold. The device uses a three-part
system to create an H13 level of ltration to capture 99.97% of particles down to .3 um. To maintain
suction and ltration performance, follow the lter replacement schedule on page 21.
While the protection oered by the Safe-T-Shield is higher than any other extraoral system
available, the Safe-T-Shield is intended to be used in conjunction with a sensible PPE regime. The
requirements for such PPE use, including gloves, gowns, and masks will vary by region and need.
Users are cautioned to take every available measure to prevent the spread of aerosol and particulate
contamination.
For user safety and optimal performance, please read this Specication and User Guide thoroughly
prior to use.
Demonstration videos for assembly, use and cleaning are referenced throughout this guide
and may be found here in the “Demonstration Videos” tab on the Safe-T-Shield page at
https://www.ergonomic-products.com/safe-t-shield/.
Physical Proximity to Others
50
Childcare Workers
Cashiers
Pilots
Personal Care Aids
Flight Attendants
Paramedics
Nurses
Couriers
Loggers
Lawyers
Maids
Garbarge Collectors
Janitors
Exposure To Diseases
0
25
50
75
100
025 75 100
Dentists
*Courtesy of The New York Times

950-104revBwww.ergonomic-products.com • 866-374-6487
Safe-T-ShieldTM - Mobile
Item T1B1
5
ENVIRONMENTAL CONDITIONS
1. Do not place the device upside down or on its side as this could damage the equipment or shorten
its life-span.
2. Do not place the device in humid surroundings or anywhere where it can come into contact with
any standing water.
3. Do not expose the device to direct or indirect heat sources. The device must be operated and
stored in a safe environment.
4. Do not operate or store at high temperatures. Comply with the specied operating and storage
conditions.
5. If the device malfunctions during use, switch it o and contact your supplier.
6. Do not dismantle or attempt to repair the device beyond what is described in this manual. Doing
so may result in injury or exposure to shortwave UV energy.
EMC WARNING
As with many devices using high-powered electrical motors, the Safe-T-Shield requires special
precautions with regard to electromagnetic compatibility (EMC) and must be installed and operated in
strict compliance with the EMC information.
In particular, do not use the device near active HF surgical equipment.
Portable RF communications equipment (including peripherals such as antenna cables and external
antennas) should be used no closer than 30 cm(12 inches) to any part of the Safe-T-Shield, including
the cables specied by the manufacturer. Operating such equipment closer than this may negatively
impact its performance.
2 - CAUTIONS AND SAFETY INFORMATION
SYMBOLS USED IN THIS GUIDE
If the instructions are not followed properly, operation
may lead to hazards for the product, user or patient.
Useful information that will increase performance or
ease of use.

950-104revB ergonomic products • 198 Airport Rd • Fall River, MA 02720
6
3 - COMPONENTS AND ASSEMBLY INSTRUCTIONS
User Accessible Components
1. Shield
2. Airow Plate
3. Manifold
4. Suction Tube
5. Handle
6. Housing Lid & Riser Tube
7. Filter Gasket
8. Primary Cotton Filter
9. Secondary Filter
10.Main Filter Assembly
11. Housing & Base
12.Power Cord
13.Remote Control
14. 90oHVE Handpiece
15. Short Handled Mirrors
1
2
3
4
5
6
8
7
9
10
11
1412
A Gift for You, Your Team and Your Patients
Your Safe-T-Shield is shipped with a 90oHVE Handpiece and a pack of disposable Short Handled
Mirrors. While not required for use, we have found these instruments oer the most comfortable
positioning and greatest access to the oral cavity when employing the Safe-T-Shield.
We are providing these items - at no additional charge - to give you the best possible experience
with our product. Please see page 16 for more information on these and other items that will help
your practice treat patients safely & comfortably while maintaining the highest level of care that you
demand.
13 15

950-104revBwww.ergonomic-products.com • 866-374-6487
Safe-T-ShieldTM - Mobile
Item T1B1
7
3 - COMPONENTS AND ASSEMBLY INSTRUCTIONS cont.
ACCESSING FILTERS FOR INITIAL USE (AND REPLACEMENT)
Click here for a demonstration video or go to: www.ergonomic-products.com/safe-t-shield
The Safe-T-Shield is shipped with packing material below the three-part ltration system.
This must be removed prior to use to avoid damaging the motor (step 6, below).
When replacing lter, be sure the device is turned o and unplugged before opening the Housing.
Failure to do so may result in damage to the device and injury to the operator.
ASSEMBLY OVERVIEW
The Safe-T-Shield requires only minor assembly, and no tools are needed.
1. Remove the lters to access and remove the packing material from the Main Filter Assembly
2. Attach the Housing Lid & Riser Tube
3. Plug in the power and remote control cords.
4. Install the Shield (visor)
Details on each step are provided in the following pages, and demonstration videos are available.
1. If Housing Lid is in place, unlatch the four black latches on the underside of the Lid (g. 3.1).
Place Lid and upper assembly on oor carefully to avoid damage to the Shield.
2. Carefully lift o and remove the black Filter Gasket from the Main Filter Assembly (g. 3.2).
3. Remove the Primary Cotton Filter (g 3.3).
3.1 3.2 3.3

950-104revB ergonomic products • 198 Airport Rd • Fall River, MA 02720
8
3.4 3.5 3.6
3 - COMPONENTS AND ASSEMBLY INSTRUCTIONS cont.
ACCESSING FILTERS FOR INITIAL USE (AND REPLACEMENT) - continued
4. To remove the Secondary Filter, grasp the tabs at both ends and lift straight up (g. 3.4).
5. To remove the Main Filter Assembly, grasp the white cardboard sides and lift straight up (g. 3.5).
6. The packing material mentioned above will be taped to the bottom of the Main Filter
Assembly upon arrival. Remove and discard this packing material prior to use (g. 3.6).
Failure to do so may cause damage to the motor.
7. Replace lters in reverse order from which they were removed.
8. Carefully replace the black Filter Gasket on the edge of the Main Filter Assembly (do not cover
the Secondary Filter tabs). Be sure it is seated properly all the way around, otherwise suction
eciency will be reduced.
Filters should be considered Hazardous Materials and replaced and discarded using standard
Hazmat protocols.
Always use appropriate PPE when replacing lters.
See page 21 for lter replacement schedule and information on ordering.

950-104revBwww.ergonomic-products.com • 866-374-6487
Safe-T-ShieldTM - Mobile
Item T1B1
9
ATTACH THE HOUSING LID (g 3.15)
1. Conrm that the black Filter Gasket is properly in
place on the edge of the Main Filter Assembly.
2. Conrm that the black Housing Lid latches are in
the open position.
Be sure the Cord Holder is on
the same side as the Power Plug
3. Carefully position the lid on the top of the Housing,
and lower until rmly seated.
4. Secure each of the four latches.
ATTACH POWER AND CONTROL CORDS (g. 3.16)
1. Connect the Power Cord (female end) to the plug on the lower face of the Housing.
2. If desired, connect the Remote Control Cord to the socket adjacent to the power plug.
3.15
Cord
Holder
Power
Plug
3 - COMPONENTS AND ASSEMBLY INSTRUCTIONS cont.
3.16
Remote Control
Cord socket
Power Cord socket
& power switch
Use only power cords provided by the manufacturer.

950-104revB ergonomic products • 198 Airport Rd • Fall River, MA 02720
10
REMOVING OR INSERTING THE SHIELD
Click here for a demonstration video or go to: www.ergonomic-products.com/safe-t-shield
The Shield is removed from the Manifold for shipping purposes. Installation (or removal) is simple and
does not require tools.
The Shield may be easily removed for replacement or as part of scheduled maintenance and cleaning
routine. See page 18 for cleaning and disinfection recommendations.
To remove the Shield:
1. Depress the retaining tab on one side of the inner part of the Manifold and gently angle the Shield
out until free of that tab (g. 3.7).
2. While supporting the Shield, depress the other tab (g. 3.8).
3. Withdraw the Shield straight out of the slots in the Manifold (g. 3.9).
To insert the Shield:
1. Carefully line up the Shield edges to the slots in the Manifold and slide the Shield in until the
retaining tabs click (g. 3.10). Conrm both tabs are engaged.
3.7
Shield Retaining Tab 3.8 3.9
3.10
3 - COMPONENTS AND ASSEMBLY INSTRUCTIONS cont.

950-104revBwww.ergonomic-products.com • 866-374-6487
Safe-T-ShieldTM - Mobile
Item T1B1
11
REMOVING OR INSERTING THE AIRFLOW PLATE
Click here for a demonstration video or go to: www.ergonomic-products.com/safe-t-shield
The stainless steel, perforated Airow Plate should arrive pre-installed in the Manifold. Under normal
use, the Airow Plate will only need to be removed for weekly cleaning.
To remove the Airow Plate:
1. Remove the Shield from the Manifold (see above)
2. Depress either retaining tab holding the Plate in place (g. 3.11).
3. Grasp the removal ring in the center of the Plate and pull out to remove it (gs. 3.12 & 3.13).
To insert the Airow Plate:
1. With the Shield removed, insert one side of the Airow Plate behind the retaining tab.
2. Gently press the other side of the Airow Plate straight into the Manifold until the retaining tab
clicks (g. 3.14).
3.11 3.12 3.13
3.14
Retaining Tab
Removal Ring
3 - COMPONENTS AND ASSEMBLY INSTRUCTIONS cont.

950-104revB ergonomic products • 198 Airport Rd • Fall River, MA 02720
12
4 - OPERATING INSTRUCTIONS
BEFORE OPERATING YOUR SAFE-T-SHIELD FOR THE FIRST TIME:
1. Conrm that the packaging material below the Main Filter Assembly
has been removed (see page 8). Operating the unit with this packing
material in place can cause damage to the motor. If any Filters
become blocked, they should be replaced immediately.
2. Do not block the slotted air inlets just under the edge of the Housing
Lid, as restricting airow here can also damage the motor.
3. Thoroughly clean and disinfect the unit using standard maintenance
protocols. See page 18.

950-104revBwww.ergonomic-products.com • 866-374-6487
Safe-T-ShieldTM - Mobile
Item T1B1
13
POWER ON/OFF
The power can be switched on using either the Remote Control or the
switch located next to the power outlet on the unit itself, as shown right.
Press power switch up (“I”) to turn unit on, and down (“O”) to turn unit o.
DISPLAY FUNCTION, SPEED SETTINGS (AIR VOLUME),
AND RUN TIME
After turning the unit on, the Display will show the last speed setting
used.
Vacuum speed may be set to a value from 1 - 10, using the buttons
on the vacuum housing shown right. (Left side button reduces speed
in increments of 1, the right side button increases it.)
After 3 minutes without any adjustments to the vacuum speed, the
display on the Housing will show a 3-digit number indicating the
cumulative runtime. Each value is equal to 5.76 million revolutions of
the fan. For example, ‘002’ = 11.52 million revolutions.
CONTROLLER FUNCTION
The Controller may be used to turn the power on and o as well as
to adjust the vacuum speed settings.
Vacuum speed (volume) is increased by turning the dial clock-wise.
The current setting is indicated by the small black dot on the dial.
Settings entered into the Remote Control will override any settings
made directly on the unit.
4 - OPERATING INSTRUCTIONS cont.
SMOKE ABSORBES CONTROL
ENTER
OFF ON
LPM
SMOKE ABSORBES CONTROL
ENTER
OFF ON
LPM

950-104revB ergonomic products • 198 Airport Rd • Fall River, MA 02720
14
5 - POSITIONING FOR TREATMENT
MOVING THE SAFE-T-SHIELD
When moving the Safe-T-Shield within the operatory or from one
treatment room to another, use the circular handle located at the top
of the Riser Tube (g. 5.1).
While the device is stable, please use caution to avoid tipping –
especially when rolling over uneven surfaces such as thresholds.
BASIC POSITIONING WITHIN THE OPERATORY
The Safe-T-Shield may be located on either side of the patient chair as shown below. For best results,
position the base no more than 24” away from the patient’s head. Distances greater than that may
cause strain on the adjustable Suction Tube and/or make it dicult to set the Shield at a proper height
above the oral cavity.
During 2-Handed use, you may want to place the unit on the clinician’s side of the patient to allow
easier adjustments of the Shield during treatment (g 5.2).
When used for 4-Handed procedures, we recommend placing the Safe-T-Shield on the assistant’s
side (g. 5.3).
In either case, be sure the unit is not obstructing the patient’s path on initial entry.
Fig. 5.3
Positioning for
4-Handed use
Fig. 5.2
Positioning for
2-Handed use
5.1

950-104revBwww.ergonomic-products.com • 866-374-6487
Safe-T-ShieldTM - Mobile
Item T1B1
15
5 - POSITIONING FOR TREATMENT cont.
POSITIONING THE SHIELD ABOVE THE PATIENT
Ideal positioning may vary depending on user
preference and treatment requirements.
However, for optimal evacuation and protection from
spray and bioburden ejection, the Shield should be
located at a distance of 8” to 10” directly above the
oral cavity, and at a downward angle of approximately
20˚ as shown (g. 5.4).
To Adjust the Height and Location of the Shield Above the Patient:
Click here for a demonstration video or go to: www.ergonomic-products.com/safe-t-shield
After positioning the base next to the patient chair as needed (see gs. 5.2 & 5.3), follow the steps
below to properly position the Shield above the patient.
1. Place your open hand on the side of the Suction Tube away from you, and approximately 6” above
the circular Handle. Place your other hand on the top of the arch formed by the Tube (g. 5.5).
2. Use lower hand to steady and control the Suction Tube, while carefully bending the top away from
you, down, and toward the patient. Leave the Shield 12” to 15” inches above their face (g. 5.6).
3. Move to the patient's head, place a hand on each side of the Manifold and carefully articulate the
Shield into proper position, in line with the patient and 8"-10" above the oral cavity (g. 5.7).
8” -10”
5.4
Do not bend the Suction Tube immediately above the Handle as this may cause
undo strain on the Tube. Maintain at least 6” of straight Tubing above the Handle.
When establishing this initial “rough” position the Shield may settle, drifting
down 3”-4”. Do not attempt to achieve a nal position at this time.
5.5 5.6 5.7

950-104revB ergonomic products • 198 Airport Rd • Fall River, MA 02720
16
6 - PROCEDURE TECHNIQUES AND SUGGESTIONS
When we say our products are “designed by dentists, for dentists” we mean it. Our founder and the
source of our industry-changing designs is Dr. David Ahearn, a practitioner with two thriving practices
in Massachusetts. While Dr. Ahearn’s experience-driven insights alone give us a unique position in
the eld, his practices allow us the opportunity to test our designs in live dental environments. We
test, we learn, we rene - and repeat the process to continuously bring you the highest quality, most
eective products available.
RECOMMENDED INSTRUMENTS
In testing live procedures under the Safe-T-Shield, we found that angled HVE handpieces provided
the highest level of comfort and access to the oral cavity, while allowing the Shield to best perform it’s
critical task of controlling the aerosols generated in treatment (g. 6.1).
Some of our team hadn’t used these instrument variants before, but all adapted quickly and became
strong proponents.
The team’s reaction was so strong, in fact, that we felt obligated to include (at no charge) the
90O Bull Frog HVE handpiece shipped with your Safe-T-Shield. We encourage you to test the
instrument and see for yourself the benets it brings.
We also tested 45O ASI handpiece as well, and to great eect.
90O HVE Base 45O HVE Base
90O - HVE Handpiece
Manufacturer: Bull Frog
Name: Ergo Vac Stationary HVE Handpiece
Mfg Item: B111715
Aluminum, ts universal holders, autoclavable
45O - HVE Handpiece
Manufacturer: ASI
Name: Ergo Handle High Volume Evacuator
Manufacturer’s Item Number: 90-2706E

950-104revBwww.ergonomic-products.com • 866-374-6487
Safe-T-ShieldTM - Mobile
Item T1B1
17
6 - PROCEDURE TECHNIQUES AND SUGGESTIONS cont.
RECOMMENDED INSTRUMENTS cont.
We discovered a few other methods to optimize comfort and control without sacricing treatment
quality during Shield use.
Short HVE tips
Shorter HVE tips allowed better positioning. For instance,
assistants suctioning from the left, during treatment of posterior
upper left teeth.
Standard tips may be easily cut to any length desired, as shown
right. We recommend cutting to a length of approximately 4”.
Short handle mirrors
As we mentioned, we included a bag of short handle
mirrors with your shipment at no charge. Our team
found these to be very eective in all cases.
Manufacturer: Pulpdent
Name: Flecta™ Disposbale Mirrors
Manufacturer’s Item Number: 879-2500

950-104revB ergonomic products • 198 Airport Rd • Fall River, MA 02720
18
7 - CLEANING AND DISINFECTION
For proper infection control, the exterior of all Safe-T-Shield components should be thoroughly
disinfected after each use. These include the Shield, Manifold, Airow Plate, Suction Tube and
Housing as detailed below. See page 20 for weekly cleaning procedures.
USE ONLY RECOMMENDED CLEANING COMPOUNDS AS DESCRIBED BELOW
RECOMMENDED DISINFECTION PRODUCTS
To more eectively capture patient exhalations and generated aerosols, the Shield is formed with a
signicant downward curve. The most eective material to create this form, while maintaining optical
clarity and patient safety, is PETG (polyethylene terephthalate glycol). While PETG is a very durable
material, some disinfectants in dental use may harm the nish or clarity of the Shield and Manifold.
Though other components of the Safe-T-Shield may be less susceptible to residue or fogging, we
recommend using only the cleaning solutions and disinfection products below on the entire unit to
avoid accidental contact with the Shield and Manifold.
Allowed Manufactured Disinfection Solutions
EPA Reg.
Number
Active
Ingredient
Product
Name Manufacturer Contact
Time*
Formulation
Type
67619-25 Hydrogen
peroxide
Clorox Commercial
Solutions ®
Hydrogen
Peroxide Wipes
Clorox
Professional
Products Co.
2 min. Wipe
67619-24 Hydrogen
peroxide
Peroxide Multi
Surface Cleaner
and Disinfectant
Clorox
Professional
Products Co.
1 min. Ready-to-use
1677-238 Hydrogen
peroxide
Peroxide Multi
Surface Cleaner
and Disinfectant
Ecolab Inc 2 min. Dilutable
Allowed Cleaning Solutions
Family Notes
Hydrogen
Peroxide
• Use a 3%-5% solution (these are available out of the bottle).
• Do not dilute.
• Let stand per manufacturer’s guidelines.
Warm, Soapy
Water
• The use of warm, gentle dish soap is a common form of cleaning and disinfecting.
• Thoroughly and vigorously wash the surface of the plastic with dish washing soap
for a minimum of 20 seconds or longer.
• Rinse with clean water.
*Source: EPA List N: Disinfectants for Use Against SARS-CoV-2 (COVID-19)

950-104revBwww.ergonomic-products.com • 866-374-6487
Safe-T-ShieldTM - Mobile
Item T1B1
19
As with all disinfection processes, follow your oce’s standard protocols regarding PPE and other
guidelines.
After cleaning and disinfection, inspect the parts and components. Any pieces that appear worn,
cracked, or damaged should no longer be used. Contact us for repairs or replacement parts.
CLEAN & DISINFECT THE SHIELD, MANIFOLD AND AIRFLOW PLATE AFTER USE
1. Use an alcohol wipe to clean any large particulate matter or spray o the Shield and Manifold. Let
air dry, approximately 1 minute.
2. Use an allowed disinfection solution and standard protocols to thoroughly disinfect both sides of
the Safe-T-Shield, both the exterior and interior of the Manifold, and the stainless steel Airow
Plate. Follow the disinfection manufacturer’s instructions for appropriate application.
While a clean Shield is obviously important for visual acuity, it is worth mentioning that the Airow
Plate is prominently in the patient’s view during treatment. To maintain a positive patient experience,
it is vital that this plate is not only thoroughly disinfected, but that it LOOKS as clean as possible, too.
An alcohol wipe is eective to remove any streaks or spotting from disinfection. Additionally, we oer
replacement Airow Plates should standard wear and tear degrade the appearance.
CLEAN & DISINFECT THE SUCTION TUBE AND LOWER ELEMENTS AFTER USE
1. If necessary, use an alcohol wipe to clean any large particulate matter or spray o the Suction
Tube and lower elements of the Safe-T-Shield. Let air dry, approximately 1 minute.
2. Use an allowed disinfection solution/product and standard protocols to thoroughly disinfect the
Suction Tube, Handle and Riser Tube. Follow the disinfection manufacturer’s instructions for
appropriate application.
3. Follow applicable regulatory board protocols on cleaning & disinfection for equipment below the
chair level when addressing the Housing and Base. Again, use only allowable solutions/products
as listed.
7 - CLEANING AND DISINFECTION cont.

950-104revB ergonomic products • 198 Airport Rd • Fall River, MA 02720
20
7 - CLEANING AND DISINFECTION cont.
WEEKLY CLEANING AND DISINFECTION
The Suction Tube Interior
In addition to cleaning and disinfection of the exterior elements of the Safe-T-Shield after each use,
we recommend disinfecting the interior of the Suction Tube weekly.
The best method for this is to employ a fogger using hypo-chlorous acid.
1. Remove the Shield from the manifold (see p. 10).
2. Remove the stainless steel Airow Plate from the manifold (see p. 11).
3. Follow your manufacturer’s instructions to prepare your fogger for use.
4. Turn on the Safe-T-Shield.
5. Place the fogger nozzle in the center of the Suction Tube
6. Fog the tube for 10 seconds only and stop. To avoid saturation of the Primary Cotton Filter, do not
run the fogger longer than the recommended 10 seconds.
7. Turn o the Safe-T-Shield and replace the Airow Plate and Shield (see pp. 10 & 11).
The Airow Plate
The Airow Plate may be autoclaved. We recommend this weekly as well. See page 11 for
instructions on removal and re-installation of the Plate.
As previously mentioned, some clients prefer to have spare Airow Plates available for a quick swap
out should they require additional cleaning to maintain a pristine appearance.
This manual suits for next models
1
Table of contents
Other Ergonomic products Medical Equipment manuals

Ergonomic products
Ergonomic products Safe-T-Shield VacTrac User manual
Ergonomic products
Ergonomic products C1A1 User manual
Ergonomic products
Ergonomic products D1C Series User manual

Ergonomic products
Ergonomic products 32 INWALL COMFORT MEDIA User manual
Ergonomic products
Ergonomic products R3A1 User manual
Ergonomic products
Ergonomic products R3A1 User manual
