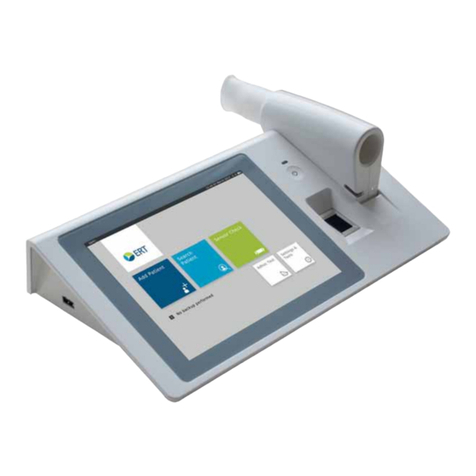
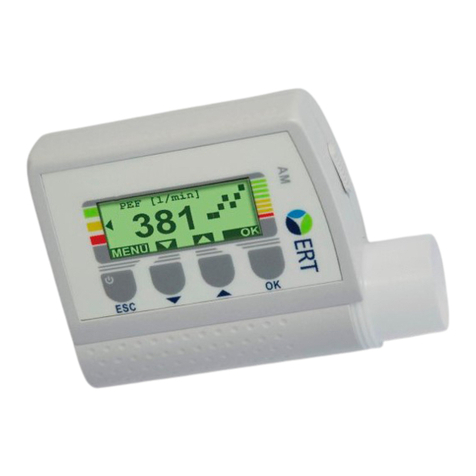
ERT MasterScope WSCS01 User manual

782126-WSSU
Version 03.00
Instructions for Use
MasterScope
· Spirometry
· ECG

Page 2/233
MasterScope - Instructions for Use
Version 03.00 • Date 19FEB2020
Please note that this study specific MasterScope device may only be used if the
user attended a detailed training covering the applicable technical aspects of the
MasterScope and the associated peripherals.
Product names or services are trademarks of their respective companies.
All rights, including those of translations, are reserved. Written permission of
eResearchTechnology (ERT) shall be obtained for the reproduction of this manual
or any excerpt thereof by any means, including printing, photo static duplication,
microfilms, or any other processes.
eResearchTechnology GmbH
Sieboldstrasse 3
97230 Estenfeld, Germany
Tel: +49 9305 720-9891
Fax: +49 9305 720-7891
www.ert.com
© 2020 eResearchTechnology GmbH. All rights reserved.

Page 3/233
MasterScope - Instructions for Use
Version 03.00 • Date 19FEB2020
Table of Contents
Indication for Use.................................................................................................. 6
ERT Customer Care Contacts ................................................................................7
Notes on Safety in Instructions for Use ..................................................................9
Declaration of Conformity..................................................................................... 9
Introduction........................................................................................................10
What is MasterScope? ........................................................................................10
Printer ............................................................................................................11
Printer HP 200 .................................................................................................... 12
1. The MasterScope Setup (Fujitsu E756).............................................14
1.1 Installing the Battery in the Notebook................................................... 14
1.2 Removing the Battery from the Notebook............................................. 15
1.3 Faulty/Damaged Batteries ..................................................................... 15
1.4 Connecting the MasterScope Accessories (Fujitsu E756)........................ 16
2. Turning on the MasterScope ............................................................17
2.1 Login.................................................................................................... 17
2.2 MasterScope First Time Use .................................................................. 18
2.2.1 MasterScope Online Setup.................................................................... 18
2.2.2 MasterScope Offline Setup ................................................................... 32
2.3 MasterScope User Registration..............................................................44
3. The Wireless Spirometry Sensor Solution (WSSS)...........................51
3.1 Wireless Spirometry Charging Station ................................................... 51
3.2 Charging the Wireless Spirometry Sensor Unit ...................................... 52
3.3 Switch on the Wireless Spirometry Sensor Unit ..................................... 54
3.4 Prepare Wireless Spirometry Sensor Unit for a Measurement
(Insert and Remove ERT PT)................................................................... 54
3.5 Device Management Wireless Spirometry Sensor Unit........................... 55
4. Subject, Proficiency and Training Mode...........................................59
4.1 Subject Mode ....................................................................................... 59
4.2 Proficiency Mode.................................................................................. 59
4.3 Training Mode ...................................................................................... 59
4.4 Subject Mode Activation....................................................................... 60
5. Program Access..................................................................................62
5.1 Fingerprint Identification....................................................................... 62
5.2 Temporary Password............................................................................. 63
5.3 Remote Support ................................................................................... 64
6. System Overview ..............................................................................65
6.1 Main Menu .......................................................................................... 65
6.2 Dashboard............................................................................................ 66
6.3 Search/New Subject.............................................................................. 67
6.3.1 Search Subject...................................................................................... 67
6.3.2 New Subject ......................................................................................... 69
6.4 Waiting Room ...................................................................................... 70
6.5 Utilities ................................................................................................. 71
6.5.1 The Tools Menu .................................................................................... 72
6.6 Status Bar............................................................................................. 74
7. Ambient Conditions and Calibration Check.....................................75
7.1 Ambient Room Conditions ................................................................... 75
7.1.1 Ambient Sensor (Automatic Ambient Condition Registration) ............... 75
7.1.2 Manual Entry of Ambient Conditions.................................................... 75
7.2 Wireless Spirometry Sensor Check ........................................................ 78
7.2.1 Quality Control for Flow-Volume Measuring Devices
in Compliance with ATS/ERS 2005 ........................................................ 78

Page 4/233
MasterScope - Instructions for Use
Version 03.00 • Date 19FEB2020
7.2.2 Wireless Spirometry Sensor Calibration Check (ERT PT Check)............... 78
7.2.3 Wireless Spirometry Sensor Linearity Check........................................... 83
8. Visit.....................................................................................................89
8.1 Visit Selection ....................................................................................... 89
8.2 Visit Summary ...................................................................................... 90
8.3 Visit Calendar ....................................................................................... 92
8.4 Subject Details...................................................................................... 93
9. Spirometry Measurement .................................................................94
9.1 Basic Conditions prior to starting a Measurement ............................... 94
9.2 Slow Spirometry (VC and IC)................................................................. 95
9.3 Perform a Slow Spirometry Measurement ............................................. 97
9.3.1 Recording of Different SVC Maneuvers on the MasterScope ............... 102
9.4 Forced Spirometry Measurement......................................................... 107
9.5 Perform a Forced Spirometry Measurement.........................................108
9.6 ATS Criteria (ATS/ERS 2005) ................................................................ 115
9.7 Unacceptable Efforts .......................................................................... 117
9.8 Selection of Best Parameters............................................................... 119
9.9 Measurement Summary Result and Comments................................... 120
9.10 Review Results and Edit Comments ....................................................121
9.11 Amending Spirometry Measurements ................................................. 122
10. Resting ECG......................................................................................123
10.1 Information on ECG Recording ........................................................... 125
10.1.1 The Waveform.................................................................................... 125
10.1.2 ECG Leads.......................................................................................... 126
10.1.3 Chest ECG.......................................................................................... 126
10.1.4 Limb ECG ........................................................................................... 127
10.1.5 Basic Conditions for ECG Recording.................................................... 129
10.1.6 Preparing for the Measurement .......................................................... 129
10.2 Performing an ECG Recording ............................................................ 130
10.2.1 Electrode Test ..................................................................................... 130
10.2.2 ECG Recording ................................................................................... 132
10.2.3 ECG Evaluation................................................................................... 133
10.3 Recording Quality ECGs...................................................................... 136
10.4 Hygiene ECG ...................................................................................... 137
10.5 Additional Safety Notes for the ECG Amplifier .................................... 137
10.6 Technical Data ECG............................................................................. 141
11. Additional Visit Actions ..................................................................142
11.1 Rescheduling Visits ............................................................................. 142
11.2 Document Dosing Times for Post PFT and Serial Testing ...................... 142
12. Report Printing and Export to External Media.............................. 144
12.1 Report Printing ................................................................................... 144
12.2 Report Export ..................................................................................... 146
12.3 Printing Screenshots ........................................................................... 149
13. Data Transfer.................................................................................... 150
13.1 Data Transfer to the Data Center ........................................................ 150
13.1.1 Ethernet (LAN) Data Transfer............................................................... 151
13.1.2 Wireless LAN (WLAN) Data Transfer .................................................... 160
13.1.3 Web Upload Data Transfer.................................................................. 170
13.1.4 Analog Modem Data Transfer ............................................................. 179
14. Backup ..............................................................................................183
15. MasterScope Software Updates..................................................... 188
15.1 Online Update .................................................................................... 188
15.1.1 Optional Actions................................................................................. 190

Page 5/233
MasterScope - Instructions for Use
Version 03.00 • Date 19FEB2020
15.2 Installation of Software Update via SD Card or USB Stick .................... 193
15.2.1 Optional Actions................................................................................. 197
15.3 Date/Time Check and Correction ........................................................ 199
16. Data Corrections and Communications..........................................202
16.1 New DCR ........................................................................................... 202
16.2 DCR Overview .................................................................................... 206
17. Troubleshooting...............................................................................208
17.1 Fingerprint Sensor .............................................................................. 208
17.2 Backup Medium ................................................................................. 209
17.3 Notebook ........................................................................................... 209
17.4 Equipment Bag................................................................................... 209
17.5 Printer ................................................................................................ 209
18. Hygiene Wireless Spirometry Sensor Unit..................................... 211
18.1 Hygiene Regulations ........................................................................... 211
18.2 How often should Contaminated Parts be Exchanged? ....................... 211
18.3 Surface Cleaning and Disinfection.......................................................212
18.4 Precleaning and Disinfection............................................................... 212
18.5 Disposal of Single Use Items/Damaged Reusable Items........................ 213
19. General Safety Precautions............................................................. 214
19.1 Graphical Symbols .............................................................................. 219
19.2 Safety Precautions for Lithium Ion Rechargeable Batteries................... 221
Notes on EMC according to EN60601-1-2......................................................... 223
Return of Goods in Medical Institutions............................................................. 224
Technical Data Calibration Syringe.....................................................................228
Technical Data Wireless Spirometer Sensor Unit & Charging Station ..................228
Technical Data Ruuvitag Ambient Sensor...........................................................229
System Requirements........................................................................................230
Technical Data Laptop (Fujitsu E756) .................................................................230
Technical Data Accessories ................................................................................ 230
Index ..........................................................................................................231

Page 6/233
MasterScope - Instructions for Use
Version 03.00 • Date 19FEB2020
Indication for Use
MasterScope WSSU is a medical device to measure inspiratory and expiratory lung
function parameters in adults and children aged 4 years and older.
With the option ECG a 12-channel surface electrocardiogram (ECG) can be
measured and recorded. It is not intended for intracardial use.
MasterScope WSSU is a portable, mains power independent, active diagnostic
medical device for transient application (≤ 60 min). It can be used by physicians in
the office or hospital.
This document contains copyright information. All rights are reserved. It is not
allowed to copy, duplicate or translate this manual in any other language
without obtaining written approval from ERT. ERT reserves the right to alter the
information included in this document without notice. Names of persons
mentioned in the context of this manual are fictitious - any resemblance to
living or deceased persons is purely incidental and not intended.
Subject to technical modifications.
Please refer to the Short Guide for additional study specific information.
FEDERAL U.S. LAW RESTRICTS THIS DEVICE TO SALE BY OR ON THE ORDER OF A
PHYSICIAN. (Rx only)

Page 7/233
MasterScope - Instructions for Use
Version 03.00 • Date 19FEB2020
ERT Customer Care Contacts
Available 24 hours a day, 7 days a week, year-round
ERT’s Global Customer Care team is always available to address any questions,
concerns or equipment needs. You can request immediate assistance by calling the
helpdesk team. Alternatively, send us an email or fax using the information below.
ERT’s Global Customer Care team is always available for technical support. A
trained specialist is standing by for your call now. Please be sure to have your
ERT study name, Portal account login or the ticket number for an existing case, if
available.
Call the ERT Helpdesk (not toll-free)
US Toll number: +1 908 595 2020
German Toll number: +49 9305 720 9891
ERT Helpdesk Toll-Free (where available) numbers can be found on the ERT’s
website: www.ert.com/contact/contact-customer-care/
Contact us via ERT Portal
Click in the ERT Portal on “Contact Customer Care” and follow the instructions
on the screen to submit a helpdesk ticket.
Please note that the ERT Customer Care phone system logs the caller ID (phone
number) of incoming phone calls. The numbers are stored with a date and time,
and separately from any other call, ticket, study, site, or subject information,
in a separate password-protected database. If required, the data is used for
troubleshooting purposes and the generation of call metrics only, and is only
accessible by authorized ERT personnel who work in Customer Care. To avoid
disclosing a private telephone number, it is recommended to use a site-owned
phone to call in rather than a private phone. Alternatively, if needed, it is
possible to block the caller ID before calling.

Page 8/233
MasterScope - Instructions for Use
Version 03.00 • Date 19FEB2020
International Support is responsible for all hardware and software issues and
should be contacted as soon as a problem occurs at a site.
Contact Us by Email
You can email questions and comments to the Global Helpdesk at
customercar[email protected]
Our approximate turnaround time for incoming emails is 48 hours (during
business days). If your request is urgent, please call the ERT Helpdesk for
immediate assistance using the telephone number for your country above.
International Germany
eResearchTechnology GmbH
Sieboldstrasse 3
97230 Estenfeld, Germany
International US
eResearchTechnology
1818 Market Street, Suite 1000
Philadelphia, PA 19103-3638
Please have the following information available when you call:
• Study name
• Site number
• System #
• Subject/CRF Number or SYS Number
• Whether this issue has been reported by the respective site to the
hotline before
The Technical Hotline Operator will ask you for this information in order to
provide the most efficient service.

Page 9/233
MasterScope - Instructions for Use
Version 03.00 • Date 19FEB2020
Notes on Safety in Instructions for Use
Following the ANSI recommendations (American National Standards Institute) for
safety notes, specific passages of the Instructions for Use are clearly marked as
safety notes.
Additional icons shown in the Instructions for Use:
Degree of Danger Injury to
Persons
Damage
to Property Use in case of:
X
DANGER indicates an imminently hazardous situation which,
if not avoided, will result in death or serious injury.
This signal word is to be limited to the most extreme
situations.
XWARNING indicates a potentially hazardous situation which,
if not avoided, could result in death or serious injury.
X (X)
CAUTION indicates a potentially hazardous situation which,
if not avoided, may result in minor or moderate injury. It may
also be used to alert against unsafe practices.
Declaration of Conformity
Important and useful information. Information does not warn
of dangerous or harmful situations.
Hints for use.
The original document of the Declaration of Conformity can be found in the
Accompanying Documents.

Page 10/233
MasterScope - Instructions for Use
Version 03.00 • Date 19FEB2020
The MasterScope is a customized system used to support clinical studies. This
manual will guide you through setting up and operating the
MasterScope.
Training
All individual users of the MasterScope equipment must have had a training
session by a certified trainer.
Safety
Along with the practical information required to use the MasterScope, the
MasterScope Instructions for Use contains important safety information.
Please refer to the chapter “General Safety Precautions“ before installing and
using the equipment.
Troubleshooting
If any of the MasterScope components are not functioning properly, please consult
the MasterScope Instruction for Use, chapter “Troubleshooting“.
What is MasterScope?
MasterScope is your comprehensive solution for conducting clinical trials. Our
customized software allows for protocol-driven workflows and can be tailored for
use in multi-center studies.
MasterScope provides automated and secure data transmission for global data
collection and analysis, including review of protocol compliance, test
acceptability and overall quality monitoring.
MasterScope is the most advanced system on the market providing biometric
fingerprint identification to comply with the 21 CFR Part 11 requirements.
All actions are logged in an audit trail, which makes quality and compliance
monitoring easy.
With the MasterScope, data can be transmitted via ethernet, wireless LAN, web
upload or analog modem to the ERT Data Center. If a data transfer is not possible,
data can be backed-up on a external media which is then sent to the ERT Data
Center by mail.
Do not put excessive weight on the Equipment Bag.
Introduction

Page 11/233
MasterScope - Instructions for Use
Version 03.00 • Date 19FEB2020
Remove the protection tapes from the printer and open the
paper feed holder and the front panel. Remove the blue transport
protection, if enclosed.
Insert the paper into the paper tray of the printer.
Insert the power cable from the external power supply into
the back of the printer. Connect the other end of the external
power supply to the wall socket. Insert the parallel printer cable
into the back of the printer and connect the other end to the
MasterScope. Press the power button to turn the printer on.
Printer
Prior printing with the MasterScope, the delivered printer has to be prepared
and connected to the MasterScope.
Remove the protection seal from the cartridges.
Do NOT touch or remove the copper strip underneath the tape.
The following description applies to any printer model supported by the
MasterScope. Only printer models provided by ERT can be used with the
MasterScope system.

Page 12/233
MasterScope - Instructions for Use
Version 03.00 • Date 19FEB2020
Open the lid of the printer. The printer head will move
to the cartridge loading position. Unlock the blue and
grey handles and insert the ink cartridges.
Lock the handles.
The cartridge number can vary by printer models! The pictures above are just
examples in regards to the cartridge number.
Power button
On/Off
Lights and keys:
Battery LED
Power LED
On/Off
Power LED lightning: Printer is turned on
Power LED dark: Printer is turned off
Battery LED
Not used with ERT configuration!
Ensure that the printer power cable is always
connected to use the printer (battery is not
provided with the printer).
Printer HP 200
Use the keys
to navigate Display with
instructions, e.g.
when printing
Use the keys
to navigate
Not needed
with ERT setup

Page 13/233
MasterScope - Instructions for Use
Version 03.00 • Date 19FEB2020
The printer is pre-configured by ERT. There is no need to go into the Setup
menu to configure the printer. Please ensure to plug in the power cord,
insert paper and cartridges, connect it to the MasterScope, switch it on and the
printer is ready to use.
ERT is not providing the battery for the printer! It works only if the power cable
is plugged in!
Ensure first to plug the delivered “Power Adapter” into the printer and
then plug in the power cable!
Power Adapter
Power Adapter
connected to printer

Page 14/233
MasterScope - Instructions for Use
Version 03.00 • Date 19FEB2020
1. Remove the notebook battery from foil package.
2. Position the battery at the edge.
3. Insert the battery into the battery compartment until it engages positively (1).
4. Slide the release button in the direction of the arrow (2).
5. Keep the foil package for the return of the equipment.
Battery must be charged permanently to avoid complete battery failure!
1. The MasterScope Setup (Fujitsu E756)
1.1 Installing the Battery in the Notebook
Due to regulatory safety for Lithium Ion batteries transportation it is necessary to
remove the battery from the notebook before shipping.

Page 15/233
MasterScope - Instructions for Use
Version 03.00 • Date 19FEB2020
1.2 Removing the Battery from the Notebook
Before shipping the device the battery must be removed from the
notebook!
1. Slide the release button in the direction of the arrow (1).
2. Slide the release button in direction of the arrow (2) and hold it in place.
3. Remove the battery from the battery compartment (3).
4. Place the battery in the foil package next to the notebook in the MasterScope
shipping box.
1.3 Faulty/Damaged Batteries
It is prohibited to ship faulty/damaged Lithium Ion batteries. Please
recycle those according to your local recycle rules.

Page 16/233
MasterScope - Instructions for Use
Version 03.00 • Date 19FEB2020
1.4 Connecting the MasterScope Accessories
(Fujitsu E756)
All MasterScope accessories must be connected to the Equipment Bag and the
MasterScope.
ECG
SD Card
Printer
Equipment Bag
Bag (bottom )
Mouse
Mouse
To Power
Socket
or
Ba
g
(bottom
)
USB 4/ECG, AM3, NIOX,
tremoflo, USB Stick
USB Stick
LAN
Power
Supply USB1/
Fingerprint
Sensor
USB3/
Equipment Bag
USB2/
Spirometry
Handle Wireless Spirometry
Sensor Unit (WSSU)
or
For USB ports with multiple device connections please always ensure to connect
the right device properly before starting the workflow action, e.g. if the next
workflow action is a backup on the USB stick, then unplug the currently
connected device at the particular USB port and connect the USB stick properly
before starting the workflow action.
Please note that with Fujitsu E756 analog data transmission is not
supported anymore. Please use WiFi/LAN or SD Card upload instead.

Page 17/233
MasterScope - Instructions for Use
Version 03.00 • Date 19FEB2020
2. Turning on the MasterScope
Connect your MasterScope to a power socket which corresponds to the local
regulations (110/240V). Turn the MasterScope ON using the power switch on the
keyboard.
2.1 Login
The identification of the current user is necessary during startup and before each
measurement.
For further information, see chapter “Program Access”.
Running system on power supply
If the MasterScope is not connected to the power supply while in use, a warning
message is displayed on top of the screen. Please make sure that the power cable
is connected to the MasterScope.
Do not use the notebook without connecting it to the power supply since it could
lead to loss of data. Never do a measurement without connection to the power
supply. The MasterScope should be shut down at the end of each visit day, while
keeping it connected to the power supply. The MasterScope must be connected
to the power supply and turned on at least once a month for a minimum of 24
hours. This is to keep the battery charged and to save essential settings of the
notebook, e.g. date and time.
The notebook is protected by a power-on password, which will be distributed by
ERT during the training session.
After turning on the MasterScope, please wait for about 5 minutes
before starting the first measurement.
In case the MasterScope is not in use for longer than 12 hrs the system
will shut down automatically. This is to avoid any damage on the hard
disk.

Page 18/233
MasterScope - Instructions for Use
Version 03.00 • Date 19FEB2020
2.2 MasterScope First Time Use
The MasterScope must be installed with the protocol-specific software prior to
system use.
When the system is turned on for the first time, the MasterScope Configuration
Wizard will start and will guide the user through the process. There are two
options to install the MasterScope:
1. Online Setup: Install the software via internet download
2. Offline Setup: Install the software via setup medium, e.g. SD Card or
USB stick.
2.2.1 MasterScope Online Setup
For installing the MasterScope software online, the following steps need to be
completed:
Step 1: Complete the Site Qualification Form (SQF) via any PC/laptop with
internet access (not possible via MasterScope).
Step 2: Connect all necessary peripherals to the MasterScope (see Chapter
“Connecting the MasterScope Accessories” and Chapter “Device
Management Wireless Spirometry Sensor Unit”) and turn on
MasterScope.
Step 3: Establish an internet connection first (WiFi or LAN)
Step 4: Download the study-specific software with your MyStudyPortal account
and the SQF PIN.
Step 5: Install software
Step 6: Register all site users
Here is the detail description for each online setup step:
Step 1: Complete Site Qualification Form (SQF)
SQF needs to be completed on any internet PC/laptop (SQF is not possible via
MasterScope) before the online setup can be performed on the MasterScope.
What is SQF?
Before any site can start working in a clinical trial with ERT systems it is necessary
to register the site in ERT’s My Study Portal (MSP). MSP is ERT’s online system that
provides access to reports, queries, supply ordering and reference materials. In
addition it enables the capability for MasterScope to download and install the most
current software versions.
What do I need to complete SQF?
You will need the study specific SQF PIN (received via e-mail), your Site ID, full
contact information for your Site’s Principal Investigator, Shipping Contact, Report
Receiver, and Query Receiver.
How to complete SQF?
Please see the Site Qualification Form Quick Guide which explains the process for
creating accounts and completing the Site Qualification Form (SQF).

Page 19/233
MasterScope - Instructions for Use
Version 03.00 • Date 19FEB2020
Click <Next> to start the setup wizard.
Click <Use Update medium> to continue with offline setup and go to the
respective chapter.
Step 2: Connect peripherals and turn on MasterScope
Connect all peripherals as described in chapter 1.4 and turn on MasterScope. Enter
the power on password (received during the training) and the configuration wizard
will appear.
Click <Next> for online-setup and continue with the next step.

Page 20/233
MasterScope - Instructions for Use
Version 03.00 • Date 19FEB2020
Step 3: Establish an internet connection first (WiFi or Lan)
It is necessary to establish an internet connection before the protocol specific
software can be downloaded and finished.
Select the preferred internet connection (WiFi or LAN) according to your local IT
settings and click <Next> to continue.
For more detailed information about the MasterScope internet settings click on
<Admin Guide>. This might be useful for your IT System Administrator in case
of connectivity issues.
Table of contents
Other ERT Medical Equipment manuals
Popular Medical Equipment manuals by other brands

Coltene
Coltene SciCan BRAVO G4 Technical & service manual

Wallach Surgical Devices
Wallach Surgical Devices SummitDoppler Vista ABI user manual

Motive
Motive DXA-CM-002 quick start guide

Bedfont
Bedfont GastroCH4ECK Gastrolyzer user manual

Blatchford
Blatchford Silcare Breathe user guide

NuVasive
NuVasive PRECICE ERC1 Quick reference guide