ESAB Rustler EM 280C PRO User manual

Rustler
EM280CPRO, EM350CPRO,
EM350CPROSYNERGIC
Instruction manual
0463 930 001 GB 20230113
Valid for: GC236-, GC237-, GC238-,
OP250-XX XXXX


TABLE OF CONTENTS
0463 930 001 -4- © ESAB AB 2023
1 SAFETY ...................................................................................................................................... 6
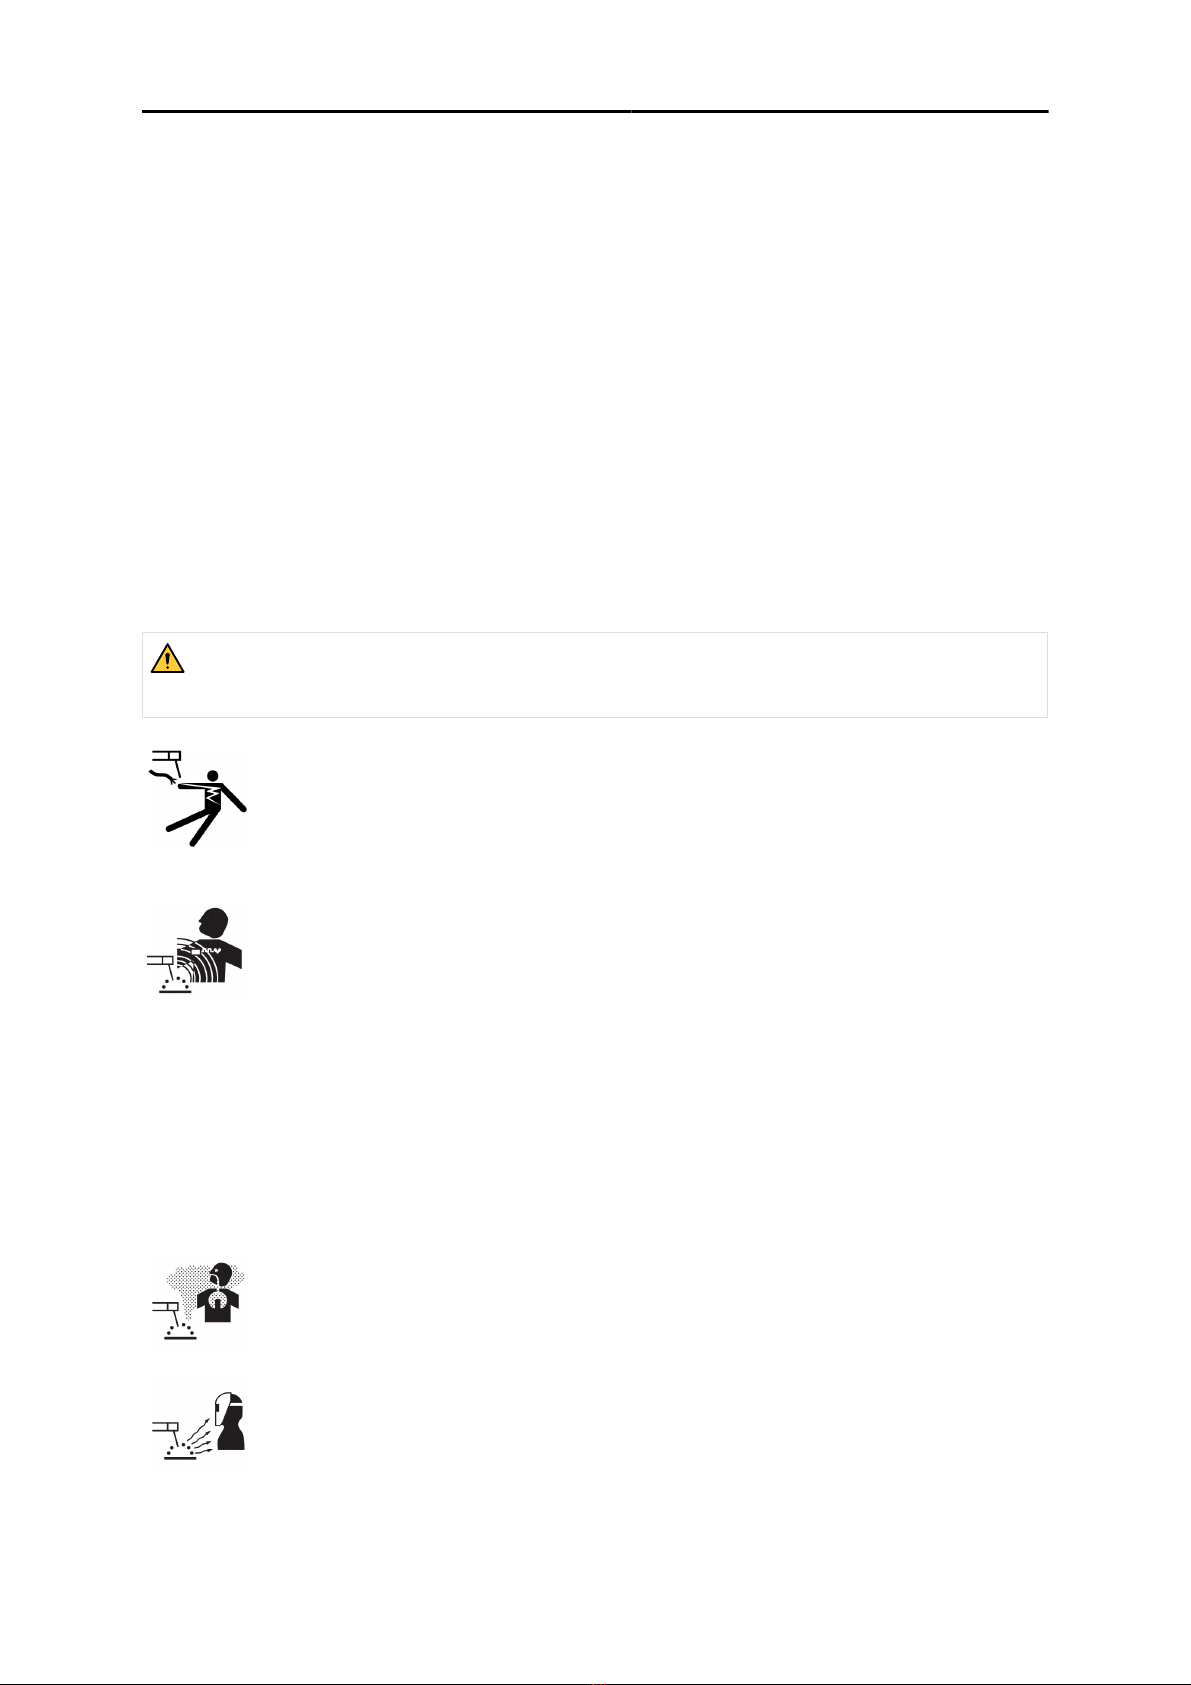
1.1 Meaning of symbols .................................................................................................... 6
1.2 Safety precautions ...................................................................................................... 6
2 INTRODUCTION ......................................................................................................................... 9
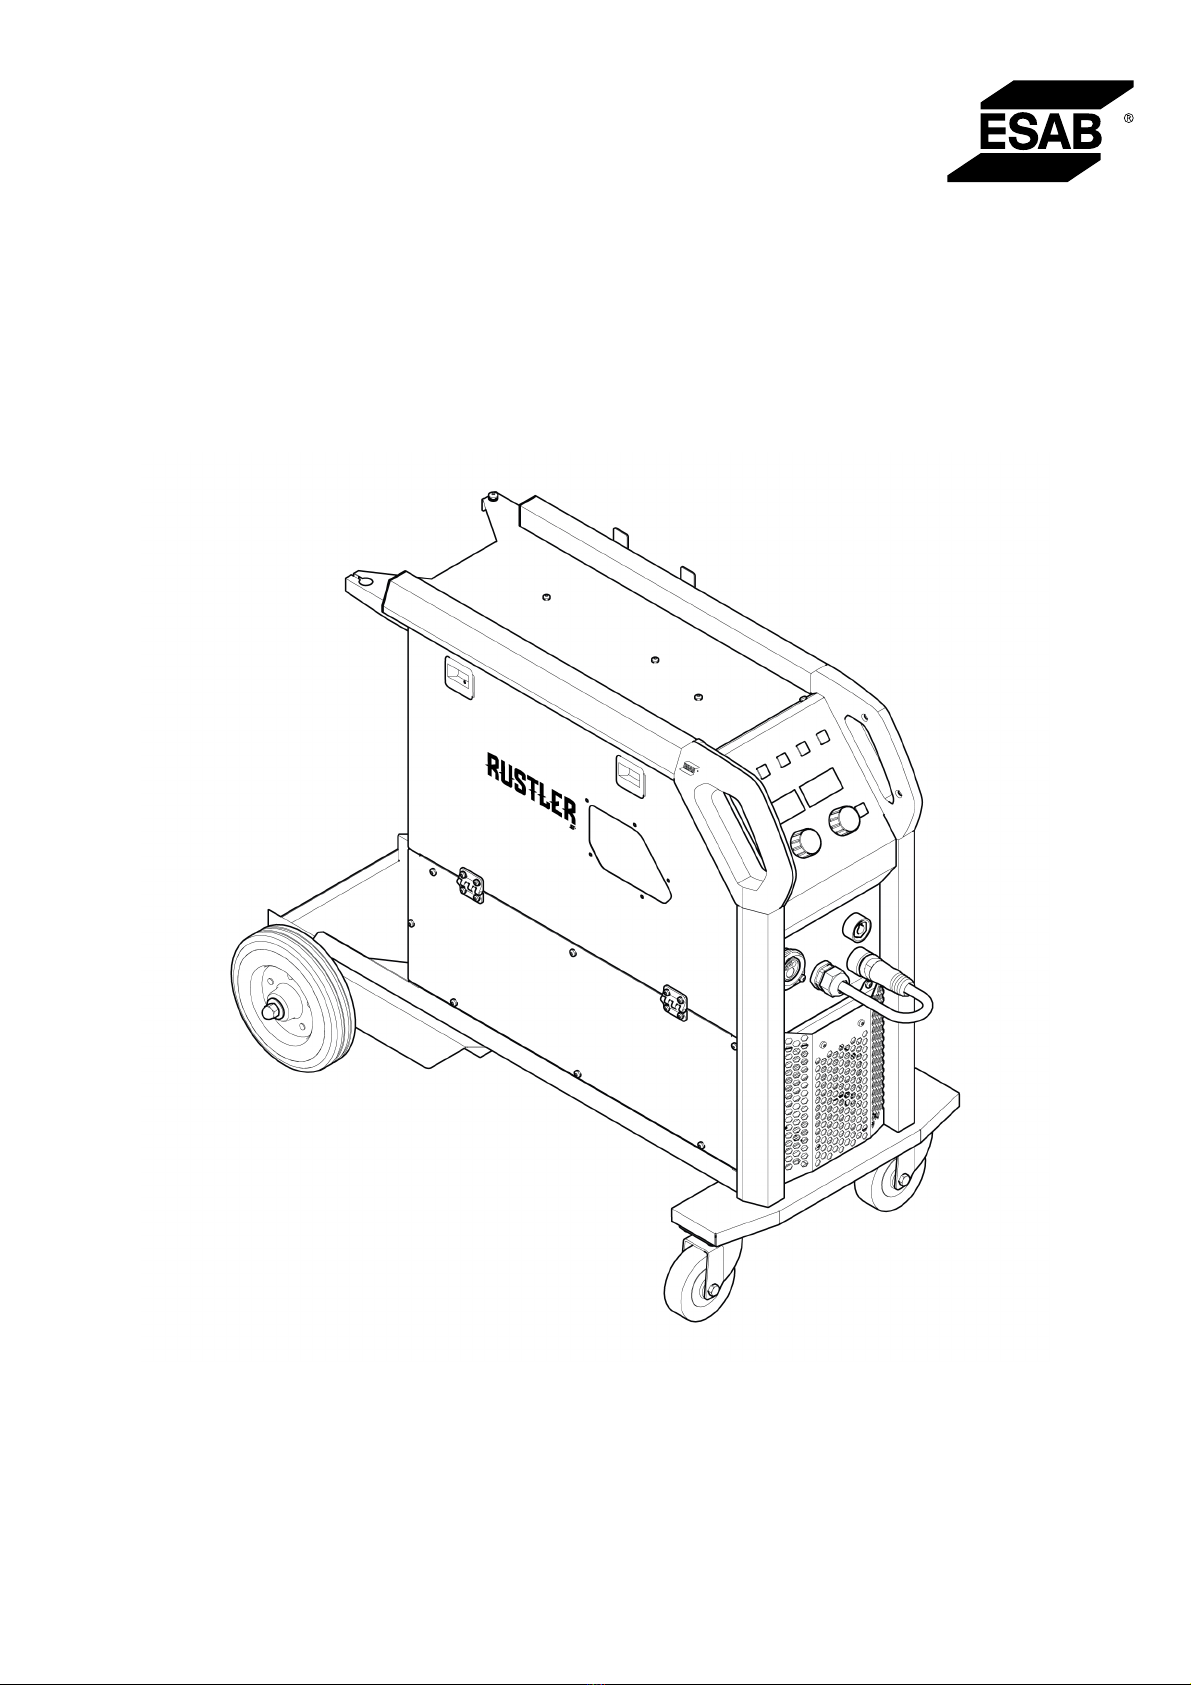
2.1 Equipment.................................................................................................................... 9
3 TECHNICAL DATA ..................................................................................................................... 10
3.1 ECO design information ............................................................................................. 11
4 INSTALLATION........................................................................................................................... 12
4.1 Location........................................................................................................................ 12
4.2 Move instructions (No lifting)..................................................................................... 12
4.3 Mains supply................................................................................................................ 13
5 OPERATION ............................................................................................................................... 14
5.1 Connections and control devices .............................................................................. 14
5.2 Recommended maximum current values for connection cables set ..................... 15
5.3 Connecting welding and return cables ..................................................................... 15
5.4 Polarity change............................................................................................................ 15
5.5 Turning the mains power on/off ................................................................................. 16
5.6 Bobbin brake................................................................................................................ 16
5.7 Changing and loading wire......................................................................................... 16
5.8 Changing feed rollers.................................................................................................. 17
5.9 Changing the wire guides........................................................................................... 17
5.9.1 Inlet wire guides ................................................................................................. 18
5.9.2 Middle wire guide ............................................................................................... 18
5.9.3 Outlet wire guide ................................................................................................ 18
5.10 Roller pressure ............................................................................................................ 19
6 CONTROL PANEL...................................................................................................................... 20
6.1 External control panel................................................................................................. 20
6.2 LED indicators description......................................................................................... 21
6.3 Internal control panel .................................................................................................. 25
6.4 Menu selection ............................................................................................................ 26
6.4.1 MIG/MAG and MIG/MAG SYN ........................................................................... 26
6.4.2 Hidden functions for MIG/MAG and MIG/MAG SYN .......................................... 26
6.4.3 MIG SPOT.......................................................................................................... 27
6.4.4 Hidden functions for MIG SPOT......................................................................... 28
6.4.5 MMA ................................................................................................................... 28
6.4.6 Hidden functions for MMA .................................................................................. 29
7 MAINTENANCE.......................................................................................................................... 30
7.1 Routine maintenance .................................................................................................. 30
7.2 Power source............................................................................................................... 31
7.3 Inspection, cleaning and replacement ...................................................................... 31
8 ERROR CODES.......................................................................................................................... 32
8.1 Error code descriptions .............................................................................................. 32
9 TROUBLESHOOTING ................................................................................................................ 34
10 CALIBRATION AND VALIDATION............................................................................................. 35
10.1 Measurement methods and tolerances ..................................................................... 35
10.2 Requirements specifications and standards ............................................................ 35
11 ORDERING SPARE PARTS ....................................................................................................... 36

TABLE OF CONTENTS
0463 930 001 -5- © ESAB AB 2023
WIRING DIAGRAM ................................................................................................................................ 37
ORDERING NUMBERS ......................................................................................................................... 39
WEAR PARTS........................................................................................................................................ 40
ACCESSORIES ..................................................................................................................................... 42

1 SAFETY
0463 930 001 -6- © ESAB AB 2023
1 SAFETY
1.1 Meaning of symbols
As used throughout this manual: Means Attention! Be Alert!
DANGER!
Means immediate hazards which, if not avoided, will result in immediate, serious
personal injury or loss of life.
WARNING!
Means potential hazards which could result in personal injury or loss of life.
CAUTION!
Means hazards which could result in minor personal injury.
WARNING!
Before use, read and understand the instruction manual and follow
all labels, employer´s safety practices and Safety Data Sheets
(SDSs).
1.2 Safety precautions
Users of ESAB equipment have the ultimate responsibility for ensuring that anyone who works on or
near the equipment observes all the relevant safety precautions. Safety precautions must meet the
requirements that apply to this type of equipment. The following recommendations should be observed
in addition to the standard regulations that apply to the workplace.
All work must be carried out by trained personnel well-acquainted with the operation of the equipment.
Incorrect operation of the equipment may lead to hazardous situations which can result in injury to the
operator and damage to the equipment.
1. Anyone who uses the equipment must be familiar with:
• its operation
• location of emergency stops
• its function
• relevant safety precautions
• welding and cutting or other applicable operation of the equipment
2. The operator must ensure that:
• no unauthorised person is stationed within the working area of the
equipment when it is started up
• no-one is unprotected when the arc is struck or work is started with the
equipment
3. The workplace must:
• be suitable for the purpose
• be free from drafts

1 SAFETY
0463 930 001 -7- © ESAB AB 2023
4. Personal safety equipment:
• Always wear recommended personal safety equipment, such as safety
glasses, flame-proof clothing, safety gloves
• Do not wear loose-fitting items, such as scarves, bracelets, rings, etc.,
which could become trapped or cause burns
5. General precautions:
• Make sure the return cable is connected securely
• Work on high voltage equipment may only be carried out by a
qualified electrician
• Appropriate fire extinguishing equipment must be clearly marked and
close at hand
• Lubrication and maintenance must not be carried out on the equipment
during operation
If equipped with ESAB cooler
Use ESAB approved coolant only. Non-approved coolant might damage the equipment and jeopardize
product safety. In case of such damage, all warranty undertakings from ESAB cease to apply.
For ordering information, see the "ACCESSORIES" chapter in the instruction manual.
WARNING!
Arc welding and cutting can be injurious to yourself and others. Take precautions when
welding and cutting.
ELECTRIC SHOCK - Can kill
• Do not touch live electrical parts or electrodes with bare skin, wet gloves
or wet clothing
• Insulate yourself from work and ground.
• Ensure your working position is safe
ELECTRIC AND MAGNETIC FIELDS - Can be dangerous to health
• Welders having pacemakers should consult their physician before welding.
EMF may interfere with some pacemakers.
• Exposure to EMF may have other health effects which are unknown.
• Welders should use the following procedures to minimize exposure to
EMF:
○ Route the electrode and work cables together on the same side
of your body. Secure them with tape when possible. Do not
place your body between the torch and work cables. Never coil
the torch or work cable around your body. Keep welding power
source and cables as far away from your body as possible.
○ Connect the work cable to the workpiece as close as possible
to the area being welded.
FUMES AND GASES - Can be dangerous to health
• Keep your head out of the fumes
• Use ventilation, extraction at the arc, or both, to take fumes and gases
away from your breathing zone and the general area
ARC RAYS - Can injure eyes and burn skin
• Protect your eyes and body. Use the correct welding screen and filter lens
and wear protective clothing
• Protect bystanders with suitable screens or curtains

1 SAFETY
0463 930 001 -8- © ESAB AB 2023
NOISE - Excessive noise can damage hearing
Protect your ears. Use earmuffs or other hearing protection.
MOVING PARTS - Can cause injuries
• Keep all doors, panels and covers closed and securely in place. Have only
qualified people remove covers for maintenance and troubleshooting as
necessary. Reinstall panels or covers and close doors when service is
finished and before starting engine.
• Stop engine before installing or connecting unit.
• Keep hands, hair, loose clothing and tools away from moving parts.
FIRE HAZARD
• Sparks (spatter) can cause fire. Make sure therefore that there are no
inflammable materials nearby
• Do not use on closed containers.
HOT SURFACE - Parts can burn
• Do not touch parts bare handed.
• Allow cooling period before working on equipment.
• To handle hot parts, use proper tools and/or insulated welding gloves to
prevent burns.
MALFUNCTION - Call for expert assistance in the event of malfunction.
PROTECT YOURSELF AND OTHERS!
CAUTION!
This product is solely intended for arc welding.
CAUTION!
Class A equipment is not intended for use in residential locations
where the electrical power is provided by the public low-voltage
supply system. There may be potential difficulties in ensuring
electromagnetic compatibility of class A equipment in those
locations, due to conducted as well as radiated disturbances.
NOTE!
Dispose of electronic equipment at the recycling facility!
In observance of European Directive 2012/19/EC on Waste
Electrical and Electronic Equipment and its implementation in
accordance with national law, electrical and/or electronic equipment
that has reached the end of its life must be disposed of at a
recycling facility.
As the person responsible for the equipment, it is your
responsibility to obtain information on approved collection stations.
For further information contact the nearest ESAB dealer.
ESAB has an assortment of welding accessories and personal protection equipment for
purchase. For ordering information contact your local ESAB dealer or visit us on our website.

2 INTRODUCTION
0463 930 001 -9- © ESAB AB 2023
2 INTRODUCTION
The RustlerEM280PRO, EM350PRO and EM350PROSynergic is a compact welding power
source intended for welding with solid wires, flux cored wires and coated electrodes (MIG/MAG,
FCAW, and MMA).
The equipment has built in wheels and gas bottle bracket to move easily around the work place and
provide a better reach.
Main features of RustlerEMPRO:
• High output current and duty cycle
• Easy and intuitive set up
• Durable housing
• Superb arc characteristic, optimized for most common based materials
• MMA welding mode
ESAB accessories for the product can be found in the "ACCESSORIES" chapter of this manual.
2.1 Equipment
The power source is supplied with:
• 4 m black rubber gas hose
• 3m return cable with crocodile type earth clamp
• Safety instruction
• Quick start guide

3 TECHNICAL DATA
0463 930 001 - 10 - © ESAB AB 2023
3 TECHNICAL DATA
EM280 EM350 EM350SYN
Mains voltage 400 V ±15%, 3~ 50/60 Hz
Primary current I max
MIG/MAG 14 A 20.6 A 20.6A
MMA 13.5 A 20 A 20A
Setting range
MIG/MAG
40A/16V -
280A/28V
30A/15.5V -
350A/31.5V
30A/15.5V -
350A/31.5V
MMA
20A/20.8V -
250A/30V
20A/20.8V -
320A/32.8V
20A/20.8V -
320A/32.8V
Wire feed speed 1.5 - 22m/min
Permissible load at MIG/MAG
40 % duty cycle 280A/28V 350A/31.5V 350A/31.5V
60 % duty cycle 229 A/25.5 V 286 A/28.3 V 286A/28.3V
100% duty cycle 177 A/22.9 V 222 A/25.1 V 222A/25.1V
Open-circuit voltage 65V 71 V 71V
Permissible load at MMA
40 % duty cycle 250A/30V 320A/32.8V 320A/32.8V
60 % duty cycle 204 A/28.2 V 262 A/30.5 V 262A/30.5V
100% duty cycle 158 A/26.3 V 203 A/28.1 V 203A/28.1V
Open-circuit voltage 63V 66.6V 66.6V
Active power I2at maximum current 12.5kVA 14.5kVA 14.5kVA
Power factor at maximum current >0.9 >0.9 >0.9
Efficiency at maximum output power 89 % 89 % 89 %
No-load power demand when
energy-saving mode
30W 30W 30W
Weight 54kg 57.5kg 61kg
Recommended generator 12kW 17kW 17kW
Operating temperature -10 to +40°C (+14 to 104°F)
Transportation temperature -20 to +55°C (-4 to +131°F)
Dimensions l × w × h 977 × 487 × 800 mm
Insulation class H
Enclosure class IP 23
Application class
Duty cycle
The duty cycle refers to the time as a percentage of a ten-minute period that you can weld or cut at a
certain load without overloading. The duty cycle is valid for 40°C/104°F, or below.

3 TECHNICAL DATA
0463 930 001 - 11 - © ESAB AB 2023
Enclosure class
The IP code indicates the enclosure class, i.e. the degree of protection against penetration by solid
objects or water.
Equipment marked IP23 is intended for indoor and outdoor use.
Application class
The symbol indicates that the power source is designed for use in areas with increased electrical
hazard.
3.1 ECO design information
The equipment has been designed in order to be compliant with the Directive 2009/125/EC and the
Regulation 2019/1784/EU.
Efficiency and idle power consumption:
Name Idle power Efficency when max power
consumption
EM280CPRO 30W 89%
EM350CPRO 30W 89%
EM280CPROSYNERGIC 30W 89%
The value of efficiency and consumption in idle state have been measured by method and conditions
defined in the product standard EN 60974-1.
Manufacturer’s name, product name, serial number and date of production can be read from rating
plate.
1. Product name
2. Manufacturer's name and address
3. Serial number
3A. Manufacturing location code
3B. Revision level (last digit of year and week number)
3C. Year & week produced (last two digits of year and week number)
3D. Sequential number system (each week starts with 0001)

4 INSTALLATION
0463 930 001 - 12 - © ESAB AB 2023
4 INSTALLATION
The installation must be carried out by a professional.
CAUTION!
This product is intended for industrial use. In a domestic environment this product may cause
radio interference. It is the user's responsibility to take adequate precautions.
4.1 Location
Position the power source so that cooling air inlets and outlets are not obstructed.
WARNING!
Electric shock! Do not touch the workpiece or the
welding head during operation!
4.2 Move instructions (No lifting)
Mechanical lifting must be done with both outer handles.

4 INSTALLATION
0463 930 001 - 13 - © ESAB AB 2023
4.3 Mains supply
NOTE!
Mains supply requirements
This equipment complies with IEC 61000-3-12 provided that the short-circuit power is greater
than or equal to Sscmin at the interface point between the user's supply and the public system.
It is the responsibility of the installer or user of the equipment to ensure, by consultation with
the distribution network operator if necessary, that the equipment is connected only to a supply
with a short-circuit power greater than or equal to Sscmin. Refer to the technical data in the
TECHNICAL DATA chapter.
1. Rating plate with supply connection data.
Recommended fuse sizes and minimum cable area
EM280CPRO EM350CPRO EM350CPROSYN
Mains voltage 400V±15%, 3~50/60Hz
Mains cable area 4×2.5mm24×2.5mm24×2.5mm2
Maximal current rating Imax
(MIG/MAG) 14A 21A 21A
I1eff 9A 13A 13A
Fuse
anti-surge type C MCB
20A
20A
30A
30A
30A
30A
Maximum recommended
extension cord length
100m/330ft. 100m/330ft. 100m/330ft.
Minimum recommended
extension cord size
4×2.5mm24×2.5mm24×2.5mm2

5 OPERATION
0463 930 001 - 14 - © ESAB AB 2023
5 OPERATION
General safety regulations for handling the equipment can be found in the "SAFETY" chapter
of this manual. Read it through before you start using the equipment!
NOTE!
When moving the equipment use intended handle. Never pull the cables.
WARNING!
Electric shock! Do not touch the workpiece or the welding head during operation!
5.1 Connections and control devices
1. External control panel 7. Mains power supply switch, O/I
2. Connector for welding torch 8. Mains cable
3. Cable for change the polarity 9. Heater socket (optional)
4. Negative welding terminal: Return 10. Wire inlet adapter to use with MarathonPac™
(optional)
5. Positive welding terminal: Welding cable 11. Wire feeding mechanism
6. Connection for shielding gas 12. Internal control panel

5 OPERATION
0463 930 001 - 15 - © ESAB AB 2023
5.2 Recommended maximum current values for
connection cables set
Recommended maximum welding current values for the welding/return cable(copper) at an
ambient temperature of +25°C and normal 10minutes cycle
Cable size mm2Duty cycle Voltage
drop/10m
100% 60% 35%
50 285A 320A 370A 0.352V/100A
70 355A 400A 480A 0.254V/100A
95 430A 500A 600A 0.189V/100A
Recommended maximum welding current values for the welding/return cable(copper) at an
ambient temperature of +40°C and normal 10minutes cycle
Cable size mm2Duty cycle Voltage
drop/10m
100% 60% 35%
50 250A 280A 320A 0.352V/100A
70 310A 350A 420A 0.254V/100A
95 375A 440A 530A 0.189V/100A
5.3 Connecting welding and return cables
The power source has two outputs, a positive welding terminal (+) and a negative welding terminal (-),
for connecting welding and return cables. The output to which the welding cable is connected depends
on the welding method or type of electrode used.
Connect the return cable to the other output on the power source. Secure the return cable's contact
clamp to the work piece and ensure that there is good contact between the work piece and the output
for the return cable on the power source.
• For MIG/MAG and MMA welding, the welding cable can be connected to the positive
welding terminal (+) or negative welding terminal (-) depending on the type of
electrode used. The connecting polarity is stated on the electrode packaging.
5.4 Polarity change
The power source is delivered with the polarity changeover cable connected to the positive terminal.
Some wires, e.g. self-shielded cored wires, are recommended to be welded with negative polarity.
Negative polarity means that the polarity changeover cable is connected to the negative terminal and
the return cable to the positive terminal. Check the recommended polarity for the welding wire you
want to use.
The polarity can be changed by moving the polarity changeover cable to suit the applicable welding
process.

5 OPERATION
0463 930 001 - 16 - © ESAB AB 2023
5.5 Turning the mains power on/off
Turn on the mains power by turning switch to the ”I” position.
Turn the unit off by turning the switch to the ”O” position.
Whether the mains power supply is interrupted or the power source is switched off in the normal
manner, weld programs will be stored so that it is available next time the unit is started.
CAUTION!
Do not turn off the power source during welding (with load).
5.6 Bobbin brake
The bobbin brake force should be increased just enough to prevent wire feed overrun. The actual
brake force needed, is dependent of the wire feed speed and the size and weight of the bobbin spool.
Do not overload the bobbin brake! A too high brake force may overload the motor and reduce the
welding result.
The bobbin brake force is adjusted using the 6 mm hexagon Allen screw in the middle of the brake
hub nut.
5.7 Changing and loading wire
1) Open the left door of the power source
2) Untighten and remove the brake hub nut and remove the old wire spool.
3) Insert a new wire spool into the unit and straighten out the new welding wire 10–20cm. File away
burrs and sharp edges from the end of the wire before inserting it into the feeder mechanism.

5 OPERATION
0463 930 001 - 17 - © ESAB AB 2023
4) Lock the wire spool onto the brake hub, by tightening the brake hub nut.
5) Thread the wire through the feeder mechanism.
NOTE!
Replace the brake hub nut and the brake hub sleeve if they are worn out and do not lock
properly.
6) Close and lock the left door of the wire feeder.
5.8 Changing feed rollers
When changing to a different type of wire, the feed rollers should be changed to match the new type of
wire. For information about correct feed roller depending on wire diameter and type, see the WEAR
PARTS appendix.
1) Open the left door of the wire feeder.
2) Unlock the feed rollers to be exchanged, by rotating the roller quick lock (A) for each roller.
3) Relieve the pressure on the feed rollers, by folding the tensioner units (B) down and thereby
releasing the swing arms (C).
4) Remove the feed rollers and install the correct ones (according to the WEAR PARTS appendix).
5) Reapply the pressure on the feed rollers, by pushing the swing arms (C) down and secure them
using the tensioner units (B).
6) Lock the rollers by rotating the roller quick locks (A).
7) Close and lock the left door of the wire feeder.
5.9 Changing the wire guides
When changing to a different type of wire, the wire guides may have to be changed to match the new
type of wire. For information about the correct wire guides depending on wire diameter and type, see
the WEAR PARTS appendix.

5 OPERATION
0463 930 001 - 18 - © ESAB AB 2023
5.9.1 Inlet wire guides
1) Unlock the inlet wire guide quick lock (A) by folding it out.
2) Remove the inlet wire guide (B).
3) Install the correct inlet wire guide (according to the WEAR PARTS appendix).
4) Lock the new inlet wire guide using the wire guide quick lock (A).
5.9.2 Middle wire guide
1) Apply a little pressure on the middle wire guide clip and pull out the middle wire guide (A).
2) Push in the correct type of wire guide (according to the WEAR PARTS appendix). The clip
automatically locks the wire guide when in the correct position.
5.9.3 Outlet wire guide
1) Remove the lower right feed roller (see Section 5.8 "Changing feed rollers", page17).
2) Remove the middle wire guide (see Section 5.9.2 "Middle wire guide", page18).
3) Unlock the outlet wire guide quick lock (A) by folding it out.
4) Remove the outlet wire guide (B).

5 OPERATION
0463 930 001 - 19 - © ESAB AB 2023
5) Install the correct outlet wire guide (according to the WEAR PARTS appendix).
6) Lock the new outlet wire guide using the wire guide quick lock (A).
7) Reattach the second pair of feed rollers and reapply the roller pressure (see Section 5.8 "Changing
feed rollers", page17).
5.10 Roller pressure
The roller pressure should be adjusted separately on each tensioner unit, depending on used wire
material and diameter.
Start by making sure that the wire moves smoothly through the wire guide. Then set the pressure of
the wire feeder's pressure rollers. It is important that the pressure is not too high.
Figure A. Figure B.
To check that the feed pressure is set correctly, you can feed out the wire against an insulated object,
e.g. a piece of wood.
When you hold the welding torch approx. 5mm from the piece of wood (figure A) the feed rollers
should slip.
If you hold the welding torch approx. 50mm from the piece of wood, the wire should be fed out and
bend (figure B).

6 CONTROL PANEL
0463 930 001 - 20 - © ESAB AB 2023
6 CONTROL PANEL
6.1 External control panel
1. Process selection button 4. Right potentiometer knob
2. Parameter selection button 5. Jobs
3. Left potentiometer knob
Process selection button (1)
The various welding processes such as MIG, MIG SYN, MIG SPOT and MMA can be selected
through this button. When the machine is turned ON, it will be in MIG mode by default. Press this
button to change to MIG SYN/MIG SPOT/MMA and repeat.
Parameter selection button (2)
Parameter selection button is used to switch the functionality of the torch trigger from trigger mode,
Inductance and Menu.
Trigger mode
To access the functions, press the parameter selection button and let the
trigger mode symbol ON. The left display shows the letter TRG and the
right display shows 2T or 4T. Select the function by turning the knob (4).
Inductance
To access the functions, press the parameter selection button and let the
inductance symbol ON. The left display shows the letter IND and the right
display shows the value. The knob (4) is used to change the value of the
selected function.
This manual suits for next models
2
Table of contents
Other ESAB Welding System manuals

ESAB
ESAB Miggytrac B501 User manual

ESAB
ESAB 100i User manual

ESAB
ESAB Aristo MechTig 3000i User manual

ESAB
ESAB ET 201i DC User manual

ESAB
ESAB Plasmarc EPP-450 User manual

ESAB
ESAB Origo Mig 410 User manual

ESAB
ESAB OCE 2H User manual

ESAB
ESAB A2 SF User manual

ESAB
ESAB 100i User manual

ESAB
ESAB Warrior 400i CC User manual

ESAB
ESAB LAW 420 User manual

ESAB
ESAB TIG 401iW User manual

ESAB
ESAB ESP-150 User manual

ESAB
ESAB WARRIOR EDGE 500 User manual

ESAB
ESAB Aristo Mig U4000i User manual

ESAB
ESAB Caddy Professional 250 User manual

ESAB
ESAB TAE 800 User manual

ESAB
ESAB RS 400x User manual

ESAB
ESAB MIGMASTER 250 User manual

ESAB
ESAB A6 Mastertrac Tandem User manual