A chronograph combines two time-keeping functions. It incorporates
a device to measure intervals of time independent of the regular time
shown on the dial.Your ESQ by Movado Fusion Chronograph may be
used to time events up to 10 hours in duration, in 1/10 of-a-second
increments.
Setting the Time:
1. Pull crown out to position 2. (Watch will stop.)
2. Turn crown in either direction to move hands to desired time.
Be sure to take AM/PM into account so that date changes at midnight,
not noon.
3. Push crown back in to position 1. (Watch will restart.)
NOTE: To set time to exact second, pull crown out to position 2
precisely when small seconds hand Sreaches <<60>> position.
(Watch stops.) Adjust time to one minute ahead, and take an accurate
time signal, from a radio news station, for example. When audible tone
signals exact time, immediately push crown back in to position 1.
(Watch will restart, now set to the exact time.)
Setting the Date (quick change):
1. Use a pin or small pointed tool to press date corrector button V.
Each press and release will advance date indicator hand Fby one
increment.
CAUTION: Do not press and hold corrector button V; holding it down
could jam the date mechanism.
NOTE: If the date is adjusted during the automatic date changing phase
(between 9:00 PM and 00:20 AM), set date to following day.
Setting the Time, Date, Day of week and Month:
1. Pull crown out to position 2. (Watch will stop.)
2. Turn crown in either direction to move hands to correct time, making
sure date changes at midnight, not noon. (To set time to exact
second, see “Setting the time”.)
3. Push crown back in to position 1. (Watch will restart.)
NOTE: Each press and release on corrector buttons will advance setting
by one increment:
4. Use corrector button V(on side of case at 8 o’clock) to advance
Date indicator hand F.
5. Use corrector button W(on side of case at 10 o’clock) to advance
Day of week shown in window D.
6. Use corrector button T(on side of case at 2 o’clock) to advance
Month shown in window J.
Chronograph Function Overview
Use buttons Aand Bto operate the chronograph. Pressing button A
the first time will start the chronograph. While the chronograph is
running, once the chronograph seconds counter hand Chas completed
one turn, minute-counter hand Ewill jump ahead one minute. Tenths-
of-a-second hand Gdoes not move when the chronograph is running.
Pressing button Aa second time will stop the chronograph and move
hand Gto the relevant tenth-of-a-second mark. Pressing button Bwill
reset hands G, Eand Cto zero. Adjusting the time does not stop the
chronograph, but it does block buttons Aand Bfor as long as the
crown is pulled out.
IMPORTANT: Crown must be in position 1 and hands must be at zero
before chronograph is started. Press button Bto reset hands to zero.
Do not push button Aor Bwhile crown is pulled to position 2. If but-
ton Aor Bis accidentally activated while crown is not flush against case,
one or more of the chronograph hands will become de-synchronized.
Should this occur, see directions for synchronizing hands at end of
following instructions.
Simple chronograph functions:
To measure the duration of a single, non-stop event:
1. Press button Ato start chronograph.
2. Press button Aa second time to stop chronograph, and read the
3 chronograph hands to determine elapsed time, for example:
14 minutes, 37 seconds, 5/10 of a second.
3. Press button Bto reset chronograph to zero.
Accumulated time functions:
To measure the combined time of a series of shorter events, for
example the actual playing time of a football game, where play is
repeatedly interrupted:
1. Press button Ato start chronograph.
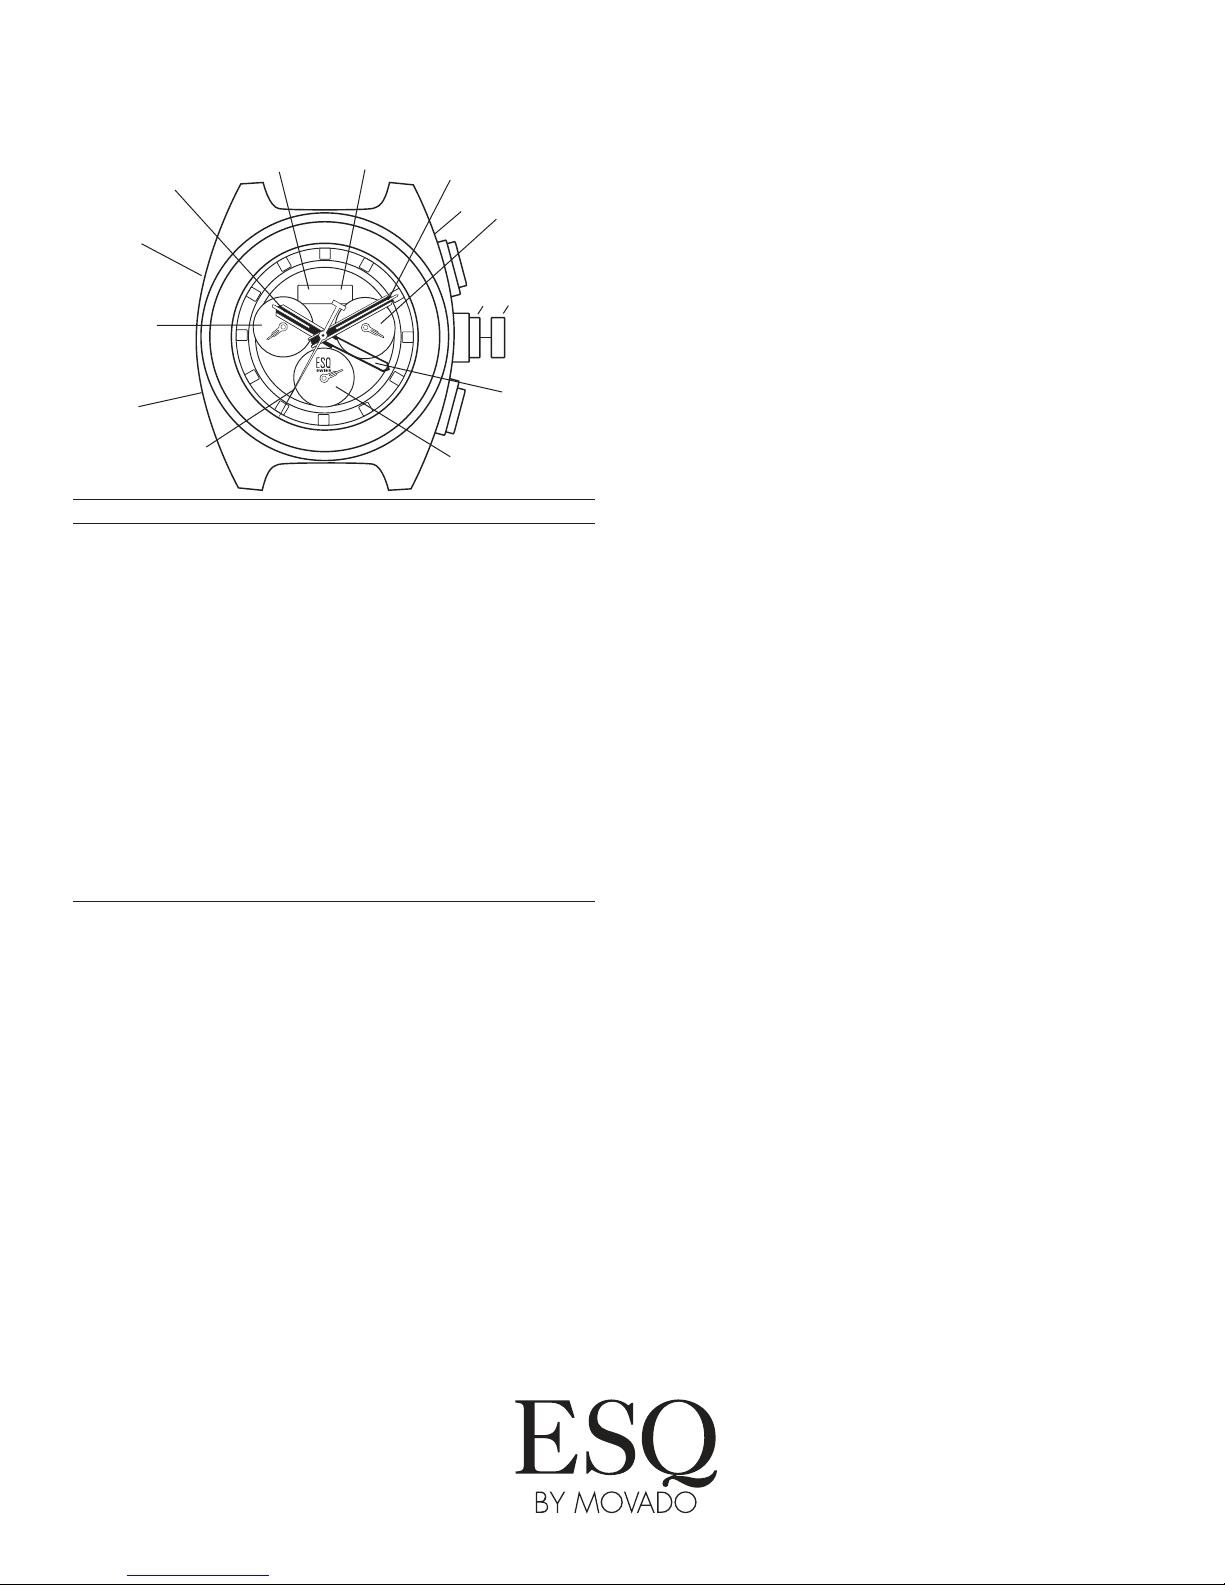
Legend
H- Hour hand
M- Minute hand
S- Small seconds hand
F- Date indicator hand
C- Center-mounted chronograph seconds counter
E- Chronograph minutes counter
G- Chronograph tenths-of-a-second counter
(hour counter after 30 minutes)
D- Day of week display
N- Month display
1, 2 - Crown positions
A- Chronograph start/stop push-button
B- Chronograph reset push-button
W- Day corrector button
T- Month corrector button
V- Date corrector button
2
0
1
5
1
0
4
0
3
5
3
0
2
5
2
0
0
6
8
7
6
5
4
3
2
5
3
0
0
5
5
0
5
5
6
0
1
0
1
5
1
2
MON
MAR
E
1
A
B
C
F
G
2
S
Operating Instructions
ESQ FUSION CHRONOGRAPH
HD
W
N
V
M
T


