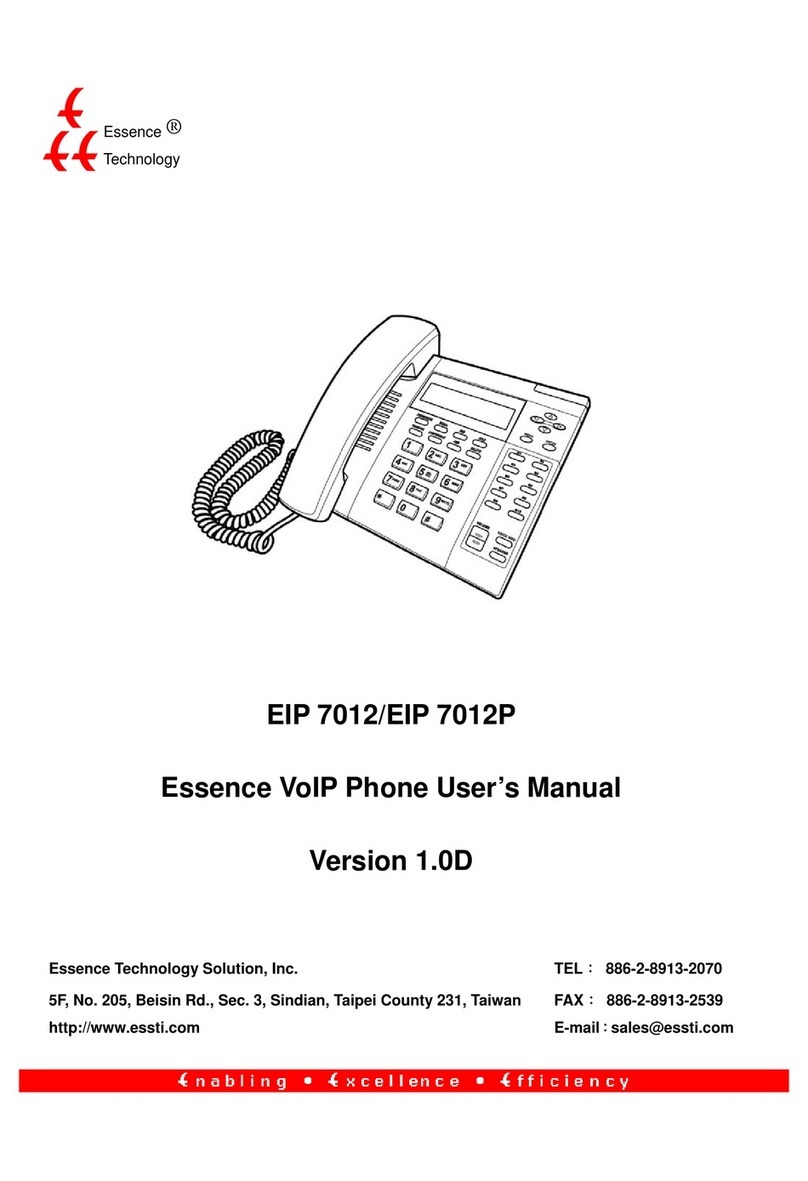
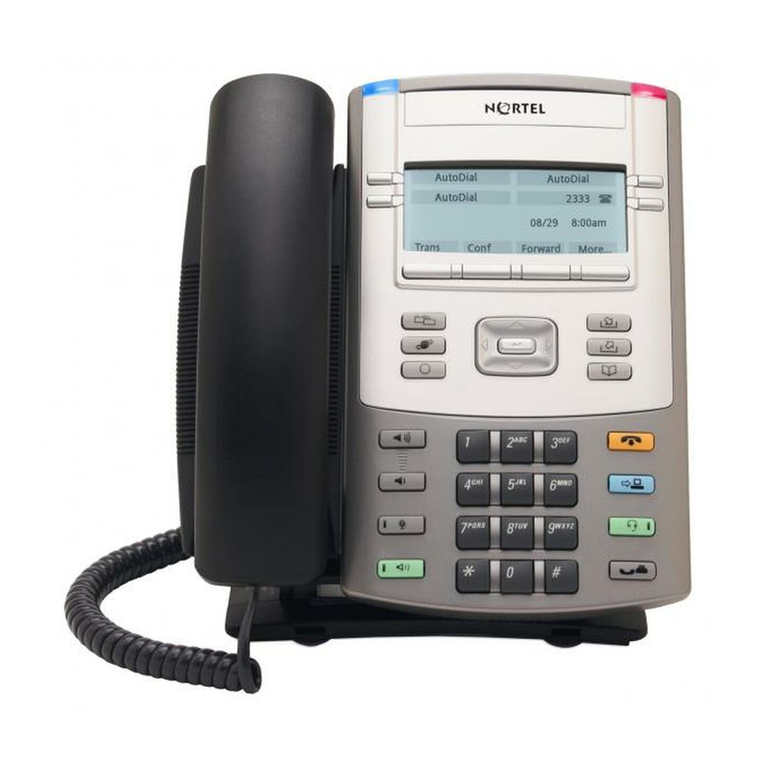
Essence Technology EIP 7012 Instruction Manual

EIP 7012
Essence VoIP Phone Administration Guide
Version 1.0B
Essence ®
Technology

2/14/2007 VoIP Phone Administration Guide MAG-07005-2 Rev. B
ii
Table of Contents
1Introduction....................................................................................................................................................... 1
1.1 Hardware Overview......................................................................................................................1
1.2 Software Overview........................................................................................................................1
2Keypad interface for IP Phone demo system................................................................................................... 3
2.1 Keypad description....................................................................................................................... 3
2.2 Recording .....................................................................................................................................4
2.3 Keypad Function and setting List ................................................................................................. 4
2.3.1 Phone Book .........................................................................................................................4
2.3.2 Call history...........................................................................................................................5
2.3.3 Phone setting....................................................................................................................... 5
2.3.4 Network................................................................................................................................6
2.3.5 SIP Settings ......................................................................................................................... 7
2.3.6 NAT Traversal ......................................................................................................................7
2.3.7 Administrator........................................................................................................................8
2.3.8 Sys. Authority.......................................................................................................................8
3Setup the VoIP Phone by Web Browser .......................................................................................................... 9
3.1 Login............................................................................................................................................. 9
3.2 System Information for the IP PHONE......................................................................................... 9
3.3 Phone Book................................................................................................................................10
3.3.1 Phone Book .......................................................................................................................10
3.3.2 Speed Dial List....................................................................................................................11
3.4 Phone Setting..............................................................................................................................11
3.4.1 Forward Settings................................................................................................................12
3.4.2 SNTP Settings....................................................................................................................13
3.4.3 Volume Settings.................................................................................................................13
3.4.4 Ringer Settings ..................................................................................................................14
3.4.5 DND Settings.....................................................................................................................14
3.4.6 Dial Plan Setting ................................................................................................................14
3.4.7 Call Waiting Settings..........................................................................................................16
3.4.8 Soft-key Settings................................................................................................................16
3.4.9 Hot Line Settings................................................................................................................16
3.4.10 Alarm Settings....................................................................................................................17

2/14/2007 VoIP Phone Administration Guide MAG-07005-2 Rev. B
iii
3.5 Network....................................................................................................................................... 17
3.5.1 Network Status...................................................................................................................17
3.5.2 WAN Settings.....................................................................................................................18
3.5.3 LAN Settings......................................................................................................................18
3.5.4 DDNS Settings...................................................................................................................19
3.5.5 VLAN Settings....................................................................................................................19
3.5.6 DMZ Setting.......................................................................................................................20
3.5.7 Virtual Server .....................................................................................................................21
3.6 SIP Settings................................................................................................................................21
3.6.1 Service Domain..................................................................................................................22
3.6.2 Port Settings ......................................................................................................................23
3.6.3 Codec Settings...................................................................................................................23
3.6.4 Codec ID Settings..............................................................................................................24
3.6.5 DTMF Settings...................................................................................................................24
3.6.6 RPort Function...................................................................................................................25
3.6.7 Other Settings....................................................................................................................25
3.7 NAT Trans...................................................................................................................................25
3.8 Others......................................................................................................................................... 26
3.8.1 MAC Clone Setting ............................................................................................................26
3.8.2 Tones Settings ...................................................................................................................26
3.8.3 Advanced Settings.............................................................................................................27
3.9 System Auth................................................................................................................................28
3.10 Save Changes............................................................................................................................28
3.11 Update........................................................................................................................................28
3.11.1 Update Firmware ............................................................................................................... 28
3.11.2 Auto Update Settings.........................................................................................................29
3.11.3 Restore Default Settings.................................................................................................... 30
3.12 Reboot........................................................................................................................................30
4Automatic Client Configuration with Essence IP PBX.................................................................................... 31

2/14/2007 VoIP Phone Administration Guide MAG-07005-2 Rev. B
1
1 Introduction
This administration guide is for VoIP Phone, EIP 7012. The administration guide explains the keypad instruction,
web configuration and command line configuration for EIP 7012. Before using EIP 7012, some setup processes
are required to make the VoIP Phone work properly. Please refer to the Setup Menu for further information.
1.1 Hardware Overview
EIP 7012 has the following interfaces for Networking, telephone interface, LED indication, and power connector.
Two RJ-45 Networking interface, these two interfaces support 10/100Mps Fast Ethernet. You can connect one
RJ-45 Fast Ethernet port to theADSL or Switch, and connect the other one to your computer.
LED Indication: some LED indicators in the VoIP Phone show the functions, like speaker phone, Register, and so
on.
1.2 Software Overview
Network Protocol
․ SIP v1 (RFC2543), v2(RFC3261)
․ IP/TCP/UDP/RTP/RTCP
․ IP/ICMP/ARP/RARP/SNTP
․ TFTP Client/DHCP Client/ PPPoE Client
․ Telnet/HTTP Server
․ DNS Client
Codec
․ G.711: 64k bit/s (PCM)
․ G.723.1: 6.3k / 5.3k bit/s
․ G.726: 16k / 24k / 32k / 40k bit/s (ADPCM)
․ G.729A: 8k bit/s (CS-ACELP)
․ G.729B: adds VAD & CNG to G.729
Vice Quality
․ VAD: Voice activity detection
․ CNG: Comfortable noise generator
․ LEC: Line echo canceller
․ Packet Loss Compensation
․ Adaptive Jitter Buffer
Call Function
․ Call Hold
․ Call Waiting
․ Call Forward
․ Caller ID
․ 3-way conference
DTMF Function
․ In-Band DTMF
․ Out-of Band DTMF
․ SIP Info
SIP Server
․ Registrar Server (three SIP account)
․ Outbound Proxy
Tone
․ Ring Tone
․ Ring Back Tone
․ Dial Tone

2/14/2007 VoIP Phone Administration Guide MAG-07005-2 Rev. B
2
․ Busy Tone
․ User Programming Tone
Phone Function
․ Volume Adjustment
․ Speed dial, Phone book
․ Flash
․ Speaker Phone
IP Assignment
․ Static IP
․ DHCP
․ PPPoE
Security
․ HTTP 1.1 basic/digest authentication for Web
setup
․ MD5 for SIP authentication (RFC2069/ RFC
2617)
QoS
․ QoS field
NAT Traversal
․ STUN
Configuration
․ Web Browser
․ Console/Telnet
․ Keypad
Firmware Upgrade
․ TFTP
․ Console
․ HTTP
․ FTP

2/14/2007 VoIP Phone Administration Guide MAG-07005-2 Rev. B
3
2 Keypad Interface for IP Phone Demo System
2.1 Keypad Description
Key Name Description Note
1 “1”
2 “2”, “a”, “b”, “c”, “A”, “B”, “C”
3 “3”, “d”, “e”, ”f”, “D”, “E”, “F”
4 “4”, “g”, “h”, “I”, “G”, “H”, “I”
5 “5”, “j”, “k”, “l”, “J”, “K”, “L”
6 “6”, “m”, “n”, “o”, “M”, “N”, “O”
7 “7”, “p”, “q”, “r”, “s”, “P”, “Q”, “R”, ‘S”
8 “8”, “t”, “u”, “v”, “T”, “U”, “V”
9 “9”, “w”, “x”, “y”, “z”, “W”, “X”, “Y”, “Z”
0 “0”, “space”
* “*”, “•”, “:”, “@”
# Start dialing process
4-way
Navigation Keys
Press to scroll through lists and menus on the
display.
MENU Press to access the menu options or cancel your
selection and go back to the previous level.
ENTER Press to enter a menu or confirm a selection.
Phone Book Press to access the personal phonebook
directory.
REDIAL Press to call the last number dialed.
DND Press to block all incoming calls.
HOLD Press to put an active call on hold.
TRANSFER Press to transfer an active call to another VoIP
phone on the system.
CONFERENCE Press to activate the three-way conference call.
FWD Press to forward all incoming calls to another

2/14/2007 VoIP Phone Administration Guide MAG-07005-2 Rev. B
4
phone on the system.
DELETE Press to erase the number you dialed when
making a call.
M1~M9 Press any of the keys to speed dial the preset
contact number.
REC Press to record the conversation, please refer to
section 2.2 for further details.
VOICE MSG Press to listen to voice mail messages.
SPEAKER Press to activate the speakerphone to allow
hand-free conversations.
VOLUMN
Control Key
Press to increase or decrease the volume of the
ringer tone, handset, or the volume of the current
call using the speakerphone.
2.2 Recording
The recording function is for the user who wants to record the conversations during the calls. The user only
needs to press “REC” button to start recording and press again to stop it. The voice file will be saved in the
user’s voice mail system. The Message Waiting Indicator on IP phones will be lit to inform the user.
To listen to the recording, make a call to the user’s voice mail system, press “1” to hear the new messages
of the recording.
2.3 Keypad Function and Setting List
2.3.1 Phone Book
Name Description
Search Search Phone Book.
Add Entry Add new phone number to phone book.
Speed Dial Add speed dial phone number to speed dial list.
Erase All Erase all phone number from Phone Book.

2/14/2007 VoIP Phone Administration Guide MAG-07005-2 Rev. B
5
2.3.2 Call History
Name Description
Incoming Calls Show all incoming calls.
Dialed Numbers Show all dialed calls.
Erase Record Delete call history.
All: Delete all call history.
Incoming: Delete all incoming call.
Dialed: Delete all dialed call.
2.3.3 Phone Setting
Name Description
All Fwd. Activation: To Enabled/Disabled this function.
Number: Forward to a Speed Dial Number.
Busy Fwd. Activation: To Enabled/Disabled this function.
Number: Forward to a Speed Dial Number.
No Answer Fwd. Activation: To Enabled/Disabled this function.
Number: Forward to a Speed Dial Number.
Call Forward
Ring Timeout Set the Ring times to start the no answer forward function, ex:
2 means after 2 rings then forward to the dedicated number.
Always Block all phone calls.
By Period Block all phone calls at a certain period of time.
Do not Disturb
Period Time Set the start time and end time to Block Setting.
Activation Set the Alarm Enabled or Disabled.Alarm Setting
Alarm Time Set the time for alarming.
Date and Time Setting.
Date & Time Set the IP Phone Date and Time.
Time Format To set the time as 12-hour or 24-hour clock.
SNTP setting
SNTP Enabled / Disable SNTP.
Date/Time
Primary SNTP Set Primary SNTP server IP address.

2/14/2007 VoIP Phone Administration Guide MAG-07005-2 Rev. B
6
Secondary SNTP Set Secondary SNTP server IP address.
Time Zone Set Time zone.
Sync. Time Set adjustment time period.
Handset Volume Set Handset volume from 0~15 (max.) for you to hear.
Speaker Volume Set Speaker phone volume from 0~15 (max.) for you to hear.
Handset Gain Set Handset Gain from 0~15 (max.) for the other site to hear.
Volume & Gain
Speaker Gain Set Speaker phone Gain from 0~15 (max.) for the other site to
hear.
Ringer Volume Ringer volume setting from 0~15 (max.).Ringer
Ringer Type Ringer tone selection from 1~4.
Auto Dial Set Auto Dial time from 3~9 seconds.
2.3.4 Network
Name Description
IP Type Fixed IP: self configure the IP address.
DHCP: to get IP address through DHCP.
PPPoE: to get IP address through PPPoE.
Set Fixed IP IP Address: the IP address of the IP phone.
Subnet Mask: configure subnet mask.
Default Gateway: the gateway address.
WAN Setup
Set PPPoE User name: user name of PPPoE.
Password: password of PPPoE.
Bridge Set LAN as bridging mode.LAN Setup
NAT Set LAN as NAT mode.
Primary DNS First DNS addressDNS
Secondary DNS Second DNS address
Activation Activate or disable the VLAN.
VID Set VID from 2 to 4094.
Priority Set the priority from 0 to 7.
VLAN
CFI 0~1
Status Show WAN, LAN IP address and MAC address.

2/14/2007 VoIP Phone Administration Guide MAG-07005-2 Rev. B
7
2.3.5 SIP Settings
If you want to use keypad to set the SIP setting, you have to go to item 8 Sys. Authority to input the password, or
you can not change the SIP setting.
Name Description
Service Domain First/Second/Third
Realm
The realms include following information. You can press “1*#”,
“2*#”, and ”3*#” to change among these three SIP realms.
Activation: toActivate or stop the realm.
User Name: the SIP’s user name.
Display Name: the SIP’s display name.
Register Name: the SIP’s registered name.
Register Pwd.: the SIP’s password.
Proxy Server: the address of SIP proxy.
Domain Server: the address of domain server.
Outbound Proxy: the address of outbound proxy.
Codec Type The codec type includes G.711 uLaw, G.711 aLaw, G.723,
G.729, G.726-16, G.726-24, G.726-32, and G.726-40.
Codec
VAD Select Voice Active Detection Enable or Disable.
Outband DTMF Enable/Disable outband DTMF.RTP Setting
Duplicate RTP No duplicate: do not resend the voice packages.
One duplicate: resend voice packages one time.
Two duplicate: resend voice packages two times.
RPort Setting RPort Enabled/Disabled.
Hold by RFC Enable/Disable Holding the calls, according to RFC3261.
Status Show the SIP Proxy register status. You can use UP/Down key to check each Realm’s
status.
2.3.6 NAT Traversal
If you want to use keypad to set the NAT Traversal settings, you have to go to item 8 Sys. Authority to input the
password, or you can not change the NAT Traversal settings.
Name Description

2/14/2007 VoIP Phone Administration Guide MAG-07005-2 Rev. B
8
STUN Enable/Disable STUN.
STUN Setting
STUN Server The address of STUN server.
2.3.7 Administrator
If you want to use keypad to set theAdministrator setting, you have to go to item 8 Sys. Authority to input the
password, or you can not change the Administrator setting.
Name Description
This function must be work with IP PBX.
Upgrade Now Select to direct connect to IP PBX to check if there is any
upgrade version. If there is a newer version, IP phone will
upgrade the system automatically.
Upgrade system
Schedule State Select to see the current status and scheduling time.
Set to Default You can restore to the default setting.
Change Pwd. Press ENTER and press a new password to replace the original password with the new
one.
Version This will show the system’s firmware version.
Vendor ID To see the vendor ID of the IP Phone
Watch Dog You can use this to enable Watch Dog function to do the debugging.
Restart You can use this function to restart your IP Phone.
2.3.8 Sys. Authority
To do the SIP setting, NAT traversal and Administrator from Keypad, you need to input the password first. Default
is “test”.

2/14/2007 VoIP Phone Administration Guide MAG-07005-2 Rev. B
9
3 Setup the VoIP Phone by Web Browser
Default the IP Phone’s Bridge is enabled, WAN port is in DHCP Client Mode. LAN port is the same as WAN.
Connect the IP Phone to DHCP server, and the server assign an IP address to the phone. Check the IP address
and add the port number “:9999” at the end of the IP address to access the web browser.
Note: If the IP Phone fail to connect to a DHCP server and cannot get the IP address, you can go to Network ->
LAN Setup, and change to NAT. Then, connect LAN port to your PC, and you can use the default IP
address http://192.168.123.1:9999 to access the Web interface.
3.1 Login
Please input the username and password into the blank field. The default setting is:
1. For Administrator, the username is: root; and the password is: test. If you use the account login, you can
configure all the setting.
2. For normal user, the username is: user; and the password is: test. If you use the account login, but you can
not configure the SIP setting.
Click Login to move into the VOIP PHONE web based management information page.
Any changes in the Web Management interface except for Phone Book require clicking Submit in that page, and
then go to the Save changes page and click Save. The system will restart, and all the settings can work properly.
3.2 System Information for the IP PHONE
When you login the web page, you can see the current system information of the IP phone like Model Name,
Firmware Version, Vendor ID and Codec Version in this page.
Also you can see the function lists in the left side. You can use mouse to click the function you want to set up.

2/14/2007 VoIP Phone Administration Guide MAG-07005-2 Rev. B
10
3.3 Phone Book
Phone Book contains Phone Book and Speed Dial Settings. You can setup the Phone Book and Speed Dial
number. The Phone Book can store 140 phone numbers and the Speed Dial can store 9 phone numbers. If you
want to use Speed Dial you just dial the speed dial number then press “#”.
3.3.1 Phone Book
In the Phone Book function, you can add/delete the phone number in the phone book list. You can add maximum
140 entries phone book list.
If you need to add a phone number into the phone book, you need to enter the position, the name, and the phone
number (by URL type). When you finished a new phone list, just click Add Phone.

2/14/2007 VoIP Phone Administration Guide MAG-07005-2 Rev. B
11
If you want to delete a phone number, you can select the phone number you want to delete then click Delete
Selected.
If you want to delete all phone numbers, you can click Delete All.
3.3.2 Speed Dial List
In Speed Dial List function, you can add/delete Speed Dial number. You can input maximum 9 entries speed dial
list.
If you need to add a phone number into the Speed Dial list, you need to input the position, the name, and the
phone number (by URL type). When you finished a new phone list, just click Add Phone.
If you want to delete a phone number, you can select the phone number you want to delete then click Delete
Selected.
If you want to delete all phone numbers, you can click Delete All.
3.4 Phone Setting
Phone Setting contains Forward Settings, SNTP Settings, Volume Settings, Ringer Settings, DND Settings, Dial
Plan Settings, Call Waiting Settings, Soft-key Settings, Hot Line Settings andAlarm Settings.

2/14/2007 VoIP Phone Administration Guide MAG-07005-2 Rev. B
12
3.4.1 Forward Settings
You can setup the phone number you want to forward in this page. There are three type of Forward mode. You
can chooseAll Forward, Busy Forward, and No Answer Forward by clicking the icon.
3.4.1.1All Forward
All incoming calls will forward to the number you select. You can input the name and the phone number in the
URL field. If you select this function, then all the incoming call will directly forward to the speed dial number you
choose.
3.4.1.2Busy Forward
If you are on the phone, the new incoming call will forward to the number you select. You can input the name and
the phone number in the URL field.
3.4.1.3No Answer Forward
If you can not answer the phone, the incoming call will forward to the number you select. You can input the name
and the phone number in the URL field. Also you have to set the Time Out time for system to start to forward the
call to the number you select.
When you finished the settings, click Submit. Go to the Save changes page and click Save to reflect the
changes.

2/14/2007 VoIP Phone Administration Guide MAG-07005-2 Rev. B
13
3.4.2 SNTP Settings
You can setup the primary and second SNTP Server IPAddress, to get the date/time information.Also you can
base on your location to set the Time Zone, and how long need to synchronize again. When you finished the
settings, click Submit. Go to the Save changes page and click Save to reflect the changes.
3.4.3 Volume Settings
You can setup the Handset Volume, Speaker Volume, Ringer Volume, the Handset Gain, and Speaker Gain.
Handset Volume is to set the volume you hear from the handset.
Speaker Volume is to set the volume you hear from the speaker phone.
Ringer Volume is to set the ringer volume.
Handset Gain is to set the volume send out from the handset.
Speaker Gain is to set the volume send out from the micro phone.
When finished the settings, click Submit. Go to the Save changes page and click Save to reflect the changes.

2/14/2007 VoIP Phone Administration Guide MAG-07005-2 Rev. B
14
3.4.4 Ringer Settings
You can select the melody for the incoming calls. When you finished the setting, click Submit. Go to the Save
changes page and click Save to reflect the changes.
3.4.5 DND Settings
You can setup the DND Setting to keep the phone silence. You can choose DND Always or DND Period.
DND Always:All incoming call will be blocked until disable this feature.
DND Period: Set a time period and the phone will be blocked during the time period. If the “From” time is large
than the “To” time, the Block time will from Day 1 to Day 2.
When you finished the settings, click Submit. Go to the Save changes page and click Save to reflect the
changes.
3.4.6 Dial Plan Setting
This function is when you input the phone number by the keypad but you don’t need to press “#”. After time out
the system will dial directly.

2/14/2007 VoIP Phone Administration Guide MAG-07005-2 Rev. B
15
3.4.6.1Symbol Explain:
Drop Prefix: The default is No for adding the prefix to the dial plan in Replace Rule. Click Yes to delete the
prefix of the dial plan in Replace Rule.
Replace Rule 1~4: Enter rule for matching.
Example:
Drop Prefix Replace Rule Description
No 002 8613+8662 When the dialed number begins with
“8613” or “8662”, the number will be
added “002” to call out.
No 002 12 When the dialed number begins with
“12”, the number will be added “002” to
call out.
No 002 5xxx When the dialed number begins with “5”,
and has total of four digits, the number
will be add “002” to call out.
Yes 002 003+004+005 When the dialed number begins with
“003”, “004” or “005”, the number will be
dropped “003”, “004” or “005”, and then
add “002” to call out.
Yes 002 55xxxx When the dialed number begins with “55”
and has total of six digits, the number will
x or X 0,1,2,3,4,5,6,7,8,9
+ or

2/14/2007 VoIP Phone Administration Guide MAG-07005-2 Rev. B
16
be dropped “55”, and add “002” to call
out.
Auto Dial Time: The default is 5 seconds. Enter a time in sec for auto dial after the time is up.
When you finished the setting, click Submit. Go to the Save changes page and click Save to reflect the changes.
3.4.7 Call Waiting Settings
If the user doesn’t want to be informed there is a new incoming call, user can set the function off. When you
finished the settings, click Submit. Go to the Save changes page and click Save to reflect the changes.
3.4.8 Soft-key Settings
EIP 7012 supports soft-key settings for voice messages. You can press SPEAKER, and then VOICE MSG on the
IP phone to dial out the entered number in order to get into the voice mail service.
Voice Mail Key: enter a serial of number for listening to the voice messages.
When you finished the setting, click Submit. Go to the Save changes page and click Save to reflect the changes.
3.4.9 Hot Line Settings
Hot line setting is a special line for the IP Phone. When enable the function, the phone will directly dial out the
number once the phone is picked up.

2/14/2007 VoIP Phone Administration Guide MAG-07005-2 Rev. B
17
Hot Line Number: Enter a phone number as a special line.
When you finished the setting, click Submit. Go to the Save changes page and click Save to reflect the changes.
3.4.10Alarm Settings
Alarm Settings is to inform user at a certain time. Click ON and then enter the time for ringing.
Alarm Time: enter a time for reminding.
Current Time: display the current time of the IP phone.
When you finished the setting, click Submit. Go to the Save changes page and click Save to reflect the changes.
3.5 Network
In Network, you can check the Network status, configure the WAN Settings, LAN Settings, DDNS settings, VLAN
Settings, DMZ Settings and Virtual Server.
3.5.1 Network Status
You can check the current Network settings in this page.
Table of contents
Other Essence Technology IP Phone manuals
Popular IP Phone manuals by other brands
Cisco
Cisco 9951 Video Quick reference guide
Aastra
Aastra Clearspan 6739i Quick reference guide

Yealink
Yealink SIP-T20 user manual
dais Technology Partners
dais Technology Partners Fanvil XU Series Quick setup guide

Avaya
Avaya 3641 Operating instruction

Horizon Fitness
Horizon Fitness Cisco 504 Quick user guide
