manuals.online logo
Brands
  1. Home
  2. •
  3. Brands
  4. •
  5. Yealink
  6. •
  7. IP Phone
  8. •
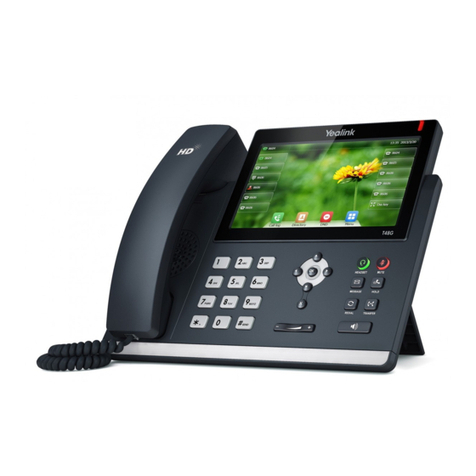
  9. Yealink T43U Troubleshooting guide

Yealink T43U Troubleshooting guide

Other manuals for T43U

2

Other Yealink IP Phone manuals

Yealink SIP-T2 Series User manual

Yealink

Yealink SIP-T2 Series User manual

Yealink T54W User manual

Yealink

Yealink T54W User manual

Yealink T41P Skype User manual

Yealink

Yealink T41P Skype User manual

Yealink T22P User manual

Yealink

Yealink T22P User manual

Yealink Telkom W52P User manual

Yealink

Yealink Telkom W52P User manual

Yealink W60P Telesystem User manual

Yealink

Yealink W60P Telesystem User manual

Yealink W52H User manual

Yealink

Yealink W52H User manual

Yealink Yealink SIP-T42G User manual

Yealink

Yealink Yealink SIP-T42G User manual

Yealink SIP-T43U User manual

Yealink

Yealink SIP-T43U User manual

Yealink Yealink SIP-T21P User manual

Yealink

Yealink Yealink SIP-T21P User manual

Yealink MP54 User manual

Yealink

Yealink MP54 User manual

Yealink SIP-T27G User manual

Yealink

Yealink SIP-T27G User manual

Yealink T46G Skype For Business Edition Service manual

Yealink

Yealink T46G Skype For Business Edition Service manual

Yealink Telkom W52P User manual

Yealink

Yealink Telkom W52P User manual

Yealink Yealink SIP-T42G User manual

Yealink

Yealink Yealink SIP-T42G User manual

Yealink T58A Teams Service manual

Yealink

Yealink T58A Teams Service manual

Yealink T22P Owner's manual

Yealink

Yealink T22P Owner's manual

Yealink T4 series User manual

Yealink

Yealink T4 series User manual

Yealink Yealink SIP-T42G User manual

Yealink

Yealink Yealink SIP-T42G User manual

Yealink Yealink SIP-T46G User manual

Yealink

Yealink Yealink SIP-T46G User manual

Yealink T48G User manual

Yealink

Yealink T48G User manual

Yealink SIP-T52S User manual

Yealink

Yealink SIP-T52S User manual

Yealink Telkom W52P User manual

Yealink

Yealink Telkom W52P User manual

Yealink SIP-T43U User manual

Yealink

Yealink SIP-T43U User manual

Popular IP Phone manuals by other brands

Cortelco C62 VoIP Phone user guide

Cortelco

Cortelco C62 VoIP Phone user guide

VanillaIP Polycom IP300 user manual

VanillaIP

VanillaIP Polycom IP300 user manual

Viking SR-IP product manual

Viking

Viking SR-IP product manual

Panasonic KX-UT133-B Administrator's guide

Panasonic

Panasonic KX-UT133-B Administrator's guide

Avaya one-X 9600 Series overview

Avaya

Avaya one-X 9600 Series overview

AVA Enterprises B179 Installation and administration guide

AVA Enterprises

AVA Enterprises B179 Installation and administration guide

Cisco Unified 7900 Series System guide

Cisco

Cisco Unified 7900 Series System guide

Polycom SoundPoint IP 450 datasheet

Polycom

Polycom SoundPoint IP 450 datasheet

Cisco SPA-500 Series user guide

Cisco

Cisco SPA-500 Series user guide

IPitomy IP290 user manual

IPitomy

IPitomy IP290 user manual

Polycom SoundPoint IP 650 user guide

Polycom

Polycom SoundPoint IP 650 user guide

Proximus Maestro 3016 IP quick start guide

Proximus

Proximus Maestro 3016 IP quick start guide

Polycom IP 450 user guide

Polycom

Polycom IP 450 user guide

Fanvil X4 user manual

Fanvil

Fanvil X4 user manual

Snom 320 quick start guide

Snom

Snom 320 quick start guide

Avaya Integral 5 R3.0 user guide

Avaya

Avaya Integral 5 R3.0 user guide

Nortel 1140E Getting started

Nortel

Nortel 1140E Getting started

Nexotek NT-P500 user manual

Nexotek

Nexotek NT-P500 user manual

manuals.online logo
manuals.online logoBrands
  • About & Mission
  • Contact us
  • Privacy Policy
  • Terms and Conditions

Copyright 2025 Manuals.Online. All Rights Reserved.

iiNet BizPhone ‘Standard’T43U Quick Startup Guide
P a g e | 1 of 2
Confidential
IP PHONE T43U
Quick Startup Guide
Packaging Contents
The following contents are included in your T43U package:
Assembling the Phone
1. Attach the stand, as shown below.
2. Connect the handset and optional headset, as shown below.
Note: Headsets are to be purchased separately.
3. Connect the USB flash drive (if required), as shown below.
Note: The USB ports can also be used to connect other
USB devices, such as EXP43, USB headset and so on. We
recommend you connect Bluetooth USB dongle or Wi-Fi
USB dongle (purchased separately) to the upper USB
port, and connect EXP43 (purchased separately) to the
lower USB port.
4. Connect the network and power, as shown below.
Note: You have two Power Options –AC or PoE. If PoE is
provided, you do not need to connect to the Power Adapter.
Startup the Phone
After the IP Phone is connected
to the network and supplied with
power, it automatically begins
the initialisation process.
After startup, the phone is ready
to use (pre-configured).
P a g e | 2 of 2
Confidential
HANDSET SETTINGS
Add a Contact
•Press the Directory soft key when the phone is idle, and then
select the desired group.
•Press the Add soft key to add a contact.
•Enter a unique contact name in the Name field and contact
numbers in the corresponding fields.
•Press the Add soft key to accept the change.
Delete a Contact
•Press the Directory soft key when the phone is idle, and then
select All Contacts.
•Press or to highlight the desired contact, press the
Option soft key, and then select Delete from the prompt list.
•Press the Ok soft key when the LCD screen prompts “Delete
selected item?”
Assign a Speed Dial Number
•Press the Menu soft key when the phone is idle, and then
select Features -> Dsskey.
•Select the desired DSS key and then press the Enter soft
key.
•Select SpeedDial from the Type field, select the desired line
from the Account ID field, enter a label in the Label field and
then enter the number in the Value field.
•Press the Save soft key to accept the change.
Volume Adjustment
•Press during a call to adjust the receiver volume
of handset/speakerphone/headset.
•Press when the handset is idle to adjust the
ringer volume.
•Press to adjust the media volume in the
corresponding screen.
BASIC CALL FEATURES
Placing Calls
Using the Handset:
Pick up the handset, enter the number and press the Send soft
key.
Using the Speakerphone:
With the handset on-hook, press , enter the number and
press the Send soft key.
Using the Headset:
With the headset connected, press to activate the headset
mode, enter the number and press the Send soft key.
Placing Calls using the Speed Dial Key
Press the Speed Dial key to dial out the preset number.
Placing Calls from Call History
•Press the History soft key when the phone is idle, and press
or to scroll through the list.
•Select an entry from the list and press the Send soft key to
call the entry.
Answering Calls
Using the Handset: Pick up the handset.
Using the Speakerphone: Press .
Using the Headset: Press
Ending Calls
Using the Handset:
Hang up the handset and tap the End Call soft key.
Using the Speakerphone:
Press or tap the End Call soft key.
Using the Headset:
Tap the End Call soft key.
Call Hold
Press the Hold soft key during an active call.
Call Resume
•If there is only a call on hold, press the Resume soft key.
•If there is more than one call on hold, press or to
select the desired call , and then press the Resume soft key.
Call Transfer –Blind Transfer
•Press the Transfer soft key during an active call. The call is
placed on hold.
•Enter the number you want to transfer the call to.
•Press the BTransfer soft key.
Call Transfer –Attended Transfer
•Press the Transfer soft key during an active call. The call is
placed on hold.
•Enter the number you want to transfer the call to, and then
press Send soft key.
•Press the Transfer soft key when the second party answers.
Call Forward
•Press the Menu soft key when the phone is idle, then select
Features -> Call Forward.
•Select the desired Forward Type:
Always Forward –incoming calls are forwarded
unconditionally.
Busy Forward –incoming calls are forwarded when the
phone is busy.
No Answer Forward –incoming calls are forwarded if not
answered after a period of time.
•Enter the number you want to forward to. For No Answer
Forward, press or to select the desired ring time to
wait before forwarding from the After Ring Time field.
•Press the Save soft key to accept the change.
NOTE: For more information about other features, refer to the BizPhone User Reference Guide (contact your Administrator)