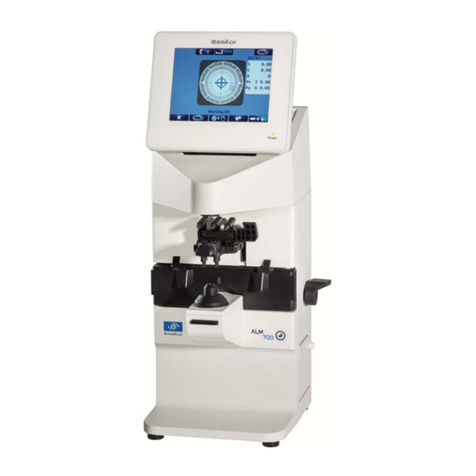
Essilor ALM500 Manual

TECHNICAL INFORMATION
INSTRUMENTS
CONNECTION PROCEDURES
Product(s) : ALM500, ALM700, AKR550, AKR750, APH550, CS550, CSPOLA600
Implementation date : 20 6.02. 6
Criticality : normal
I. Hardware 2
. Hardware provided 2
2. Hardware to be ordered 2
II. Connection procedures 3
. Connect the APH550 system 3
2. Connect the APH550 system with a CSPOLA600 or a CS550 or a CP550 4
3. Connect the APH550 system with a AKR550 or a AKR750 5
4. Connect the APH550 system with a ALM500 or a ALM700 6
III. Settings 7
. Configure the KB550 keyboard 7
2. Configure the monitors and the test projector 0
a. CSPOLA600 and CS550 0
b. CP550 2
3. Configuring an AKR750 or an AKR550 2
4. Configuring an ALM500 or an ALM700 3
IV. Exporting data from an ALM or an AKR 4
. Exporting data from an ALM500 or an ALM700 4
2. Exporting data from an AKR750 or an AKR550 5
V. Importing data on the APH550 6
Please find below the connection procedures between ALM500/ALM700 (Focimeter) and AKR550/AKR750
(autokerato refractometer) with APH550 to import fitting data from the ALM and/or the AKR.
International Customer Service
Essilor Instruments
64bis, avenue Aubert – 94306 Vincennes Cedex – France
Tél. : +33(0) 72 94 7 00 – Fax : +33(0) 72 94 70 27 / 7

I. HARDWARE
. HARDWARE PROVIDED
Cable for connection of:
•the head to the power supply unit
•KB550 keyboard to power supply unit
2. HARDWARE TO BE ORDERED
RS232 DB9 male/female cable, for connecting
ALM or AKR, ref. X83A56 or ref. X83A60
X83A56
X83A60
International Customer Service
Essilor Instruments
64bis, avenue Aubert – 94306 Vincennes Cedex – France
Tél. : +33(0) 72 94 7 00 – Fax : +33(0) 72 94 70 27 2/ 7

II. CONNECTION PROCEDURES
. CONNECT THE APH550 SYSTEM
The APH550 System includes the following components:
•a head
•a power supply unit,
•a KB550 keyboard
•two connection cables
To connect the system to the power supply unit:
. plug in cable between the head and the “Head” port on the power supply unit
2. plug in cable between the keyboard and the “Controller” port on the power supply unit
> System APH550 is connected.
International Customer Service
Essilor Instruments
64bis, avenue Aubert – 94306 Vincennes Cedex – France
Tél. : +33(0) 72 94 7 00 – Fax : +33(0) 72 94 70 27 3/ 7

2. CONNECT THE APH550 SYSTEM WITH A CSPOLA600 OR A CS550 OR A CP550
Connection between the APH550 system and a CSPOLA or a CS550 or CP550 is infra-red.
International Customer Service
Essilor Instruments
64bis, avenue Aubert – 94306 Vincennes Cedex – France
Tél. : +33(0) 72 94 7 00 – Fax : +33(0) 72 94 70 27 4/ 7

3. CONNECT THE APH550 SYSTEM WITH A AKR550 OR A AKR750
To connect the system to the power supply unit:
•plug in the cable (ref. X83A60 or X83A56) between the AKR550 or the AKR750 and port “ref.” on the
power supply unit
International Customer Service
Essilor Instruments
64bis, avenue Aubert – 94306 Vincennes Cedex – France
Tél. : +33(0) 72 94 7 00 – Fax : +33(0) 72 94 70 27 5/ 7

4. CONNECT THE APH550 SYSTEM WITH A ALM500 OR A ALM700
To connect the system to the power supply unit:
•plug in the cable (ref. X83A60 or X83A56) between the ALM500 or the ALM700 and the “Lensmeter” port
on the power supply unit
International Customer Service
Essilor Instruments
64bis, avenue Aubert – 94306 Vincennes Cedex – France
Tél. : +33(0) 72 94 7 00 – Fax : +33(0) 72 94 70 27 6/ 7

III. SETTINGS
. CONFIGURE THE KB550 KEYBOARD
Hold the central button down while pressing the “ON/OFF” button.
The monitor comes on.
When you hear the beep, remove your finger.
The following screen will appears.
Go to the tab “Chart”.
International Customer Service
Essilor Instruments
64bis, avenue Aubert – 94306 Vincennes Cedex – France
Tél. : +33(0) 72 94 7 00 – Fax : +33(0) 72 94 70 27 7/ 7
>
>
1
2
3

Select the installed monitor or projector:
•CP550EA or CP550EB, projector
•CSPOLA600, polarized 24” monitor
•CS550A, red/green 9” monitor
•“A” corresponds to decimal acuity notation
•“BF” corresponds to acuity notation in feet
•“BM” corresponds to metric acuity notation
Only CP550EA (decimal) or CP550EB (feet + metric) models are available in the range.
•If you have a CP550EA, select CP550A
•If you have a CP550EB, select CP550BF
Go to the tab “Communication”.
Complete the fields “Baud rate LM” and “Baud rate ref.” with the same values as on the devices.
International Customer Service
Essilor Instruments
64bis, avenue Aubert – 94306 Vincennes Cedex – France
Tél. : +33(0) 72 94 7 00 – Fax : +33(0) 72 94 70 27 8/ 7
4
5
6

The “Import/export” tab allows you to automatically or manually import data.
•REF corresponds to the AKR data importation
•LM corresponds to the ALM data importation
International Customer Service
Essilor Instruments
64bis, avenue Aubert – 94306 Vincennes Cedex – France
Tél. : +33(0) 72 94 7 00 – Fax : +33(0) 72 94 70 27 9/ 7

2. CONFIGURE THE MONITORS AND THE TEST PROJECTOR
a. CSPOLA600 and CS550
Conf gure the channel
Connect the remote control with an USB cable.
When setting up with a CSPOLA600, use the “synchronization” port, as illustrated below.
The CS550 has only one USB port.
Go to the “ emote Channel” menu.
Select “APH550 Chanel” (channel)
Select the same channel as selected on the APH550, A, B, C or D.
International Customer Service
Essilor Instruments
64bis, avenue Aubert – 94306 Vincennes Cedex – France
Tél. : +33(0) 72 94 7 00 – Fax : +33(0) 72 94 70 27 0/ 7
1
2
3
4

Conf gure the acu ty notat ons
Go to the “Interface” menu.
Select:
•Link 2: “A” for a decimal acuity measurement
•Link 3: “A” for an acuity measurement in feet
•Link 4: “BM” for a metric acuity measurement
Go to the menu “Chart Type” .
Select:
•A: decimal
•B: feet
•C: metric
International Customer Service
Essilor Instruments
64bis, avenue Aubert – 94306 Vincennes Cedex – France
Tél. : +33(0) 72 94 7 00 – Fax : +33(0) 72 94 70 27 / 7
1
2

b. CP550
The projector channel by default is “A”.
If you wish to change this, please refer to the relevant document on M’eye Docs.
3. CONFIGURING AN AKR750 OR AN AKR550
Press the button under the screen.
The menu “Setup” is displayed.
Select the settings to be modified by pressing the key or the key.
Confirm the modification by pressing the key.
Go back to the measurements screen by pressing the key.
Select the same Baud rate value (on the RS-232C line) as on the APH550.
On an AKR550 On an AKR750
In the “Customize” sub-menu, check that Output PC setting is set to A.
•If the Output PC mode is on “A” then communication between an APH550 and a PC is possible
•If the Output PC mode is on “B” then only communication with a PC is possible
International Customer Service
Essilor Instruments
64bis, avenue Aubert – 94306 Vincennes Cedex – France
Tél. : +33(0) 72 94 7 00 – Fax : +33(0) 72 94 70 27 2/ 7
>
1
2
3
4
5

4. CONFIGURING AN ALM500 OR AN ALM700
Press the button to access the configuration menu.
Press keys and to access the “Data Output” menu, in order to configure the serial
link settings.
Press the key .
The following screen is displayed:
•Select Off on line “Auto Comm,” select Off.
•On the line Baud ate, select the same speed as on the APH550.
LINE STATUS RESULT
Output dev ce Print Paper printing only
S232C Paper printing + sending to PC
Auto Comm Off Data sent by pressing or
On Data sent continuously
Note this value.
International Customer Service
Essilor Instruments
64bis, avenue Aubert – 94306 Vincennes Cedex – France
Tél. : +33(0) 72 94 7 00 – Fax : +33(0) 72 94 70 27 3/ 7
>
1
2
3
4

IV. EXPORTING DATA FROM AN ALM OR AN AKR
. EXPORTING DATA FROM AN ALM500 OR AN ALM700
Center a lens on the ALM.
Refer to the relevant note if needed.
Take a measurement.
You can take a measurement on a lens or a frame.
To take a measurement: press to select the right or left lens to be measured.
Press once to display the right side and a second time to display the left side .
Confirm by pressing the button located on the front of the machine.
The colors of the values area are reversed (white text on colored background). The data has been saved
to the memory.
Press the button on the front located under the icon or to send the data.
International Customer Service
Essilor Instruments
64bis, avenue Aubert – 94306 Vincennes Cedex – France
Tél. : +33(0) 72 94 7 00 – Fax : +33(0) 72 94 70 27 4/ 7
>
1
2
3
4
5

2. EXPORTING DATA FROM AN AKR750 OR AN AKR550
After carrying out a measurement, the following screen is displayed:
By default, on an AKR750 or AKR550, the “Export” mode is always active.
Press the key to send the data to the APH550.
If you wish to send the data without printing out the values on paper, set the tab to “Off”.
During data export, the message “Data transfer” is displayed on the screen.
When the transfer has finished, the message “Data output success” is displayed on the screen.
International Customer Service
Essilor Instruments
64bis, avenue Aubert – 94306 Vincennes Cedex – France
Tél. : +33(0) 72 94 7 00 – Fax : +33(0) 72 94 70 27 5/ 7

V. IMPORTING DATA ON THE APH550
To import data on the APH550:
Go to the measurements screen.
Click on “External Data”.
The menu “Import data from” is displayed:
This menu allows you to import data manually or automatically.
International Customer Service
Essilor Instruments
64bis, avenue Aubert – 94306 Vincennes Cedex – France
Tél. : +33(0) 72 94 7 00 – Fax : +33(0) 72 94 70 27 6/ 7
>
1
2

Manual mode
To import data manually, click on the button:
•REF if you wish to import data from an AKR
•LM if you wish to import data from an ALM
Automat c mode
If importing is set to automatic: the data is displayed automatically as soon as the export is carried out and the
“Import”button turns gray.
> Press “SET” to set up the corresponding lenses in the head.
Wr tten by D. Biasot
Checked by H Rizki
Approved by F. Drouard
International Customer Service
Essilor Instruments
64bis, avenue Aubert – 94306 Vincennes Cedex – France
Tél. : +33(0) 72 94 7 00 – Fax : +33(0) 72 94 70 27 7/ 7
This manual suits for next models
6
Table of contents
Other Essilor Measuring Instrument manuals
Popular Measuring Instrument manuals by other brands

Hanna Instruments
Hanna Instruments HI 96701C instruction manual

Extech Instruments
Extech Instruments CO10 user guide

Dräger
Dräger Polytron 8900 UGLD Instructions for use

Fluke
Fluke 5020AThermo-Hygrometer 5020A user manual

Hanna Instruments
Hanna Instruments HI96705C instruction manual

Meriam
Meriam meriGauge Plus user guide