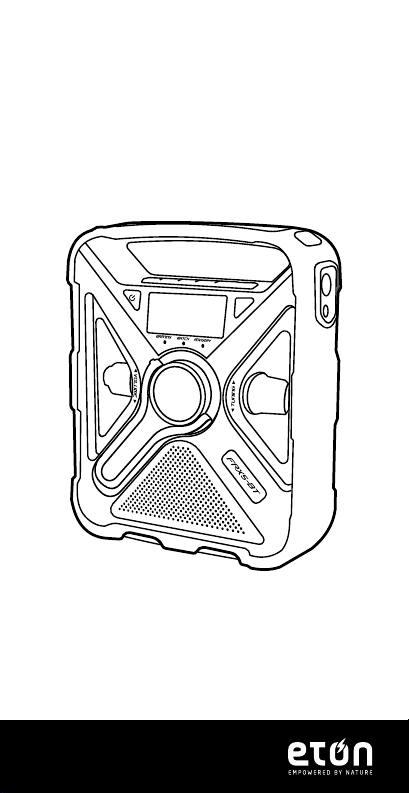
Eton FRX5-BT User manual

1
Owner’s Manual
The Rugged, All-Purpose, Multi-Power, Smartphone
Charging Weather Alert Radio with S.A.M.E. Technology
and Bluetooth®
FRX5-BT

FRX5-BT OWNER’S MANUAL
2
1Power Button
2Display
3Volume Knob
4Hand Crank
5Speaker
6Play/Pause Button
7SAME Alert Status
Level Lights
8Tuning Knob
9Alarm On/Off
10 AM/FM & Back/
Previous & Bluetooth
11 Weather Band &
Enter/Conrm Button
12 WB Alert Button
13 Menu & Scan
Downward Button
14 Cell Phone Charger &
Scan Upward Button
15 Light Button
16 Ambient Light
17 Antenna
MEET THE FRX5-BT
Thank you for purchasing the Etón FRX5-BT.
We want you to thoroughly enjoy the use of this
product. To take advantage of its many excellent and
unique features, we urge you to carefully read the
user’s manual.
NOTE:
Radio performance may be degraded while using the USB input or output
charging feature. The audio from weak radio stations may no longer come
in clearly.
Features
1
2
4
5
3
6
7
8
Front
18 Strap Hole
19 LED Flashlight and
Emergency Beacon
20 Micro-USB Charging Port
21 Headphone Jack
22 AUX Port
23 USB Out Phone
Charging
24 Reset Button
25 Solar Panel

FRX5-BT OWNER’S MANUAL
3
Reset
16
18
17
21
22
23
25
25
20
15
Top Buttons
Top Side
Bottom Side
Right Side Back Side
19
910 11 12 13 14

FRX5-BT OWNER’S MANUAL
4
KEY OPERATIONS
POWER
Press to turn on/off
Selecting Radio Band
With radio on: Press AM/FM/Bluetooth to switch
between AM/FM/Bluetooth or press WB button to
listen to WB. Scroll tuning knob to nd WB station for
your area.
Note:
MENU button has secondary function. When listening to either FM/AM, press and
hold MENU to tune into the previous available station, press and hold CELL to tune
into the next available station, press MENU to store the current frequency into
memory. 8 memory locations are available for each band; FM/AM. Rotate TUNING
knob to select the location(from 1 ~ 8) and press MENU to save to that location.
After storing stations into memory, each time you press the MEMORY/TUNE
button, you will go to your stored stations. To go to the next stored station, press
MEMORY/TUNE again. For example, when the FM you are listening to is memory
location 5, with pressing of MEMORY/TUNE button, the radio will go to memory
location 6.
Bluetooth
Press AM/FM/Bluetooth to turn on the Bluetooth. Turn
on Bluetooth on your device and connect to FRX5-BT.
Play your music through the FRX5-BT.
PLAY/PAUSE Streaming Music
Press the Play/Pause button on the front of the FRX5-
BT to control your streaming music.
Light Operation
Press the Light button to turn on the ambient light
or the ashlight(alternate), press it again to turn off.
When the ambient light or the ashlight is on, press

FRX5-BT OWNER’S MANUAL
5
and hold the Light button to adjust the brightness.
Press the Light button twice quickly to turn on the
red emergency light, press it twice again to turn off.
Tablet or Cell Phone Charging
Plug your device’s USB charging cable into the
USB out port on the FRX5-BT and plug the other
end into your device. Press the CELL phone
charger button to start charging,”CELL” ashes
in the display in the display. Press it again to stop
charging and the symbol will disappear.
FRX5-BT POWER OPTIONS
Charge via USB
Insert provided micro USB cable into Micro USB
Charging Port and other end into standard USB
charging block and plug into wall outlet. The battery
charging icon will indicate that the unit is charging.
NOTE: The USB power source should be able to withstand a minimum constant
500 mA power output for an extended period of time to fully charge the FRX5-
BT’s 2000mAh battery.
Solar Charging
When placed in sunlight, it will automatically start
charging the lithium battery. Battery charging icon will
show unit is charging. Fully charges the battery in 5-6
hours.
Crank Charging
Crank for 4 minutes to get 1 minute of talk time on
most smart phones, 10-15 minutes of radio time.
Setting Weatherband Alert
1. With RADIO on, press WB button
2. Rotate tuning knob to tune to WB for your location.
3. Press the WB ALERT button, WB will be displayed in
the display.

FRX5-BT OWNER’S MANUAL
6
Note: Audio will shut off in WB ALERT mode.
4. Press WB or AM/FM button to exit the WB Alert
mode.
All feature settings below require the radio to
be in the “OFF” mode.
Set Time
1. Press MENU.
2. SET TIME will be displayed.
3. Press WB.
4. The HOURS digits on the clock will ash.
5. Rotate the TUNING dial up or down to the
appropriate digit, note that AM or PM will change as
you pass the number 12.
6. Press WB to enter.
7. The MINUTES digits on the clock will ash.
8. Press WB to enter.
9. If no buttons are pressed for 20 seconds, the unit will
go back to normal position.
Set Alarm
1. Press MENU.
2. Rotate TUNING dial up one step.
3. SET ALARM will be displayed.
4. Press WB.
5. The HOURS digits on the clock will ash.
6. Rotate the TUNING dial up or down to the
appropriate digit, note that AM or PM will change as
you pass the number 12.
7. Press WB to enter.
8. The MINUTES digits on the clock will ash.
9. Press WB to enter.
10. If no buttons are pressed for 20 seconds, the unit
will go back to normal position.
11. Press Alarm ON/OFF button to turn on the alarm.
A bell icon will appear on the display. Press button
again to turn off alarm.

FRX5-BT OWNER’S MANUAL
7
SET S.A.M.E. ALERT MODE
Set S.A.M.E location using preloaded
locations
1. Press MENU.
2. Rotate TUNING dial up three steps.
3. COUNTY – MUL, COUNTY –SIN or COUNTY –ALL
will be displayed.
4. Press WB.
5. The word MULTIPLE, SINGLE or ALL will ash on
the display.
6. Rotate the TUNING dial up or down to the
desired choice.
7. Press WB to enter
MULTIPLE or SINGLE OPERATION:
8. The memory slot number, 01 – 25 will display on
the left side of the display.
9. Rotate the tuning dial up or down to select the
desired channel to set .
10. Press WB to enter.
11. Use TUNING dial to select USA or CANADA or
USER SET for your location.
12. Press WB to enter.
USA OR CANADA OPERATION:
13. Use TUNING dial to select STATE if in USA,
Province if in CANADA.
14. Press WB to enter.
15. Use TUNING dial to select COUNTY if in USA or
AREA if in CANADA.
16. Press WB to enter, entered location will scroll
across the screen for this location. Rotate
TUNING dial to select a new location or press
MENU to EXIT.
17. If no buttons are pressed for 20 seconds, the unit
will go back to normal position.

FRX5-BT OWNER’S MANUAL
8
Voice or Siren
1. Press MENU.
2. Rotate TUNING dial up four steps.
3. ALERT – VOI or ALERT - SIR will be displayed.
4. Press WB.
5. SIREN will ash on the screen.
6. Rotate the TUNING dial up or down to indicate either
SIREN or VOICE.
7. Press MENU to enter setting.
8. If no buttons are pressed for 20 seconds, the unit will
go back to normal position.
Set S.A.M.E. location directly entering COUNTY/
PROVINCE code
1. The memory slot number, 01 – 25 will display on the
left side of the display.
2. Rotate the tuning dial up or down to select the
desired channel to set.
3. Press WB to enter
4. Use TUNING dial to select rst digit for your location.
5. Press WB to enter.
6. Use TUNING dial to select second digit for your
location.
7. Repeat until all 6 digits are correct.
8. Press MENU to enter.
9. ALL locations OPERATION:
10. Press MENU.
11. Rotate TUNING dial up three steps.
12. COUNTY – MUL, COUNTY –SIN or COUNTY –ALL will
be displayed.
13. Press WB.
14. Rotate TUNING knob until ALL ashes on the screen.
15. Press MENU to select.
16. COUNTY-ALL will be displayed .
17. If no buttons are pressed for 20 seconds, the unit
will go back to normal position.

FRX5-BT OWNER’S MANUAL
9
Enable or Disable S.A.M.E. ALERT
1. Press MENU
2. Rotate TUNING dial ve steps
3. ALERT ON or ALERT OFF will be displayed
4. Press WB button
5. The ALERT icon will ash at the top of the screen
6. Rotate the TUNING dial to select either ALERT ON or
ALERT OFF
7. Press MENU to enter and exit
NOTE: ALERT OFF - When a alert is issued, the text alert will scroll across the
screen without audio.
ALERT Lights
Alert lights are classied according to the event’s degree
of urgency and severity.
WARNING (Red Light)
A WARNING is issued when a hazardous weather or
hydrologic event is occurring, imminent or likely. A
WARNING means weather conditions pose a threat to
life or property. People in the path of the storm need to
take protective action.
WATCH (Orange Light)
A WATCH is used when the risk of a hazardous weather
or hydrologic event has increased signicantly, but
its occurrence, location or timing is still uncertain. It is
intended to provide enough lead time so those who need
to set their plans in motion can do so. A WATCH means
that hazardous weather is possible. People should have
a plan of action in case a storm threatens and they
should listen for later information and possible warnings
especially when planning travel or outdoor activities.

FRX5-BT OWNER’S MANUAL
10
ADVISORY (Yellow Light)
An ADVISORY is issued when a hazardous weather
or hydrologic event is occurring, imminent or likely.
ADVISORIES are for less serious conditions than
WARNINGS, that cause signicant inconvenience and
if caution is not exercised, could lead to situations that
may threaten life or property.
When a S.A.M.E. alert is issued for your area the text
alert will scroll across the screen, a loud siren will sound
and one of the S.A.M.E. alert status level lights will
illuminate.
Set DEFEAT mode
To disable any S.A.M.E. notications you do not want to
be alerted to you can use the DEFEAT feature.
1. Press MENU
2. Rotate TUNING dial four steps
3. DEFEAT – SIR will be displayed
4. Press WB
5. The S.A.M.E. notications will begin to scroll across
the display
6. Rotate the TUNING dial to the desired notication to
ENABLE or DISABLE
7. Press WB
8. DISABLE or ENABLE will be shown below the
notication
9. Rotate TUNING dial to next desired notication to
ENABLE or DIABLE
10. Press MENU to enter and exit.
Setting Weatherband Alert
Tune to WB for your location and press the <WB ALERT>
button. ‘Alert’ will appear in the display and the audio
will turn off. The radio will continue to monitor your WB
station and will activate the audio if an alert is issued.
Press any button to turn off the Alert.

FRX5-BT OWNER’S MANUAL
11
Note: NOAA does a test alert every Wednesday between 10 am and noon,
regardless of your location. For more information please go to: http://www.nws.
noaa.gov/nwr/nwrtest.htm
Set Backlight LED sleep mode
Normal operation for the radio’s backlight is to dim
after 30 seconds of inactivity. If you desire to have the
backlight always illuminated you can choose ON MODE
for the backlight LED, this will keep the backlight always
illuminated for the display. Note that this will shorten
battery life.
1. Press MENU
2. Rotate TUNING dial six steps
3. SET BKLED will be displayed
4. Press WB
5. NORMAL or ON will ash on the display
6. Rotate TUNING knob to select
7. Press MENU to exit
TROUBLE-SHOOTING
If the unit becomes unresponsive, press the RESET
button with a paper clip to reset. If you are having
further problems please contact us.
NEED HELP? CONTACT US.
Etón Corporation
1015 Corporation Way, Palo Alto, CA 94303, USA 1-800-
872-2228 (U.S.)
1-800-637-1648 (Canada)
650-903-3866 (Worldwide)
M-F, 8:00AM-4:30PM, Pacic Standard Time
www.etoncorp.com.
WARNING
• Do not expose this appliance to rain or
moisture.

FRX5-BT OWNER’S MANUAL
12
• Do not submerge or expose for extended
period to water.
• Protect from high humidity and rain.
• Only operate within specied temperature
range
• (0 °C to 40 °C).
• Unplug immediately if liquid has been
spilled or any object has fallen into the
apparatus.
• Clean only with a dry cloth. Do not use
detergents or
• chemical solvents as this might damage
the nish.
• Unplug and disconnect external antennas
during
• lightning storms.
• Do not remove cover [or back].
• Refer servicing to qualied service
personnel.
ENVIRONMENT
Disposal
According to the European Directive 2002/96/EC all
electrical and electronic products must be collected
separately by a local collection system.
Please act according to your local rules and do not
dispose of your old products with your normal household
waste.
Please dispose of all types of batteries per your
Government, State or Local rules and/or regulations.
If you are unsure, please call the appropriate local

FRX5-BT OWNER’S MANUAL
13
authority to nd out how to dispose of them safely and
help protect the environment.
WARRANTY REGISTRATION
To ensure full warranty coverage or product updates,
registration of your product should be completed as
soon as possible after purchase or receipt.
Please go to
http://www.etoncorp.com/productregistration to
register your product.
LIMITED WARRANTY
Retain your proof of purchase or the receipt. Limited
Warranty information can be viewed at www.etoncorp.
com in the Support section.
SERVICE FOR YOUR PRODUCT
To obtain service for your product, we recommend
rst contacting an Etón service representative
at 800-872-2228 US, 800-637-1648 Canada or
(650) 903-3866 for problem determination and
trouble-shooting. If further service is required, the
technical staff will instruct how to proceed based
on whether the radio is still under warranty or
needs non-warranty service.
WARRANTY
If your product is still in warranty and the Etón
service representative determines that warranty

FRX5-BT OWNER’S MANUAL
14
service is needed, a return authorization will
be issued and instructions for shipment to an
authorized warranty repair facility. Do not ship
your radio back without obtaining the return
authorization number.
NON-WARRANTY
If your product is no longer under warranty and requires
service our technical staff will refer you to the nearest
repair facility that will be able to best handle the repair.
For service outside of North America, please refer
to the distributor information included at time of
purchase/receipt.the radio is still under warranty or
needs non-warranty service.

FRX5-BT OWNER’S MANUAL
15

FRX5-BT - MODE D’EMPLOI
16
2Afchage
3Bouton volume
4Manivelle
5Haut-parleur
6Bouton Lecture/Pause
7Lumières de l’état du
niveau de l’alerte SAME
8Molette de syntonisation
9Alarme marche-arrêt
10 AM / FM et précédent/
retour et Bluetooth
11 Bande météo et bouton
entrer/conrmer
12 Touche WB (chaîne
d’alerte météo)
13 Bouton Menu et
Balayage arrière
14 Chargeur téléphone
Bouton Balayage avant
15 Bouton lumière
16 Lumière ambiante
17 Antenne
18 Trou de sangle
DÉCOUVREZ LE FRX5-BT
Nous vous remercions d’avoir acheté Eton FRX5-BT. Nous
voulons que vous protiez pleinement de l’utilisation de ce
produit. An de proter de ses nombreuses fonctionnalités
uniques et excellentes, nous vous encourageons de lire
attentivement le mode d’emploi.
REMARQUE :
La qualité de la réception peut diminuer lorsque la fonction de rechargement par
l’entrée ou la sortie USB est utilisée. Le son des stations de radio dont le signal est
faible peut alors ne pas être tout à fait net.
Caractéristiques
1Interrupteur d’alimentation
FACE
19 Lampe de poche à LED et
balise de détresse
20 Port micro-USB pour le
chargement
21 Prise casque
22 Port AUX
23 Sortie USB pour le
chargement de téléphone
24 Bouton de
réinitialisation
25 Panneau solaire
1
2
4
5
3
6
7
8

FRX5-BT - MODE D’EMPLOI
17
Côté droit Face arrière
16 17
15
Touches du haut
Côté supérieur
Côté inférieur
910 11 12 13 14
Reset
18
21
22
23
25
25
20
19

FRX5-BT - MODE D’EMPLOI
18
FONCTIONS DES TOUCHES
ALIMENTATION
Appuyez pour mettre en marche-arrêt
Sélectionner la bande Radio
Avec radio allumée : appuyez sur AM / FM pour
basculer entre AM / FM, ou appuyez sur la touche
WB pour écouter la chaîne météo. Tournez la
molette de syntonisation pour trouver la station de
la chaîne météo (WB) de votre région.
Remarque :
La touche MENU a une fonction secondaire. Lorsque vous êtes sur l’une des
bandes (FM/AM/SW), maintenez enfoncée la touche MENU pour aller à la station
disponible précédente, la touche CELL pour aller à la station disponible suivante,
ou appuyez sur MENU pour mémoriser la station à l’écoute. 8 emplacements de
mémoire sont disponibles pour chaque bande (FM/AM/SW). Tournez le bouton
TUNING pour choisir un emplacement (de 1-8) et appuyez sur MENU pour
enregistrer une fréquence à cet emplacement.
Une fois que des stations sont enregistrées, vous pouvez y accéder en appuyant
sur le bouton MEMORY/TUNE. Pour aller à la station enregistrée suivante, appuyez
à nouveau sur MEMORY/TUNE. Si, par exemple, la station que vous écoutez est
à l’emplacement 5 et que vous appuyez sur MEMORY/TUNE, la radio passera à
l’emplacement 6.
Bluetooth
Appuyez sur AM/FM/Bluetooth pour activer le
Bluetooth. Activez le Bluetooth sur votre appareil et
connectez-vous au FRX5-BT. Jouez votre musique sur
le FRX5-BT.
Diffusion de musique LECTURE/PAUSE
Appuyez sur le bouton Lecture/Pause sur l’avant du
FRX5-BT pour contrôler votre diffusion de musique.

FRX5-BT - MODE D’EMPLOI
19
Fonction LUMIÈRE
Appuyez sur la touche LUMIÈRE pour allumer la lumière
ambiante ou la lampe de poche (alterner), appuyez à
nouveau pour éteindre. Lorsque la lumière ambiante ou
la lampe de poche est activée, appuyez et maintenez la
touche LUMIERE pour régler la luminosité. Appuyez sur
la touche lumière deux fois rapidement pour allumer la
lumière rouge d’urgence, appuyez deux fois encore pour
éteindre.
Chargement tablette ou de téléphone cellulaire
Branchez le câble de chargement USB de votre
périphérique dans le port de sortie USB sur le FRX5-BT
et branchez l’autre extrémité sur votre périphérique.
Appuyez sur la touche de chargeur de téléphone
portable pour commencer à charger, « CELL » clignote
sur l’écran d’afchage. Appuyez à nouveau pour arrêter
le chargement et le symbole disparaîtra.
OPTIONS D’ALIMENTATION DU FRX5-BT
Chargement via le port USB
Insérez le câble micro-USB fourni dans le port de chargement
Micro USB et l’autre extrémité dans le bloc de chargement
standard USB et branchez dans une prise de courant. L’icône de
chargement de la batterie indique que l’appareil se charge.
Remarque : la source d’alimentation USB doit être capable de résister à une
sortie de puissance minimale constante de 500 mA pendant une longue période
de temps an de charger complètement la batterie 2000 mAh du FRX5-BT.
Chargement solaire
Lorsqu’il est placé en plein soleil, il démarrera
automatiquement le chargement de la batterie au
lithium. L’icône de chargement de la batterie indique que
l’appareil est en charge. Charge entièrement la batterie
en 5-6 heures.

FRX5-BT - MODE D’EMPLOI
20
Manivelle de chargement
Tournez la manivelle pendant 4 minutes pour obtenir
1 minute de temps de conversation sur la plupart des
Smartphones, 10 à 15 minutes de temps d’écoute de la
radio.
Régler la bande de l’alerte météo
1. Avec la RADIO allumée, appuyez sur la touche d’alerte
météo (WB)
2. Tournez la molette de syntonisation pour syntoniser
l’alerte météo (WB) pour votre emplacement.
3. Appuyez sur la touche ALERTE MÉTÉO, WB
s’afchera à l’écran.
Remarque : le son s’arrêtera en mode alerte WB.
4. Appuyez sur WB ou AM / FM pour quitter le mode
alerte WB.
Tous les paramètres des fonctionnalités ci-
dessous nécessitent que la radio soit en mode
« ARRÊT ».
Régler l’heure
1. Appuyez sur MENU.
2. SET TIME s’afchera.
3. Appuyez sur WB.
4. Les chiffres des HEURES sur l’horloge se mettent à
clignoter.
5. Tournez la molette de syntonisation vers le haut ou
vers le bas jusqu’au chiffre approprié, notez que AM
ou PM changera quand vous passez le numéro 12.
6. Appuyez sur WB pour entrer.
7. Les chiffres des MINUTES sur l’horloge se mettent
à clignoter.
8. Appuyez sur WB pour entrer.
9. Si aucune touche n’est pressée pendant 20
secondes, l’appareil revient à sa position normale.
Table of contents
Languages:
Other Eton Radio manuals

Eton
Eton American Red Cross FR405 User manual

Eton
Eton GM100PE User manual

Eton
Eton TRAVELER II DIGITAL G8 User manual

Eton
Eton Traveler III User manual

Eton
Eton SOLARLINK FR500 User manual

Eton
Eton FIELD RADIO GS350DL User manual

Eton
Eton SCORPION - User manual

Eton
Eton GRUNDIG Globe Traveler G3 User manual

Eton
Eton Mini User manual

Eton
Eton American Red Cross FR350 User manual