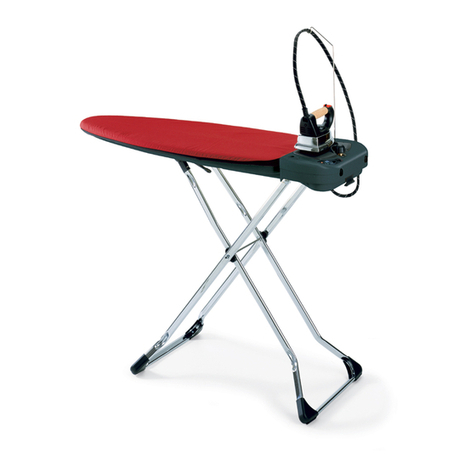
Euroflex SMOOTH B2S User manual

B2S
Un ottimo alleato del tuo ferro
INSTRUCTION MANUAL
Before using this appliance, please read this instruction manual and keep it for future reference.
ACTIVE IRONING BOARD WITH INTEGRATED
STEAM BOILER AND PROFESSIONAL IRON

SAVE THESE INSTRUCTIONS
2Safety Information
IMPORTANT SAF ETY INFORMATION
.
Dear Customer,
We are delighted that you have purchased the Euroex Smooth
Active Ironing Board (B2S). Through proper assembly, use and
maintenance the board will provide excellent ironing results for a
long time. Before using this ironing system for the rst time, please
read carefully through the instructions in this manual and store
them for future reference. These instructions are to accompany the
appliance when it is used by another person who is unfamiliar with
its operation or when ownership is transferred to another person.
The manufacturer, importer and the distributor assume no liability
in the event that the information in these instructions has not been
strictly followed.
GENERAL SAFETY WARNINGS
• This appliance is solely for household domestic use.
• If the electrical cord is damaged, it must be replaced by the
manufacturer or an authorised service agent in order to
avoid a hazard.
• Do not use the board if visible damage is present. In this
case get it checked by an authorised technical service
center before using it again.
• Children should be supervised to ensure that they do not
play with the appliance or its cord.
• This appliance should not be used by children and persons
with reduced physical, sensory or mental capabilities.
• Children should not play with the appliance.
• Cleaning and user maintenance should not be carried out
by children without supervision.
• This appliance must not be left unattended while it is
connected to the power supply.
• The plug must be removed from the socket-outlet before
the water reservoir is lled with water.
• The ironing board must be rested and used on a stable
surface.
• When placing your iron on its stand,ensure that the surface
on which the stand is placed is stable.

SAVE THESE INSTRUCTIONS
3
Safety Information
IMPORTANT SAF ETY INFORMATION
.
• This appliance is not to be used if it has been dropped, if there
are visible signs of damage or if it is leaking.
• Keep the appliance and its cord out of reach of children when
it is in operation or cooling down.
• The symbol 5041 relatives to IEC 60417-1 and warns
operators that surfaces are liable to get hot during use!
• This appliance complies with European Directives regarding
“electromagnetic compatibility” and “Electrical product safety”.
The appliance carries CE marking.
IMPORTANT NOTICES
• WARNING! If neither of the suction or blowing function is active, use
the iron in dry-ironing mode (without steam) to avoid condensation
inside the board.
• Repairs should be carried out solely by personnel authorised by the
manufacturer. Equipment repaired by personnel who are not authorised
to do so, represent a risk and, as such, are not covered by the warranty.
• The manufacturer reserves the right to make changes to the design and
features of the appliance without notice.
• Do not connect the appliance before having made sure that electrical
voltage supply corresponds to the required voltage shown on the
product.
• The electric socket should be earthed and equipped with a 10A
automatic circuit breaker.
• Do not connect the appliance to the electricity power supply with
an unsuitable multi socket or an unsuitable extension lead. These do
not guarantee the required safety of the appliance (e.g. danger of over
heating).
• Prior to using the appliance, make sure the iron is securely connected
to the ironing board steam valve. Failure to secure the connection could
potentially lead to steam escaping, and the risk of scalding.
• The manufacture, importer or distributor assume no responsibility for
damage to property or injury to persons, in the event that this appliance
is damaged as result of improper use or assembly; unauthorised repairs
carried out or unauthorised spare parts have been used; and for not
properly following the care and maintenance instructions found in this
manual.

SAVE THESE INSTRUCTIONS
4Safety Information
IMPORTANT SAF ETY INFORMATION
.
• Do not expose the appliance to water, dampness or heat. Only use
indoors, not intended for outdor use.
• Use a dry or slightly damp cloth to clean this appliance.
• Use solely manufacturer-recommended accessories or spare parts.
• The steam released from the appliance is extremely hot. Both
appliance and accessory tools may scald. Avoid direct contact. The
steam symbol (symbol 5597 relative to IEC 60417-1) warns
operators that there is the risk of scalding!
• Do not iron without the ironing board cover. The ironing board
reaches potentially high temperatures, do not touch under any
circumstances. High temperatures may potentially scald.
• Keep the appliance in a safe dry place (not outdoors) and out of the
reach of children when not in use.
• Do not pull on the electrical cable. Do not use the cable to move
the appliance. Do not exert undue pressure on the cable (i.e. when
closing a door). Avoid any contact with sharp edges and corners.
Keep the cable away from hot surfaces.
• No parts which are connected to an electrical power supply (switch,
plug, electronic components, etc) should come in contact with water.
• Disconnect the appliance from the power supply prior to any
maintenance or cleaning operations. Always allow the appliance to
completely cool down.
• Remove the power supply in the event the appliance remains
unattended for a long period of time.
• Loosen the security cap only when the steam in the boiler has been
released by holding down the steam supply button (10), and the
appliance has been turned off and completely cooled.
• Boiler lling should only be carried out with water that is free of
additives, perfumes, or any other chemical substances.
• Do not overturn or lean the appliance unduly to one side.
• Do not point the jet of steam in the direction of persons, animals
or plants.
• Do not point the jet of steam in the direction of electrical or
household appliances.
• Do not insert any object in the various openings and do not use the
appliance if any opening is obstructed.
• Do not use the appliance with wet hands or bare feet.
• Do not use the appliance when close to ammable or explosive
substances.

SAVE THESE INSTRUCTIONS
5
Safety Information
IMPORTANT SAF ETY INFORMATION
.
INDICATIONS OF USE
This manual can not take into account every possible use.
For further information or for any problems that are not
covered in detail in this manual, please contact the Service
Center or retailer. Keep this manual in a safe place
for future reference .
Destroy all plastic bags and packaging material,
they can be a risk for children!
NOTE: Keep the packaging for possible future transport
(eg relocations, repairs, etc.)
Attention: the photographs and/or drawings in this document
are for illustrative purposes only. Actual appliance and the
accessories may vary due to product enhancement.
Safety Informations in Digital Format: www.plastecs.it/warning
ADVICE ON DISPOSAL
1. When this crossed-out bin symbol appears on a
product it means that the product is covered by
European Directive 2002/96/EC
2. All electrical and electronic products should be
disposed of separately from the municipal waste
stream via specic collection facilities designated
by the government or the local authorities.
3. Proper disposal of your old appliance will help prevent potential
negative consequences for the environment and human health.
4. For more detailed information about disposal of your old
appliance, please contact your municipality, the waste disposal
service or the shop where you purchased the product.
Disposal of your old appliance

Product Overview
6Product Overview
10
AIR
DOWN
UP
MADE
IN
ITALY
B2S
9
AIR
DOWN
UP
MADE
IN
ITALY
B2S
76
5
13
11
12
3
1
4
16
15
1917
21
1. Power ON-OFF button
2. Power Indicator Light
3. Low water warning light
4. Steam ready indicator light
5. Function switch: blowing position
6. Function switch: suction position
7. Mode switch: synchro selection
8. Mode switch: continuous selection
9. Power supply socket for detachable cable
10. Steam supply button
11. Iron indicator light
12. Iron soleplate
13. Board height adjustment lever
14. Iron steam socket
15. Iron steam/power cord
16. Iron cord support
17. Filler Bottle
18. Power supply cable
19. Safety hot iron protection cover
20. Iron rest pad
21. Boiler cap tted with safety valve
PRODUCT OVERVIEW
20
14
18
2
8

Before Use
7
Before Use
BEFORE USE
Before starting the appliance for the rst time,
always remember that an improper use, assembly or
maintenance can be hazardous. Please, carefully read
the instructions on page 2,3,4,5.
PREPAREYOUR IRONING BOARD
POSITIONING
When setting up the ironing board please note the following:
• Place the ironing board on a at, even, dry surface, near an
earthed power socket
• Position the ironing board securely so that nobody can knock it
over or get hurt.
• Never put the appliance on or near warm surfaces or near ames
• Use the appliance indoors only.
• To avoid scalding, keep the appliance away from children.
• Use only the correct extension cables in accordance with the
advice given on page 2,3,4,5;pay attention not to trip over the cord.
Put up the ironing board as follows:
• Place the ironing board upright on the oor (steam generator
downward).
• Hold the end of the ironing board with one hand.
• With the other hand hold the upper part of the ironing board legs.
• Firmly pull the ironing board wide apart (1) until the adjustment
height device locks in place (2).
• Place the ironing board in a horizontal position (3).
Note: Be careful that the feet of the ironing board don’t slip on
smooth oors while opening/closing the ironing board.
1
1
1
2
3
INSTRUCTION FOR USE IB40/C ECO PLUS

Before Use
8Before Use
To assemble the iron rest pad proceed as follows:
• Pull out the metal frame from the rear part of integrated steam
generator.
• Put the rest pad on the metal frame following the instruction on it’s
reverse side.
• Press the rest pad hard on the metal frame to ensure it is xed properly.
Insert the iron cord support in one of the small holes
on each side of the ironing board and hang the iron
steam cord. The iron cord support keeps the iron
cord away from the surface of the board while ironing
to avoid the cord moving or dragging the garment.
The iron cord support also prevents “wear and tear”
of the iron cord due to rubbing against the edges or
surface of the board.
1
1
2
3
INSTRUCTION FOR USE IB40/C ECO PLUS

Before Use
9
Before Use
PREPAREYOUR IRONING BOARD
• Remove the iron from the iron protection cover.
• Plug the iron cable into the board steam socket.
• Put the iron (soleplate down) on the rest pad.
FILL THE TANK WITH WATER
• Ensure that the electrical cable is
disconnected from the power socket.
• Slide the iron rest pad out horizontally to
access the boiler cap.
• Unscrew and remove the safety boiler cap
carefully, ensuring that no steam is present.
• Fill the bottle with ordinary tap water.
• Put the bottle into the hole for lling the steam generator tank
and push it down to release the water to go in.
• Carefully screw in the safety cap without forcing it too much
(tightening too hard is not necessary and may cause the gasket to
wear out).
• Close the iron rest pad. Iron only when the iron rest pad is in
the closed position.
Important! The maximum capacity of the steam generator is 0.8L.
Do not forget that residual water is always left in the tank.When
water is poured, air bubbles in the lling-hole of the steam generator
can hinder the subsequent lling. Therefore, we recommend that
you slightly move the bottle from side to side during lling. Never
ll the steam generator directly from the tap: spilled water could
cause a short circuit!
TAP
WATER
PRESS LIGHTLY CLOSE THE IRON
REST PAD

Before Use
10 Before Use - Starting the Appliance
2
Information about the water
This iron works with ordinary tap water. Decalcied water of
any kind or water from tumble-dryers is not suitable, since it may be
very corrosive. Never use water treated with lter cartridges,
since the residues (e.g. particles of activated carbon) may block
the mechanical parts of the appliance. Never add in perfumes, oils,
starch into the water.Water with additives may damage the steam
generator leaving you with subsequent costs of cleaning and service.
Hard water and/or a frequent use may cause the formation of scale
deposits in your steam generator. If you wish to slow down the scale
forming,we recommend to regularly rinse out your steam generator
(see maintenance, page 14) or use distilled water.
This ironing board comes with a steam generating unit and a steam
iron with professional-style soleplate offering several advantages.
• Unlike a “normal” iron, an iron with a
professional-style soleplate has steam
holes only at the tip and it emits a large
amount of concentrated steam, which
quickly removes wrinkles and creases
in any fabric.
The strong concentrated steam easily penetrates through several
layers of fabric to avoid having to iron the underside.
• The large smooth area underneath the steam holes is heated and it
is used to dry and set the fabric.
This unique design based on commercial-style ironing systems reduces
ironing time signicantly while achieving professional ironing results.
Starting the Appliance
CONCENTRATED
STEAM
EMISSION
DRYING
SURFACE
IRONING BOARD START UP
• Plug the power supply cord into its socket.
• Place the iron on the iron rest pad.
• Switch the appliance on using the power on/off switch.The control
warning light integrated into the iron will be on and remain on. It
will switch off as soon as the iron soleplate reaches the working
temperature. The iron heating time is about 3-5 minutes. The
power on/off switch also activates the ironing board and the steam
generator.During the heating phase the equipment may emit noises.

Starting the Appliance
11
Starting the Appliance
As soon as the “steam ready” indicator light is on, the pressure is
reached in the steam generator and the iron is ready for use.The
heating time for the steam generator is about 10 minutes and can
be reduced by using lukewarm tap water.
No temperature regulation
The iron has been designed to offer you the peace of mind of steam
ironing any type of fabric.You no longer have to worry about adjusting
the temperature and/or the steam or arranging the garments according
to the fabric type.When ironing very delicate fabrics, it’s recommended
to perform an ironing test on a hidden point of the garment or to cover
the garment with a cloth. Alternatively, it is recommended to use the
teon insole (optional) to avoid any risk of damaging the garment.
STEAM IRONING
• To steam-iron push the “steam” button on the iron (10).
Warning! The steam emitted is very hot.
Danger of scalding!
Note! The appliance may give out some smoke when
using it for the rst time. It is a technical issue that will
cease after a short while.
During use and after a long pause, direct the rst steam jet toward
the air or into a piece of cloth, but not on the garment to be ironed,
so that any condensed water still in the iron may be expelled without
staining the garment.
After the rst steam jet the pressure slows down rapidly. It is not
a fault. This is due to the emission of the air that entered the boiler
during the lling.
Attention! To interrupt the emission of steam simply release the “steam”
button on the iron.When you are not ironing place the iron (soleplate down)
on the iron-rest mat.
After steam-ironing
- Turn off the appliance (on/off switch1).
- Pull the plug out of the mains socket (9).
- Let the appliance completely cool down.
- Remove the iron cord support.
Important! Store the appliance only when it has completely cooled
down.
STEAM EMISSION

Starting the Appliance
12 Starting the Appliance
DRY IRONING
• Put the iron on the iron-rest mat (20).
• Turn the appliance on (power button 1). Simultaneously, the orange
warming-up indicator light on the iron lights up (11).Later it switches
off as soon as the soleplate reaches the required temperature.The
iron reaches the required temperature after 3-5 minutes.
• To dry iron DO NOT press the steam button.
After dry ironing
- Turn off the appliance (on/off switch 9).
- Pull the plug out of the mains socket. Let the appliance cool down
completely.
SUCTION/BLOWING FUNCTION
AND HEATING OF THE BOARD
The suction absorbs the excess steam, which
is no longer used after the ironing process.The
suction helps hold the garment on the ironing
surface and helps to dry the garment. Garment
ironed with this board are ready to be placed
straight in the wardrobe without further airing.
The heated ironing surface stays dry, and keeps the steam hot so
that it passes through the board to be expelled without condensing.
SUCTION FUNCTION
With the suction function, light fabrics (silk etc.) can be held in
place on the ironing board, preventing them from slipping.
The suction function cools and sets the fabric during ironing,
guaranteeing no wrinkles.
• To activate the suction function set the selector switch on
position “I” (6).
BLOWING FUNCTION
The blowing function allows you to iron on a pillow of air without
applying downward pressure. This makes ironing of delicate items,
or difcult areas (trousers folds, pockets, seams, difcult areas to
reach), much easier and avoids the visible signs or seam crushing.
• To activate the blowing function set the selector switch on
position “II” (5).
3
FUNCTION SWITCH
AIR
DOWN
UP
MADE
IN
ITALY
B2S

Starting the Appliance
13
Starting the Appliance - Shutdown Operations
4
SYNCHRO MODE
In synchro mode the suction/blowing function is activated when
you press the steam button on the iron (10).
• To activate the synchro mode set the
selector switch on position “II” (7).
CONTINUOUS MODE
In continous mode the suction/blowing function
is activated without interruption.
• To activate the continuous mode set the selector switch on
position “I” (8).
Important! Do not rest the hot iron directly on the Ironing
board. Always use the iron-rest mat included.
AFTER IRONING
• After use, leave the board open for 10 minutes to dry the cover
and to avoid the formation of condensation in the board.
• Turn off the ironing board using the power on/off switch. (1)
• Remove the plug from the socket (9).
• Let the equipment cool completely.
• Remove the iron cord support.
• Place the iron on the iron rest pad.
• Unplug the iron/steam generator from the auxillary socket and
remove it from the board.
• Fold the shelf back over the ironing surface.
• Wrap the power supply cord around two
cord supports beneath the board.
• Hold the board leg with your foot to stop it skidding.
• Operate the height adjustment lever and close the board.
Note: do not entangle the power cord. Store the closed board in a
vertical position with the folded shelf end towards the oor. Always
ensure that the board does not skid and tilt. Store the appliance in
a dry place and out of reach of the children.
Shutdown Operations
MODE SWITCH
AIR
DOWN
UP
MADE
IN
ITALY
B2S

14
Maintenance
MAINTENANCE
BOILER CLEANING (recommended every 6 months)
• Always disconnect the power supply cord and ensure that the
equipment is completely cool and the boiler contains no water.
• Disconnect the iron from the steam supply.
• Slowly unscrew the safety cap and remove it.
• Incline the board (1) and unscrew the boiler unit.We recommend
you begin carefully from the lower screws, making sure that the
boiler unit does not fall.
• Using the bottle ll the boiler with 0.8 litres of water. Close the cap
and shake vigorously then unscrew the cap and tip the liquid into
the sink.
• Repeat the operation, two or three times.
• When you have nished reassemble the boiler unit to the board
ensuring that it is properly connected.
Note: If you have damaged the boiler, or it has developed a fault,
disassemble it as described above and either take it or send it to an
authorised repair centre.
Important!
Never pour any kind of detergents or decalciers into the generator.
Never perform Maintenance when the steam generator is under
pressure. Perform maintenance only when the equipment is
completely cooled.
5
Maintenance
13
5
2
46

15
Technical Data
Voltage: 220-240V ~ 50/60Hz
Rating: 1950W
Board dimension: 117 x 50 x 14 cm
Net weight: 14.6 kg
Cable lenght: 2.5 mt
Tank capacity: 0.8 L
TECHNICAL DATA
6
Changing the Cover
With continuous use, the cover which is tted with a drawstring is
subject to wear and should be replaced regularly. Due to the design of
this ironing system which incorporates a heated ironing surface and
to guarantee the correct performance of the product,we recommend
that you use only Euroex ironing board covers.
Metalised heat reective covers and covers with thick lining are not
suitable for this ironing system and may cause overheating of the
suction motor.
Warning!
In case of failure due to faulty material or if damage results due to
the appliance falling over or being dropped, immediately remove the
plug from the socket. Repairs should be performed exclusively by
an authorised Service Centre. Repairs performed by unauthorised
personnel may cause serious hazards for users. No responsibility
or liability is assumed for injury to persons or damage to property
caused by repairs performed by unauthorised personnel or where
parts have been used that are not approved by the manufacturer. In
such cases the manufacturer’s warranty is voided.
Maintenance
Maintenance - Technical Data

Cod. 6809989.0 10/2018
Manufactured by:
Plastecs SRL
Via dei Colli, 59
31058 Susegana (TV) - ITALY
Tel: +39 0438 453334
Email: [email protected]
Website: www.euroex-appliances.com
Distributed by:
Echidna Sewing
56 Neumann Road
CAPALABA QLD 4157
PH 07 33903600
Email: [email protected]
Imported by:
Euroex Australia Pty Ltd
79 Furniss Road
DARCH WA 6065
AUSTRALIA
TEL: 08 9302 2526
Email: admin@euroex.com.au
Website: www.euroex.com.au
Table of contents
Other Euroflex Iron manuals

Euroflex
Euroflex Monster IB 40 CLASSIC-RA User manual

Euroflex
Euroflex Monster IB 40 CLASSIC-RA User manual

Euroflex
Euroflex STIROSYSTEM IS 55 HSM/X User manual

Euroflex
Euroflex AIRFLUX IB 10 VAPOR User manual

Euroflex
Euroflex BT 3000 M User manual

Euroflex
Euroflex monster IS 56 HS User manual

Euroflex
Euroflex IS 45 HST Installation instructions

Euroflex
Euroflex Monster IB 35 Active User manual

Euroflex
Euroflex Monster IS 60 User manual

Euroflex
Euroflex monster IS 21 HS User manual