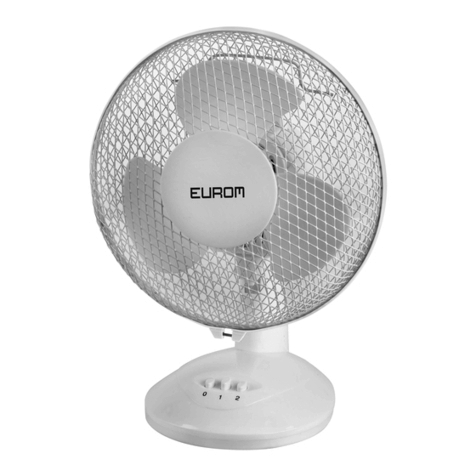
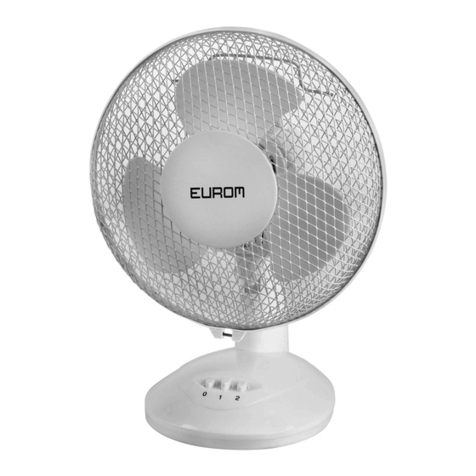
EUROM VT9 User manual

Gebruiksaanwijzing (NL) (2)
Instruction manual (EN) (10)
Gebrauchsanleitung (DE) (18)
Manuel d’utilisation (FR) (27)
VT9-VT12-VT16 VS16 (blanc)
(blanc)
385427-385434-385441 385458

2
Dank
Hartelijk dank dat u voor een EUROM apparaat hebt gekozen. U hebt daarmee een
goede keus gemaakt! Wij hopen dat hij tot uw volle tevredenheid zal functioneren.
Om het beste uit uw apparaat te halen is het belangrijk dat u deze gebruiksaanwijzing
vóór gebruik aandachtig en in zijn geheel doorleest en ook begrijpt. Schenk daarbij
speciaal aandacht aan de veiligheidsvoorschriften; die worden vermeld ter
bescherming van u en uw omgeving!
Bewaar de gebruiksaanwijzing vervolgens om het in de toekomst nog eens te kunnen
raadplegen. Bewaar ook de verpakking: dat is de beste bescherming voor uw
apparaat tijdens de opslag buiten het seizoen. En mocht u het apparaat ooit aan
iemand anders overdragen, lever er dan de gebruiksaanwijzing en de verpakking bij.
Wij wensen u veel plezier met de VT of VS ventilator!
Eurom
Kokosstraat 20
8281 JC Genemuiden (NL)
www.eurom.nl
Deze gebruiksaanwijzing is met de grootste zorg samengesteld. Niettemin behouden
wij ons het recht voor deze gebruiksaanwijzing op elk moment te optimaliseren en
technisch aan te passen. De gebruikte afbeeldingen kunnen afwijken.
________________________________________________________
Technische gegevens
Model
VT9 blanc
VT12 blanc
VT16 blanc
VS16 blanc
Aansluitspanning
220-240V~50Hz
Opgenomen
vermogen
25W
30W
45W
45W
Ø vin
9”
12”
16”
16”
Gewicht (kg)
1,22
1,74
2,20
2,78
Afmetingen (cm)
26x19x36
35x26x38
43x32x61
65x65x110
(130)

3
Belangrijke veiligheidsvoorschriften
1. Dit apparaat is uitsluitend voor gebruik binnenshuis.
2. Zet de ventilator eerst volledig in elkaar, voor u hem gebruikt. Altijd
de stekker uit het stopcontact bij monteren / demonteren.
3. Gebruik dit apparaat uitsluitend voor het doel waarvoor het is
ontworpen (het ventileren van een huishoudelijk ruimte) en op de
wijze, zoals in dit boekje beschreven. Elk ander gebruik kan
gevaarlijk zijn en kan brand, verwondingen, schade, elektrische
schok enz. veroorzaken, en doet de garantie vervallen.
4. Controleer ventilator, adapter, stekker en elektrokabel voor gebruik
op beschadigingen. Stel het apparaat niet in werking wanneer u
beschadigingen constateert aan apparaat, adapter, elektrokabel of
stekker, of wanneer het slecht functioneert, is gevallen of op andere
wijze een storing vertoont. Breng het complete apparaat terug naar
uw leverancier of een erkend elektricien voor controle en/of
reparatie. Vraag altijd om originele onderdelen. Het apparaat (incl.
adapter, elektrokabel en stekker) mag uitsluitend worden geopend
en/of gerepareerd door daartoe bevoegde en gekwalificeerde
personen.
5. Verwijder de stekker uit het stopcontact en schakel de ventilator
meteen uit wanneer je vreemde geluiden hoort, iets ruikt of rook
ziet.
6. Controleer voor gebruik of de spanning die het stopcontact, waarop
u de ventilator wilt aansluiten, afgeeft, gelijk is aan het
inputvoltage dat op het typeplaatje van de adapter staat.
7. Voorkom het gebruik van verlengkabels. Is dat onvermijdelijk,
gebruik dan een goedgekeurde kabel van voldoende capaciteit en
ontrol hem helemaal.
8. Voorkom dat de elektrokabel in contact komt met scherpe-, hete- of
bewegende voorwerpen. Wind hem niet om de ventilator en rol hem
niet te strak op.
9. Gebruik de ventilator nooit met een beschadigde adapter,
elektrokabel of aansluitstekker-ventilatorzijde. Vervang deze in het
geheel voor een origineel identiek exemplaar. Probeer deze
onderdelen nooit zelf te repareren.
10. Zorg ervoor dat de ventilator op een stevige, vlakke en horizontale
ondergrond staat tijdens gebruik.
11. Laat een werkende ventilator niet zonder toezicht in een ruimte.
4
12. Dit apparaat is niet geschikt voor gebruik in natte of vochtige
ruimtes als badkamers, wasruimtes enz. Plaats hem niet in de
nabijheid van een kraan, badkuip, douche, zwembad, fonteintje
o.i.d., zorg ervoor dat hij nooit in water kan vallen en voorkom dat
water het apparaat binnendringt. Mocht het apparaat tóch ooit in
water vallen, neem dan éérst de stekker uit het stopcontact! Een
inwendig nat geworden apparaat niet meer gebruiken maar ter
reparatie aanbieden.
13. Dompel apparaat, adapter, snoer of stekker nooit in water of
andere vloeistof en raak het apparaat en adapter nooit met natte
handen of voeten aan.
14. Plaats het apparaat niet in een open raam i.v.m. regen, niet op
natte oppervlakken en voorkom dat er vocht op wordt gemorst.
15. Hang niets over of aan de ventilator en gebruik hem niet in de
nabijheid van gordijnen, kleding of andere materialen die de motor
kunnen doen vastlopen. Dat kan oververhitting of brand tot gevolg
hebben.
16. Let op dat lang haar niet in de ventilator wordt gezogen.
17. Houd de aanzuig- en uitblaasrooster schoon en stofvrij en zorg voor
minimaal 30 cm vrije ruimte rondom de ventilator.
18. Zorg ervoor dat er zich geen objecten in de buurt van de ventilator
bevinden die de oscillatie (zwenken) kunnen verhinderen.
19. Steek nooit een vinger, pen, stokje of wat voor voorwerp dan ook
door het beschermrooster de werkende ventilator in!
20. Spuit geen middelen (anti-insect, schoonmaak of wat dan ook) op
of in de ventilator; dat kan lichamelijke klachten veroorzaken (i.h.b.
bij kinderen!) of onderdelen beschadigen.
21. Bewaar of gebruik het apparaat niet:
- Op plaatsen waar het nat kan worden of in water kan vallen
- In de buurt van licht-ontvlambare-, explosieve- of gasvormige
stoffen. Een vonkje uit de schakelaar zou die kunnen doen
ontbranden.
- In de buurt van zuren, alkali, olie en andere stoffen die corrosie
kunnen veroorzaken.
22. Sluit de ventilator niet aan op een timer of een dimmer.
23. Gebruik de ventilator niet bij temperaturen boven de 40 graden
Celsius, niet in de buurt van verwarmingsapparatuur en niet in
stoffige ruimtes.

5
24. Neem altijd de stekker uit het stopcontact voordat u de ventilator
verplaatst, schoonmaakt of er onderhoud aan uitvoert. Doe dat ook
wanneer de ventilator niet in gebruik is. Pak de stekker daartoe in
de hand; trek nooit aan het koord!
25. Wees ervan overtuigd dat de stekker uit het stopcontact is
genomen voordat u het beschermrooster van de ventilator
verwijderd voor schoonmaak- of onderhoud werkzaamheden.
26. Neem na gebruik altijd de stekker uit het stopcontact. Let wel,
stekker uit het stopcontact, niet de aansluitstekker uit de voet van
de ventilator.
27. Dit apparaat kan worden gebruikt door kinderen van 8 jaar en
ouder en personen met beperkte fysieke, sensorische of mentale
vermogens of gebrek aan ervaring en kennis als ze toezicht hebben
gekregen of instructies over het gebruik van het apparaat op een
veilige manier en begrijpen de gevaren die ermee gepaard gaan.
28. Kinderen mogen niet met het apparaat spelen.
29. Voorkom dat het apparaat continu op kleine kinderen, patiënten of
mensen die zich moeilijk kunnen verplaatsen, blaast.
30. Reiniging en gebruikersonderhoud is niet toegestaan door kinderen
zonder toezicht.
Onderdelentekeningen
VT9 BLANC
1. Klemring roosters
2. Voorrooster
3. Ventilatorbladen
4. Roosterbevestiging
5. Achterrooster
6. Motoras
7. Motorhuis
8. Zwenkknop
9. Aanpassing hoofd
10. Steun
11. Knoppen

6
VT12 BLANC & VT16 BLANC
1. Klemring roosters
2. Voorrooster
3. Ventilatorbevestiging
4. Ventilatorbladen
5. Roosterbevestiging
6. Achterrooster
7. Motoras
8. Motorhuis
9. Zwenkknop
10. Aanpassing
11. Steun
12. Knoppen
13. Voet
VS16 BLANC
1. Klemring roosters
2. Voorrooster
3. Ventilatorbevestiging
4. Ventilatorbladen
5. Rooster bevestiging
6. Achterrooster
7. Motorhuis
8. Knoppen
9. Zwenkknop
10. Fixatiebout
11. Instelbaar
standaarddeel
12. Klemkoppeling
13. Onderste standaard
14. Afdekkap
15. Voet
Samenstelling
Alle modellen
1. Schroef de roosterbevestiging tegen de klok in los van de voorzijde van het
motorhuis
2. Plaats het achterrooster tegen de voorzijde van het motorhuis (VT 9 & 16:
handgreep naar boven!), zodanig dat de pinnetjes van het motorhuis in de
passende gaatjes van het rooster vallen.

7
3. Schroef de roosterbevestiging stevig met de klok mee op de uitstekende
schroefdraad van het motorhuis.
4. Verwijder de PVC sok van de motoras en gooi hem weg.
5. Druk de ventilatorbladen op de motoras, uitsparingen over de pennetjes.
VT12 BLANC & VT16 BLANC
6. Draai de ventilatorbevestiging tegen de klok in stevig op het uiteinde van de
motoras
7. Draai het schroefje van de klemring bijna helemaal los en plaats hem losjes met
de achterste gleuf om het achterrooster. Plaats nu het voorrooster op het
achterrooster, in de voorste gleuf van de klemring. Draai het schroefje nu stevig
vast; dat klemt de roosterdelen op elkaar.
Zet de VT-modellen nu rechtop; ze zijn klaar voor gebruik.
VS16 BLANC
8. Plaats de beide voetdelen kruiselings over elkaar
9. Plaats de onderste standaard op de voet, gaatjes boven gaatjes, en schroef voet
en standaard vast met de 4 boutjes.
10. Trek het instelbare standaarddeel tot de gewenste hoogte uit de onderste
standaard en fixeer deze hoogte door de klemkoppeling stevig vast te draaien.
11. Plaats nu de ventilatorunit over het instelbare standaarddeel en klem hem stevig
vast met de fixatiebout.
Werking
De ventilatoren kunnen op verschillende snelheden draaien: de VT9 BLANC op twee
standen, de VT12 BLANC, VT16 BLANC en VS16 BLANC op drie standen. Alle types
zijn voorzien van een zwenkfunctie (45°).
Wanneer: - de ventilator volledig in elkaar is gezet
- alle verbindingen stevig vastgedraaid zitten
- alle veiligheidsvoorschriften in acht genomen zijn
kunt u de ventilator in gebruik nemen:
Steek de stekker in het stopcontact
Kies vermogen: 0=uit, 1=standaard, 2=sterk en 3=extra sterk. De ventilator zal
nu zijn werking starten.
Druk indien gewenst de zwenkknop bovenop de motor in: de ventilator zal nu in
een hoek van 45° gaan zwenken. Door deze knop weer uit te trekken schakelt u
de zwenkfunctie (of: oscillatie) weer uit.
Om de ventilator wat meer naar boven of beneden te laten blazen kunt u het
motorblokje met de ventilator wat naar boven of beneden bijstellen t.o.v. de voet.
Voor u dat doet eerst de ventilator uitschakelen en de stekker uit het stopcontact
nemen!

8
Om de ventilator uit te schakelen drukt u op de 0-knop. Wanneer u de werking langer
dan enkele minuten wilt onderbreken dient u ook de stekker uit het stopcontact te
nemen.
Schoonmaak en onderhoud
Schakel de ventilator uit en neem de stekker uit het stopcontact wanneer u hem wilt
reinigen of onderhoud wilt uitvoeren.
De ventilator vraag alleen wat algemeen, uitwendig onderhoud. Stof hem regelmatig
af met een zachte doek of plumeau of zuig hem schoon met een zacht
stofzuigerborsteltje. Is hij erg vuil, open dan het voorste rooster en neem roosters
en bladen af met een licht-bevochtigde doek met een zacht huishoudelijk
reinigingsmiddel. Droog alles goed na, laat de ventilator goed drogen en zet hem
weer volledig in elkaar voor u hem weer in gebruik neemt. Zorg ervoor dat er geen
water op andere delen dan rooster en bladen terechtkomt! Spoel of spuit de ventilator
nooit af! Gebruik geen sprays.
Om verkleuring of vervormingen van het materiaal te voorkomen nooit agressieve of
bijtende (schoonmaak)middelen gebruiken.
Wanneer u de ventilator aan het eind van het seizoen wilt opruimen, doe dat dan in
de originele verpakking: die biedt de beste bescherming. Ruim hem weg op een
veilige, droge, niet extreem warme of koude plaats.
Problemen en oplossingen
Het ventilatorblad draait niet terwijl de ventilator aangezet is
Zit de stekker wel goed in het stopcontact?
Staat er wel stroom op het stopcontact?
Is knop 1, 2 of 3 ingedrukt?
Wordt het blad niet ergens geblokkeerd, bijv. door een beschadiging, een
vervorming van het beschermrooster of een vreemd voorwerp?
Er doet zich een abnormaal geluid voor bij het opstarten
Controleer of de ventilatorbladen zo ver mogelijk over de motor-as zijn geplaatst.
Controleer of er zich wellicht fijne braampjes rond het vinnenblad bevinden.
Controleer of het vinnenblad misschien een vervorming van het beschermrooster
raakt.
Waarschuwing: Reparaties dienen door daarvoor opgeleide monteurs te worden
uitgevoerd. Dat geldt ook voor vervanging of reparatie van de elektrokabel en de
stekker. Vraag bij reparatie altijd om originele onderdelen.
In het apparaat aangebrachte wijzigingen en ondeskundig uitgevoerde reparaties
doen de garantie en de aansprakelijkheid van leverancier, importeur en fabrikant
vervallen.

9
Verwijdering
Binnen de EU betekent dit symbool dat dit product niet met
het normale huishoudelijke afval mag worden afgevoerd.
Afgedankte apparaten bevatten waardevolle materialen die
hergebruikt kunnen en moeten worden, om het milieu en de
gezondheid niet te schaden door ongereguleerde
afvalinzameling. Breng afgedankte apparatuur daarom naar
een daarvoor aangewezen inzamelpunt of wend u tot het
bedrijf waar u het apparaat gekocht hebt. Zij kunnen er voor
zorgen dat zoveel mogelijk onderdelen van het apparaat
hergebruikt worden.
CE - verklaring
Hierbij verklaart Eurom –Kokosstraat 20 –8281 JC - Genemuiden-NL dat de
EUROM Ventilatoren, types VT9 blanc, VT12 blanc, VT16 blanc en VS16
blanc voldoen aan en zijn in overeenstemming met onderstaande normen:
LVD 2014/35/EU
EN 60335-2-80:2003+A1:2004+A2:2009
EN 60335-1:2012+A11:2014
EN 62233:2008
EMC 2014/30/EU
EN 55014-1:2006+A1:2009+A2:2011
EN 55014-2:2015
EN 61000-3-2:2014
EN 61000-3-3:2013
Rohs 2011/65/EU&(EU)2015/863
Genemuiden, 22-10-2019
W.J. Bakker, alg. dir.

10
Thank you
Thank you very much for choosing for a EUROM device. You have made a good
choice! We hope you will be satisfied about its functioning.
To get maximum profit from your product, it is important to read this manual
attentive and totally before use, and to understand what is written. Read especially
the safety instructions: they are there to protect you and your environment.
Keep the manual in a safe place for future reference. Store also the package: that is
the best protection for your product in times of no-use. And if you at any time pass
the appliance on, pass on the manual and package too.
We wish you a lot of fun with the VT or VS Ventilator!
Eurom
Kokosstraat 20
8281 JC Genemuiden (NL)
www.eurom.nl
This manual has been complied with the utmost care. Nevertheless, we reserve the
right to optimize this manual at any time and to adjust it technically. The image
used may differ.
________________________________________________________
Technical data
Model
VT9 blanc
VT12 blanc
VT16 blanc
VS16 blanc
Connected
power
220-240V~50Hz
Output capacity
25W
30W
45W
45W
Ø blades
9”
12”
16”
16”
Weight (kg)
1,22
1,74
2,20
2,78
Dimensions
(cm)
26x19x36
35x26x38
43x32x61
65x65x110
(130)

11
General safety guidelines
1. This device is only to be used indoors.
2. Before using the fan, assemble it completely. Always keep the plug
out of the socket when assembling/dissembling.
3. This device should only be used for the purposes (ventilating a
domestic space) and in the way as set out in the booklet. Any other
usage may be dangerous (could cause fire, injury, damage, electric
shock etc.), will invalidate the guarantee
4. Check fan, adapter, plug and cable for damage before use. Do not
turn on the appliance if you have discovered damage to the
appliance, adapter, cord or plug, if the appliance is malfunctioning, if
it has been dropped or if there are signs of any other defect. Return
the complete product to the vendor or to a certified electrician for
inspection and/or repair. Always ask for original parts. The appliance
(incl. adapter, cord and plug) may only be opened and/or repaired
by properly authorised and qualified persons.
5. Remove the plug from the wall socket and immediately switch off the
fan when you hear strange noises, smell or see smoke.
6. Before every use, check that the voltage on the socket to be used
matches the input voltage indicated on the adapters specification
plate.
7. Avoid the use of extension cables. If unavoidable, use an approved
cable with sufficient power. Completely unroll the cable.
8. The electrical cable may never come into contact with sharp, hot or
moving objects, must not be wound around the fan and must not be
bent or rolled up too tightly.
9. Never use the fan with a damaged adapter, electrical cable or
connection plug-fan side. Replace it in its entirety with an original
identical copy. Never try to repair it yourself.
10. Always ensure that the floor is sturdy, flat and horizontal.
11. Do not leave a fan operating unsupervised in a room.
12. This device in not suitable for use in wet or damp spaces such as
bathrooms and laundry rooms. Do not place the device in the vicinity
of taps, bathtub, shower, pool, fountains or other sources of
moisture. Make sure it cannot fall into water and prevent water from
getting into the device itself. If, at any time, the device does fall into
water, unplug it immediately! Do not use a device that has a damp
interior but have it repaired.

12
13. Never immerse the device, adapter, cord or plug in water or other
liquids and never touch the device and adapter with wet hands or
feet.
14. Do not place the appliance in an open window to avoid rain or on wet
surfaces and avoid that no moisture spillage.
15. Never hang things over the device. Ensure that curtains, clothing and
other materials do not come into the vicinity of the fan.
16. Watch out that long hair is not sucked into the fan.
17. Keep the suction and extraction grill clean and free from dust and
make sure that a minimum of 30 cm of free space is left around the
fan.
18. Ensure that there are no objects in the vicinity of the fan that can
prevent oscillation.
19. Never insert a finger, pen or any other object through the protective
grille when the fan is in use!
20. Never spray any products (anti-insect, cleaning agent etc.) on or in
the fan.
21. Do not store or use the fan:
- in locations where it could become wet or fall into water;
- near flammable, explosive or gaseous substances;
- near acids, alkalis, oil or other corrosive substances.
22. Never connect the fan to a timer or dimmer.
23. Do not use the fan at temperatures above 40°C, not in the vicinity of
heating apparatuses and not in dusty areas.
24. First turn off the fan and then remove the plug from the socket before
moving, cleaning or carrying out maintenance. Do that when the fan
is not in use as well. Pull on the plug to remove from the socket,
never pull on the cord!
25. Be sure that the plug has been disconnected from the power outlet
before removing the protective grill from the fan for cleaning and
maintenance work.
26. Always unplug the appliance after use. Note that the plug must be
removed from the socket, not the plug from the base of the fan.
27. This appliance can be used by children aged from 8 years and
above and persons with reduced physical, sensory or mental
capabilities or lack of experience and knowledge if they have been
given supervision or instruction concerning use of the appliance in a
safe way and understand the hazards involved.
28. Children shall not play with the appliance.

13
29. Prevent the device from constantly blowing on small children,
patients or people who have difficulty moving.
30. Cleaning and user maintenance shall not be made by children
without supervision.
Diagrams of components
VT 9 blanc
1. Clamping ring grilles
2. Front grille
3. Fan blades
4. Grille fastener
5. Rear grille
6. Motor spindle
7. Motor housing
8. Oscillate button
9. Head Adjustment
10. Support
11. Button
VT12 BLANC blanc & VT16 BLANC blanc
1. Clamping ring grilles
2. Front grille
3. Fan fastener
4. Fan blades
5. Grille fastener
6. Rear grille
7. Motor spindle
8. Motor housing
9. Oscillate buton
10. Head
11. Support
12. Buttons
13. Base

14
VS16 BLANC blanc
1. Clamping ring grilles
2. Front grille
3. Fan fastener
4. Fan blades
5. Grille fastener
6. Rear grille
7. Motor housing
8. Buttons
9. Oscillate button
10. Fastening bolt
11. Adjustable standard part
12. Clamp coupling
13. Bottom support
14. Covering cap
15. Base
Assembly
For all models
1. Unscrew the grille fastener anticlockwise to detach it from the front of the motor
housing.
2. Mount the rear grille against the front of the motor housing (VT 9 & 16: with the
grip facing forwards!), so that the pins in the motor housing fit into the holes in
the grille.
3. Screw the grille fastener firmly clockwise onto the protruding screw thread of the
motor housing.
4. Remove the PVC socket from the motor spindle and throw it away.
5. Press the fan blades onto the motor spindle, with the notches over the pins.
VT12 blanc & VT16 blanc
6. Screw the fan fastener firmly anticlockwise onto the end of the motor spindle.
7. Unscrew the clamping ring screw nearly all the way and mount it loosely with
the rearmost slot around the rear grille. Now position the front grille onto the
rear grille, in the front slot of the clamping ring. Tighten the screw firmly; this
clamps the grille parts together.
Now place the VT models upright; they are ready for use.
VS16 blanc
8. Place both base parts crosswise over each other.
9. Place the bottom support on the base, holes over holes, and screw the base and
support tight with the four bolts.
10. Pull the adjustable standard part out of the bottom support to the required height
and fix this height by firmly tightening the clamp coupling.

15
11. Now mount the fan unit over the adjustable standard part and clamp it firmly
tight with the fastening bolt.
Operation
The fans can be set to different speeds: The VT9 BLANC has two settings; the VT12
BLANC, VT16 BLANC and VS16 BLANC have three settings. All types of fan are
equipped with an oscillation function (45°).
If - the fan has been fully assembled
- all connections have been properly secured
- all safety guidelines have been taken into account
you can use the fan.
Insert the plug into the socket.
Select setting: 0=off, 1=standard, 2=strong and 3=extra strong. The fan will now
begin to work.
If required, you may now depress the oscillation button on top of the motor: the
fan will now begin to oscillate through an angle of 45°. Depressing and releasing
this button will turn the oscillation function off.
If you would like to angle the fan upwards or downwards, the motor block can be
angled further up or down in relation to the foot. Before doing so, however, turn
off the fan and remove the plug from the socket!
Press the 0 button to switch the fan off. If you wish to turn the device off for longer
than just a few minutes, you must also remove the plug from the socket.
Cleaning and maintenance
Switch the fan off and remove the plug from the socket if you wish to clean the device
or perform maintenance.
The fan only needs general, exterior maintenance. Dust it regularly with a soft cloth
or duster or use a vacuum cleaner with a soft brush to clean. If it is very dirty, open
the grille and clean grilles and blades using a soft, damp cloth and a mild household
cleaning agent. Dry everything thoroughly and allow the fan to dry properly before
reassembling and using again. Ensure that water does not come into contact with
anything other than the grille and blades. Never rinse or spray the fan! Don not use
any spray.
In order to prevent material discolouration or deformities, never use aggressive or
corrosive (cleaning) products.
If the fan is to be stored at the end of the season, repack in its original packaging:
this offers the best protection. Store it in a safe and dry place that is not subject to
extremes of heat or cold.

16
Problems and solutions
The fan blades do not rotate even though the device is switched on
Is the plug in the socket?
Is there power to the socket?
Is button 1, 2 or 3 depressed?
Is the blade blocked, e.g. by damage, a deformity on the grille or a foreign object?
There is strange noise when starting
Check to ensure the blades are placed as far over the motor axle as possible.
Check if there are any burrs around the edges of the blades.
Check whether the blades have become deformed and are touching the protective
grille.
Warning: Repairs must be carried out by qualified engineers. This also applies to
replacing or repairing the electrical cable and plug. Please request original parts if
the device needs to be repaired.
If the device is subjected to modifications or repairs are carried out by unqualified
persons, the guarantees from the supplier, importer and manufacturer will become
null and void.
Removal
In the EU this symbol indicates that this product may not be
disposed of as ordinary household waste. Old equipment
contains valuable materials, suitable for recycling. These
materials should be made suitable for reuse in order to prevent
any adverse effects to health and the environment caused by
unregulated waste collection. Therefore, please make sure that
you bring old equipment to a designated collection point.
Alternatively, contact the original supplier, who can make sure
that as many of the components as possible can be recycled.

17
CE-statement
Hereby, Eurom - Kokosstraat 20 –8281 JC –Genemuiden - NL declares that
the Eurom ventilators types VT9 blanc, VT12 blanc, VT16 blanc and VS16
blanc meet and are in accordance with the following standards:
LVD 2014/35/EU
EN 60335-2-80:2003+A1:2004+A2:2009
EN 60335-1:2012+A11:2014
EN 62233:2008
EMC 2014/30/EU
EN 55014-1:2006+A1:2009+A2:2011
EN 55014-2:2015
EN 61000-3-2:2014
EN 61000-3-3:2013
Rohs 2011/65/EU&(EU)2015/863
Genemuiden, 22-10-2019
W.J. Bakker, alg. dir.

18
Dank
Herzlichen Dank, dass Sie sich für eine EUROM Gerät entschieden haben. Sie haben
damit eine gute Wahl getroffen! Wir hoffen, dass sie zu Ihrer vollen Zufriedenheit
funktioniert.
Um Ihren Gerät optimal zu nutzen, ist es wichtig, dass Sie dieses Handbuch vor der
Nutzung aufmerksam und komplett lesen und auch verstehen. Achten Sie dabei
besonders auf die Sicherheitsvorschriften, die zu Ihrem persönlichen Schutz und zum
Schutz Ihrer Umgebung genannt werden.
Außerdem empfehlen wir Ihnen, dieses Handbuch aufzubewahren, um es bei Bedarf
in Zukunft noch einmal konsultieren zu können. Bewahren Sie auch die Verpackung.
Sie ist der beste Schutz für Ihren Gerät, wenn Sie das Gerät außerhalb der Saison
lagern. Und sollten Sie das Gerät irgendwann weitergeben, legen Sie das Handbuch
und die Verpackung bei.
Wir wünschen Ihnen viel Spaß mit dem VT oder VS blanc Ventilator!
Eurom
Kokosstraat 20
8281 JC Genemuiden (NL)
www.eurom.nl
Diese Gebrauchsanleitung wurde mit größtmöglicher Sorgfalt zusammengestellt.
Dennoch behalten wir uns vor, diese Anleitung jederzeit zu optimieren und technisch
anzupassen. Die verwendeten Bilder können abweichen.
___________________________________________________________
Technische Daten
Type
VT9 blanc
VT12 blanc
VT16 blanc
VS16 blanc
Connected
power
220-240V / 50Hz
Output capacity
25W
30W
25W
25W
Ø blades
9”
12”
16”
16”
Weight (kg)
1,22
1,74
2,20
2,78
Dimensions
(cm)
26x19x36
35x26x38
43x32x61
65x65x110(130)

19
Wichtige Sicherheitsvorschriften
1. Dieses Gerät ist ausschließlich für die Anwendung im Haus
zugelassen.
2. Montieren Sie den Lüfter zuerst vollständig, bevor Sie ihn verwenden.
Ziehen Sie bei der Montage/Demontage immer den Stecker aus der
Steckdose.
3. Verwenden Sie dieses Gerät ausschließlich für den in dieser
Handbuch beschriebenen Zweck und den Anleitungen entsprechend.
Jede andere Anwendung kann gefährlich sein (Brand,
Körperschaden, Sachschaden, elektrischer Schock usw.) und sorgt
dafür, dass die Haftpflicht des Lieferanten, sowie die Garantie
verfallen.
4. Kontrollieren Sie vor Gebrauch das Gerät, Adapter, Stecker und
Elektrokabel auf eventuelle Beschädigungen. Setzen Sie das Gerät
nicht in Betrieb, wenn Sie Beschädigungen am Gerät, am Adapter,
am Elektrokabel oder am Stecker feststellen oder wenn es schlecht
funktioniert, heruntergefallen ist oder auf eine andere Weise eine
Störung anzeigt. Bringen Sie das komplette Gerät zur Kontrolle
und/oder Reparatur zurück zu Ihrem Lieferanten oder einem
anerkannten Elektriker. Bitten Sie immer um Originalersatzteile. Das
Gerät (inkl. Adapter, Elektrokabel und Stecker) darf ausschließlich
durch dazu befugte und qualifizierte Personen geöffnet und/oder
repariert werden.
5. Nehmen Sie den Stecker aus der Steckdose und schalten Sie den
Ventilator sofort aus, wenn Sie ungewöhnliche Geräusche hören,
etwas riechen oder Rauch sehen.
6. Kontrollieren Sie vor jeder Anwendung, ob die Spannung der
vorgesehenen Steckdose der auf dem Modelletikett des Adapter
angegebenen Eingang Spannung entspricht.
7. Verlängerungskabel weitestgehend vermeiden. Sollte es doch
unvermeidlich sein, ein zugelassenes Kabel mit ausreichender
Leistung verwenden. Kabelrollen ganz ausrollen.
8. Das Stromkabel darf nicht mit scharfen, heißen oder sich
bewegenden Gegenständen in Berührung kommen, nicht um den
Ventilator gewunden, nicht geknickt und nicht zu straff aufgerollt
werden.
9. Verwenden Sie den Lüfter niemals mit einem beschädigten Adapter,
Elektrokabel oder Anschlussstecker (Ventilator Seite). Ersetzen Sie

20
diese Teile vollständig für eine Originalkopie. Reparieren Sie diese
Teile niemals selbst.
10. Grundsätzlich für einen stabilen, flachen und horizontalen
Untergrund sorgen.
11. Lassen Sie einen arbeitenden Ventilator nicht unbeaufsichtigt.
12. Dieses Gerät ist nicht geeignet für die Anwendung in nassen oder
feuchten Räumen, wie Badezimmern, Waschräumen usw. Stellen
Sie das Gerät nicht in der Nähe von Wasserhähnen, Badewannen,
Duschen, Schwimmbecken, Waschbecken oder dergleichen auf;
sorgen Sie dafür, dass das Gerät niemals ins Wasser fallen kann
und verhindern Sie, dass Wasser ins Gerät eindringt. Sollte das
Gerät doch inwendig nass werden, entfernen Sie sofort den Stecker
aus der Steckdose! Benutzen Sie einen inwendig nass gewordenen
Gerät nicht mehr, sondern lassen Sie diesen reparieren.
13. Tauchen Sie Gerät, Adapter, Anschlussleitung oder Stecker niemals
in Wasser oder sonstige Flüssigkeiten und berühren Sie das Gerät
und Adapter niemals mit nassen Händen oder Füße.
14. Stellen Sie das Gerät weder vor ein geöffnetes Fenster –damit es
nicht im Regen stehen kann –, noch auf feuchte Flächen, und
verhindern Sie, dass Feuchtigkeit darauf gelangen kann.
15. Lassen Sie nichts auf oder am Lüfter und verwenden Sie es nicht in
der Nähe von Vorhängen, Kleidungsstücken oder anderen
Materialien, die den Motor blockieren könnten. Dies kann zu
Überhitzung oder Feuer führen.
16. Achten Sie darauf, dass lange Haare nicht in den Lüfter gesaugt
werden.
17. Das Ansaug- und Ausblasgitter sauber und staubfrei halten und auf
einen freien Raum von 30 cm um den Ventilator herum achten.
18. Stellen Sie sicher, dass sich keine Gegenstände in der Nähe des
Lüfters befinden, die die Oszillation (Schwenken) verhindern können.
19. Niemals einen Finger, Stift oder sonstiges Objekt durch das
Schutzgitter des laufenden Ventilators stecken!
20. Keine Mittelchen (Insektenspray, Reinigungsmittel etc.) auf bzw. in
den Ventilator sprühen.
21. Verwenden und lagern Sie den Ventilator nicht:
- an Stellen, wo es nass werden kann oder das Gerät ins Wasser
fallen kann.
Other manuals for VT9
1
This manual suits for next models
3
Table of contents
Languages:
Other EUROM Fan manuals

EUROM
EUROM Vento 3D User manual

EUROM
EUROM HVF 16-P User manual

EUROM
EUROM 48 User manual

EUROM
EUROM Safe-blade fan 38.505.2 Manual

EUROM
EUROM VTW33 Manual

EUROM
EUROM Vento Series Manual

EUROM
EUROM VTM12 User manual

EUROM
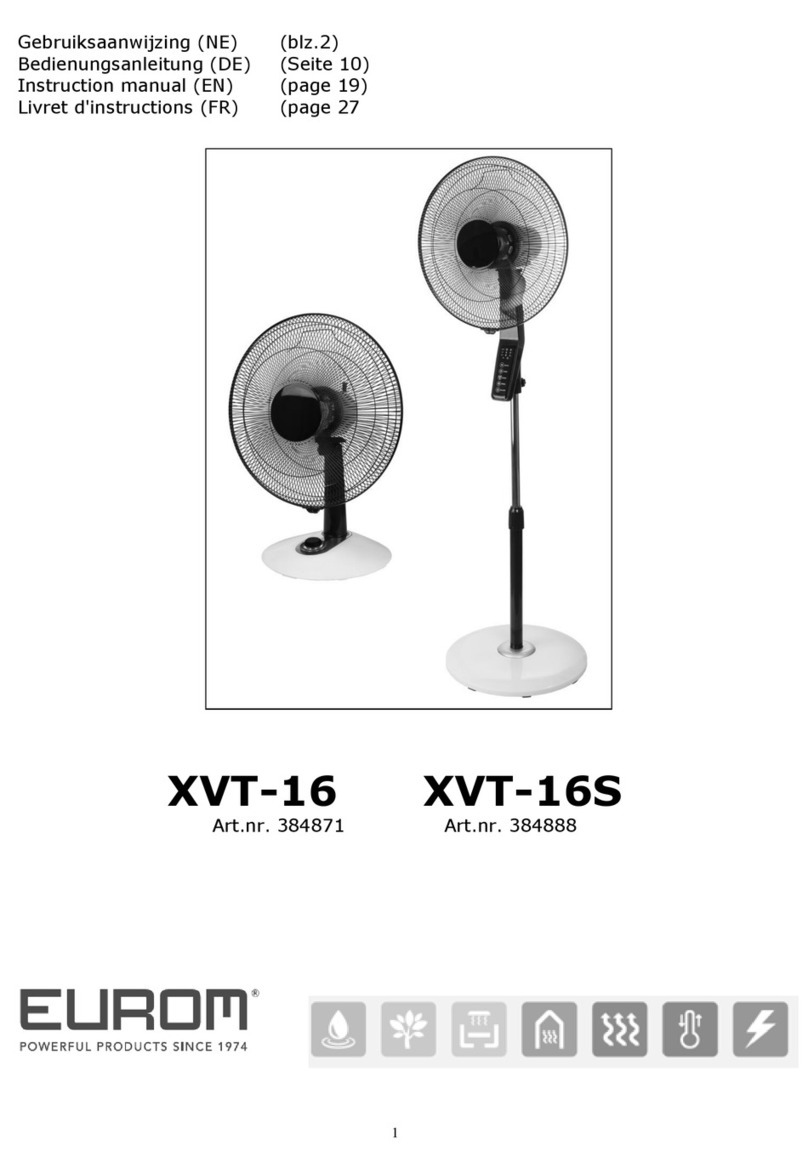
EUROM 384871 User manual

EUROM
EUROM Vento Cordless Fan User manual

EUROM
EUROM Kamin Vento 3 User manual