Evantair PTC-5137 User manual

AFTER SALES SUPPORT
(AU) 1300 886 649 (NZ) 0800 836 761
Ceramic Tower Heater
INSTRUCTION MANUAL
MODEL: PTC-5137

2
0800 422 274
NZ
Contents
Important Safety Instructions 3
Product Overview 6
Getting Started 8
Operating Instructions 10
Other Useful Information 13

3
0800 422 274
NZ
Important Safety Instructions
Read this manual thoroughly before first use, even if you are familiar with
this type of product. The safety precautions enclosed herein reduce the risk
of fire, electric shock and injury when correctly adhered to. Make sure you
understand all instructions and warnings. Keep the manual in a safe place
for future reference, along with any warranty information, your purchase
receipt and carton. If you sell or transfer ownership of this product, pass on
these instructions to the new owner.
Always follow basic safety precautions and accident prevention
measures when using an electrical appliance, including the following:
Electrical Safety and Cord Handling
• Voltage: Before plugging in the heater, make sure your outlet voltage and
frequency correspond to the voltage stated on the appliance rating label.
• Electrical circuit: To prevent overloading a circuit, do not plug the heater
into a circuit that already has other appliances working.
• No adaptor, no extension cord: Do not use the heater with a power board or
double adaptor as this may overheat and create a fire risk. Do not use it with
an extension cord because the cord may overheat and cause a risk of fire.
• WARNING: To reduce the risk of fire, electric shock or injury:
• Never touch the heater with wet or damp hands or feet.
• Do not use the heater if any part of it has become wet. Immediately call
a qualified service technician to inspect the heater and replace any part
of the electrical system that has been wet.
• Never spill liquid into the heater. Protect the heater from moisture. Do not
expose it to spray and/or dripping water. Do not place objects filled with
liquid, such as vases or open drink containers, on or near the heater.
• Damaged cord: If the supply cord is damaged, it must be replaced by the
manufacturer or an authorised service agent in order to avoid a hazard.
Contact the after sales support line for advice.
• Damaged heater: Do not operate the heater with a damaged cord or plug,
or after the heater malfunctions or has been dropped or damaged. Contact
our after sales support line to arrange an examination and/or repair.
• Plug: It is normal for the plug to feel warm to the touch; however, a loose
fit between the AC outlet and plug may cause overheating and distortion of
the plug. Contact a qualified electrician to replace a loose or worn outlet.
• Protect the power cord:
• Do not twist or kink the cord or let it touch heated surfaces.
• Do not put any stress on the cord where it connects to the product.
• Arrange the cord away from any traffic area so no one will trip over it.
• Do not run the cord under carpeting; do not cover it with rugs, runners etc.
• Only operate the heater with the power cord fully unwound.

4
0800 422 274
NZ
Important Safety Instructions (Cont.)
• After use: Always disconnect power when the heater is not in use and
before cleaning, servicing or moving the heater.
• Disconnect: To disconnect the heater, switch it off and remove the plug
from the outlet. When disconnecting, grip the plug, do not pull on the cord.
• Safety switch: Unless your home is already fitted with a residual current
device (safety switch), we recommend installing an RCD with a rated
residual operating current not exceeding 30mA to provide additional
safety protection when using electrical appliances. See your electrician for
professional advice.
Usage Conditions and Restrictions
• Domestic use: This appliance is intended for indoor household use only. It
is not suitable for commercial or industrial use.
• Space heating only: Do not use this appliance for anything other than its
intended purpose, and only use it as described in this manual. Any other
use is not recommended and may cause fire, electric shock or injury.
• Protect from moisture: This appliance is not intended for use in bathrooms,
laundry areas and similar indoor locations. Never locate this appliance where
it may fall into a bathtub or otherwise become exposed to water.
• No outdoor use: Do not use this appliance outdoors or on wet surfaces.
• No clothes drying: Do not use this appliance as a drying rack for clothing.
• Accessories: The use of accessory attachments not recommended by the
appliance distributor may result in fire, electric shock or personal injury.
• Ventilation: Only use this heater in a well ventilated area.
• Keep openings clear: To prevent a possible fire and electrical hazard, do
not insert or allow objects to enter any ventilation or exhaust openings. Do
not block air intakes or exhaust openings in any manner.
• WARNING: No timer! In order to avoid a hazard due to inadvertent reset-
ting of the thermal cutout, this appliance must not be supplied through an
external switching device, such as a timer, or connected to a circuit that is
regularly switched on and off by the utility. Use of such items could uninten-
tionally reset the overheating protection circuit and cause a fire hazard.
• WARNING: Do not leave on unattended while the heater is connected
to the power supply. Always switch off the heater and unplug it when you
have to leave the house.
DANGER! Do not cover!
Do not cover the heater in any manner as it may overheat and
become a fire risk.

5
0800 422 274
NZ
Important Safety Instructions (Cont.)
• Usage restriction: This appliance is not intended for use by persons
(including children) with reduced physical, sensory or mental capabilities,
or lack of experience and knowledge, unless they have been given
supervision or instruction concerning use of the appliance by a person
responsible for their safety.
• Children: Supervise children to ensure they do not play with the appliance.
Close supervision is necessary when any appliance is used by or near
children.
• Do not touch during use: Do not touch the front grille during use as it will
become very hot. Do not insert anything into openings.
• CAUTION: Hot! Some parts of this heater are hot during use and remain
hot for some time afterwards. To avoid burns, do not let bare skin touch hot
surfaces. Be particularly careful when children and vulnerable persons are
present. Always let the heater cool down before touching it, even if it is
unplugged from the power supply.
• Location: Only use the heater in an upright position. Make sure to place it on
a solid and level surface; do not place it on a soft surface such as on a bed,
sofa or long pile carpet, as this could cause the appliance to tip over.
• To ensure personal safety, do NOT use this heater:
• In front of or immediately below a power outlet.
• Placed up against a wall or furniture.
• Near flammable materials or surfaces (such as furniture, curtains,
pillows, bedding, papers, clothes), or near open flames. Keep such
materials at least 1m away from the front of the heater and keep them
away from the sides and rear.
• In any areas where petrol, paint or other flammable liquids are stored,
such as in a garage or workshop, as the heater has hot and arcing parts
inside which may spark.
• In the immediate vicinity of a bath, shower or swimming pool.
• Service: This heater contains no user-serviceable parts inside. Do not
attempt to open and repair the heater yourself. Other components should
only be serviced by a qualified technician.
• Do not open: Do not try to open the removable cover when the heater is
connected to the power supply. In case of malfunction, disconnect the plug
immediately and contact our after sales support line for advice.
• Storage: To avoid damaging the heater during storage or transport, keep
the heater in a dry place, free from excessive vibration.
• Improper use: Improper use or installation may result in the risk of fire,
electric shock and/or injury. We assume no liability for any eventual
damages caused by improper use or incorrect handling.

6
0800 422 274
NZ
3
Product Overview
Parts List
1 Control Panel
2 Air Outlet Grille
3 Heating Elements
(behind the grille)
4 Air Intake Grille
(at the back)
5 Power Switch
(at the back)
6 Stand Post
7 Power Cord and Plug
(at the back)
8 Decorative Washer
9 Weighted Base
2
1
7
9
8
6
5
4
Front View
7
0800 422 274
NZ
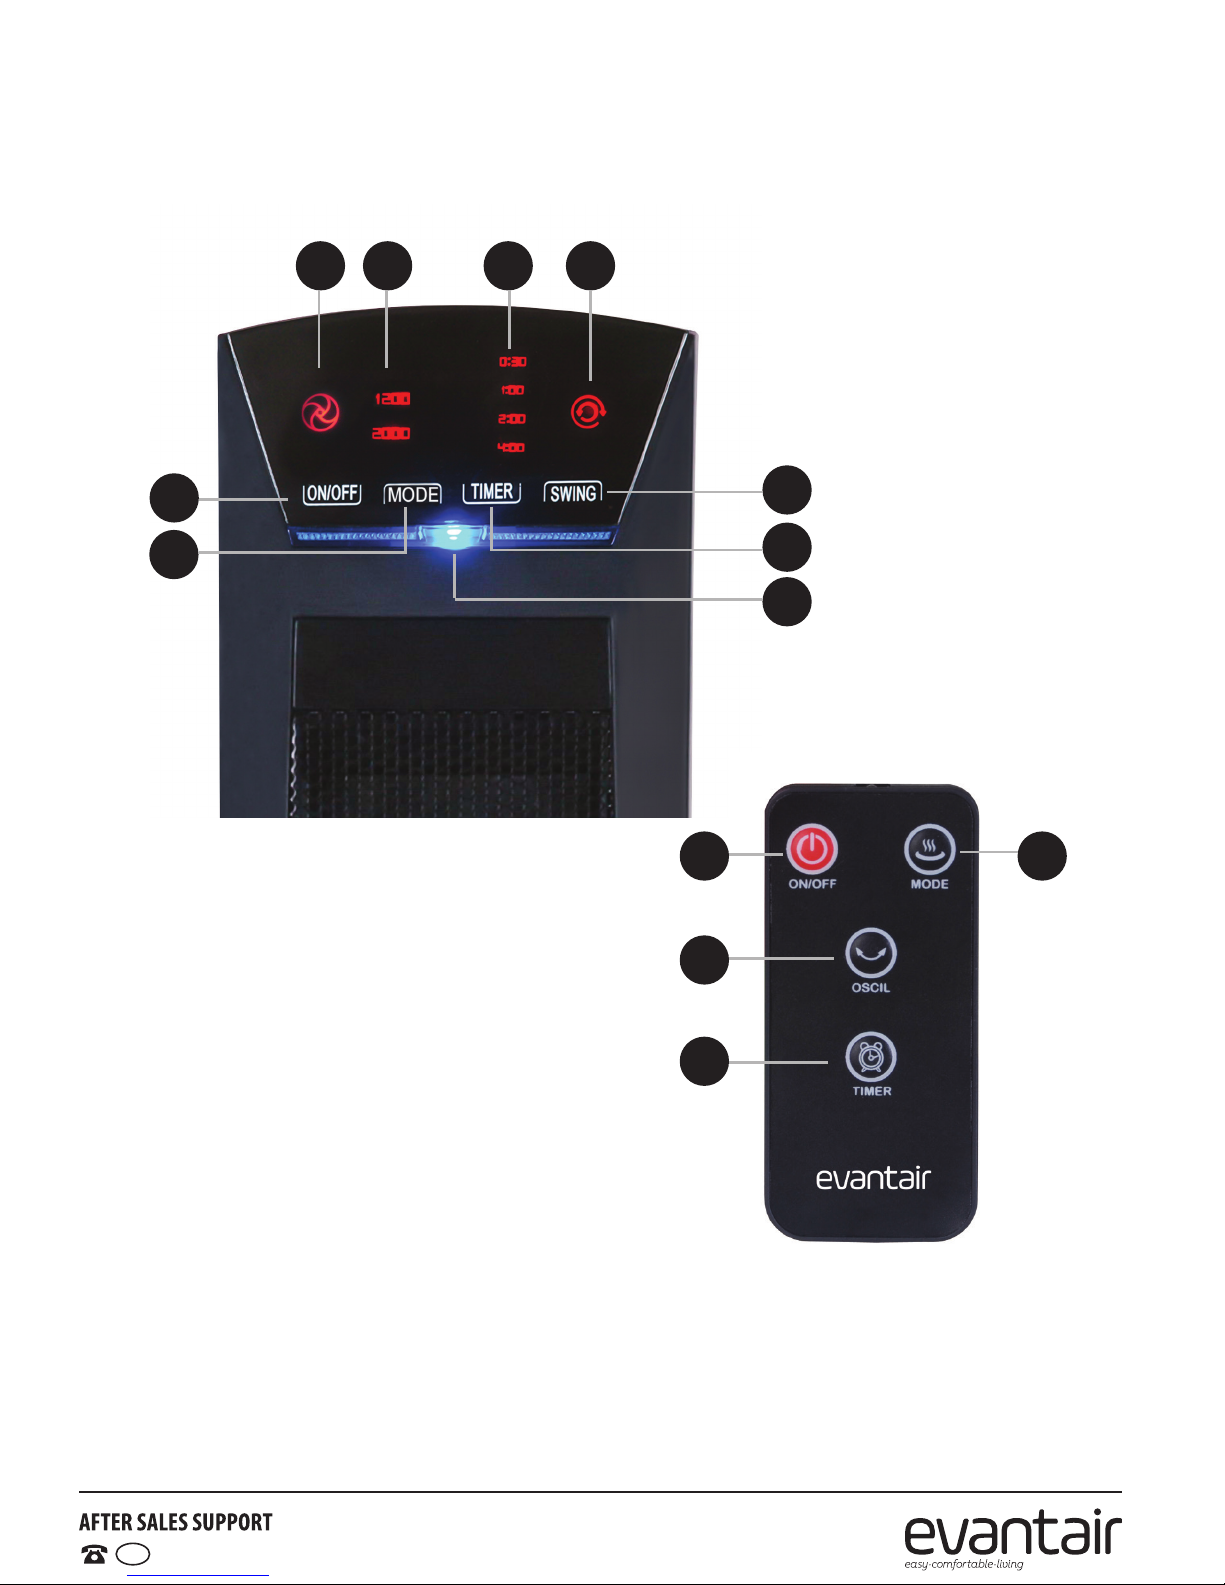
10 Fan Indicator
11 Heat Level Indicators (1200W, 2000W)
12 Timer Indicators (0:30, 1:00, 2:00, 4:00)
13 Swing (Oscillation) Indicator
14 ON/OFF Button
15 MODE Button (1200W, 2000W, Fan Only)
16 SWING (OSCIL) Button
17 TIMER Button
18 Power Indicator Light
Product Overview (Cont.)
Remote and Control Panel
10 11 12 13
14
15
16
17
NOTE: Due to continued product improvement, images and illustrations in this manual
may vary slightly from the product purchased. All images in this manual are for
reference purposes only. They are not necessarily pictured to scale.
18
14 15
16
17
Remote Control
Control Panel

8
0800 422 274
NZ
Getting Started
Unpacking
• Carton: This product has been packaged to protect it against transportation
damage. Unpack the appliance and keep the original packaging carton
and materials in a safe place. It will help prevent any damage if the product
needs to be transported in the future, and you can use it to store the
appliance when it is not in use. In the event the carton is to be disposed of,
please recycle all packaging materials where possible.
• Plastic wrapping can be a suffocation hazard for babies and young
children, so ensure all packaging materials are out of their reach and
disposed of safely.
• Cord: Inspect the power supply cord and plug, and all other parts of the
appliance, for visual damage. Do not use the appliance if anything appears
to be damaged or not working properly. In case of damage, contact our
after sales support centre using the details at the bottom of the page.
• Documentation: Make sure you have read and understood all instructions
and warnings in this manual. Refer to the Product Overview on pages 6–7
to familiarise yourself with the product and identify all parts. Pay particular
attention to the safety instructions on the previous pages.
• Assembly: The heater is packaged with the base detached. Assembly
instructions follow on the next page.
• Remote control: The heater comes with a remote control powered by a 3V
lithium button cell (CR2025), which is contained inside the remote control.
Before operation, please remove the plastic tab so the battery contacts
are activated. Simply pull to remove. See page 14 for how to insert a new
battery when it needs replacing.
WARNING!
Keep batteries out of reach of children. Swallowing may lead to
serious injury or death in as little as 2 hours due to internal burns.
If swallowed, go straight to a hospital emergency room.
Dispose of used batteries immediately.

9
0800 422 274
NZ
Getting Started (Cont.)
C
B
A
Assembly
The heater comes with the base packaged separately in the carton. Before you
can use the heater in an upright position, you have to attach the base.
• Place the heater flat on a table or benchtop so you can attach the base to
the underside of the heater. Take care when unpacking the heavy base, it
also contains the decorative washer.
• Remove the large plastic nut (not pictured) from the bottom end of the stand
pole (A).
• Put the decorative washer (B) and the weighted base (C) in place at the
bottom end of the stand pole and secure underneath the base with the
plastic nut.
• Your heater is now fully assembled. Place the heater in an upright position.
WARNING!
• Do not operate the heater without the base attached.
• Only operate the heater in an upright position (base on the bottom,
controls at the top), any other position could create a hazard.

10
0800 422 274
NZ
IMPORTANT!
• Do not connect the appliance to the mains source until it is securely
assembled on the base.
• When turning the heater on for the first time it is normal for the heater to
emit a ‘new heater’ smell, which will quickly pass. This is no cause for
concern. Ensure good ventilation.
Using the Heater
• Your new Ceramic Tower Heater can be operated using the control panel at
the front of the unit, or via the supplied remote control.
• Place the heater in an upright position on a stable, level, dry and heat-
resistant surface, taking into considering all relevant safety information on
the previous pages.
• The appliance is for floor-standing use only. Ensure that there is sufficient
distance from the wall, fixtures and other appliances. The distance must be
at least 50cm to exclude the risk of fire.
Connection
• Before connecting the heater to your power source, make sure that the
Power Switch at the back of the appliance is set to the OFF [ O ] position.
• Insert the plug of the power supply cord firmly into an electrical wall outlet
and switch on power to the outlet. Always use a separate socket that has
no other high wattage appliances connected at the same time – do not plug
it into a power board or socket adaptor; do not use an extension cord. Also
ensure that the socket is easily accessible so that the cord can readily be
disconnected in an emergency.
Standby Mode
• Press the Power Switch at the back of the appliance to set the heater into
standby mode. Once electricity is supplied, the unit will emit a short beep
and the Power Indicator Light will illuminate.
• Under standby mode, only the ON/OFF [ ] button will be effective, pressing
any other button will be ineffective.
Operating Instructions

11
0800 422 274
NZ
Fan Only Mode
The heater can be operated without heat output as a fan only.
• Press the ON/OFF [ ] button to start the fan. The Fan Indicator will
illuminate and the fan will start blowing air without heat output.
Heating Modes
The heater can be operated on two power levels: 1200W or 2000W.
• In working condition, press the MODE button to toggle between the modes:
• Low heat output: [ 1200W ] and are illuminated on the display.
• High heat output: [ 2000W ] and are illuminated on the display.
• No heat output: only is illuminated on the display.
Swing (Oscillation) Mode
• In working condition, press the SWING (OSCIL) button to turn on oscillation
(swing). The Swing (Oscillation) Indicator will illuminate and the heater will
start oscillation (70°).
• While the unit is oscillating, press the SWING (OSCIL) button to turn off
oscillation.
Timer Operation
The heater has 7.5-hour timer which you can set, in half-hourly steps, to
switch off the heater in 0.5 to 7.5 hours.
• In working condition, press the TIMER button to select the time period you
want it to remain on until it switches itself off automatically. With every press
of the button the time will be increased by half an hour and the display will
change accordingly.
• There are four Timer Indicators: 0:30, 1:00, 2:00, 4:00. For example:
* 0:30 illuminated indicates the timer will shut off after 30 minutes.
* 0:30 and 2:00 illuminated indicates it will shut off after 2.5 hours.
* 0:30, 1:00, 2:00, 4:00 illuminated indicates it will shut off after 7.5 hours.
NOTE: Pressing the button once more after the display shows 7.5 hours will
reset the heater to continuous operation.
• Once the timer has been set, it will count down the hours in half-hourly
steps and show the remaining operating time on the display.
Switching Off
• In working condition, press the ON/OFF [ ] button to stop the heater.
The fan will continue to run for 30–60 seconds before switching off.
Operating Instructions (Cont.)
12
0800 422 274
NZ
Overheat Protection and Prevention
This heater is equipped with an automatic thermal cut-off (overheat protection),
which switches the heater off automatically in the event of abnormal over-
heating. While this features provides additional safety in case of overheating,
first and foremost you should make sure to eliminate all potential reasons that
can lead to overheating and create a fire risk.
If the overheat protection has been triggered, switch off the heater, unplug
it from the electrical socket and let the appliance cool for about 30 minutes.
Eliminate the cause of the overheating (for example, excessive dust in the
appliance, or the air outlet is covered) and start it up again. If after eliminating
the cause you still cannot switch the heater back on, or if the overheating
protection circuit switches on without an apparent reason, contact our after
sales support centre for advice.
IMPORTANT!
• A common cause of overheating is deposits of dust and fluff entering
the heater. Ensure these deposits are removed regularly by unplugging
the heater, allowing it to cool and cleaning it as described opposite.
• Also make sure that the appliance can sufficiently dissipate the heat
generated. This is particularly important in case the overheat protection
has been triggered. Ensure there is sufficient room all around the heater,
and nothing is covering or obstructing the air outlet or intake.
Tilt Protection (Tip-Over Safety Switch)
This heater is equipped with a tip-over safety switch, which switches off the
heater in the event that it is knocked over or tilted to a position where safe
operation is in jeopardy. Once the heater is restored an upright position, the
heater will reset.
Operating Instructions (Cont.)

13
0800 422 274
NZ
Other Useful Information
Troubleshooting
If your heater fails to operate, or you experience any other problem with the
appliance, contact our after sales line for advice or to arrange a service.
But before phoning for a service, please ensure that the heater is properly
plugged in and the outlet and circuit breaker or fuse are working properly.
Cleaning and Maintenance
• Before cleaning your heater, switch it off and allow it to cool. Disconnect
the electricity supply to the appliance.
• If the outside of the heater needs cleaning, wipe it with a soft, damp cloth
and then wipe it dry with a dry cloth. Allow some time for the heater to dry
thoroughly before reconnecting it to the power supply.
• Do not use abrasive cleaning powders or furniture polish, as this can
damage the surface finish.
• CAUTION: Never immerse the cord, plug or heater in water or other
liquid for cleaning. Do not allow water to enter the interior of the
heater.
• Dust from around the grilles can often be removed by using a vacuum
cleaner with a soft brush attachment.
• After prolonged usage the filter at the back of the appliance may require
cleaning. Unscrew the filter cover, remove the filter and clean it carefully
under running water. Leave it to air dry completely before reinstalling it in
the appliance. Close the filter cover securely.
Storage
• If you are not going to use the heater for an extended period of time,
please unplug it at the power point.
• Clean the appliance as described above, then store it in its original carton to
protect it from dust. Store it in a cool and dry place, out of children’s reach.
CAUTION!
• Always switch off and disconnect the appliance from the power supply
before attempting any maintenance or cleaning the heater.
• Do not attempt to open the heater and repair it yourself. Any repairs
must be carried out by a qualified technician.

14
0800 422 274
NZ
Other Useful Information (Cont.)
Battery Replacement
When the battery in the remote control is flat, insert a new 3V CR2025 size
button cell following the instructions below.
Push the locking tab to one side and pull out the battery compartment at the
back side of remote control. Remove the old battery from the remote control
and insert a new one of the same type, observing the polarity, as illustrated
above. Insert the battery compartment cover back into the remote control.
Battery Precautions
WARNING!
Keep batteries out of reach of children. Swallowing may
lead to serious injury or death in as little as 2 hours due
to internal burns. If swallowed, go straight to a hospital
emergency room. Dispose of used batteries immediately.
• Do not open the batteries or short-circuit them.
• Do not mix different types of batteries. Due to increased risk of leakage,
empty batteries should be removed. The batteries should also be removed
from the remote control if it is not being used for long periods.
• Only dispose of batteries when they are fully discharged.
• WARNING: Danger of explosion! To prevent a risk of explosion, batteries
must not be charged, heated or disposed of by burning. Never throw
batteries into a fire or subject batteries to high temperatures.
• Used batteries should not be disposed of in household waste. Dispose of
them in accordance with statutory regulations.
14
After Sales Support
(AU) 1300 886 649 | (NZ) 0800 836 761 | info@tempo.org
Battery replacement
If the battery in the remote control is flat, insert a new 3V CR2025 size button
cell following the instructions below.
Push the locking tab to one side and pull out the battery compartment at the
back side of remote control. Remove the old battery from the remote control
and insert a new one of the same type, observing the polarity, as illustrated
above. Insert the battery compartment cover back into the remote control.
Battery precautions
Operating Instructions (Cont.)
WARNING!
Keep batteries out of reach of children. Swallowing may
lead to serious injury or death in as little as 2 hours due
to internal burns. If swallowed, go straight to a hospital
emergency room. Dispose of used batteries immediately.
Other battery precautions
•Do not open the batteries or short-circuit them.
•Do not mix different types of batteries. Due to increased risk of leakage,
empty batteries should be removed. The batteries should also be removed
from the remote control if it is not being used for long periods.
•Only dispose of batteries when they are fully discharged.
•WARNING: Danger of explosion! To prevent a risk of explosion, batteries
must not be charged, heated or disposed of by burning. Never throw
batteries into a fire or subject batteries to high temperatures.
•Used batteries should not be disposed of in household waste. Dispose of
them in accordance with statutory regulations.
15
0800 422 274
NZ
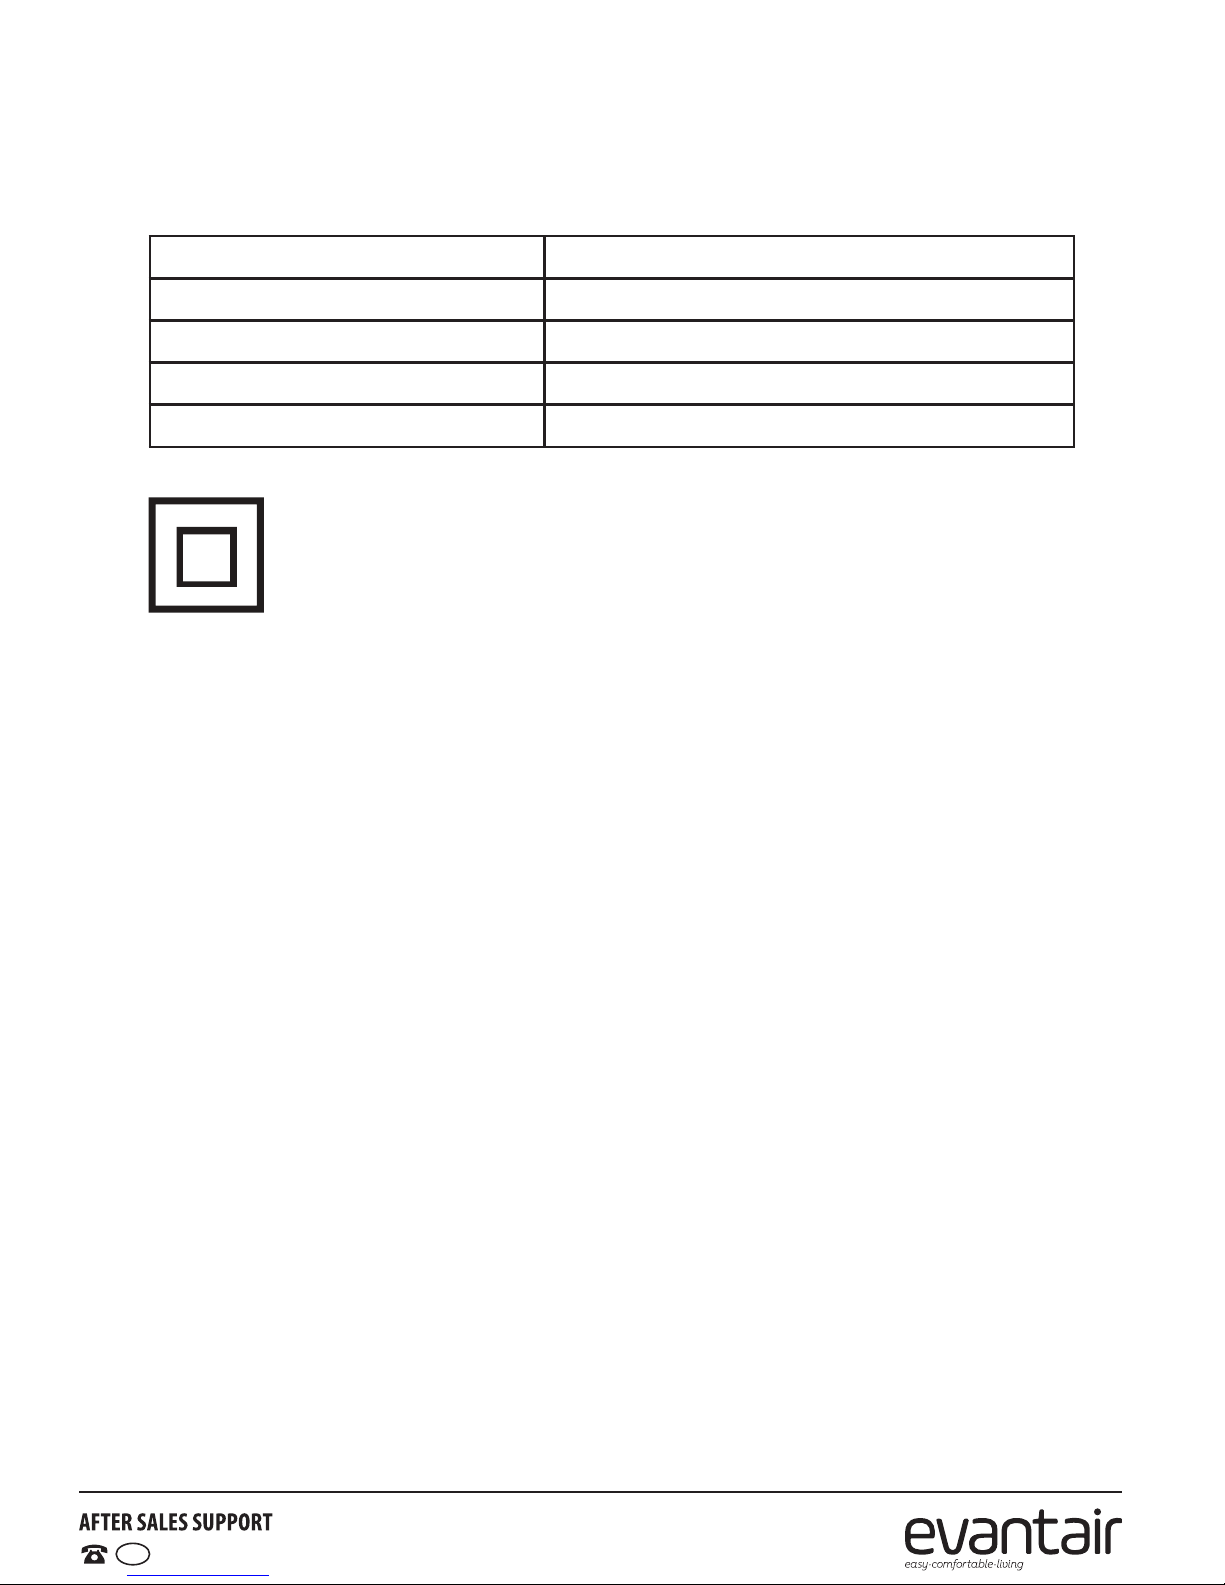
Technical Specifications
Model No PTC-5137
Power 2000W
Voltage 220–240V AC, 50Hz
Dimensions (approx.) 220mm (L) × 230mm (W) × 772mm (H)
Weight approx. 4kg
CLASS II - DOUBLE INSULATED APPLIANCE
This symbol indicates that the appliance has been designed in such a way
that it does not require a safety connection to electrical earth (ground).
Other Useful Information (Cont.)
Responsible Disposal
At the end of its working life, do not throw this appliance out with your
household rubbish. Electrical and electronic products contain substances that
can have a detrimental effect on the environment and human health if disposed
of inappropriately. Observe any local regulations regarding the disposal of
electrical consumer goods and dispose of it appropriately for recycling. Contact
your local authorities for advice on recycling facilities in your area.
Compliance
This product has been fully tested and meets all requirements as set out by
standards AS/NZS 60335.1 and AS/NZS 60335.2.30.

0800 422 274
NZ
Warranty
We pride ourselves on producing a range
of quality home appliances that are both packed with features
and completely reliable. We are so confident in our products,
we back them up with a 2 year warranty.
Now you too can relax knowing that you are covered.
Customer Helpline NZ: 0800 422 274
This Product is covered by a 2 year warranty when
accompanied by proof of purchase.
IM-V1.0
Table of contents
Other Evantair Heater manuals

Evantair
Evantair CYD10-7 User manual

Evantair
Evantair TWOC200-7T User manual

Evantair
Evantair FH-201 User manual

Evantair
Evantair TWGC100 User manual

Evantair
Evantair TWCV10010 User manual

Evantair
Evantair MH-1205 User manual

Evantair
Evantair CH-06 User manual

Evantair
Evantair EV2217CH User manual

Evantair
Evantair EV1914OH User manual
Popular Heater manuals by other brands


Palram
Palram GP 08 24 instructions

Atlantic
Atlantic F17 Documentation for installation and use

Tectro
Tectro R233TC operating manual

Toyotomi
Toyotomi Omni 120 Type A Operation and maintenance instructions

Vasco
Vasco EVE10 Instructions for installation and use

KBS
KBS 1000 Instruction and installation manual