CONTENTS
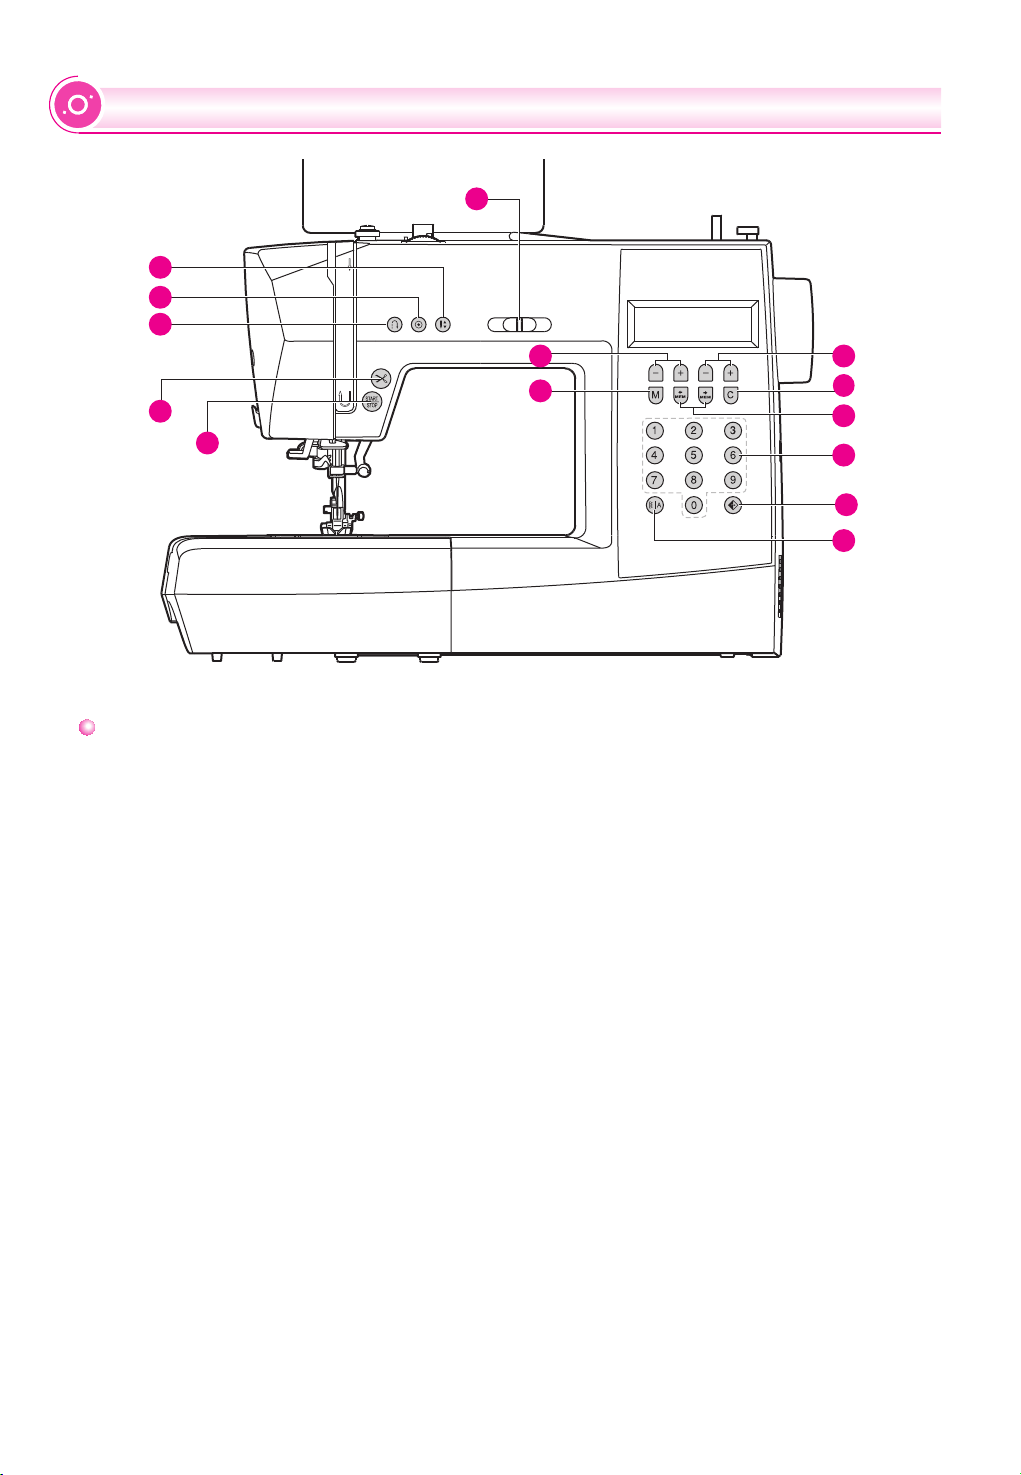
PRINCIPAL PARTS OF THE MACHINE
MACHINE CONTROL BUTTONS
LCD SCREEN
PATTERN CHART
ACCESSORIES
CONNECTING THE MACHINE TO THE POWER SOURCE
WINDING THE BOBBIN
INSERTING THE BOBBIN
THREADING THE UPPER THREAD
USING THE NEEDLE THREADER
DRAWING UP THE LOWER THREAD ..................................................
CUTTING THE THREAD
TWO-STEP PRESSER FOOT LIFTER
STARTING SEWING
THREAD TENSION
CHANGING THE PRESSER FOOT
PRESSER FOOT CHART
MATCHING NEEDLE/ FABRIC/ THREAD
REPLACING THE NEEDLE
RAISE OR LOWER FEED DOGS
OPERATION BUTTONS
FUNCTION BUTTONS
MEMORY BUTTONS
SELECTION BUTTONS
SEWING TIPS
...................................................6
.....................................................7-8
Operation buttons (see page 28/29/30) ...............................................7
Function buttons (see page 31/32/33) ................................................8
Memory buttons (see page 34) ......................................................8
Selection buttons (see page 35) .....................................................8
.....................................................................9
..................................................................10
...................................................................11
...................................12
Connecting the machine .........................................................12
..........................................................13-14
Bobbin winding .............................................................13-14
...........................................................15
..................................................16-17
......................................................18
19
.............................................................19
.....................................................20
20
...............................................................21
Start/stop button ...............................................................21
Foot control...................................................................21
................................................................22
.....................................................23
.............................................................24
................................................25
...........................................................26
.......................................................26
27
..........................................................28-30
Start/stop button ...............................................................28
Thread cutter button.............................................................28
Reverse button.................................................................29
Auto-lock button ...............................................................29
Needle up/down position button ...................................................30
...........................................................31-33
Stitch width adjustment button .....................................................31
Stitch length adjustment button .....................................................32
MODE selection button ..........................................................32
Mirror button (see page 64) ......................................................33
...............................................................34
Memory button ................................................................34
Arrow button ..................................................................34
Clear button ..................................................................34
.............................................................35
Direct pattern selection and number buttons ...........................................35
.................................................................36-37
Sewing corners ................................................................36
Reverse ......................................................................36
Freearm.....................................................................36
Installing the extension table.......................................................37
Sewing on heavy fabric ..........................................................37
ADJUSTING PRESSER FOOT PRESSURE................................................
PATTERN BALANCE ADJUSTMENT ....................................................
III