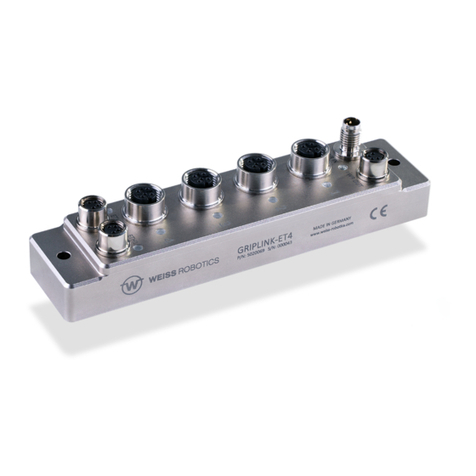
WEISS ROBOTICS GRIPLINK-ET4 User manual

GRIPLINK PLUG-IN FOR ABB
Version 1.0
December 2022

- 1 -
Table of contents
1 Introduction........................................................................................................................ 2
1.1 Notation and symbols......................................................................................................... 2
1.2 Intended use....................................................................................................................... 2
1.3 System requirements.......................................................................................................... 2
1.4 License terms...................................................................................................................... 3
2 Installation .......................................................................................................................... 4
2.1 Add-In Installation............................................................................................................... 4
2.2 Add the Add-In to an existing project................................................................................. 4
2.3 Network configuration........................................................................................................ 8
3 Command Set Reference .................................................................................................... 9
3.1 Open connection - CONNECT............................................................................................ 10
3.2 Close Connection –DISCONNECT ..................................................................................... 11
3.3 Enable device - ENABLE .................................................................................................... 12
3.4 Disable device - DISABLE................................................................................................... 13
3.5 Get Device State –DEVSTATE........................................................................................... 14
3.6 Reference gripper - HOME................................................................................................ 15
3.7 Grip part - GRIP................................................................................................................. 16
3.8 Grip part with multiple grippers –MGRIP ........................................................................ 17
3.9 Release part - RELEASE ..................................................................................................... 18
3.10 Release part with multiple grippers –MRELEASE............................................................. 19
3.11 Wait for state transition and return state –WSTR........................................................... 20
3.12 Wait for multiple state transitions –MWAITFOR............................................................. 21
3.13 Get sensor value –VALUE................................................................................................. 22
3.14 Control gripping force retention - CLAMP ........................................................................ 23
3.15 Control of the LED display –LED........................................................................................ 24
3.16 Configure grip settings - GRIPCFG..................................................................................... 25
3.17 Assert device type - DEVASSERT....................................................................................... 26
4 Wizard Easy Programming................................................................................................ 27
5 Error Handling................................................................................................................... 29
6 Device States..................................................................................................................... 30
- 2 -
1Introduction
With the GRIPLINK technology, servo-electric and smart pneumatic gripping modules from WEISS
ROBOTICS can be controlled by robot controllers of all leading robot brands via simple TCP/IP network
connections.
The GRIPLINK plug-in for ABB is the software link between the GRIPLINK interface converter and the
robot controller and enables the easy integration of WEISS ROBOTICS’ GRIPLINK technology into ABB
robot systems.
This manual describes the functions of the GRIPLINK plug-in. For information about
installation and operation of the GRIPLINK interface converter please refer to the
GRIPLINK user’s manual. The manual can be found online on www.griplink.de/manuals
1.1 Notation and symbols
For a better understanding, the following symbols are used in this manual:
Functional or safety relevant information. Non-compliance may endanger the safety of
personnel and the system, damage the device or impair its function.
Additional information for a better understanding of the described facts.
Reference to further information.
1.2 Intended use
The software “GRIPLINK plug-in“ is intended for communication between the GRIPLINK interface
converter from WEISS ROBOTICS and a robot controller. The requirements of the applicable guidelines
as well as the installation and operation instructions in this manual must be noted and adhered to. Any
other use or use beyond that is considered improper use. The manufacturer is not liable for any
damage resulting from this.
1.3 System requirements
To run the GRIPLINK plug-in, the following ABB products are required:
•ABB Robot Controller with RobotWare 7.1 or newer
•ABB RobotStudio® programming environment, version 2022.3 or newer
Please contact ABB or your ABB distributor in order to purchase these products.

- 3 -
1.4 License terms
The GRIPLINK plug-in is protected by copyright. The software package includes the applicable license
terms. By installing and using the GRIPLINK plug-in, the user accepts these license terms.

- 4 -
2Installation
2.1 Add-In Installation
To operate the GRIPLINK, the GRIPLINK Add-In for ABB RobotStudio® provided by WEISS ROBOTICS is
required on the robot controller. To install the GRIPLINK Add-In, please execute the following steps:
Please make sure the most recent version of the GRIPLINK plug-in is used. It can be
downloaded from www.griplink.de/software.
1. Open the ABB RobotStudio® software. Choose the ribbon “Add-Ins”. Note that you don’t
need to open a project to install add-ins (cf. Figure 1).
Figure 1
2. In the toolbar, click on “Install Package” and select the Weiss Robotics GRIPLINK Add-In you
previously downloaded. The add-in will be installed and should now be available in the
“Installed Packages” tree view on the left.
2.2 Add the Add-In to an existing project
After installing the Add-In for ABB RobotStudio®, you can add the functionality to a new or existing
robot controller running RobotWare 7.0 or higher.
1. In ABB RobotStudio®, open an existing project or create a new one. Please refer to the
RobotStudio documentation or ABB support for details.
2. From the menu, select the “Controller” tab and choose “Installation Manager” from the
toolbar (cf. Figure 2).

- 5 -
Figure 2
3. Select the controller of your previously opened or created project. This can also be a virtual
controller. Note that you might have to adjust the search path for virtual controllers in the
preferences on the left (Figure 3).
4. After you’ve selected the appropriate controller, click on the “Edit” button on the bottom right
side of the Installation Manager window (Figure 3).
Figure 3
5. Click on the “Add” button to add additional packages to the controller (Figure 4)

- 8 -
2.3 Network configuration
The connection between the GRIPLINK and the robot controller is established via TCP/IP networking.
To use TCP/IP networking, the robot controller must have an IP address that is compatible with the
address assigned to the GRIPLINK. Please refer to the documentation of your ABB robot system to find
out how to set an appropriate IP address for your robot controller. When using the simulation in ABB
RobotStudio®, the IP address of your computer’s network interface will be used to connect to the
GRIPLINK. In this case, please make sure the GRIPLINK is connected to your computer and can be
accessed via its web interface.
The IP address of the GRIPLINK is set to 192.168.1.40 by default and can be adjusted via its web
interface. To change the IP address, connect the GRIPLINK to a PC or laptop and open the web interface
in your favorite browser by entering http://192.168.1.40 into the address bar. You can access the IP
settings by pressing the "Config" button.
The GRIPLINK command interface accepts incoming connections on port 10001 (TCP).
For more information about the configuration of the GRIPLINK, please refer to the
associated user’s manual.
The IP addresses of both the robot controller and the GRIPLINK interface converter
must be within the same subnet range. Please contact your network administrator if
you experience any problems assigning appropriate IP addresses to the devices.

- 9 -
3Command Set Reference
The GRIPLINK plug-in provides a number of functions to control gripping modules from WEISS
ROBOTICS as well as sensors and actors from several third-party vendors. Both single and multi-gripper
commands are available.
Multi-gripper commands
With the multi-gripper commands, several actors can be addressed at once. These commands are
particularly suitable for handling large or flexible workpieces with multiple gripping modules
simultaneously.
The basic program flow with the GRIPLINK plug-in is always as follows:
1. Establish connection with CONNECT
2. Depending on device: Activate with ENABLE
3. For servo gripping modules without absolute encoder: Reference gripping module with
HOME / MHOME
4. Gripping / releasing with GRIP / MGRIP or RELEASE / MRELEASE
The following chapters describe the available commands provided by the plug-in in detail.
Procedure/Function
Description
WRO_GriplinkConnect
Open connection to GRIPLINK
WRO_GriplinkDisconnect
Close connection GRIPLINK
WRO_GriplinkDevAssert
Make sure a specific device is connected to the selected GRIPLINK port
WRO_GriplinkEnable
Enable device
WRO_GriplinkDisable
Disable device
WRO_GriplinkDevState
Query device state
WRO_GriplinkValue
Query sensor value(s)
WRO_GriplinkHome
Reference gripping module
WRO_GriplinkGrip
Grip workpiece
WRO_GriplinkMultiGrip
Grip workpiece with multiple grippers
WRO_GriplinkRelease
Release workpiece
WRO_GriplinkMultiRelease
Release workpiece with multiple grippers
WRO_GriplinkWaitFor
Wait for state transition
WRO_GriplinkMultiWaitFor
Wait for multiple state transitions
WRO_GriplinkClamp
Control gripping force retention PERMAGRIP®
WRO_GriplinkLED
Control LED display
WRO_GriplinkGripCfg
Set grip configuration

- 10 -
3.1 Open connection - CONNECT
This command establishes the connection between the GRIPLINK interface converter and the robot
controller. It will also check the command protocol version supported and will raise an error on
protocol version mismatch.
The IP address of the GRIPLINK can be changed via the web interface.
Signature
PROC WRO_GriplinkConnect( string stIPAddr )
Parameters
stIPAddr IP address of the GRIPLINK interface converter as string
Return value
-
Example
Open a connection to the GRIPLINK with IP address 192.168.1.40:
WRO_GriplinkConnect “192.168.1.40”;

- 11 -
3.2 Close Connection –DISCONNECT
This command closes a connection that has been established previously by the WRO_GriplinkConnect()
procedure.
Signature
PROC WRO_GriplinkDisconnect()
Parameters
-
Return value
-
Example
Disconnect GRIPLINK from the robot controller:
WRO_GriplinkDisconnect;

- 12 -
3.3 Enable device - ENABLE
This command activates the device connected to the given port of the GRIPLINK. Note that not all
devices have to be enabled explicitly before use. The command, however, can be useful to re-enable
a device that previously has been disabled with the DISABLE command to acknowledge an error.
Signature
PROC WRO_GriplinkEnable( num nDevIdx )
Parameters
nDevIdx Port index (0 to 31)
Return value
-
Example
Enable device connected at GRIPLINK port 0:
WRO_GriplinkEnable 0;

- 13 -
3.4 Disable device - DISABLE
This command deactivates the device connected to the given port of the GRIPLINK. This function can
be used, for example, when using an automatic tool changer. If a gripping module from WEISS
ROBOTICS is connected, it deactivates the drive of the selected gripping module, e.g. when using a tool
changer. On some devices, the DISABLE command will acknowledge error states. Use the ENABLE
command to re-enable the device again.
Signature
PROC WRO_GriplinkDisable( num nDevIdx )
Parameters
nDevIdx Port index (0 to 31)
Return value
-
Example
Change gripping module at port 1:
! Open connection between robot controller and GRIPLINK
WRO_GriplinkConnect “192.168.1.40“;
! Enable drive for gripping module at port 1
WRO_GriplinkEnable 1;
! Execute program (e. g. pick & place)
! …
! Disable gripping module at port 1
WRO_GriplinkDisable 1;
! Now the gripping module can be removed.
! …
! Enable new gripping module
WRO_GriplinkEnable 1;
! Continue with program
! …

- 14 -
3.5 Get Device State –DEVSTATE
This function returns the device state of the selected device. The device state is provided as an integer
value. To simplify and improve readability, pre-defined constants are available that can be used when
processing device states.
Signature
PROC WRO_GriplinkDevState( num nDevIdx, VAR num nDevState )
Parameters
nDevIdx Port index (0 to 31)
nDevState Variable (reference) to save device state to
Return value
Current device state (cf. chapter 6)
Example
Wait until the device state of the gripping module at port 2 changes to HOLDING (4):
! Query gripping state of gripping module at port 2
VAR num nDevState;
! The numeric constant DS_HOLDING is defined in the Griplink program
! module
WRO_GriplinkDevState 0, nDevState;
WHILE nDevState <> DS_HOLDING DO
WRO_GriplinkDevState 0, nDevState;
IF nDevState = DS_FAULT THEN
! An error has occurred
ENDIF
ENDWHILE

- 15 -
3.6 Reference gripper - HOME
References the selected servo gripper. The command executes a reference run of the gripping module
and waits until it’s completed. After the command has been executed, the fingers of the gripping
module are without force and must be moved to a defined position by using WRO_GriplinkGrip() /
WRO_GriplinkMultiGrip() or WRO_GriplinkRelease() / WRO_GriplinkMultiRelease().
The direction of the reference run can be configured via the web interface of the
GRIPLINK interface converter.
Signature
PROC WRO_GriplinkHome( num nDevIdx )
Parameters
nDevIdx Port index (0 to 31)
Return value
-
Example
Reference gripping module at port 3:
'Reference gripping module at port 3
WRO_GriplinkHome 3;

- 16 -
3.7 Grip part - GRIP
Grips a workpiece with the selected gripping module and grip preset. The command waits until the
gripping state changes to either HOLDING or NO PART.
The gripping parameters can be configured via the web interface of the GRIPLINK
interface converter.
Signature
PROC WRO_GriplinkGrip( num nDevIdx, num nGripIdx )
Parameters
nDevIdx Port index (0 to 31)
nGripIdx Grip preset to be executed (range depends on gripper type)
Return value
-
Example
Gripping module at port 0 shall execute grip preset 2. After gripping, check device state:
VAR num nDevState;
! Grip part
WRO_GriplinkGrip 0, 2;
! Check device state
WRO_GriplinkDevState 0, nDevState;
! The constants DS_NO_PART and DS_HOLDING are defined in the
! Griplink program module
IF nDevState = DS_NO_PART THEN
! No part found
ELSEIF nDevState = DS_HOLDING THEN
! Part gripped
ELSE
! Unexpected grip state
ENDIF

- 17 -
3.8 Grip part with multiple grippers –MGRIP
This function executes a grip command with the selected gripping modules. The function waits until all
gripping modules have reached either HOLDING or NO PART state.
The gripping parameters can be configured via the web interface of the GRIPLINK
interface converter.
Signature
PROC WRO_GriplinkMultiGrip( bool bSelected{*}, num nGripIdx )
Parameters
bSelected{*} Array of boolean values selecting the desired devices that should execute
the GRIP command
nGripIdx Grip preset to be executed on the bSelected grippers
Return value
-
Example
Gripping modules at port 1 and 2 shall grip a workpiece. Display a message if both workpieces
were gripped correctly:
VAR bool bSelected{4};
VAR num nDevStates{4};
! Select devices 2 and 3 (1 and 2 in GRIPLINK internal counting)
bSelected := [FALSE, TRUE, TRUE, FALSE];
! Grip with selected devices
WRO_GriplinkMultiGrip bSelected, 2;
FOR i FROM 1 TO Dim( bSelected, 1 ) DO
! Get device state. Note that the GRIPLINK starts counting
! ports from 0 whereas RAPID array indices start with 1
WRO_GriplinkDevState i - 1, nDevStates[i];
ENDFOR
! The constants DS_NO_PART and DS_HOLDING are defined in the
! Griplink program module
IF nDevStates{2} = DS_HOLDING AND nDevStates{3} = DS_HOLDING THEN
! Holding parts
ENDIF

- 18 -
3.9 Release part - RELEASE
Releases the workpiece previously gripped with the selected gripping module. The command waits
until the workpiece has been released.
The gripping parameters can be configured via the web interface of the GRIPLINK
interface converter.
Signature
PROC WRO_GriplinkRelease( num nDevIdx, num nGripIdx )
Parameters
nDevIdx Port index (0 to 31)
nGripIdx Selected grip preset (range depends on gripper type)
Return value
-
Example
Gripping module at port 0 shall release a workpiece previously gripped with grip preset 2:
VAR num nDevState;
WRO_GriplinkRelease 0, 2;
WRO_GriplinkDevState 0, nDevState;
! The constant DS_RELEASED is defined in the Griplink program module
IF nDevState = DS_RELEASED THEN
! Part released
ENDIF

- 19 -
3.10 Release part with multiple grippers –MRELEASE
Releases the workpiece(s) gripped with the selected gripping modules. The function waits until all
gripping modules have reached the RELEASED state.
The gripping parameters can be configured via the web interface of the GRIPLINK
interface converter.
Signature
PROC WRO_GriplinkMultiRelease( bool bSelected{*}, num nGripIdx )
Parameters
bSelected{*} Array of boolean values selecting the desired devices that should execute
the GRIP command
nGripIdx Grip preset to be executed on the bSelected grippers
Return value
-
Example
Gripping module at ports 1, 2 and 3 release a workpiece previously gripped with grip preset 3:
VAR bool bSelected{4};
bSelected := [TRUE, TRUE, TRUE, FALSE];
WRO_GriplinkMultiRelease bSelected, 3;
Other manuals for GRIPLINK-ET4
3
Table of contents
Other WEISS ROBOTICS Robotics manuals

WEISS ROBOTICS
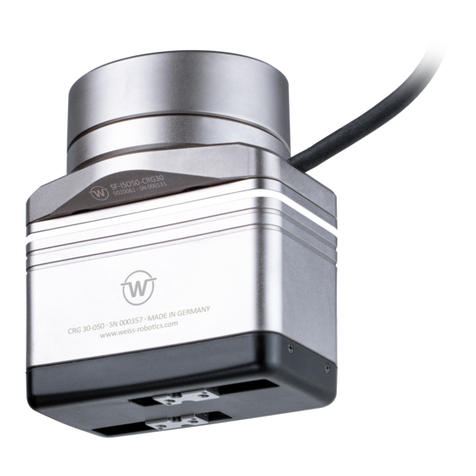
WEISS ROBOTICS CRG Series Technical document

WEISS ROBOTICS
WEISS ROBOTICS GRIPKIT CR EASY User manual

WEISS ROBOTICS
WEISS ROBOTICS IEG Series Technical document

WEISS ROBOTICS
WEISS ROBOTICS GRIPKIT CR EASY User manual

WEISS ROBOTICS
WEISS ROBOTICS GRIPKIT CR EASY User manual

WEISS ROBOTICS
WEISS ROBOTICS GRIPLINK User manual

WEISS ROBOTICS
WEISS ROBOTICS GRIPKIT CR PLUS User manual

WEISS ROBOTICS
WEISS ROBOTICS GRIPKIT CR PLUS User manual

WEISS ROBOTICS
WEISS ROBOTICS GRIPLINK-ET4 User manual

WEISS ROBOTICS
WEISS ROBOTICS GRIPKIT CR PLUS Series User manual