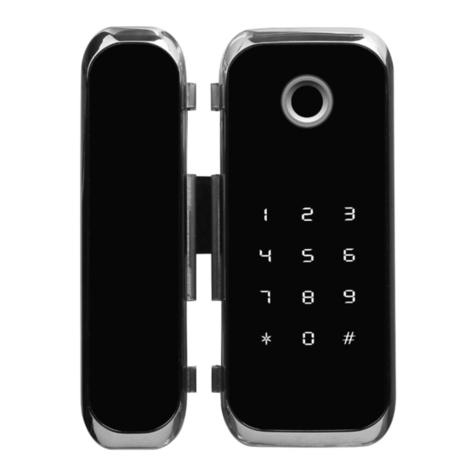
EVVA e-primo User manual

Elektronischer Zylinder | Electronic cylinder | Cylindre électronique
Cilindro elettronico | Cilindro electrónico | Elektronische cilinder
Bedienungsanleitung | User Guide | Guide d’utilisation
Istruzione d’uso | Manual de uso | Bedieningshandleiding

Technische Änderungen/Abweichungen und Druckfehler vorbehalten. Das Copyright liegt bei der EVVA Sicherheitstechnologie GmbH.
Technical changing and misprint are subject to change. Copyright by EVVA Sicherheitstechnologie GmbH.
Sous réserve de modications/divergences techniques et d‘erreurs d‘impression. Tous droits réservés à EVVA Sicherheitstechnologie GmbH.
Con riserva di modiche tecniche/differenze ed errori di stampa. Il copyright è di EVVA Sicherheitstechnologie GmbH.
Sujeto a modicaciones/divergencias técnicas y errores de impresión. Copyright de EVVA Sicherheitstechnologie GmbH.
Technische wijzigingen/afwijkingen en drukfouten voorbehouden. Copyright berust bij EVVA Sicherheitstechnologie GmbH.

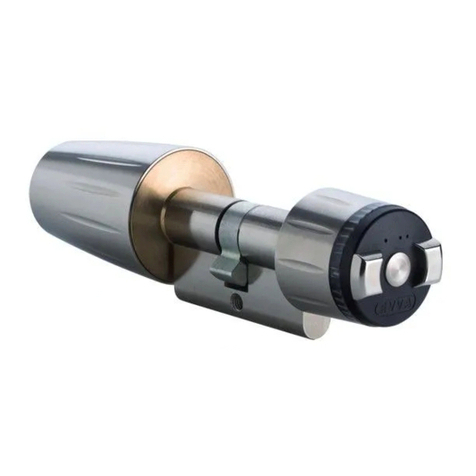
e-primo air
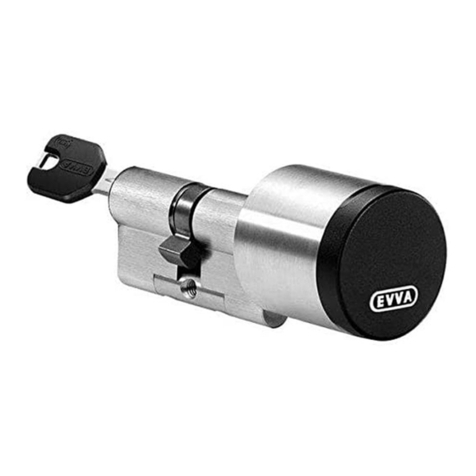
e-primo iButton
125
36 8 97
4
101213 1114

DeutschEnglishFrançaisItalianoEspañol
Nederlands
5
Deutsch ....................................................6
English....................................................20
Français ..................................................34
Italiano ...................................................48
Español...................................................62
Nederlands.............................................76

20
Electronic cylinder
The e-primo cylinder in detail
1Thumb turn cover/inside thumb turn
2 Battery in battery compartment
3 Battery clip
4 Inside locating screw
5 Groove
6 Outside thumb turn
7 Gasket
8 Outside thumb turn
9 Light ring
10 Reader
11 Fixing screw
12 Outside locating screw
13 Cam
14 INIT button
Technical data
Dimensions
Outside thumb turn (conical):
– e-primo iButton: Ø max. 35 mm, length 31 mm
– e-primo air: Ø max. 35 mm, length 32.5 mm
Inside thumb turn (conical): Ø max. 40 mm, length 56 mm
Power supply
1 × standard lithium battery, Panasonic CR 123A
Humidity
Up to 90 %, non-condensing
Temperature range
Inside thumb turn: –20° C to +60° C
Outside thumb turn: –20° C to +60° C
Protection class
IP 65
Certications
– EN 1634-1 re protection
– CE
– Diverse certications with various lock manufacturers
per EN 179 and EN 1125 (optional)

English
21
The components
Included in cylinder-package A
– e-primo cylinder
– gasket
– special Allen wrench, ZTOOL1
– lithium battery, CR123A
– cylinder xing screw, M5x60
– user guide
Included in media-kit B
– programming key | PK (Programming Key)
– 3 × user key | UK (User Key)
– copy key | CK (Copy Key)
– 4 × delete key | DK (Delete Key)
Available options C
– cylinder xing screw, M5x70
– cylinder xing screw, M5x80
– ofce key | OK (Ofce Key)
– blocking key | BK (Blocking Key)
– emergency opening key | EK (Emergency Key)
– emergency power device (incl. 3-pole cable XRP0PC01
and 3 batteries, type AAA)

22
Electronic cylinder
Battery
Use only the specied, CR123A, battery type and be sure
of correct polarity when inserting a battery. Batteries
contain chemical substances. They should therefore be
disposed of properly.
Weak battery
If the battery is weak, the e-primo cylinder will sound a
descending warning tone and blink in orange twice before
it can be activated.
Replace the battery without delay when the “weak
battery“ condition is indicated. Repeated disregard of the
“weak battery“ warning can lead to inoperability of the
e-primo cylinder.
After the rst “weak battery“ warning only a maximum of
2000 opening cycles are possible over the next 4 weeks
(tested for Panasonic CR123A at room temperature).
An e-primo cylinder with a completely discharged battery
can only be operated with the emergency power device
and a valid user key (see “Emergency power supply/Emer-
gency opening“). Please contact your dealer if you do not
have an emergency power device.
Battery insertion/replacement
1 Loosen (turn clockwise) the inside thumb turn‘s xing
screw with the special ZTOOL1 Allen wrench until there is
noticeable resistance.
2Pull off the thumb turn cover.
Notice: Please note, when the inside thumb turn cover
is removed the outside thumb turn can operate the
cam even without electronic authorisation. Avoid con-
tamination of the e-primo cylinder when the thumb
turn cover is removed.
3Open the battery clip and remove the discharged battery
from the battery compartment. Insert the new battery and
close the battery clip so that it latches.
4Carefully push the thumb turn cover onto the e-primo
cylinder. The inside locating screw must be engaged in
the cover‘s guide groove. Secure the screw carefully (turn
counter-clockwise) with the special ZTOOL1 Allen wrench.

English
23
1 2 3 4

24
Electronic cylinder
Installing the e-primo cylinder
Please note that it may not be possible to open the door
again after it is closed because the outside thumb turn will
rotate passively, i.e. without engaging. After installation –
but before closing the door – insert a battery (see “Battery
insertion/replacement“), program the e-primo cylinder and
test its functionality. The e-primo cylinder can now only be
opened with a valid identication medium.
Should problems arise during installation, please contact
your dealer or visit our website on the Internet at
www.evva.com/e-primo
1 Loosen (turn clockwise) the outside thumb turn‘s xing
screw with the special ZTOOL1 Allen wrench and pull it off.
2Rotate the outside thumb turn such that the outer loca-
ting screw is in the area of the cylinder prole.
3Push the e-primo cylinder by hand, from inside to out-
side, through the escutcheon and the mortise lock (loosen
the escutcheon‘s fastening screws if necessary).
4Fasten the e-primo cylinder in the mortise lock with the
cylinder xing screw. The cylinder xing screw should be
tightened down to a torque of 2 Nm (now also re-tighten
the escutcheon‘s fastening screws if necessary). Place the
gasket into the groove.
Notice: The specied IP rating is only achieved when
the gasket is in place.
5Carefully push the outside thumb turn cover to its limit
onto the e-primo cylinder. The outer locating screw must
be engaged in the guide groove. Fasten the outside thumb
turn by carefully screwing in (turn counter-clockwise) its
screw with the special ZTOOL1 Allen wrench.
Important: Please assign a programming key and a
user key to the cylinder and make sure a functional
battery is inserted before closing the door!

English
25
1
3
45
2

26
Electronic cylinder
Technology & media
The e-primo cylinder is available in versions for iButton or
air technology. User keys are therefore designed differently,
depending on the technology.
At least one programming key and one user key are
required to operate one or more e-primo cylinders.
Media functions
Programming key | PK (Programming Key)
The programming key is used to start and stop the
programming procedure on the e-primo cylinder. It is also
used to limit the INIT button‘s function to the owner of
the programming key as well as to terminate the blocking
and emergency opening functions. A single programming
key can be used for multiple e-primo cylinders.
User key | UK (User Key)
The user key serves to lock and unlock the door, it is issued
to the user. The user key can also be trained for additional
functions, e.g. the ofce function.
Delete key | DK (Delete Key)
The delete key is used in programming mode to delete
validation of a lost programming or user key from the
e-primo cylinder‘s memory.
Copy key | CK (Copy Key)
The copy key is used in programming mode to start the
copy process in which the data of a programming or user
key is stored onto a delete key.
Ofce key | OK (Ofce Key) (available option)
The ofce key is used to train the user keys to the ofce
function as well as to enable the ofce function globally
on an e-primo cylinder. The ofce function permits con-
tinuous release of the e-primo cylinder (e.g. during ofce
hours).
Blocking key | BK (Blocking Key) (available option)
The blocking key sets the e-primo cylinder into a continu-
ous locked condition; it cannot be activated from outside.
This function can only be terminated by the programming
key or the emergency opening key. A single blocking key
can be assigned to multiple e-primo cylinders but only one
blocking key per e-primo cylinder is possible.
Emergency opening key | EK (Emergency Key)
(available option)
The emergency opening key sets the e-primo cylinder to
its emergency opening function (continuously open). This
function can only be terminated by the programming key
or the blocking key. A single emergency opening key can
be assigned to multiple e-primo cylinders but only one
emergency opening key per e-primo cylinder is possible.

XIBCxPKP
Programming Key | PK
English
27
Operation
Commissioning the e-primo cylinder
The e-primo cylinder is not programmed to media when
delivered.
Assigning media
Assigning the programming key
l Hold the programming key briey at the reader.
Ü A sequence of high-pitch tones will be emitted, the light
ring blinks green. The e-primo cylinder now recognises
this medium as its programming key.
Notice: Please note that it may not be possible to
open the door again after it is closed because the
outside thumb turn will rotate passively, i.e. without
engaging. The e-primo cylinder can only be operated
after assignment of a programming key and a user
key.
Assignment of user keys; programming mode
1 First hold the programming key briey at the reader.
Ü A sequence of low and high tones will be emitted, the
light ring blinks orange then green. The e-primo cylinder
is now in its programming mode for 7 seconds.
2 Hold the user key you want to train into the e-primo
cylinder briey at the reader within 7 seconds.
Ü An ascending sequence of tones will be emitted, the
light ring illuminates orange then green. The e-primo
cylinder now recognises this user key as valid for locking
and unlocking the e-primo cylinder.
You can also assign several user keys, one after the other,
by holding each of them at the reader within 7 seconds.
3 Terminate programming mode by holding the program-
ming key briey at the reader or waiting for programming
mode to terminate automatically.
Ü A descending sequence of tones will be emitted, the
light ring illuminates orange then red. 2
1

28
Electronic cylinder
Creating delete keys
1Start programming mode.
2 Hold the copy key briey at the reader.
ÜThe light ring will blink orange.
3Hold the programming or user key, for which a delete
key is to be created, briey at the reader within 5 seconds.
Ü A high-pitched tone will be emitted, the light ring briey
illuminates green.
4 Hold the delete key briey at the reader within 5 seconds.
ÜA high-pitched tone will be emitted, the light ring will
illuminate green. The delete key for the programming or
user key is now created.
You can create multiple delete keys, one after the other,
by repeating steps 3 and 4.
5Terminate programming mode.
Notice: You should mark all delete keys appropri-
ately for their corresponding keys so that when a
delete key is needed the correct card is available for
deleting. Delete keys should be safeguarded securely
and separately from programming and user keys.
Please note that delete keys can only be assigned
once to a programming or user key.
Deleting media
Deleting a lost user key
1Start programming mode.
2 Hold the delete key for the lost user key briey at the
reader.
Ü A descending sequence of tones will be emitted, the
light ring illuminates orange then red. The lost user key
is deleted from the cylinder‘s memory.
3Terminate programming mode.
If the delete key is held at the reader during normal ope-
ration, the e-primo cylinder will indicate whether the lost
user key is still valid (green) or not (red).
Deleting a user key which is on-hand
1Start programming mode.
2 Hold the user key to be deleted (or multiple keys) briey
at the reader.
Ü A descending sequence of tones will be emitted, the
light ring illuminates orange then red. The user key is
deleted from the cylinder‘s memory.
3Terminate programming mode.
Deleting a lost programming key,
assigning a new programming key
1Start programming mode by holding the delete key for
the lost programming key at the reader.
2 Hold the new programming key briey at the reader
within 5 seconds.
Ü An ascending sequence of tones will be emitted, the
light ring illuminates orange then green. The new pro-
gramming key is now assigned and the old programming
key is deleted from the memory.
If no new programming key is held at the reader within
5 seconds, the original programming key remains stored in

English
29
the cylinder‘s memory.
3 Terminate programming mode.
Even after assigning a new programming key, all user keys
previously assigned to this e-primo cylinder retain their
validity.
Resetting to factory settings
You can reset the e-primo cylinder to its factory settings so
that all settings made, like assignments of media, blocking,
ofce and emergency opening functions, are deleted from
the cylinder‘s memory.
1 Loosen (turn clockwise) the inside thumb turn‘s xing
screw with the special ZTOOL1 Allen wrench and pull off
the outside thumb turn.
2Press the INIT button.
Ü During the deletion process a sequence of tones will be
emitted and the light ring will illuminate alternately in
red, orange and green.
ÜA higher pitched tone will be emitted, the light ring will
illuminate orange. The e-primo cylinder‘s memory is now
in its delivered state.
3Fasten the inside thumb turn by carefully screwing
in (counter-clockwise) its xing screw with the special
ZTOOL1 Allen wrench.
Notice: Please note that any person who has access
to the ZTOOL1 Allen wrench is able to reset the
e-primo cylinder back to its factory settings.
Be aware, after resetting to factory settings, media
must again be assigned to the e-primi cylinder
before you close the door.
Limiting the INIT button‘s function
To avoid misuse, the functionality of the INIT button can
be limited to the owner of the programming key.
l Hold the programming key for about 5 seconds at the
reader.
Ü A sequence of ascending tones will be emitted, the light
ring blinks green. The e-primo cylinder can now only be
reset to factory settings if the programming key is being
held at the reader.
You can remove this limitation by holding the program-
ming key at the reader again for 5 seconds.
Notice: Be sure that a delete key has been created
for the programming key. Otherwise, if the pro-
gramming key is lost, the e-primo cylinder must be
returned to EVVA for restoration.

30
Electronic cylinder
Supplementary functions (optional)
The following functions are available through the purchase
of an appropriate medium.
Ofce function
The e-primo cylinder can be switched to continuous open
operation, e.g. for ofce hours.
Global disable/enable of the ofce function
Continuous open operation functionality can be globally
disabled or enabled for the e-primo cylinder. It is enabled
by factory setting.
1Start programming mode.
2 Hold the ofce key for at least 3 seconds at the reader.
ÜA higher pitched tone will be emitted, the light ring will
illuminate green.
ÜAfter 3 seconds a descending tone will be emitted, the
light ring blinks red. The e-primo cylinder‘s continuous
open mode is now disabled.
You can globally enable the ofce function again by
repeating this process.
Training user keys to the ofce function
1Start programming mode.
2 Hold the ofce key briey at the reader.
3Hold the user key at the reader within 5 seconds.
Ü An ascending sequence of tones will be emitted, the
light ring illuminates orange then green. The user key is
now entitled to use the ofce function.
4Terminate programming mode.
You can train multiple user keys to the ofce function,
one after the other, by repeating step 3.
You can revoke ofce function entitlement for a user key
by repeating this process.
This process also simultaneously assigns any user key to
the cylinder if it was not already assigned previously –
therefore the step “Assignment of user keys“ can be
waived.
Ofce function via user key
lHold the entitled user key at the reader for at least 3 se-
conds, when the outside thumb turn is disengaged.
Ü A sequence of ascending tones will be emitted, the light
ring blinks green. The e-primo cylinder will be unlocked
and is now in continuous open mode.
You can deactivate continuous open mode by repeating
this process.
If the ofce function is globally disabled, continuous open
mode cannot be activated with a user key.

English
31
Blocking function
The e-primo cylinder can be continuously blocked with a
blocking key, e.g. to lock up in case of a criminal act. User
keys are inoperable when blocking mode is set.
A single blocking key can be assigned to multiple e-primo
cylinders, but only one blocking key per e-primo cylinder
is possible.
Notice: The blocking key must be assigned in the
same manner as a user key before it is functional
(see “Assignment of user keys“).
Activating the blocking function
lHold the assigned blocking key at the reader.
Ü A descending sequence of tones will be emitted, the
light ring illuminates red. The blocking function is
activated.
Deactivating the blocking function
lHold the programming key at the reader.
Notice: An assigned emergency opening key can
directly switch the e-primo cylinder from blocking
mode into emergency opening mode.
Emergency opening function
The e-primo cylinder can be permanently opened with an
emergency opening key, e.g. in the event of re. User keys
are inoperable when emergency opening mode is set.
A single emergency opening key can be assigned to mul-
tiple e-primo cylinders but, only one emergency opening
key per e-primo cylinder is possible.
Notice: The emergency opening key must be assi-
gned in the same manner as a user key before it is
functional (see “Assignment of user keys“).
Activating the emergency opening function
lHold the assigned emergency opening key at the reader.
Ü A sequence of ascending tones will be emitted, the
light ring illuminates green. Emergency opening mode
is activated.
Deactivating the emergency opening function
lHold the programming key at the reader.
Notice: An assigned blocking key can directly switch
the e-primo cylinder from emergency opening mode
into blocking mode.

32
Electronic cylinder
Emergency power supply (optional)
Emergency opening
1Be sure batteries are inserted in the emergency power
device – pay attention to correct polarity.
2Plug the 3-pole cable XRP0PC01 into the emergency power
device, then carefully plug it into the outside thumb turn.
3Slide the switch to “ON“ to turn on the emergency
power device.
4To open the door, activate the e-primo cylinder with a
valid medium as usual.
Notice: After this emergency opening process, please
replace the e-primo cylinder‘s battery without delay.
Usage notices
To ensure proper functionality of the e-primo cylinder,
EVVA recommends it be used in combination with a morti-
se lock in good operating condition.
Use of the e-primo cylinder in emergency exit doors or pa-
nic doors conforming to EN 179 or EN 1125 is dependent
on approval by the lock‘s manufacturer.
Please use only the special ZTOOL1 Allen wrench to install
the e-primo cylinder.
EVVA‘s guarantee does not cover product defects caused
by repairs, modications or unprofessional servicing carried
out by unauthorised persons. Intervention in the electrical
or mechanical elements of the e-primo cylinder by unaut-
horised persons also voids the guarantee.
Care of the e-primo cylinder
Use a soft, lint-free cloth and soapy water for cleaning.
Never use products or sprays which can be aggressive to
metal surfaces. Pay attention, particularly when a turn‘s
cover is removed, that no liquid gets into the e-primo
cylinder.
Media handling
All media are to be continuously safeguarded such that
they are only accessible to authorised persons. Delete keys
should be safeguarded separately from programming and
user keys.
When a medium is lost, it should be deleted from the
cylinder‘s memory without delay (see “Deleting media“).

English
33
Misuse
The thumb turn may not be turned with pliers.
Opening may not be affected with tools or other contri-
vances.
The e-primo cylinder also has plastic parts which could
be broken by rough handling (e.g. hammering) during
installation.
The cylinder‘s thumb turn is not intended as an object to
move the door leaf (as would be the door‘s knob, push-
bar, handle, etc).
When the outside thumb turn is engaged, the inside
thumb turn may not be held in place to prevent the
locking/unlocking process.
Avoid contamination when the thumb turn cover is remo-
ved, particularly by contact with greases, acids, moisture
or external voltage sources.
Do not try to open the door by applying an external vol-
tage source to the outside thumb turn.
The thumb turns may not be used as a means to step up.
What to do when ...
... the outside thumb turn is loose?
– tighten the xing screw with ZTOOL1
... the e-primo cylinder does not open?
– replace discharged battery
– perform emergency opening with the emergency
power device
– clean the reader
– send it to EVVA
If you need help, please contact your dealer or visit our
website on the Internet at www.evva.com/e-primo

AAA
XRP0PC01
UK iButton
Delete Key | DK
XIBCxPKP
Programming Key | PK
XIBCxBKP
Blocking Key | BK
XIBCxCKP
Copy Key | CK
Emergency Key | EK
CR 123A
ZTOOL1
M5x60
M5x70
M5x80
M5x70
AB C

CC10 39.15-75.03
www.evva.com/e-primo
Other manuals for e-primo
1
Table of contents
Other EVVA Lock manuals
