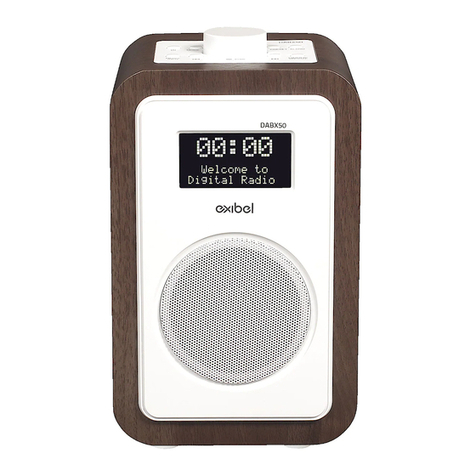
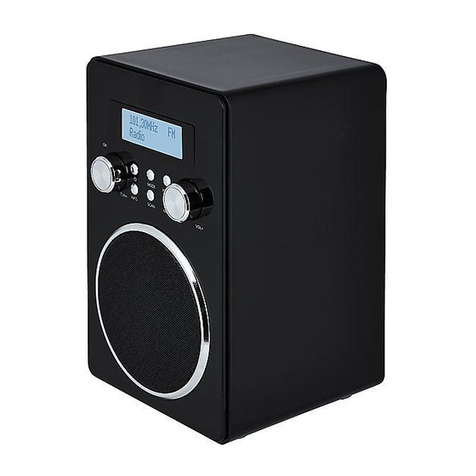
Exibel E80170P User manual

English 3
Svenska 10
Norsk 17
Suomi 24
Deutsch 31
DAB+ Radio
Ver. 20130617
Art.no. Model
38-4425 E80170P

2

3
English
DAB+ Radio
Art.no 38-4425 Model E80170P
Please read theentire instruction manual before use and save it for future reference.
Wereserve theright for any errors in text or images and for making any necessary
technical changes to this document. Ifyou should have any questions concerning
technical problems please contact our Customer Services.
Safety
• The product should not be taken apart or modified. Certainexposed parts inside
thecasing carry dangerous current. Touchingthese can lead to fires or electric shock.
• The product is intended for indoor use only.
• Never subject theproduct to high temperature, dust, heavy vibration, impacts,
humidity or moisture.
• Do not place theproduct where there is arisk of it falling into water or other liquid.
Donot place any objects containing liquid on theproduct, e.g. flower vases or drinks.
• Do not cover theappliance. Adequateventilation with adistance of at least
10cm between ventilation holes and thesurrounding area is necessary to prevent
theappliance from becoming too warm.
• Disconnect thedevice from thepower supply by unplugging it from thewall socket.
Theproduct’s plug should be easily accessible.
• The on/off switch only switches thedevice into standby power mode and does not
totally cut off current from themains.
• Protect your hearing. Listeningto theplayer on high volume for prolonged periods
can lead to permanent hearing loss.
• Repairs and service should only be performed by qualified tradesmen, and only
with original spare parts.
Product description
DAB/DAB+/FM radio. 10 station presets, carrying handle, illuminated LCD display,
headphone socket, telescopic aerial and clock. Poweredby theincluded mains
adaptor or 4 × C/LR14 batteries (sold separately). Referto www.teracom.se for
current service area.

4
English
S
15
16
17
18
1
2
3
6
9
12
4
7
10
13
5
8
11
14
Buttons and functions
1. Aerial
2. Display
3. [STANDBY] On/off
4. [Volume – ]
5. [Volume + ]
6. [◄◄ ] Previous
7. [SELECT] Confirm
8. [►► ] Next
9. [DAB/FM]
10. [SCAN]
11. [DISPLAY]
12. [SLEEP]
13. [PRESET/SAVE ]
14. [MUTE] Sound off
15. Handle
16. Battery compartment
17. Headphone socket
18. Power socket (DC 5 V)

5
English
Getting started
1. Plug theDC connector on themains lead into thepower socket on theback of
theradio.
2. Plug theother end of mains lead into awall socket.
3. Your radio will display abrief welcome message and then automatically tune into all
theavailable DAB stations.
4. The radio will then display thenumber of DAB stations found. Ifthere are no DAB
stations in your area, thedisplay will show “SIG N/A”. Alltheavailable stations will
be saved for future use.
5. You can toggle between DAB and FM mode using the[ DAB/FM ] button.
Note:
• If you move theradio to anew location, you can search for new stations by
pressing the[SCAN] button.
• You may need to reposition theaerial for optimum reception.
• When using batteries, you should unplug theadaptor from theDC power socket.
Operation
Turn theradio on using the[STANDBY] button.
Listening to the FM radio
1. Select FM by pressing the[DAB/FM] button.
2. Select thedesired frequency by pressing and holding the[◄◄ ] or [►► ] button
to search up or down.
3. Fine tuning can be done by pressing the[◄◄ ] or [►► ] button once and
repeating until thedesired frequency is found.
4. Alternatively, if you press the[SCAN] button it will automatically seek out thenext
available station. Pressand hold in [SCAN] to search in theopposite direction.
Listening to the DAB radio
1. Press the[DAB/FM] button and theradio will automatically search for all
theavailable DAB stations. Ifyou wish to fine tune aDAB station or search for new
stations, press the[SCAN] button.
2. Press the[SCAN] button to activate thequick scan; thedisplay will show “Q SCAN”.
3. Press and hold in the[SCAN] button to activate thefull scan; thedisplay will show
“F SCAN”.
4. Change station by pressing the[◄◄ ] or [►► ] button.
DAB station search
In theDAB mode, press and hold in the[SELECT] button for over two seconds
to come to the“AUTO ON/OFF” mode. Pressand hold in the[SELECT] button
repeatedly to toggle between theAUTO ON and AUTO OFF modes.

6
English
• In the“AUTO ON” mode, press the[◄◄ ] or [►► ] button to search for and
selectstations.
• In the“AUTO OFF” mode, you will need to press the[SELECT] button to confirm
theselection of astation.
Storing your favourite stations
1. Your favourite radio stations can be saved in thememory (preset). Thisenables you
to access you favourite stations quickly and easily.
2. Press the[PRESET/SAVE] button. Theletter “P” followed by anumber from 1 to 10
and theword “FREE” will appear on thedisplay if thepreset station slot is free.
3. Press and hold in the[◄◄ ] or [►► ] button repeatedly to select thedesired
preset slot (1–10).
4. Press and hold in the[PRESET/SAVE] button. Thedisplay will show “P” and
thenumber of your desired preset station will flash.
5. Press the[SELECT] button to confirm your selection. “P xx SAVE” will appear on
thedisplay (where xx is the number of the preset station).
6. You can save up to 10 stations in both DAB and FM mode.

7
English
Recalling a stored station
1. Once you have stored apreset station, it can be recalled by pressing
the[PRESET/SAVE ] button. Theletter “P” followed by anumber from 1 to 10
andtheword “FREE” will appear on thedisplay if theslot is free. Iftheslot is
notfree, just anumber will appear.
2. Press the[◄◄ ] or [►► ] button to select apreset station number.
3. Press the[SELECT] button to confirm your selection and thedisplay will show
“PzzLOAD”.
Setting the time
When you turn theradio on it will automatically synchronise with thelocal time
via theDAB signal. Itwill continue to search for thetime information until it
been synchronised. Ifafter 3 minutes, theclock has not automatically set itself,
tryrepositioning theradio to get abetter reception.
If theradio cannot find aDAB signal with thetime information, you can try theFM mode
as some FM stations also transmit time and date information. Pressthe[DISPLAY]
button to display thetime and date. Note: Not all FM stations transmit thetime.
Changing the display
When using theradio in either FM or DAB mode, you can change what appears on
thedisplay by pressing [DISPLAY].
Setting the sleep time
The SLEEP function allows you to programme theradio to switch itself off after
aperiod of 90, 60, 30 or 10 minutes.
There are 5 sleep time settings: S OFF, S 90 MIN, S 60 MIN, S 30 MIN and S 10
MIN. Pressthe[SLEEP] button to select atime option; theselection will be confirmed
automatically after 3 seconds or if you press the[SELECT] button. “S CONFIRM” will
appear on thedisplay. Whenthesleep function is activated theword “SLEEP” will
appear on thedisplay.
Resetting the radio
In DAB mode
1. Press and hold in the[DISPLAY] button until thedisplay changes.
2. Press the[DISPLAY] button again, “RESET” will appear on thedisplay.
3. Press the[SELECT] button to confirm.
4. After theword “RESET” has appeared on thedisplay, theradio automatically
enters quick scan mode. “Q SCAN” is shown on thedisplay.
8
English
In FM mode
1. Press and hold in the[DISPLAY] button until “RESET” appears on thedisplay.
2. Press the[SELECT] button to confirm.
3. After theword “RESET” has appeared on thedisplay, theradio automatically
returns to thefrequency of 87.5 MHz.
Using headphones
Headphones can be plugged into the3.5 mm socket on theside of theradio.
What does DLS mean?
Dynamic Label Segmenting is text sent from theDAB station you are listening to.
Thiscan include information about thesongs that are playing or other information.
Care and maintenance
Clean theproduct using asoft, dry cloth. Neveruse solvents or abrasive cleaning agents.
Troubleshooting guide
Problem Solution
No power. Check thepower point.
Check that themains lead is connected properly to both
theradio and wall socket.
No sound. Check thevolume.
Check that theMUTE function is not activated.
Poor radio signal
reception.
Adjust theaerial.
Fine tune thefrequency.
Still poor reception. Try switching off and unplugging theradio.
Wait 2 minutes before switching it on again.

9
English
Disposal
When it is time to dispose of this product, do so in accordance with local regulations.
Ifyou are unsure how to proceed, contact your local authority.
Specifications
Adaptor input voltage 100–240 V, 50/60 Hz
Adaptor output voltage 5 V, 1.2 A
Frequency response DAB band III and FM PLL radio
Band III 174.928 MHz to 239.200 MHz
FM 87.5–108 MHz
Speaker power output 2.5 W RMS
Speaker 3.0 inches
Display LCD with white backlight
Headphone socket 3.5 mm stereo
Power consumption 6 W
Batteries 4 × C/LR14 batteries (sold separately)
Standby 0.8 W
Size 21 × 14 × 8 cm

10
Svenska
DAB+ radio
Art.nr 38-4425 Modell E80170P
Läs igenom hela bruksanvisningen före användning och spara den sedan för
framtida bruk. Vireserverar oss för ev. text- och bildfel samt ändringar av tekniska
data. Vidtekniska problem eller andra frågor, kontakta vår kundtjänst (se adress-
uppgifter på baksidan).
Säkerhet
• Produkten får inte demonteras eller ändras. Farligspänning finns oskyddad på
komponenter inuti produktens hölje. Kontaktmed dessa kan leda till brand eller
geelektriska stötar.
• Produkten är endast avsedd för inomhusbruk.
• Utsätt aldrig produkten för höga temperaturer, dammig miljö, starka vibrationer,
stötar, fukt eller väta.
• Placera inte produkten så att den kan falla ner ivatten eller annan vätska. Ställinte
några föremål som innehåller vätska på produkten, t.ex. enblomvas eller dryck.
• Täck inte över apparaten. Tillräckligventilation, med ettminsta avstånd på
ca10cm mellan ventilationshålen och omgivande ytor, är nödvändig för att
förhindra att apparaten blir för varm.
• Bryt strömmen till apparaten genom att dra apparatens stickpropp ur vägguttaget.
Apparatensstickpropp måste vara lättåtkomlig.
• Strömbrytaren är sekundärt kopplad och bryter inte strömmen från nätet.
• Skydda din hörsel. Lyssningmed hög volym under lång tid kan leda till
beståendehörselskador.
• Låt behörig personal utföra service och reparationer och endast
medoriginalreservdelar.
Produktbeskrivning
DAB/DAB+/FM-radio. Snabbvalför 10 kanaler, bärhandtag, belyst LCD-display,
uttagför stereohörlurar, teleskopantenn, klocka m.m. Drivsvia medföljande
batterieliminator eller 4 × C/LR14-batterier (säljs separat). Sewww.teracom.se
föraktuell DAB-täckningskarta.

11
Svenska
S
15
16
17
18
1
2
3
6
9
12
4
7
10
13
5
8
11
14
Knappar och funktioner
1. Antenn
2. Display
3. [STANDBY] Av/på
4. [Volume – ] Volymknapp –
5. [Volume + ] Volymknapp +
6. [ ◄ ◄ ] Föregående
7. [SELECT] Bekräfta
8. [ ► ► ] Nästa
9. [DAB/FM] Val av DAB- och FM-läge
10. [SCAN] Kanalsökning
11. [DISPLAY] Visa information
12. [SLEEP] Sleepfunktion
13. [PRESET/SAVE ] Förinställa/spara
14. [MUTE] Ljud av
15. Handtag
16. Batterifack
17. Uttag för hörlurar
18. Strömingång (DC 5 V)

12
Svenska
Att komma igång
1. Anslut nätsladden till strömingången på din radio.
2. Anslut stickproppen till ettvägguttag.
3. Radion visar ettvälkomstmeddelande och ställer sedan automatiskt in sig på
tillgängliga DAB-stationer.
4. Displayen visar det antal DAB-stationer som hittats. Ominga stationer hittats,
visardisplayen ”SIG N/A”. Allastationer sparas för framtida bruk.
5. Det går att skifta mellan DAB- och FM-läge genom att trycka på [DAB/FM].
Observera att:
• Det går att flytta radion till enannan plats för att hitta fler stationer.
Tryck på [ SCAN ] för att söka.
• Det går att justera antennen för bästa sändning.
• När du använder batterier kan du koppla ifrån nätsladden från din radio.
Användning
Slå på radion genom att trycka på [STANDBY].
Lyssna på FM-radio
1. Välj FM genom att trycka på [DAB/FM].
2. Välj frekvens manuellt genom att trycka på [◄◄ ] eller [ ►► ] för att söka.
3. Finjustering kan ske genom att trycka på [◄◄ ] eller [►► ] ettsteg itaget.
4. Det går även att trycka på [SCAN] för automatisk sökning framåt.
Tryck och håll ned [ SCAN ] för att söka bakåt.
Lyssna på DAB-radio
1. Tryck på [ DAB/FM ] för att söka in alla DAB-stationer automatiskt. Omdu vill
fininställa enDAB-station eller söka efter nya stationer, tryck på [ SCAN ].
2. Tryck och håll ned [SCAN] för att aktivera snabbsökning, displayen visar ”Q SCAN”.
3. Tryck och håll ned [ SCAN ] för att aktivera full sökning, displayen visar ”F SCAN”.
4. Byt station genom att trycka på [◄◄ ] eller [►► ].
Söka i DAB-läge
Tryck och håll ned [ SELECT ] iminst 2 sekunder för att komma till ”AUTO ON/OFF”-
läge. Tryckoch håll ned [ SELECT ] upprepade gånger för att bläddra mellan AUTOON
och AUTO OFF.

13
Svenska
• I läget ”AUTO ON”, använd [◄◄ ] eller [►► ] för att bläddra mellan stationer.
• I läget ”AUTO OFF” måste man trycka på [SELECT] för att bekräfta val av station.
Spara din favoritstation
1. Det går att spara stationer iminnet. Dettagör att du snabbt och enkelt kan ta fram
och lyssna på din favoritstation.
2. Tryck på [ PRESET/SAVE]. Bokstaven”P” följt av ensiffra från 1–10 och ”FREE”
visas idisplayen om lagringsplatsen är ledig.
3. Tryck och håll ned [ ◄ ◄ ] eller [ ► ► ] upprepade gånger för att välja lagringsplats
(1–10).
4. Tryck och håll ned [ PRESET/SAVE]. Bokstaven”P” visas och numret för den valda
lagringsplatsen blinkar.
5. Tryck på [ SELECT ] för att bekräfta ditt val. ”P”, vald lagringsplats samt ”SAVE”
visas i displayen.
6. Du kan spara upp till 10 stationer ibåde DAB- och FM-läge.

14
Svenska
Ta fram en sparad station
1. När du har sparat enförinställd station kan du ta fram den genom att trycka
på [PRESET/SAVE ]. Bokstaven”P”, ettnummer från 1–10 samt ”FREE” visas
idisplayen om platsen är tom. Harden ensparad station visas bara ett nummer.
2. Tryck på [ ◄◄ ] eller [ ►► ] för att välja din förinställda station.
3. Tryck på [ SELECT ] för att bekräfta valet och displayen visar ”Pzz LOAD”.
Ställa in tiden
När du startar radion synkroniseras den automatiskt till lokal tid genom DAB-signalen.
Densöker automatiskt efter synkronisering tills signal har hittats. Omapparaten efter
3minuter inte har ställt in sig, flytta den till enannan plats för bättre mottagning.
Om apparaten inte kan hitta enDAB-signal kan du använda FM-läge för att se tid och
datum. Tryckpå [ DISPLAY ] för att visa informationen. Observeraatt alla FM-stationer
inte har denna funktion.
Ändra displayen
Det går att bläddra mellan informationen som visas idisplayen ibåde DAB- och
FM-läge genom att trycka på [DISPLAY].
Ställa in automatisk avstängning (SLEEP)
Sleepfunktionen gör att man kan programmera apparaten att slå av sig själv inom 90,
60, 30 eller 10 minuter.
Det finns 5 lägen: S OFF, S 90 MIN, S 60 MIN, S 30 MIN och S 10 MIN. Tryckpå
[SLEEP] för att bläddra och valet bekräftas automatiskt efter 3 sekunder eller tryck på
[SELECT]. ”S CONFIRM” visas då idisplayen. Närfunktionen är aktiv visas ”SLEEP”
idisplayen.
Återställa radion
I DAB-läge
1. Tryck och håll ned [ DISPLAY ] tills skärmen ändras.
2. Tryck på [ DISPLAY ] igen, ”RESET” visas igen.
3. Tryck på [ SELECT ] för att bekräfta.
4. Efter att ”RESET” visas idisplayen går apparaten automatiskt in
isnabbsökningsläget. ”Q SCAN” visas idisplayen.

15
Svenska
I FM-läge
1. Tryck och håll ned [ DISPLAY ] tills ”RESET” visas idisplayen.
2. Tryck på [ SELECT ] för att bekräfta.
3. Efter att ”RESET” visas idisplayen går apparaten automatiskt tillbaka till
frekvensen87,5 MHz.
Använda hörlurar
Det går att ansluta hörlurar med 3,5 mm plugg till anslutningen på sidan av radion.
Vad betyder DLS?
Dynamic Label Segmenting är text från DAB-stationen du lyssnar till.
Informationenkan inkludera information om låtarna eller övrig information.
Skötsel och underhåll
Rengör produkten med entorr och mjuk trasa.
Använd aldrig lösningsmedel eller slipande rengöringsmedel.
Felsökningsschema
Problem Lösning
Ingen ström. Kontrollera att vägguttaget är helt.
Kontrollera att nätsladden är korrekt
ansluten till vägguttaget och apparaten.
Inget ljud. Kontrollera volymen.
Kontrollera att MUTE inte är aktiverad.
Dålig radiosignal. Justera antennen.
Byt kanal.
Fortfarande dålig radiosignal. Prova att starta om radion helt.
Vänta2minuter mellan försöken.

16
Svenska
Avfallshantering
När du ska göra dig av med produkten ska detta ske enligt lokala föreskrifter.
Är du osäker på hur du ska gå tillväga, kontakta din kommun.
Specifikationer
Batterieliminator inspänning 100–240 V, 50/60 Hz
Batterieliminator utspänning 5 V, 1,2 A
Frekvensområde DAB band III och FM PLL radio
Band III 174,928–239,200 MHz
FM 87,5–108 MHz
Uteffekt högtalare 2,5 W RMS
Högtalare 3,0 tum
LCD-display Display med ljus
Hörlursuttag 3,5 mm stereoplugg
Strömförbrukning 6 W
Batterityp 4 × C/LR14-batterier (säljs separat)
Strömförbrukning standby 0,8 W
Mått 21 × 14 × 8 cm

17
Norsk
DAB+ radio
Art.nr. 38-4425 Modell E80170P
Les nøye igjennom hele bruksanvisningen og ta vare på den til senere bruk.
Vi reserverer oss mot ev. tekst- og bildefeil, samt forandringer av tekniske data.
Ved tekniske problemer eller andre spørsmål, ta kontakt med vårt kundesenter
(seopplysninger på baksiden).
Sikkerhet
• Produktet må ikke demonteres eller forandres på. Farligspenning ligger ubeskyttet
på visse komponenter under produktets deksel. Kontaktmed disse kan føre til
brann eller gi elektriske støt.
• Produktet er kun beregnet for innendørs bruk.
• Utsett aldri produktet for høye temperaturer, fuktighet, støvete omgivelser, sterke
vibrasjoner eller støt.
• Plasser ikke produktet slik at det kan komme ikontakt med vann eller annen
væske. Plasseraldri produktet nær gjenstander som kan forårsake at væske
skylles over produktet.
• Produktet må ikke tildekkes. Tilstrekkeligventilasjon, med enminsteavstand
på ca.10 cm mellom ventilasjonsrillene og omliggende flater er nødvendig, for
åhindre at apparatet blir for varm.
• Produktet gjøres strømløst ved at støpselet trekkes ut av strømuttaket.
Apparatetsstøpsel må være lett tilgjengelig.
• Strømbryteren er sekundærkoblet og bryter ikke strømmen mellom nettet
ogapparatet.
• Beskytt hørselen din. Lyttingmed høyt volum over lengre tid kan føre til
varigehørselsskader.
• La profesjonelle fagfolk utføre service og reparasjoner. Benyttkun
originalereservedeler.
Produktbeskrivelse
DAB/DAB+/FM-radio. Hurtigvalgfor 10 kanaler, bærereim, belyst LCD-skjerm,
uttak for stereoheadset, teleskopantenne, klokke m.m. Drivesmed medfølgende
batterieliminator eller 4 × C/LR 14-batterier (selges separat). Se www.teracom.se for
aktuell DAB-kart for områder som dekkes.

18
Norsk
S
15
16
17
18
1
2
3
6
9
12
4
7
10
13
5
8
11
14
Knapper og funksjoner
1. Antenne
2. Display
3. [STANDBY] Av/på
4. [Volume – ] Volumknapp –
5. [Volume + ] Volumknapp +
6. [ ◄ ◄ ] Foregående
7. [SELECT] Bekrefte
8. [ ► ► ] Neste
9. [DAB/FM] Modus
10. [SCAN] Søke
11. [DISPLAY]
12. [SLEEP] Sleepfunksjon
13. [PRESET/SAVE] Forhåndsinnstilling/lagre
14. [MUTE] Lyd av
15. Håndtak
16. Batteriholder
17. Uttak for hodetelefoner
18. Strøminntak (DC, 5 V)

19
Norsk
Kom i gang
1. Strømkabelen kobles til strøminngangen på radioen.
2. Støpselet kobles til etstrømuttak.
3. Radioen viser envelkomsttekst og stilles deretter automatisk inn på tilgjengelige
DAB-stasjoner.
4. Displayet viser det antall DAB-stasjoner som den finner. Hvisden ikke finner noen
stasjoner, vises «SIG N/A» idisplayet. Allestasjoner lagres for framtidig bruk.
5. Man kan skifte mellom DAB- og FM-modus ved åtrykke på [DAB/FM].
Legg merke til at:
• Radioen kan flytte til etannet sted for åfå inn flere stasjoner.
Trykkpå [ SCAN ] for åsøke.
• Juster antennen for best mulig mottak.
• Når batteriene benyttes kan strømkabelen kobles fra.
Bruk
Slå på radioen ved åtrykke på [STANDBY].
Lytte på FM-radio
1. Velg FM ved åtrykke på [ DAB/FM ].
2. Velg frekvens manuelt ved åtrykke på [◄◄ ] eller [ ►► ] for åsøke.
3. Finjustering kan foretas med knappene [◄◄ ] eller [►► ], med etttrinn av gangen.
4. Ved åtrykke på [ SCAN ] vil søk framover gå automatisk. Trykkinn og hold [SCAN ]
inne for åsøke automatisk bakover.
Høre på DAB-radio
1. Trykk inn [ DAB/FM ] for åsøke på alle DAB-stasjoner automatisk. Hvisdu vil
fininnstille enDAB-stasjon eller søke etter nye stasjoner, så trykk på [ SCAN ].
2. Trykk inn [ SCAN ] og hold den inne for åaktivere hurtigsøking.
Displayetviser «QSCAN».
3. Trykk inn [ SCAN ] og hold den inne for åfå full hurtigsøking.
Displayetviser «FSCAN».
4. Skift stasjon ved åtrykke på [◄◄ ] eller [►► ].
Søke i DAB-modus
Trykk inn [ SELECT ] og hold inne iminst 2 sekunder for åkomme til «AUTO ON/OFF»-
modus. Trykkinn [ SELECT ] og hold inne gjentatte ganger for åbla mellom AUTO ON
og AUTO OFF.

20
Norsk
• I «AUTO ON»-modus, benyttes [◄◄ ] eller [►► ] for åbla mellom de forskjellige
stasjonene.
• I «AUTO OFF»-modus må man trykke på [SELECT] for åbekrefte valg av stasjon.
Lagre favorittstasjon
1. Radiostasjoner kan lagres iminnet. Dettegjøres ved åhente fram den ønskede
stasjonen.
2. Trykk så på [ PRESET/SAVE]. Bokstaven«P» fulgt av ettall fra 1 til 10 og «FREE»
vises idisplayet.
3. Trykk på[ ◄◄ ] eller [ ►► ] gjentatte ganger og hold inne for åvelge
enlagringsplass fra 1 til 10.
4. Trykk inn [ PRESET/SAVE] og hold den inne. Bokstaven«P» vises og nummeret for
den valgte stasjonen blinker idisplayet.
5. Trykk på [ SELECT ] for åbekrefte valget. «P xx SAVE» vises idisplayet.
6. Inntil 10 stasjoner kan lagres iDAB- eller FM-modus.
Table of contents
Languages:
Other Exibel Radio manuals

Exibel
Exibel DAB X30 User manual

Exibel
Exibel NE-6205-UK? NE-6205 User manual

Exibel
Exibel DAB X40S User manual

Exibel
Exibel DX26 User manual

Exibel
Exibel MD-088P User manual

Exibel
Exibel KK-9802 User manual

Exibel
Exibel X40BT User manual

Exibel
Exibel X40 User manual

Exibel
Exibel DAB X45 User manual

Exibel
Exibel DX25 User manual
Popular Radio manuals by other brands

LENCO
LENCO SCD-420 instruction manual

Cobra
Cobra 19 DX IV owner's manual

Schulmerich Carillons
Schulmerich Carillons GENERATION4 Operating instructions and specifications

Bosch
Bosch pb180 Operating/safety instructions

Sony
Sony SRF-M606 operating instructions

Freeplay
Freeplay Eco-ChargeTM I-ECO-C1 user manual