manuals.online logo
Brands
  1. Home
  2. •
  3. Brands
  4. •
  5. Exsys
  6. •
  7. Switch
  8. •
  9. Exsys EX-1178-W User manual

Exsys EX-1178-W User manual

651
AUFBAU
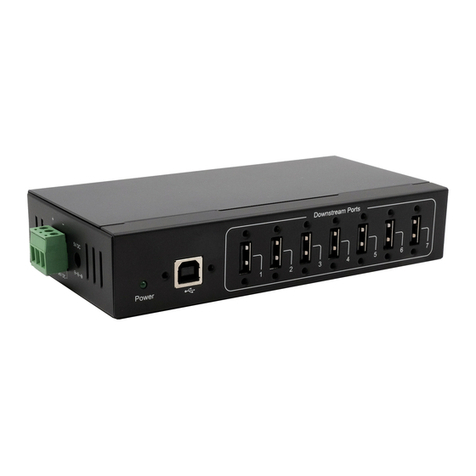
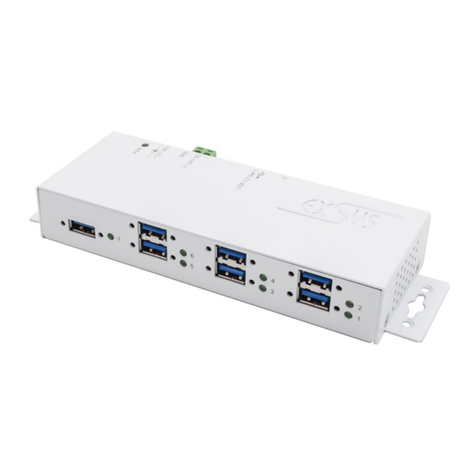
Die EX-1178-W ist ein USB 2.0 Metall HUB für bis zu 7 Endgeräte. Er ist mit 7 Ports für Endgeräte
und 1 Port für den Anschluss an den PC ausgestattet. Er unterstützt alle USB Anschlüsse von 1.1
bis 2.0. Durch die Stromversorgung über das im Lieferumfang enthaltenem Netzteil oder dem PC-
Netzteil werden an jedem Port die vollen 500mA zur Verfügung gestellt. Der serielle USB 2.0 Bus
unterstützt optimal die Leistung des schnellen Renesas Chipsatz. Die EX-1178-W gewährleistet so
eine sichere Datenübertragung und exzellente Performance von bis zu 480Mbit/s. Er unterstützt
den Self Powered und Bus Powered Modus. Es ist nicht möglich die I/O Adressen und Interrupts
manuell einzustellen, da die Einstellungen vom System (BIOS) und beim installieren des Betriebs-
systems automatisch vorgenommen werden.
BESCHREIBUNG & TECHNISCHE DATEN
Kompatibilität: USB 1.1 & 2.0
Betriebssysteme: Alle Betriebssysteme
Anschlüsse: 7x USB A-Buchse, 1x USB B-Buchse, 1x 5V Buchse, 1x 4 Pin Stecker
Lieferumfang: EX-1178-W, Anleitung, USB Kabel, Netzteil
Zertifikate: CE / FCC / RoHS / WEEE DE97424562 / WHQL
ANSCHLÜSSE
ACHTUNG!!!
Nur zur Verwendung mit im Lieferumfang enthaltenem Netzteil!
5 Volt Buchse:
USB 1-7:
USB 2.0 A-Buchse
Pin Signal Pin Signal
1VCC 3DATA+
2DATA- 4GND
4 Pin Anschluss:
1 +5V
2 GND
3 GND
4 +12V
Bitte auf die richtige Polarität achten!
Achtung! Stecker nie bei eingeschaltetem PC ein oder ausstecken!
CONNECTORS
USB B-Port:
USB 2.0 B-Port
Pin Signal Pin Signal
1VCC 3DATA+
2DATA- 4GND
Because there are large differences between PC’s, we can give you only a general installation
guide for the EX-1178-W. Please refer your computer’s reference manual whenever in doubt.
1. Connect the USB cable to the USB B-Port at the Hub.
2. Connect the included power supply into the 5Volt connector at the Hub. If you want to
supply the EX-1178-W via the 4 pin connector with power, then now connect the 4 pin
plug of the PC power supply to the 4 pin connector on the EX-1178-W.
3. Now connect the other end from the USB cable (A-Plug) to the A-Port at your PC.
HARDWARE INSTALLATION
Anleitung
Vers. 1.0 / 01.04.16
EX-1178-W
DRIVER INSTALLATION
All OS
After the hardware installation the OS will recognize the device automatically and install the
drivers.
CHECK INSTALLED DRIVER
Open the >Device manager<. Now you should see at „USB-Controller“ the following new entry's:
If you see this or a similar information the device is installed correctly.
CLEANING
For cleaning please use only a dry fluff less cloth and remove the dirt with gently pressure. In
the area of the connectors please make sure that no fibres from the cloth remain in the connect-
ors. Attention! Never use a moist or wet cloth for cleaning!
Betriebs LED
USB 1-7: 7 x externe USB 2.0 A-Buchse für Endgeräte
5V Buchse für
externes Netzteil
USB B-Buchse
PC-Anschluss
4 Pin Stromanschluss
234
ANSCHLÜSSE
USB B-Buchse:
USB 2.0 B-Buchse
Pin Signal Pin Signal
1VCC 3DATA+
2DATA- 4GND
TREIBER INSTALLATION
Alle Betriebssysteme
Nach Abschluss der Hardwareinstallation erkennt das Betriebssystem den EX-1178-W automa-
tisch und installiert diesen.
ÜBERPRÜFEN DES INSTALLIERTEN TREIBER
Öffnen Sie den >Geräte-Manager<. Jetzt müssten Sie unter „ USB-Controller“ folgende
Einträge sehen:
Sind diese oder ähnliche Einträge vorhanden, ist die EX-1178-W richtig installiert.
REINIGUNG
Zur Reinigung des Gerätes verwenden Sie bitte ausschließlich ein trockenes nicht faserndes
Tuch und entfernen Sie die Verschmutzung mit leichtem Druck. Im Bereich der Anschlüsse bitte
darauf Achten, dass keine Fasern des Tuchs in der Buchse hinterlassen werden. Verwenden
Sie bitte zu Reinigung in keinem Fall ein feuchtes oder nasses Tuch!
Beachten Sie bitte die folgenden Installationshinweise. Da es große Unterschiede zwischen
PC‘s gibt, können wir Ihnen nur eine generelle Anleitung zum Einbau der EX-1178-W geben.
Bei Unklarheiten halten Sie sich bitte an die Bedienungsanleitung Ihres Computersystems.
1. Verbinden Sie das mitgelieferte USB Kabel mit der USB B-Buchse des Hub´s.
2. Stecken Sie jetzt den Stromanschluss des mitgelieferten Netzteils an die 5Volt Buchse des
Hub´s an und stecken Sie den Netzstecker des Netzteils in eine Steckdose. Falls Sie die EX-
1178-W über den 4 Pin Anschluss mit Strom versorgen wollen, dann schließen Sie jetzt den
4 Pin Stecker des PC-Netzteil an den 4 Pin Anschluss der EX-1178-W an.
3. Verbinden Sie nun das andere Ende (A-Stecker) des mitgelieferten USB Kabels mit der A
-Buchse an Ihrem PC.
HARDWARE INSTALLATION
The EX-1178-W is a plug & play high-speed USB 2.0 metal hub for 7 USB devices. The EX-
1178-W provides 7 ports for USB devices and 1 uplink port for PC. It supports all USB connec-
tions from 1.1 to 2.0. The power over the included power supply or the PC power supply pro-
vides a maximum of power on each USB port of 500mA. The EX-1178-W design fully utilize the
Renesas chipset, which represents the latest in high speed USB interface technology. It uses
data transfer rates up to 480Mbit/s. It provides a secure and very high data transfer on each
single port. The EX-1178-W support the Self Powered and Bus Powered mode. It is not possi-
ble to change the address or IRQ settings manually, they will be obtained automatically by the
system (BIOS) and operating system.
DESCRIPTION & TECNICAL INFORMATION
Compatibility: USB 1.1 & 2.0
Operating system: All OS
Connectors: 7x USB A-Port, 1x USB B-Port, 1x 5V Connector, 1x 4 Pin Connector
Extent of delivery: EX-1178-W, Manual, USB Cable, Power Supply
Certificates: CE / FCC / RoHS / WEEE DE97424562 / WHQL
CONNECTORS
ATTENTION!!!
Use only with power supply which is included in delivery!
5 Volt Connector:
USB 1-7:
USB 2.0 A-Port
Pin Signal Pin Signal
1VCC 3DATA+
2DATA- 4GND
4 Pin Connector:
1 +5V
2 GND
3 GND
4 +12V
Please make sure you connect the plug in the right direction!
Never connect or release the plug while the PC power is on!
Manual
Vers. 1.0 / 01.04.16
EX-1178-W
LAYOUT
Power LED
USB 1-7: 7 x external USB 2.0 A-Port for Devices
5V Connector for
Power Supply
USB B-Connector
for PC
4 Pin Power Connector
Other Exsys Switch manuals

Exsys EX-1180HMS User manual

Exsys

Exsys EX-1180HMS User manual

Exsys EX-62020 User manual

Exsys

Exsys EX-62020 User manual

Exsys EX-1198VS User manual

Exsys

Exsys EX-1198VS User manual

Exsys EX-1185HMVS User manual

Exsys

Exsys EX-1185HMVS User manual

Exsys EX-1189HMVS-3W User manual

Exsys

Exsys EX-1189HMVS-3W User manual

Exsys EX-1187HMVS-2 User manual

Exsys

Exsys EX-1187HMVS-2 User manual

Exsys EX-1144HMVS User manual

Exsys

Exsys EX-1144HMVS User manual

Exsys EX-1240HMVS User manual

Exsys

Exsys EX-1240HMVS User manual

Exsys EX-1177HMVS User manual

Exsys

Exsys EX-1177HMVS User manual

Exsys EX-1526HMVS User manual

Exsys

Exsys EX-1526HMVS User manual

Exsys EX-1221HM User manual

Exsys

Exsys EX-1221HM User manual

Exsys EX-1189HMVS-2 User manual

Exsys

Exsys EX-1189HMVS-2 User manual

Exsys EX-1188HMS-3 User manual

Exsys

Exsys EX-1188HMS-3 User manual

Exsys EX-1113HMS User manual

Exsys

Exsys EX-1113HMS User manual

Exsys EX-1144HMVS User manual

Exsys

Exsys EX-1144HMVS User manual

Exsys EX-1185HMVS-WT User manual

Exsys

Exsys EX-1185HMVS-WT User manual

Exsys EX-1178S User manual

Exsys

Exsys EX-1178S User manual

Exsys EX-1178S User manual

Exsys

Exsys EX-1178S User manual

Exsys EX-1163 User manual

Exsys

Exsys EX-1163 User manual

Exsys EX-1189HMVS-3 User manual

Exsys

Exsys EX-1189HMVS-3 User manual

Exsys EX-1186HMVS-2 User manual

Exsys

Exsys EX-1186HMVS-2 User manual

Exsys EX-1183HMVS-2 User manual

Exsys

Exsys EX-1183HMVS-2 User manual

Exsys EX-1126 User manual

Exsys

Exsys EX-1126 User manual

Exsys EX-1178 User manual

Exsys

Exsys EX-1178 User manual

Popular Switch manuals by other brands

Moxa Technologies ToughNet TN-5510-2GLSX-ODC Hardware installation guide

Moxa Technologies

Moxa Technologies ToughNet TN-5510-2GLSX-ODC Hardware installation guide

Videotec SW42REM operating instructions

Videotec

Videotec SW42REM operating instructions

ANTAIRA LMP-1802G-SFP Series Quick installation guide

ANTAIRA

ANTAIRA LMP-1802G-SFP Series Quick installation guide

Wearpai HDSW0021M1 user manual

Wearpai

Wearpai HDSW0021M1 user manual

D-Link DGS-3000-10L Quick installation guide

D-Link

D-Link DGS-3000-10L Quick installation guide

See Water Water Smart WSS12 Installation and operator's manual

See Water

See Water Water Smart WSS12 Installation and operator's manual

Schrack Technik FSA installation instructions

Schrack Technik

Schrack Technik FSA installation instructions

Maretron VMM6 Series user manual

Maretron

Maretron VMM6 Series user manual

CTC Union JB220 Series product manual

CTC Union

CTC Union JB220 Series product manual

Planet Networking & Communication WGSD-10020HP user manual

Planet Networking & Communication

Planet Networking & Communication WGSD-10020HP user manual

NuTone LP510R quick start guide

NuTone

NuTone LP510R quick start guide

socomec SIRCO MOT AT instruction manual

socomec

socomec SIRCO MOT AT instruction manual

Linksys EZXS55W - EtherFast 10/100 Workgroup Switch Quick installation

Linksys

Linksys EZXS55W - EtherFast 10/100 Workgroup Switch Quick installation

AFi MXR4-1000TX instruction manual

AFi

AFi MXR4-1000TX instruction manual

Samlexpower STS-30 owner's manual

Samlexpower

Samlexpower STS-30 owner's manual

GESTRA TRS 5-6 installation instructions

GESTRA

GESTRA TRS 5-6 installation instructions

FIBARO Smart Module operating manual

FIBARO

FIBARO Smart Module operating manual

TechLogix Network TL-CAV-01-HD user manual

TechLogix Network

TechLogix Network TL-CAV-01-HD user manual

manuals.online logo
manuals.online logoBrands
  • About & Mission
  • Contact us
  • Privacy Policy
  • Terms and Conditions

Copyright 2025 Manuals.Online. All Rights Reserved.