manuals.online logo
Brands
  1. Home
  2. •
  3. Brands
  4. •
  5. Exsys
  6. •
  7. Switch
  8. •
  9. Exsys EX-11217HMVS User manual

Exsys EX-11217HMVS User manual

651
BESCHREIBUNG & TECHNISCHE DATEN
AUFBAU
Anleitung
Vers. 1.0 / 15.09.22
EX-11217HMVS
Kompatibilität: USB 1.1, 2.0 & 3.2
Betriebssysteme: Alle Betriebssysteme
Anschlüsse: 7x USB 2.0 A-Buchse, 1x USB 2.0 B-Buchse, 1x DC-Buchse 5V,
1x Terminal Block 9-36V
Lieferumfang: EX-11217HMVS, Netzteil (5V/4A), USB 2.0 Kabel, DIN-Rail Kit,
Wandmontagehalterung, Anleitung
Zertifikate:
1x USB 2.0
Upstream B-Buchse 7x USB 2.0
Downstream A-Buchse
Betriebs LED
5V DC-Buchse für
im Lieferumfang
enthaltenen Netzteil
9-36V T-Block für optional
erhältliches Netzteil
HARDWARE INSTALLATION
DRIVER INSTALLATION
Because there are large differences between PC’s, we can give you only a general installation
guide for the EX-11217HMVS. Please refer your computer’s reference manual whenever in
doubt.
1. Install the EX-11217HMVS on a mounting rail by using the DIN-Rail Kit or on the wall using
the Wall Mounting Brackets.
2. Connect the USB 2.0 cable with the USB 2.0 Upstream B-Port at the EX-11217HMVS.
3. Now connect the power connector of the included power supply to the DC-Connector or the
optionally available power supply to the Terminal Block of the hub and insert the power plug of
the power supply into a power outlet.
4. Now connect the other end from the USB 2.0 cable (A-Plug) to the USB A-Port at your PC.
All Operating Systems
After the hardware installation the Operating System will recognize the EX-11217HMVS auto-
matically and install the drivers.
CHECK INSTALLED DRIVER
Open the >Device manager<. Now you should see at „USB-Controller“ the following new entry:
If you see this or a similar information the hub is installed correctly.
CONNECTORS
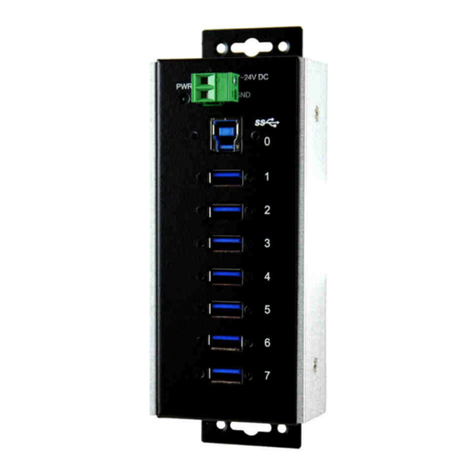
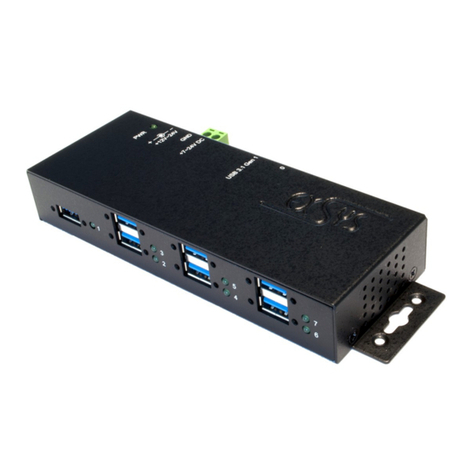
Der robuste und industrietaugliche EX-11217HMVS USB-Hub im Metallgehäuse ist mit sieben
USB-A 2.0 Buchsen ausgestattet. Er unterstützt alle USB-Anschlüsse von 1.1 bis 3.2. Jede USB-
Buchse an der EX-11217HMVS ist zusätzlich verschraubbar. Durch die Stromversorgung über die
DC-Buchse oder den Terminal Block können an jedem USB-Port 500mA zur Verfügung gestellt
werden. Der USB 2.0 Bus unterstützt optimal die Leistung des schnellen Genesys Chipsatz. Der
EX-11217HMVS gewährleistet so eine sichere Datenübertragung und exzellente Performance von
bis zu 480Mbit/s. Er unterstützt nur den Self-Powered Modus und somit ist es zwingend erforder-
lich ein externes Netzteil anzuschließen. Zusätzlich ist der EX-11217HMVS mit einem 15KV ESD
Überspannungsschutz ausgestattet. Der EX-11217HMVS unterstützt die Norm IP30. Im Lieferum-
fang ist ein DIN-Rail Kit für die Installation auf einer Tragschiene und Wandmontagehalterungen für
eine Montage an eine Wand enthalten. Das DIN-Rail Kit wird mit zwei Schrauben auf der Rückseite
festgeschraubt. Die Wandmontagehalterungen können ohne Schrauben an den Seiten des EX-
11217HMVS befestigt werden.
Switzerland:
EXSYS Vertriebs GmbH
Dübendorfstrasse 17
8602 Wangen
www.exsys.ch
Germany:
EXSYS Vertriebs GmbH
Industriestrasse 8
61449 Steinbach
www.exsys.de
USB 2.0 B-Port:
USB 2.0 A-Port:
5V DC-Connector:
ATTENTION!
Only for use with included power supply or another
compliant power supply!
- +
9V to 36V T-Block:
ATTENTION!
Please pay attention to the correct polarity!
Never connect the power supply to the terminal block
while it is switched on!
+V -V
USB 2.0 A-Port
Pin Signal Pin Signal
1VCC 3DATA+
2DATA- 4GND
USB 2.0 B-Port
Pin Signal Pin Signal
1VCC 3DATA+
2DATA- 4GND
Mounting of the DIN-Rail Kit with
two screws on the rear side Mounting the Wall Mounting Bracket
on the sides
234
USB 2.0 B-Buchse:
HARDWARE INSTALLATION
TREIBER INSTALLATION
Beachten Sie bitte die folgenden Installationshinweise. Da es große Unterschiede zwischen
PC‘s gibt, können wir Ihnen nur eine generelle Anleitung zum Anschluss des EX-11217HMVS
geben. Bei Unklarheiten halten Sie sich bitte an die Bedienungsanleitung Ihres Computersys-
tems.
1. Installieren Sie den EX-11217HMVS mit dem DIN-Rail Kit auf eine Tragschiene oder mit
den Wandmontagehalterungen an die Wand.
2. Verbinden Sie das mitgelieferte USB 2.0 Kabel mit dem USB 2.0 Upstream B-Anschluss
des Hubs.
3. Schließen Sie jetzt den Stromanschluss des im Lieferumfang enthaltenen Netzteils an die DC-
Buchse oder des optional erhältlichen Netzteils an den Terminal Block des Hubs an und
stecken Sie den Netzsteckers des Netzteils in eine Steckdose.
4. Verbinden Sie nun das andere Ende (A-Anschluss) des mitgelieferten USB 2.0 Kabels mit der
USB A-Buchse an Ihrem PC.
Alle Betriebssysteme
Nach Abschluss der Hardwareinstallation erkennt das Betriebssystem den EX-11217HMVS
automatisch und installiert diesen.
ÜBERPRÜFEN DES INSTALLIERTEN TREIBER
Öffnen Sie den >Geräte-Manager<. Jetzt müssten Sie unter „USB-Controller“ folgende
Einträge sehen:
Ist dieser oder ein ähnlicher Eintrag vorhanden, ist der USB Hub richtig installiert.
USB 2.0 A-Buchse:
ANSCHLÜSSE
5V DC-Buchse:
ACHTUNG!
Nur zur Verwendung mit im Lieferumfang enthaltenen
Netzteil oder einem anderem konformen Netzteil!
Montage des DIN-Rail Kit mit
zwei Schrauben an der Rückseite Montage der Wandmontagehalterung
an den Seiten
DESCRIPTION & TECNICAL INFORMATION
LAYOUT
Manual
Vers. 1.0 / 15.09.22
EX-11217HMVS
Compatibility: USB 1.1, 2.0 & 3.2
Operating System: All Operating Systems
Connectors: 7x USB 2.0 A-Port, 1x USB 2.0 B-Port, 1x DC-Connector 5V,
1x Terminal Block 9-36V
Extent of Delivery: EX-11217HMVS, Power Supply (5V/4A), USB 2.0 Cable,
DIN-Rail Kit, Wall Mounting Brackets, Manual
Certificates:
- +
9V bis 36V T-Block:
ACHTUNG!
Bitte auf die richtige Polarität achten!
Netzteil nie eingeschaltet mit dem Terminal Block
verbinden!
+V -V
Schweiz:
EXSYS Vertriebs GmbH
Dübendorfstrasse 17
8602 Wangen
www.exsys.ch
Deutschland:
EXSYS Vertriebs GmbH
Industriestrasse 8
61449 Steinbach
www.exsys.de
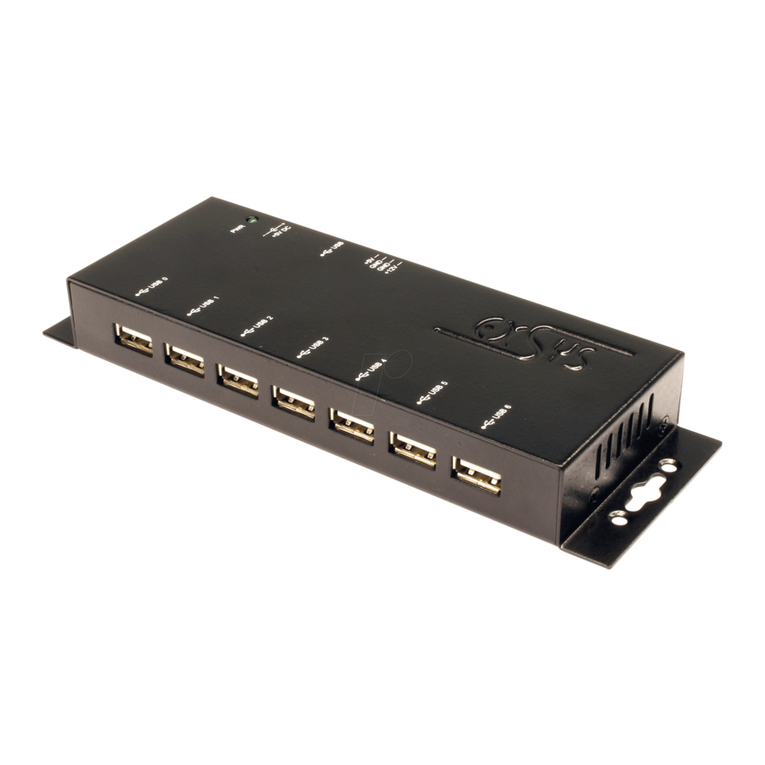
The rugged and industrial grade EX-11217HMVS USB hub in metal housing is equipped with
seven USB-A 2.0 ports. It supports all USB ports from 1.1 to 3.2 and can provide 500mA to
each USB port by powering via DC-Connector or Terminal Block. Each USB port on the EX-
11217HMVS is additionally screwable. The USB 2.0 bus optimally supports the performance of
the fast Genesys chipset. The EX-11217HMVS thus ensures secure data transfer and excellent
performance of up to 480Mbps. The EX-11217HMVS supports only Self-Powered mode and
thus it is mandatory to connect an external power supply. In addition, the EX-11217HMVS is
equipped with a 15KV ESD surge protection. The EX-11217HMVS supports IP30 standard and
comes with a DIN-Rail kit for installation on a DIN-Rail and Wall Mounting Brackets for a mount-
ing on a wall. The DIN-Rail Kit is screwed tight with two screws on the back. The Wall Mounting
Brackets can be attached to the sides of the EX-11217HMVS without screws.
USB 2.0 A-Buchse
Pin Signal Pin Signal
1VCC 3DATA+
2DATA- 4GND
USB 2.0 B-Buchse
Pin Signal Pin Signal
1VCC 3DATA+
2DATA- 4GND
1x USB 2.0
Upstream B-Port 7x USB 2.0
Downstream A-Port
Power LED
9-36V T-Block for optional
Power Supply
5V DC-Connector for
Power Supply which is
included in the delivery
Other Exsys Switch manuals

Exsys EX-1171 User manual

Exsys

Exsys EX-1171 User manual

Exsys EX-1187HMVS User manual

Exsys

Exsys EX-1187HMVS User manual

Exsys EX-1186HMVS-2 User manual

Exsys

Exsys EX-1186HMVS-2 User manual

Exsys EX-1181HMS User manual

Exsys

Exsys EX-1181HMS User manual

Exsys EX-1330M User manual

Exsys

Exsys EX-1330M User manual

Exsys EX-1181HMS-WT User manual

Exsys

Exsys EX-1181HMS-WT User manual

Exsys EX-1178-W User manual

Exsys

Exsys EX-1178-W User manual

Exsys EX-6128 User manual

Exsys

Exsys EX-6128 User manual

Exsys EX-6685HMV User manual

Exsys

Exsys EX-6685HMV User manual

Exsys EX-1112HMS User manual

Exsys

Exsys EX-1112HMS User manual

Exsys EX-1144HMVS User manual

Exsys

Exsys EX-1144HMVS User manual

Exsys EX-1113HMS User manual

Exsys

Exsys EX-1113HMS User manual

Exsys EX-1250V User manual

Exsys

Exsys EX-1250V User manual

Exsys EX-1185HMVS-WT User manual

Exsys

Exsys EX-1185HMVS-WT User manual

Exsys EX-1181HMS User manual

Exsys

Exsys EX-1181HMS User manual

Exsys EX-1137 User manual

Exsys

Exsys EX-1137 User manual

Exsys EX-1144HMVS User manual

Exsys

Exsys EX-1144HMVS User manual

Exsys EX-1247HMVS User manual

Exsys

Exsys EX-1247HMVS User manual

Exsys EX-1183HMVS User manual

Exsys

Exsys EX-1183HMVS User manual

Exsys EX-1184HMV User manual

Exsys

Exsys EX-1184HMV User manual

Exsys EX-1116HMVS User manual

Exsys

Exsys EX-1116HMVS User manual

Exsys EX-1189HMVS-2 User manual

Exsys

Exsys EX-1189HMVS-2 User manual

Exsys EX-1163HMS-WT User manual

Exsys

Exsys EX-1163HMS-WT User manual

Exsys EX-1163HM User manual

Exsys

Exsys EX-1163HM User manual

Popular Switch manuals by other brands

Austin Hughes Electronics CyberView M-IP1614 Specifications

Austin Hughes Electronics

Austin Hughes Electronics CyberView M-IP1614 Specifications

ETAS ES600.2 user guide

ETAS

ETAS ES600.2 user guide

NETGEAR GSM712 installation guide

NETGEAR

NETGEAR GSM712 installation guide

Cisco C9200L-24PXG-2Y-A installation guide

Cisco

Cisco C9200L-24PXG-2Y-A installation guide

Dell S4148FE installation guide

Dell

Dell S4148FE installation guide

LEGRAND Pass & Seymour RRW600U instructions

LEGRAND

LEGRAND Pass & Seymour RRW600U instructions

Panasonic PN28058 Operation manual for cli

Panasonic

Panasonic PN28058 Operation manual for cli

StarTech.com SV431DPUA2 user manual

StarTech.com

StarTech.com SV431DPUA2 user manual

Autonics BEN Series product manual

Autonics

Autonics BEN Series product manual

CAMBRIONIX PP8S user manual

CAMBRIONIX

CAMBRIONIX PP8S user manual

Avaya 8800 Series installation guide

Avaya

Avaya 8800 Series installation guide

urmet domus GROTHE MISTRAL SE06 Instructions for installation and operation

urmet domus

urmet domus GROTHE MISTRAL SE06 Instructions for installation and operation

S+S Regeltechnik PREMASREG 716x Series Operating Instructions, Mounting & Installation

S+S Regeltechnik

S+S Regeltechnik PREMASREG 716x Series Operating Instructions, Mounting & Installation

Moxa Technologies NSwitch Outdoors user manual

Moxa Technologies

Moxa Technologies NSwitch Outdoors user manual

Juniper QFX10008 quick start guide

Juniper

Juniper QFX10008 quick start guide

TRENDnet TE100-S2424V Specifications

TRENDnet

TRENDnet TE100-S2424V Specifications

Zte ZXR10 2900E Series Command reference

Zte

Zte ZXR10 2900E Series Command reference

Intellinet 561204 Quick instruction guide

Intellinet

Intellinet 561204 Quick instruction guide

manuals.online logo
manuals.online logoBrands
  • About & Mission
  • Contact us
  • Privacy Policy
  • Terms and Conditions

Copyright 2025 Manuals.Online. All Rights Reserved.