manuals.online logo
Brands
  1. Home
  2. •
  3. Brands
  4. •
  5. Exsys
  6. •
  7. Switch
  8. •
  9. Exsys EX-1198VS User manual

Exsys EX-1198VS User manual

651
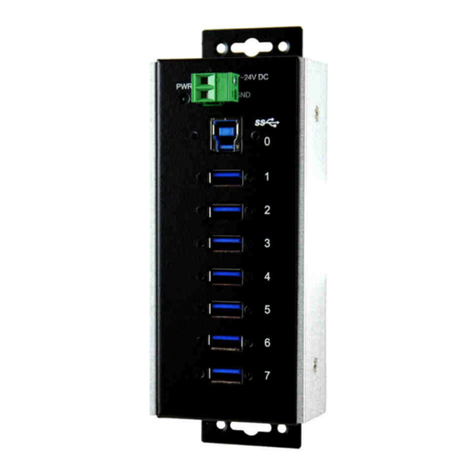
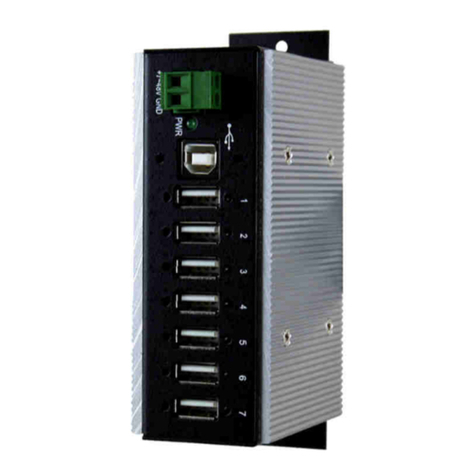
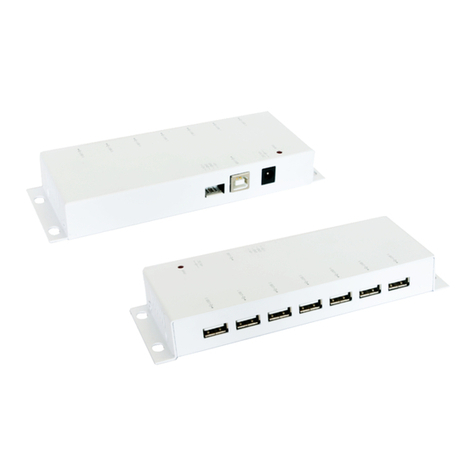
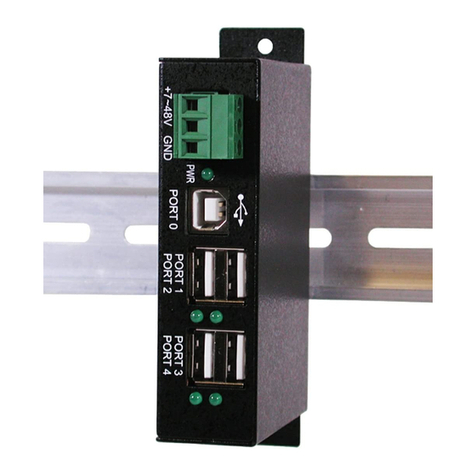
Die EX-1198VS ist ein USB 3.0/3.1(Gen1) HUB für bis z 7 Endgeräte mit 15KV ESD Über-
spann ngs-Sch tz. Der H b ist mit fünf USB 3.0/3.1(Gen1) A-B chsen sowie zwei USB 3.0/3.1
(Gen1) C-B chsen für Endgeräte nd eine USB 3.0/3.1(Gen1) C-B chse für den Anschl ss an
den PC a sgestattet. Die EX-1198VS nterstützt alle USB Anschlüsse von 2.0, 3.0 & 3.1. Über
die externe Stromversorg ng per Netzteil können an jedem Port 900mA z r Verfüg ng gestellt
werden. Die EX-1198VS gewährleistet so eine sichere Datenübertrag ng nd exzellente Perfor-
mance von bis z 5Gbit pro Sek nde! Die EX-1198VS nterstützt den Self Power nd B s
Power Mod s. Z sätzlich ist die EX-1198VS mit einem USB Power Überspann ngssch tz
a sgestattet. Die EX-1198VS kann problemlos mit der im Liefer mfang enthaltenen Wand
Montage Halter ng an die Wand installiert werden. Des weiteren besitzt die EX-1198VS ver-
schra bbare USB 3.0/3.1(Gen1) Anschlüsse.
ANSCHLÜSSE
BESCHREIBUNG & TECHNISCHE DATEN
AUFBAU
Anleit ng
Vers. 1.0 / 20.06.17
EX-1198VS
Kompatibilität: USB 2.0, 3.0 & 3.1
Betriebssysteme: Alle Betriebssysteme
Anschlüsse: 5x USB 3.1(Gen1) A-B chse, 3x USB 3.1(Gen1) C-B chse
1x Terminal-Block 7V-24V, 1x DC B chse 7-24V
Lieferumfang: EX-1198VS, Anleitung, USB 3.1(Gen1) Ka el, Netzteil,
Wand Montage Halterung
Zertifikate: CE / FCC / RoHS / WEEE DE97424562 / WHQL
+7V - 24V T-Block:
+7V - 24V GND (Ground)
ACHTUNG!!!
Schließen Sie niemals Strom an Ground an,
dadurch kann Ihre Hardware zerstört werden!!!
1x USB 3.0/3.1(Gen1)
Upstream C-B chse
(verschra bbar)
5x USB 3.0/3.1(Gen1)
Downstream A-B chse
Betriebs LED
2x USB 3.0/3.1(Gen1)
Downstream C-B chse
7-24V DC Anschl ss für
beiliegendes Netzteil 7-24V T-Block für optionales
externes Netzteil
HARDWARE INSTALLATION
Beca se there are large differences between PC’s, we can give yo only a general installation
g ide for the EX-1198VS. Please refer yo r comp ter’s reference man al whenever in do bt.
1. Install the EX-1198VS to the wall with the Wall Mo nting Kit.
2. Connect the USB cable to the USB C-Port at the H b.
3. Connect the incl des power s pply to the DC Connector or connect the optional power
s pply to the Terminal Block to the H b.
4. Now connect the other end from the USB cable (C-Pl g) to the C-Port at yo r PC.
Attention!
Never plug in with
force or in wrong
direction.
USB 3.1 (Gen1) A-Port:
CONNECTORS DRIVER INSTALLATION
CLEANING
For cleaning please se only a dry fl ff less cloth and remove the dirt with gently press re. In
the area of the connectors please make s re that no fibres from the cloth remain in the connect-
ors. Attention! Never use a moist or wet cloth for cleaning!
Note!
By dual assignment of the pins, the USB Type-C plug can e plugged into the port on
oth sides.
USB 3.1 (Gen1) C-Port:
D+D-
StdB_SSTX+
StdB_SSTX -
StdB_SSTX+
StdB_SSTX -
GND_DRAIN
GNDVCC
All OS
After the hardware installation, the operating system will recognize the device a tomatically and
install the drivers.
CHECK INSTALLED DRIVER:
Open the >Device manager<. Now yo sho ld see at „USB-Controller“ the following new entry:
If yo see this or a similar information the device is installed correctly.
ATTENTION!!!
Use only with power supply which is included in delivery!
7-24V Connector:
234
HARDWARE INSTALLATION
Beachten Sie bitte die folgenden Installationshinweise. Da es große Unterschiede zwischen
PC‘s gibt, können wir Ihnen n r eine generelle Anleit ng z m Einba der EX-1198VS geben.
Bei Unklarheiten halten Sie sich bitte an die Bedien ngsanleit ng Ihres Comp tersystems.
1. Installieren Sie die EX-1198VS an die Wand mit der mitgelieferten Wand Montage Halte-
r ng.
2. Verbinden Sie das mitgelieferte USB 3.1(Gen1) Kabel mit dem USB 3.0/3.1(Gen1) Upstream
C-Anschl ss des H bs.
3. Schließen Sie jetzt den Stromanschl ss des mitgelieferten Netzteils an die DC B chse an
oder schließen Sie das optionale Netzteile an den Terminal Block des H bs an nd stecken
Sie den Netzstecker des Netzteils in eine Steckdose.
4. Verbinden Sie n n das andere Ende (C-Anschl ss) des mitgelieferten USB 3.0/3.1(Gen1)
Kabels mit der C-B chse an Ihrem PC.
Achtung!
Stecker niemals
umgekehrt oder mit
Gewalt einstecken.
USB 3.1 (Gen1) A-Buchse:
ANSCHLÜSSE TREIBER INSTALLATION
REINIGUNG
Z r Reinig ng des Gerätes verwenden Sie bitte a sschließlich ein trockenes nicht faserndes
T ch nd entfernen Sie die Verschm tz ng mit leichtem Dr ck. Im Bereich der Anschlüsse bitte
dara f Achten, dass keine Fasern des T chs in der B chse hinterlassen werden. Verwenden
Sie itte zu Reinigung in keinem Fall ein feuchtes oder nasses Tuch!
Hinweis!
Durch die Doppel elegung der Pins, kann der USB Typ-C Stecker eidseitig in die Buch-
se gesteckt werden.
USB 3.1 (Gen1) C-Buchse:
D+D-
StdB_SSTX+
StdB_SSTX -
StdB_SSTX+
StdB_SSTX -
GND_DRAIN
GNDVCC
Alle Betrie ssysteme
Nach Abschl ss der Hardware Installation erkennt das Betriebssystem den EX-1198VS a to-
matisch nd installiert diesen.
ÜBERPRÜFEN DES INSTALLIERTEN TREIBER:
Öffnen Sie den >Geräte-Manager<. Jetzt müssten Sie nter „USB-Controller“ folgenden Eintrag
sehen:
Ist dieser oder ein ähnlicher Eintrag vorhanden, ist die EX-1198VS richtig installiert.
ACHTUNG!!!
Nur zur Verwendung mit im Lieferumfang enthaltenem Netzteil!
7-24V Buchse:
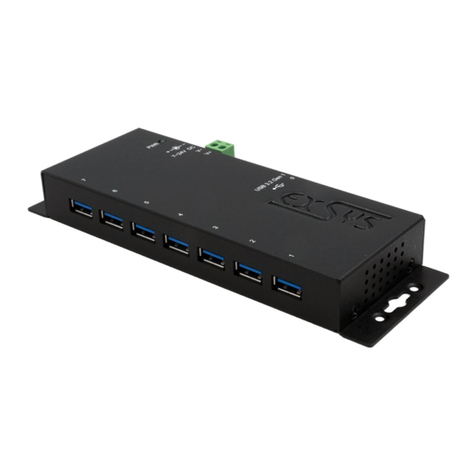
The EX-1198VS is a pl g & play high-speed USB 3.0/3.1(Gen1) h b for 7 devices with 15KV
ESD S rge Protection. The EX-1198VS provides five USB 3.0/3.1(Gen1) A-Ports and two USB
3.0/3.1(Gen1) C-Ports for USB devices and one Upstream USB 3.0/3.1(Gen1) C-Port to the PC.
It ses data transfer rates p to 5Gbit per second. The EX-1198VS design f lly tilize the
Renesas chipset, which represents the latest in high speed USB interface technology. It pro-
vides a sec re and very high data transfer on each single port. Via a external power s pply it is
possible to provide a maxim m of 900mA on each USB port. Additionally it provides b s pow-
ered or self powered mode. The EX-1198VS is additionally eq ipped with a USB peak power
s rge protection. The EX-1198VS can installed to a wall with the Wall Mo nting Kit. F rther-
more the EX-1198VS s pport screw able USB 3.0/3.1 (Gen1) ports.
CONNECTORS
DESCRIPTION & TECNICAL INFORMATION
LAYOUT
Man al
Vers. 1.0 / 20.06.17
EX-1198VS
Compatibility: USB 2.0, 3.0 & 3.1
Operating System: All Operating Systems
Connectors: 5x USB 3.0/3.1(Gen1) A-Port, 3x USB 3.0/3.1(Gen1) C-Port
1x Terminal-Block 7V-24V, 1x DC Connector 7-24V
Extent of delivery: EX-1198VS, Manual, USB 3.1(Gen1) Ca le, Power Supply,
Wall Mounting Kit
Certificates: CE / FCC / RoHS / WEEE DE97424562 / WHQL
+7V - 24V T-Block:
+7V - 24V GND (Ground)
ATTENTION!!
Never connect power to GND, it will destroy
your Hardware!!!
1x USB 3.0/3.1(Gen1)
Upstream C-Port
(screw lock)
5x USB 3.0/3.1(Gen1)
Downstream A-Port
Power LED
2x USB 3.0/3.1(Gen1)
Downstream C-Port
7-24V Connector for
incl ded power s pply 7-24V T-Block for optional
external power s pply
Other Exsys Switch manuals

Exsys EX-1187HMVS User manual

Exsys

Exsys EX-1187HMVS User manual

Exsys EX-1112HMS User manual

Exsys

Exsys EX-1112HMS User manual

Exsys EX-1144HMVS User manual

Exsys

Exsys EX-1144HMVS User manual

Exsys EX-1171 User manual

Exsys

Exsys EX-1171 User manual

Exsys EX-1504HMS User manual

Exsys

Exsys EX-1504HMS User manual

Exsys EX-1195HMS User manual

Exsys

Exsys EX-1195HMS User manual

Exsys EX-1144HMVS User manual

Exsys

Exsys EX-1144HMVS User manual

Exsys EX-1178-W User manual

Exsys

Exsys EX-1178-W User manual

Exsys EX-1170HMVS User manual

Exsys

Exsys EX-1170HMVS User manual

Exsys EX-1185HMVS User manual

Exsys

Exsys EX-1185HMVS User manual

Exsys EX-1116HMVS User manual

Exsys

Exsys EX-1116HMVS User manual

Exsys EX-1221HM User manual

Exsys

Exsys EX-1221HM User manual

Exsys EX-1183HMVS-W User manual

Exsys

Exsys EX-1183HMVS-W User manual

Exsys EX-1163HM User manual

Exsys

Exsys EX-1163HM User manual

Exsys EX-1181HMS User manual

Exsys

Exsys EX-1181HMS User manual

Exsys EX-1163 User manual

Exsys

Exsys EX-1163 User manual

Exsys EX-6128PoE User manual

Exsys

Exsys EX-6128PoE User manual

Exsys EX-1116HMVS User manual

Exsys

Exsys EX-1116HMVS User manual

Exsys EX-1184HMVS-2 User manual

Exsys

Exsys EX-1184HMVS-2 User manual

Exsys EX-1189HMVS-3 User manual

Exsys

Exsys EX-1189HMVS-3 User manual

Exsys EX-1240HMVS User manual

Exsys

Exsys EX-1240HMVS User manual

Exsys EX-1183HMVS-2 User manual

Exsys

Exsys EX-1183HMVS-2 User manual

Exsys EX-1163HMS-WT User manual

Exsys

Exsys EX-1163HMS-WT User manual

Exsys EX-6002 User manual

Exsys

Exsys EX-6002 User manual

Popular Switch manuals by other brands

OEZ BD250NE300 Instructions for use

OEZ

OEZ BD250NE300 Instructions for use

Key Digital Champion KD-2X1 operating instructions

Key Digital

Key Digital Champion KD-2X1 operating instructions

Videotec SW42K operating instructions

Videotec

Videotec SW42K operating instructions

3Com 3CRUS2475 24 Command reference guide

3Com

3Com 3CRUS2475 24 Command reference guide

KTI Networks KS-SOHO-5 user guide

KTI Networks

KTI Networks KS-SOHO-5 user guide

Lindy 38000 manual

Lindy

Lindy 38000 manual

Eaton Airflex TRS 3064 Installation and operation

Eaton

Eaton Airflex TRS 3064 Installation and operation

Cypress CH-2170 Operation manual

Cypress

Cypress CH-2170 Operation manual

BW SENSING DIS344 Series Technical manual

BW SENSING

BW SENSING DIS344 Series Technical manual

ZyXEL Communications GS1510 - brochure

ZyXEL Communications

ZyXEL Communications GS1510 - brochure

AETEK H40 Series Quick installation guide

AETEK

AETEK H40 Series Quick installation guide

Belkin F1U115E - AutoSwitch 2 Port Switch user guide

Belkin

Belkin F1U115E - AutoSwitch 2 Port Switch user guide

IBM 8271 F12 Quick installation guide

IBM

IBM 8271 F12 Quick installation guide

Moxa Technologies PT-7710 Series Quick installation guide

Moxa Technologies

Moxa Technologies PT-7710 Series Quick installation guide

Dell PowerEdge 2161DS Hardware user's guide

Dell

Dell PowerEdge 2161DS Hardware user's guide

DANLERS ControlZAPP CZ CEFL Installation notes

DANLERS

DANLERS ControlZAPP CZ CEFL Installation notes

Cabletron Systems SPECTRUM 1800 user guide

Cabletron Systems

Cabletron Systems SPECTRUM 1800 user guide

Broadcom Brocade G730 Hardware installation guide

Broadcom

Broadcom Brocade G730 Hardware installation guide

manuals.online logo
manuals.online logoBrands
  • About & Mission
  • Contact us
  • Privacy Policy
  • Terms and Conditions

Copyright 2025 Manuals.Online. All Rights Reserved.