8EZ LITE CRUISER ® DELUXE MODELS - LIGHTWEIGHT & FOLDABLE POWER CHAIR
WHAT’S IN THE BOX?
SINGLE WOOD CRATE
WOOD CRATE + BOXES
IF YOUR ENTIRE ORDER WAS SHIPPED IN JUST ONE PARCEL (CRATE ONLY)
Inside the crate you will nd a box containing some nishing parts that you’ll need
to complete the initial setup the device before rst use. Inside the battery storage
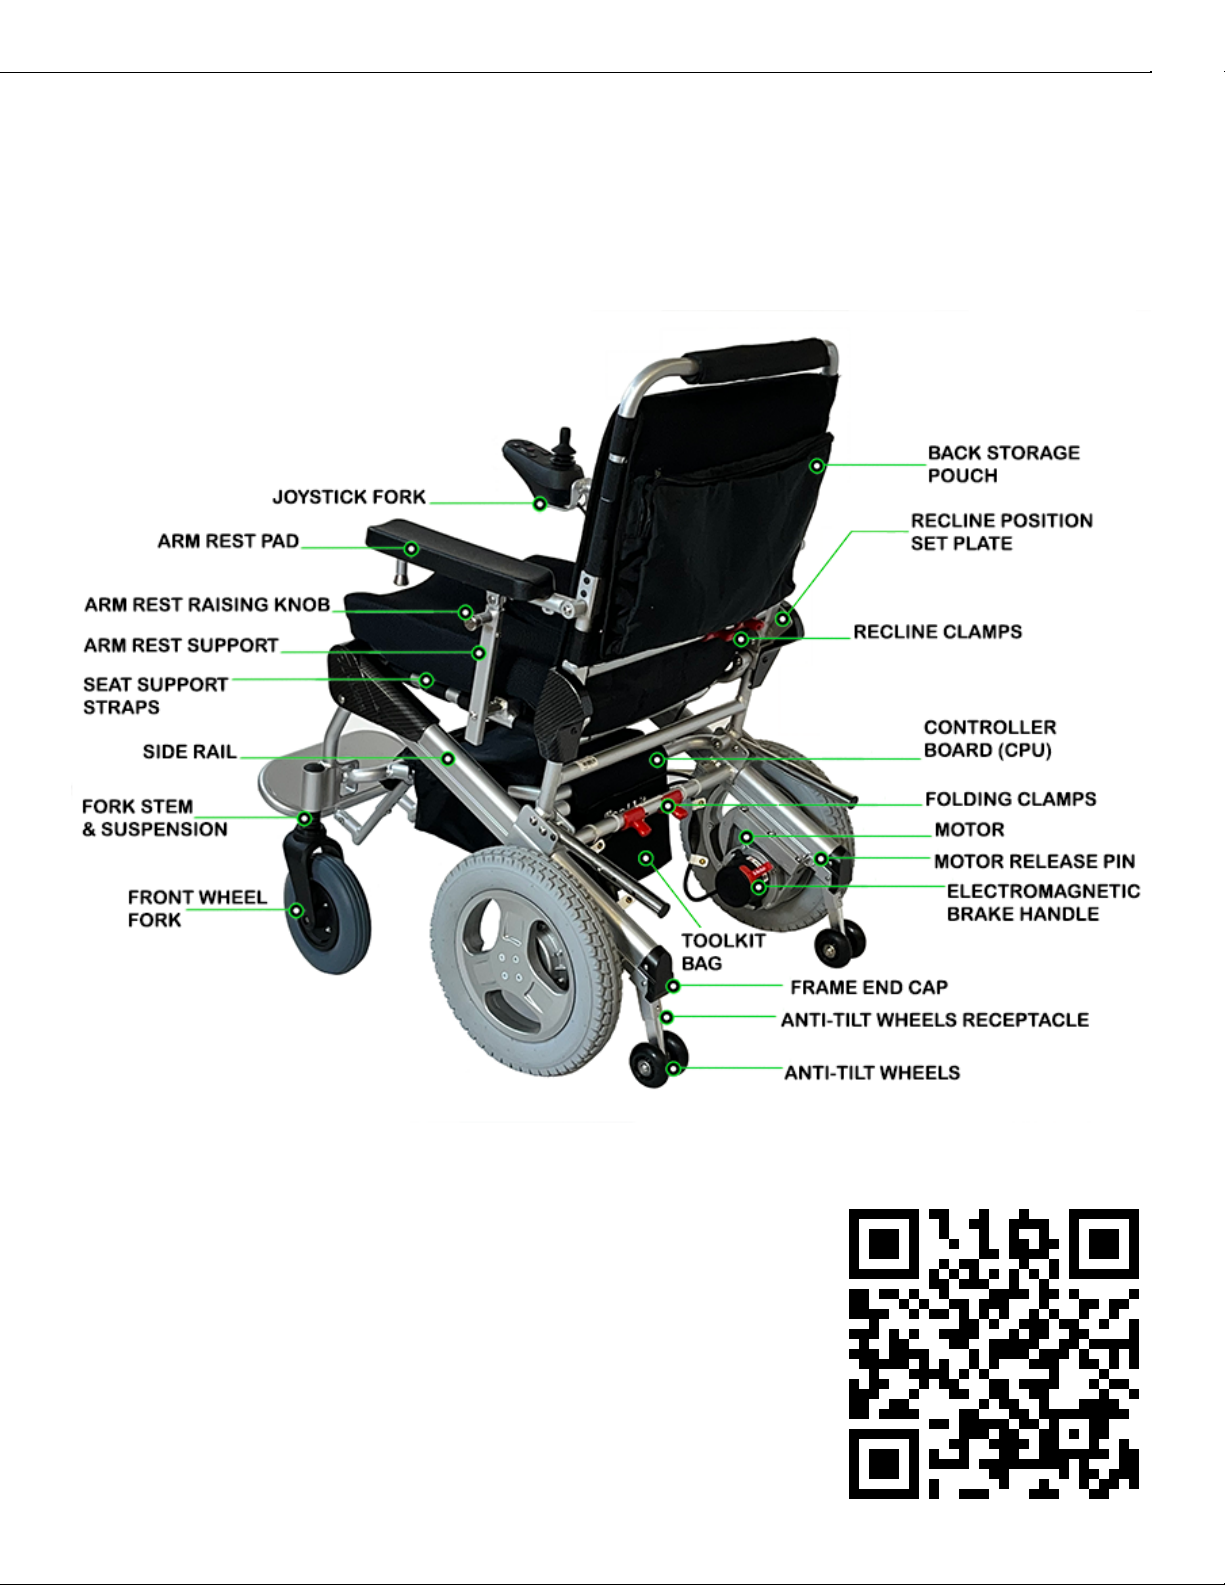
compartment (see Component Guide on page 4-5), you will nd the primary battery
& charger. Any accessories ordered will be inside the battery storage compartment or
inside the main wooden crate. Set those items aside, we will show you what to do with
them in the EZ Setup Guide on the following pages.
IF YOUR ORDER WAS SHIPPED IN MULTIPLE PARCELS (CRATE + BOXES)
As noted above, inside the crate you will nd a box containing some nising parts that
you’ll need to complete the initial setup the device before rst use. Inside the battery
storage compartment (see Component Guide on page 4-5), you will nd the primary
battery & charger. Set those items aside, we will show you what to do with them in the
EZ Setup Guide on the following pages.
Any additional batteries, chargers & any accessories (unless back-ordered) will be
located in any separate box(es). The size, weight & contents of any additional boxes
may vary depending on what you ordered. Be sure to refer to your order conrmation
email & notications to determine what items are in which package.
Refer to your shipment notications or order details (generally communicated to you via e-mail
or text messages) to see if your order was a single parcel, or split into separate shipments. This is
important to determine where your components are located.
In certain instances, generally if the device is drop shipped directly to you from our manufacturer
(the shipment originating overseas) the primary battery & charger and any accessories will be
packed and shipped separately, and the box containing the nishing parts will be in the battery
storage compartment. Shipments may arrive on different days depending on the shipping carrier,
shipping volume, customs clearance, general delivery delays, and other factors.