10
Transferring Patient from Chair,
Wheelchair, or Toilet
Step 1
Position Sling
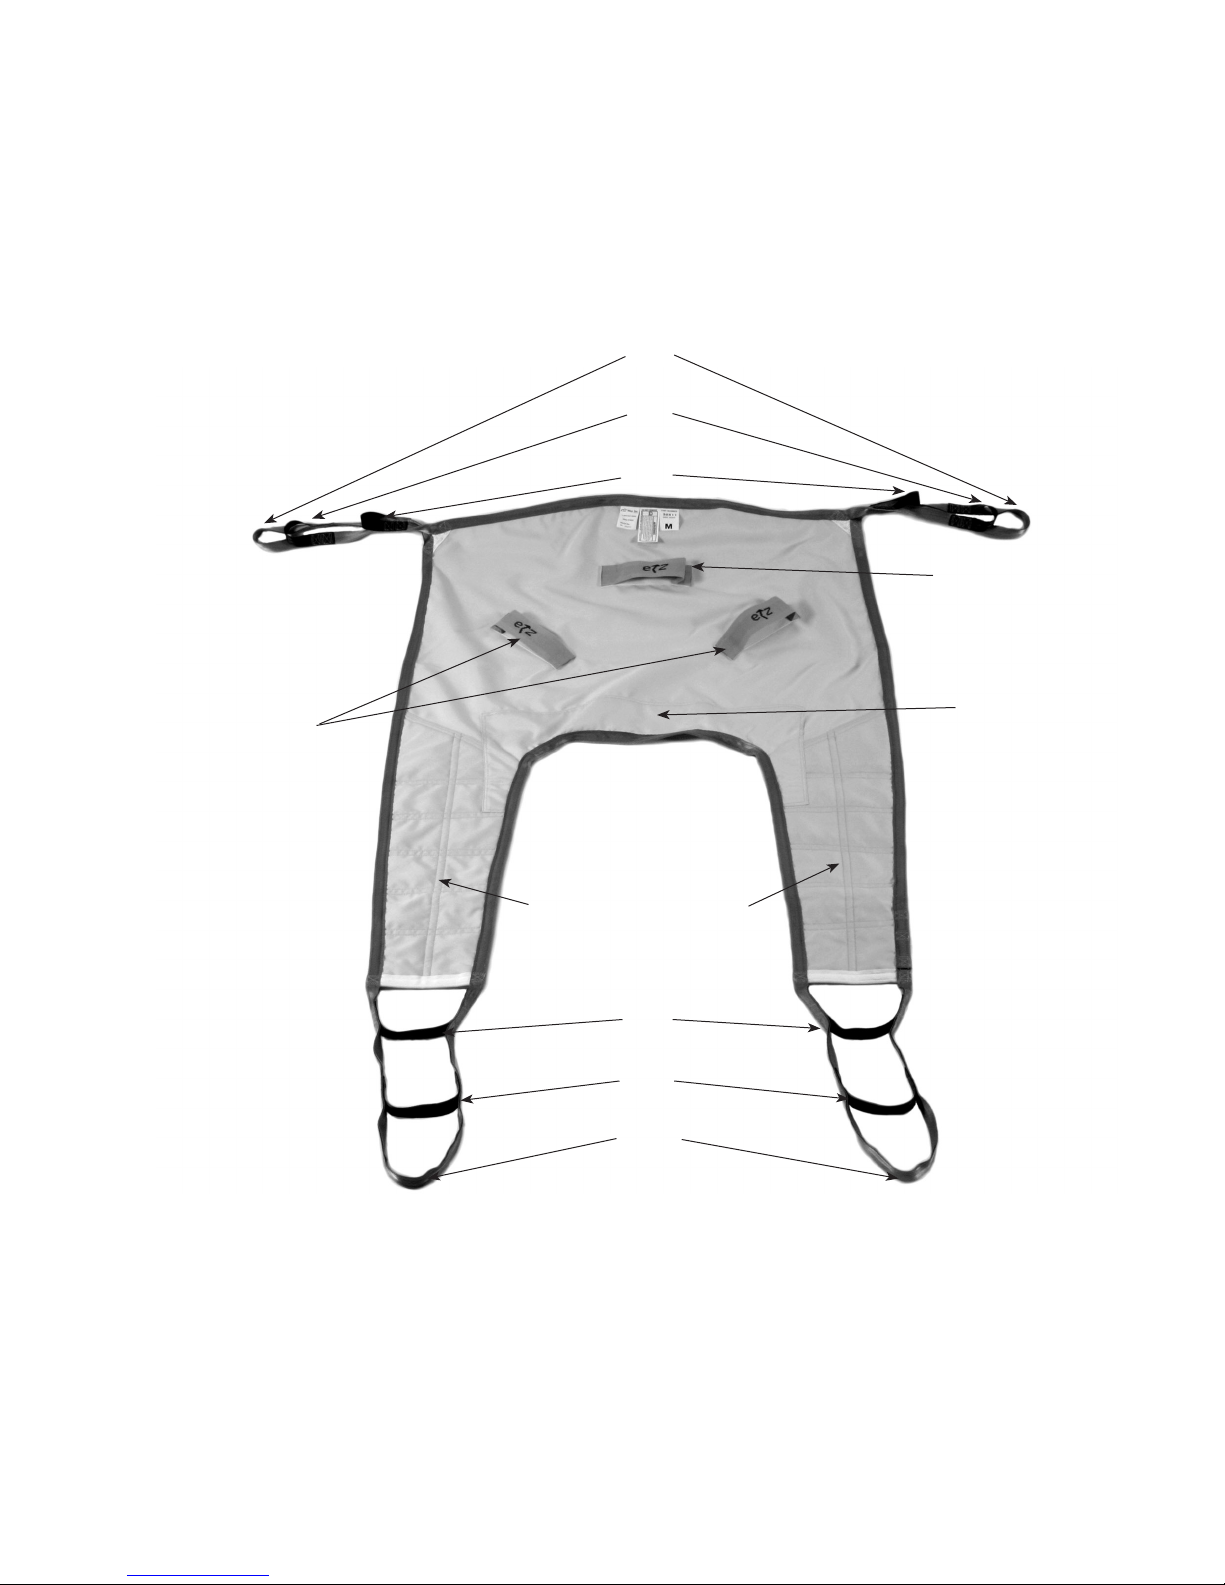
1) While standing in front of or beside the patient,
lean the patient forward several inches to place
the sling behind the patient.
2) With the sling handles and washing labels
toward the chair back, place the sling behind the
patient, keeping the center handle of the sling
centered on the patient’s spine. Make sure the
base of the sling touches the chair seat and is two
inches below the tailbone. Make sure the top of
the sling is above the patient’s shoulders and lean
the patient back in the chair. (See FIG. 13)
3) Pull the legs of the sling along inside of the chair.
4) To set the sling properly, you must do the
following: On the patient’s right side, position
your right hand between the patient’s hip and
the sling. With your fingers, push down on the
edge of the sling so that it touches the base of the
chair seat. Next, grasp the bottom edge of sling
leg with your left hand and pull with a
tug towards you.
5) Lift the patient’s left knee and with a tug, pull
the leg of the sling under the hip and thigh.
Place the excess sling length over the left thigh.
Repeat this procedure on the right side. This
procedure will ensure that the sling is under the
patient’s tail bone and behind his/her back, with the
patient’s weight evenly distributed on the sling.
NOTE: Make sure all the seams of the sling are
smooth underneath the patient.
Step 2
Moving the Lift to the Patient
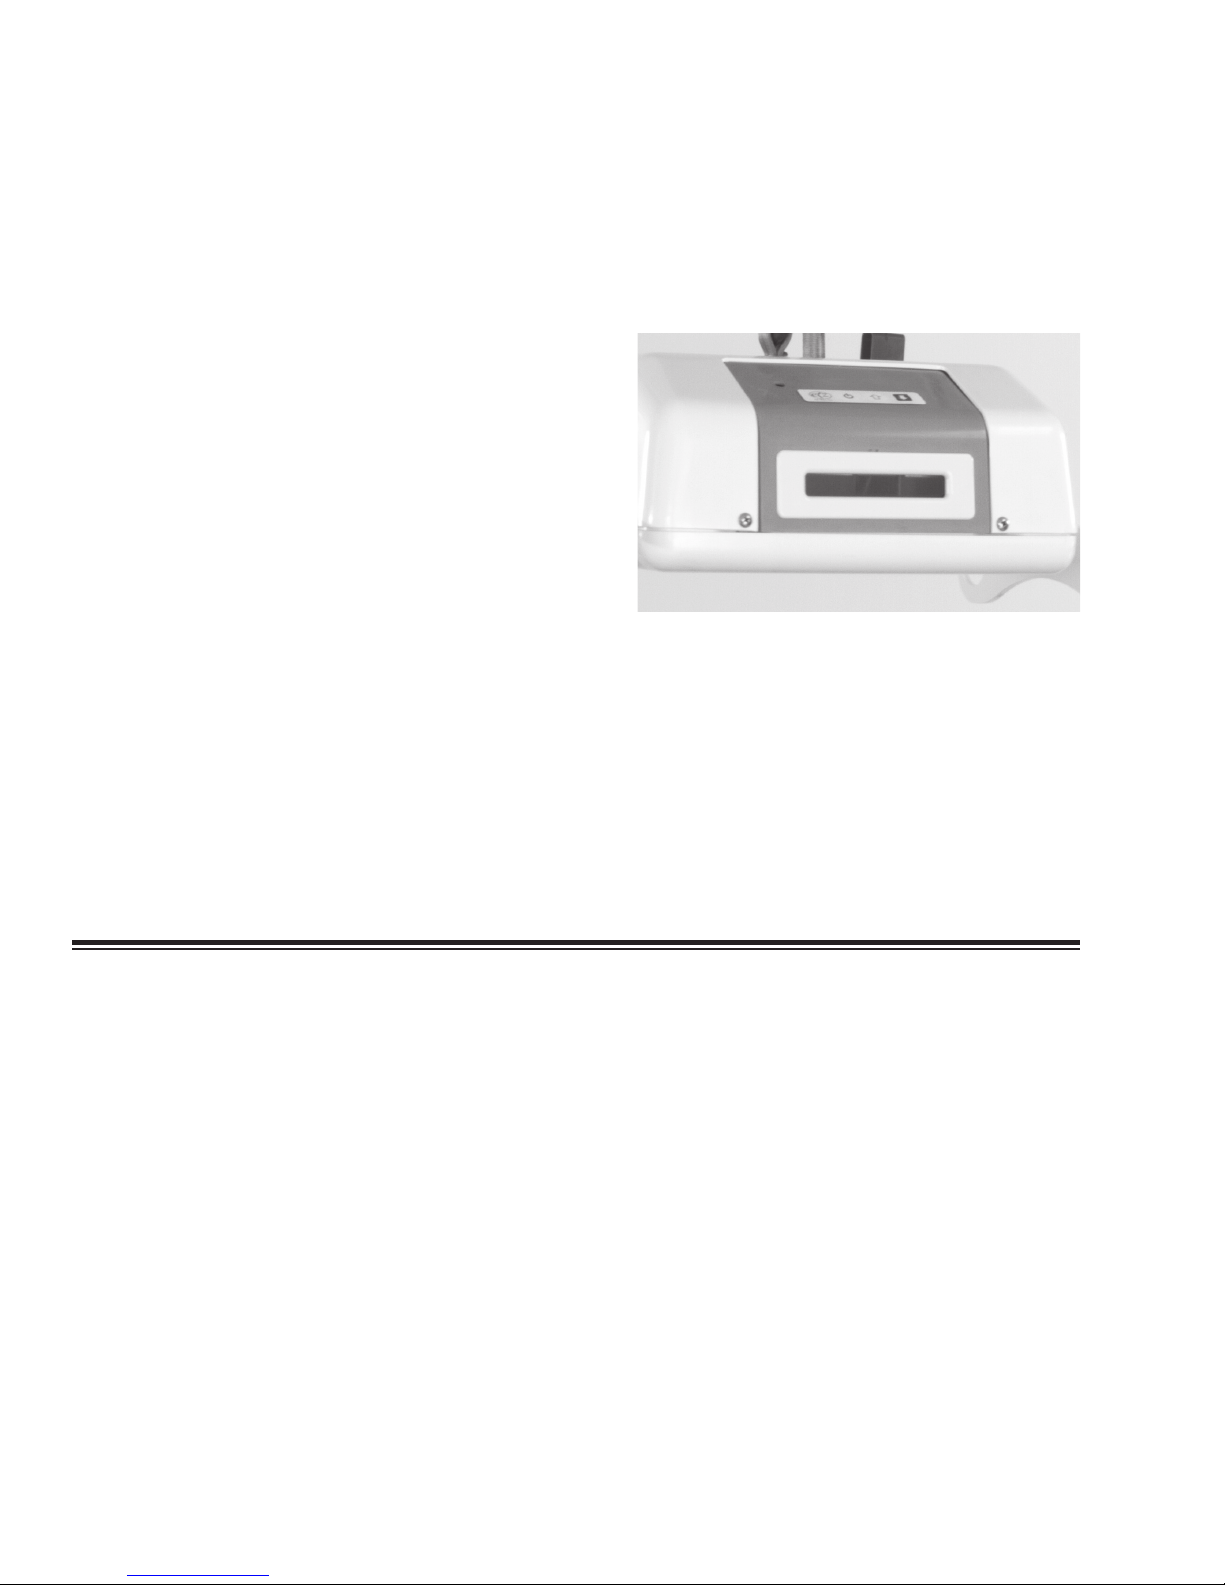
1) Move the EZ Way Ceiling Lift until the spreader
hanger bar is centered over the patient’s lap.
2) Using the Down button, lower the hanger bar so
it is level with the patients forehead and is
10 to 12 inches in front of the patient. The goal
is to provide for ease of sling attachment
(Step 3).
Important
Ensure that the lift is directly above patient prior
to attaching sling. Do not attach sling if lift is
misaligned to the front, back or either side.
Step 3
Attach Sling to the Lift
1) Turn hanger bar assembly so it is perpendicular to
the patient’s torso as shown in Figure 14.
2) Take the sling leg that is lying over the patient’s
left thigh and attach it to the right hook on the
hanger bar. (See FIG. 14)
3) Take the sling leg that is lying over the right
thigh and attach to the left hook on the hanger
bar, again using the same length and color of
loop strap on each side.
4) Attach the straps located near the patient’s
shoulders to the lift hanger bar hooks using
the same length and color of loop strap on each
side. Example: If you choose the shortest loop
on the strap for the right shoulder, you must use
the shortest loop on the strap for the left
shoulder. (1T on Sling Diagram)
Figure 13 - Place Sling Behind Patient
Figure 14 - Attaching the Sling