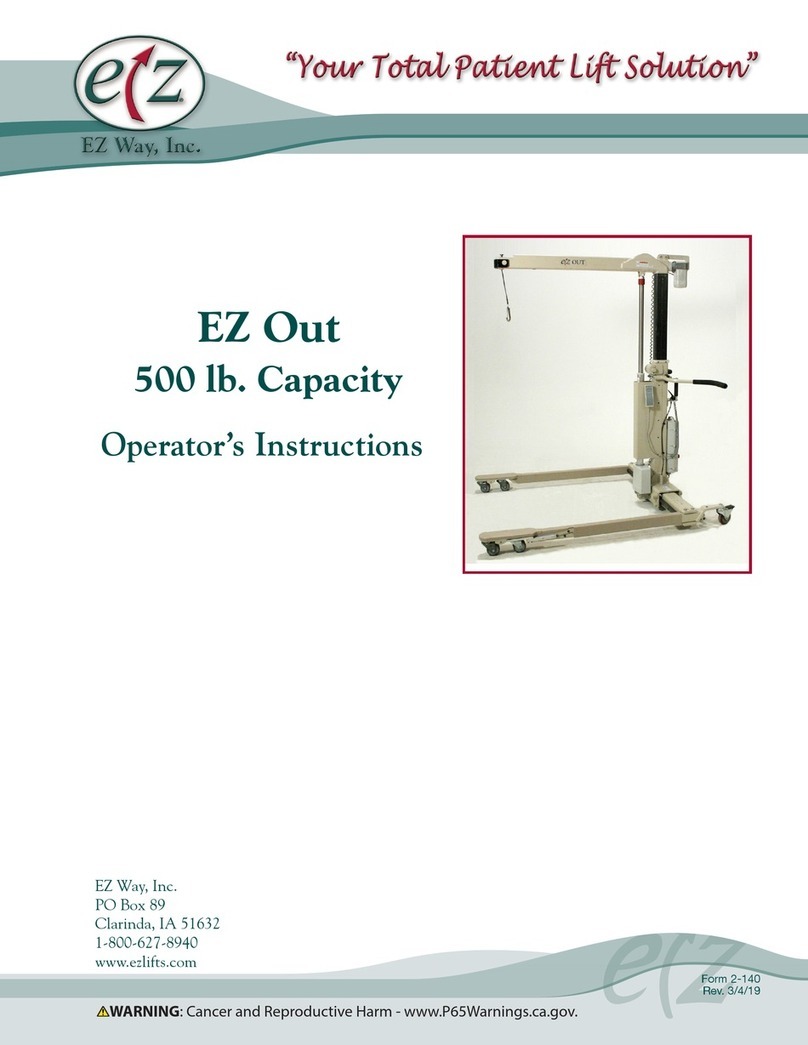
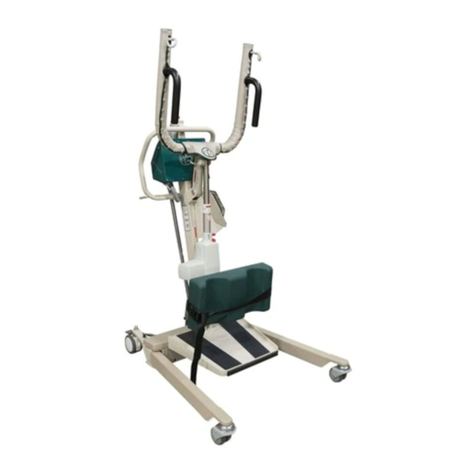
eZway Smart Lift Specifications

EZ Way Smart Lift®
500, 600 & 1,000 lb.
Capacities
Form 2-174
Rev. 8/10/18
Operator’s Instructions
EZ Way, Inc.
PO Box 89
Clarinda, IA 51632
1-800-627-8940
www.ezlifts.com
WARNING: Cancer and Reproductive Harm - www.P65Warnings.ca.gov.

Safety Notes
The EZ Way Smart Lift®was designed primarily to lift patients from the bed, chair , toilet and floor.
For safe operation of the EZ Way Smart Lift®, operators should watch the training video, read through this
manual, complete the competency checklist, and practice on fellow staff members before use with patients.
The EZ Way Smart Lift®comes in 500, 600, and 1,000 lb. weight capacities. All washable EZ Way slings are
capable of bearing a 1,000 lb. weight load, but must only be used to hold the amount of weight dictated by the EZ
Way Smart Lift®capacity. The maximum lifting capacity of each EZ Way Smart Lift®is located on the opposite
side of the lift mast from the battery receiver (See FIG. 1) by the model and serial number of the EZ Way Smart
Lift®and on the side of the control box. (See FIG. 2)
Do not modify the sling design in any way. Please make sure the accessories used with each lift are appropriate
for both the patient and the transferring situation and call EZ Way at 1-800-627-8940 if you have any questions.
EZ Way slings are made specifically for EZ Way Smart Lift®s. For the safety of the patient and caregiver, only EZ
Way slings should be used with EZ Way lifts.
The wheels of the EZ Way Smart Lift®should never be locked when lifting or lowering a patient.
The EZ Way Smart Lift®was designed to be operated safely by one caregiver. However, depending on the
situation, facility policy, and the patient’s condition, two caregivers may be necessary.
All EZ Way equipment must be maintained regularly by competent staff according to the maintenance checklist
provided.
These instructions should be kept with the EZ Way Smart Lift®at all times. Instructions can also be downloaded
from EZ Way’s website www.ezlifts.com.
2
Do not push, pull, or use the actuator as
a handle for moving the EZ Way Smart
Lift®. Do not cover the actuator. Inspect
regularly as directed in the maintenance
checklist.
WARNING:
For safe operation of the EZ Way Smart
Lift®, the lift must be used by trained
personnel in accordance with the
operator’s manual, video and training
checklist to avoid injury to patient.
WARNING:
Keep the area clear between the actuator
and the mast.
WARNING:
The EZ Way Smart Lift®was designed primarily to lift patients from the bed, chair , toilet and floor. The
maximum lifting capacity is located by the model and serial number of your lift. The EZ Way Smart Lift®was
designed to be operated safely by one person. However, with some patients it is best to use two people.
For safe operation of the EZ Way Smart Lift®, operators should watch the training video, read through this
manual, complete the competency checklist, and practice on fellow staff members before use with patients.

3
LCD Display
The EZ Way Smart Lift®includes a built-in operator interface, backlit LCD (liquid crystal display) and key
switches located on the front panel. This interface notifies the user of basic functions as well as provides
diagnostic feedback from the unit.
Basic Functions
The UP and DOWN keys located on the front panel, arrow keys on the hand control, and left and right toggle
switches located on the sides of the control box can all be used to operate the EZ Way Smart Lift®boom in an up
or down direction.
When an UP switch is pressed the display reads ‘UP’.
When a DOWN switch is pressed the display reads ‘DOWN’.
Battery Status
When the EZ Way Smart Lift®is sitting idle the display
shows the battery level. The battery level is shown as a bar
graph. The fewer the bars displayed the lower the battery
level.
When the battery level becomes low swap the battery with
a fully charged battery. Regular battery charging will extend
the life of your batteries.
LIMITED WARRANTY: Smart Lifts and Stands
Frame = 10 Years Components = 3 Years
Batteries = 12 Months Slings/Harnesses = 6 Months
EZ Products are manufactured with the highest quality components. EZ Way Inc. warrants that all new equipment, with normal use
and service, will be free from defects in material and workmanship for a period of (see above) from the date of purchase by the original
purchaser. Normal wear and tear, injury by natural forces, user neglect and purposeful destruction are not covered by this warranty.
Warranty service must be performed by the manufacturer at 710 E. Main St., Clarinda, Iowa., or by an authorized repair center at their
location. On occasion, EZ Way Inc. may authorize in-house repairs, but these repairs MUST be pre-approved to avoid invalidation of
the warranty. Services covered under warranty include any labor that takes place at EZ Way Inc. Cost of Labor incurred while installing
the warranty part at the place of ownership is not covered by this warranty. EZ Way Inc.’s obligation is limited to the replacement
of parts that have been returned and are determined by EZ Way Inc. to be defective. THE PROVISIONS OF THIS WARRANTY
CLAUSE ARE IN LIEU OF ALL OTHER WARRANTIES, EXPRESSED OR IMPLIED, AND OF ALL OTHER OBLIGATIONS
OR LIABILITIES ON EZ WAY INC.’S PART AND IT NEITHER ASSUMES OR AUTHORIZES ANY OTHER PERSON TO
ASSUME FOR EZ WAY INC. ANY OTHER LIABILITIES IN CONNECTION WITH THE SALE OF SAID ARTICLE. IN NO
EVENT SHALL EZ WAY INC. BE LIABLE FOR ANY SUBSEQUENTIAL OR SPECIAL DAMAGES. ANY MISUSE, IMPROPER
INSTALLATION OR TAMPERING SHALL VOID THIS WARRANTY. Your warranty was registered automatically by EZ Way Inc. at
time of purchase.

4
Down
Button
Boom
Legs
To operate the EZ Way Smart Lift®
follow the steps below:
Pre-operation check
Before operating the unit, complete a maintenance
safety check for loose nuts and bolts and damaged
parts. Also, ensure the sling is not ripped, frayed
or showing signs of wear. EZ Way recommends
all slings be replaced after one year, or at the first
sign of wear. If the unit fails to operate, contact
your maintenance person. If necessary, the
maintenance person can call our service department
at 1-800-627-8940. NOTE: It is helpful for the
maintenance person to be near the unit when
making the service call.
Insert battery
Insert a fully charged battery pack into the battery
receiver on the mast of the EZ Way Smart Lift®.
(See FIG. 1)
Turn unit on
Push the ON/OFF button. The EZ Way Smart
Lift®will display a greeting message while several
diagnostic functions are performed. The EZ Way
Smart Lift®has a built-in timer that automatically
shuts off the unit after a period of inactivity.
NOTE: Push the ON/OFF button to power off
the EZ Way Smart Lift®.
The EZ Way Smart Lift®is operational when the
battery charge level is showing on the screen.
(See FIG. 2)
Adjust the emergency stop button
The RED EMERGENCY STOP BUTTON must
be in the UP position. The unit will not operate if
the button is in the down position. If the button
is in the DOWN position, the screen will indicate
EMERGENCY STOP. Turn it in the direction of
the arrow on top of the button to release it.
(See FIG. 1)
Figure 1
Figure 2
Emergency Stop
Button
Toggle
Switches
Capacity
(not shown)
Up
Button
Display
Window
On/Off
Switch
Hanger Bar
Spreader
Sling
Hangers
Actuator
Mast
Capacity
(not shown) Sling
Bag
Battery
Pack
Battery
Receiver
Leg Spreader

5
Sling information and diagram
EZ Way Slings are designed to be applied or removed with a minimum amount of handling of the patient. As
patients do vary in size, shape, weight and temperament, these conditions must be taken into consideration
when deciding which EZ Way Sling is suitable for each patient’s needs. There are a variety of slings available in
various sizes. Please contact EZ Way with any questions regarding sling dimensions and sizes, or view them at
www.ezlifts.com
We have used the Medium Deluxe Sling throughout the manual because it is the most commonly used
sling. Wipeable and disposable slings are also available. To order slings call 1-800-627-8940.
1T – 1st Loop (shortest)
2T – 2nd Loop (middle)
3T – 3rd Loop (longest)
4 – Center Handle
5 – Side Handles
6L – Left Sling Leg
6R – Right Sling Leg
7 – Base of Sling
1B – 1st Loop (shortest)
2B – 2nd Loop (middle)
3B – 3rd Loop (longest)
3T
2T
1T
1B
2B
3B
6L 6R
4
57
Figure 3

6
Transferring patient from bed to
chair, wheelchair, or toilet
Step 1
Position sling under patient
1) Log roll the patient on his/her side away from
you. (See Figure 4)
2) Position the sling so the handles on the back of
the sling are facing the mattress. Tuck half of
sling underneath patient.
3) Using the center handle (4 on Figure 3 Sling
Diagram) as a guide, center the sling on the
patient’s spine with the base of the sling
approximately two inches below the base of the
tailbone.
4) Log roll patient in opposite direction and pull
rest of sling out the other side.
5) Lay patient on their back. Make sure the sling is
centered beneath the patient.
6) Lift patient’s left thigh and pull the left sling leg
(6L on Figure 3 Sling Diagram) of the sling
under patient’s thigh. Then place excess sling leg
over the top of the patient’s left thigh.
7) Repeat above step for right thigh. (See Figure 5)
NOTE: If the patient’s legs are extremely rigid, it
may work better to bring the left sling leg under
the right thigh and the right sling leg under the left
thigh instead of threading between the patient’s legs.
The patient must have good torso stability to use
this method and the caregiver must be sure that the
back of the sling is positioned properly behind the
patient’s back and under their tailbone to provide
support. (The top of the sling must reach just above
the patient’s shoulders and the base of the sling
should be 2 inches below their tailbone.)
Step 2
Moving the lift to the patient
1) Make sure there are no cords or other objects
near the path of the lift or under or near the bed
that could obstruct the wheels of the lift.
2) Do not lock the wheels of the EZ Way Smart
Lift®when lifting or transferring patients.
3) Move the EZ Way Smart Lift®until the tip of
the boom (green nose cone) is centered over the
patient’s torso.
4) Turn the hanger bar spreader so the two sling
hanger bars are parallel to the patient’s body and
the sides of the bed.
5) Using the “Down” button, lower the boom so
it is positioned a few inches over the body of the
patient. The goal is to provide for ease of sling
attachment (Step 3).
Step 3
Attaching the sling to the lift
1) Attach the loops nearest the patient’s
shoulders, to the hanger bar hooks of the lift
nearest each shoulder using the same length
and color of loop strap on each side. (See Figure
3 Sling Diagram)
2) Take the sling leg lying over the left leg, cross it
over and attach it on the hook of the hanger bar
located on the right side of the patient.
3) Next, take the sling leg lying over the right leg,
cross it over and attach it on the hook of the
hanger bar located on the left side of the patient
using the same length and color of loop strap on
each sling leg. (3B on Figure 3 Sling Diagram)
4) Make a final check of all four loop attachment
points to ensure each loop is sufficiently attached
to the respective hook of the hanger bars. Patient
is now ready to be lifted. (See Figure 6)
NOTE: If you have gone under both legs with the
sling legs for a rigid patient, bring the loops straight
up along the outside of the legs and hook on the
Figure 4 - Log roll patient
Figure 5 - Place sling leg over patient’s thigh

7
longest loop. (3B on Figure 3 Sling Diagram)
Crossing the legs as described in Step 3 is the most
recommended procedure; caregivers must assess the
condition of the patient to determine what method
is appropriate.
Step 4
Lifting the patient
1) Push the UP button on the hand control to
initiate the upward motion of the lift boom.
2) Continue the upward motion until there is
tension on the sling legs, making sure all the
loops on the sling are securely hooked on the
hanger bars.
3) Lift the patient’s knee and smooth out the sling
under each of the thighs, if necessary.
NOTE: For patients who have soft or delicate skin,
care must be taken to ensure the sling is smoothed
out along the thigh. There may be instances when
patients with extremely fragile skin will require a
different sling, such as a multipurpose sling.
4) Continue lifting the patient so he/she is just high
enough to clear the bed.
Step 5
Transferring the patient
1) Ensure there are no obstructions in the path of
travel.
2) Maneuver the lift away from the bed.
3) During transfer, do not roll lift over obstructions
or into objects that could create an imbalance
of the lift. Only use the lift operator’s handles
attached to the mast to maneuver the lift at all
times. Do not attempt to move the lift using the
boom.
WARNING: Do not push, pull or use the
actuator (motor) as a handle for moving the EZ
Way Smart Lift®.
WARNING: Do not place any objects around the
actuator (motor) or between the actuator and the
lift mast
Step 6
Lower patient into wheelchair, toilet or chair
ADJUST LIFT LEGS
Using the spreader bar, (See Figure 1), adjust the
legs of the lift to go around a wheelchair, toilet or
chair.
1) Position the wheelchair under the patient and
lock the wheels of the wheelchair. If transferring
the patient to a chair or toilet, position the
patient over the chair or toilet. Using the
handles located on the back of the sling, position
the patient so he/she is properly aligned to be
lowered onto the chair, toilet or wheelchair.
2) Push the DOWN button on the hand control.
3) Stand behind the patient and hold onto the
center handle located on the back of the sling.
When the patient is nearly seated, gently pull up
on the center handle to ensure the patient will
be seated in an upright position. (See Figure 7)
4) When the patient’s weight is supported by the
wheelchair, chair or toilet, continue lowering the
lift to release the tension on the loops.
5) Detach sling from hanger bar and move the lift
away from the patient.
Step 7
Remove sling
1) Gently lift the patient’s left knee, pulling the
sling legs out from underneath the patient’s
thigh. Continue on right knee.
2) Lean patient slightly forward and grasp the side
handles or the center handle, pulling the sling
out from behind the patient.
Figure 7 - Lowering into wheelchair
Figure 6 - Patient ready to be lifted

8
Transferring patient from chair,
wheelchair, or toilet
Step 1
Position sling
1) Lean the patient forward several inches to place
the sling behind the patient.
2) With the sling handles and washing labels
facing the chair back, place the sling behind the
patient, keeping the center handle of the sling
centered on the patient’s spine. Make sure the
base of the sling touches the chair seat and is two
inches below the tailbone. Make sure the top of
the sling is above the patient’s shoulders and lean
the patient back in the chair. (See Figure 8)
3) Pull the legs of the sling along inside of the chair.
4) To set the sling properly, you must do the
following: On the patient’s right side, position
your right hand between the patient’s hip and
the sling. With your fingers, push down on the
edge of the sling so it touches the base of the
chair seat. Next, grasp the bottom edge of sling
leg with your left hand and pull with a tug
towards you.
5) Lift the patient’s left knee and with a tug, pull
the leg of the sling under the hip and thigh.
Place the excess sling length over the left thigh.
Repeat this procedure on the right side. This
procedure will ensure the sling is under the
patient’s tail bone and behind his/her back, with
the patient’s weight evenly distributed on the sling.
NOTE: Make sure all seams of the sling are smooth
underneath the patient.
Step 2
Position EZ Way Smart Lift®
1) Make sure there are no cords or other objects
near the path of the lift or under or near the bed
that could obstruct the wheels of the lift.
2) Using the leg spreader bar, (See Figure 1), adjust
the legs of the lift to go around the wheelchair,
toilet or chair.
3) Do not lock the wheels of the EZ Way Smart
Lift®when lifting or transferring patients.
4) Turn the hanger bar assembly so the two hanger
bars are parallel to the patient’s body.
5) Using the “DOWN” button, lower the boom until
the tip of the boom (green nose cone) is in front
of the patient’s torso. The goal is to provide for
ease of sling attachment (Step 3).
Step 3
Attach sling to the lift
1) Take the sling leg that is lying over the patient’s
left thigh and attach it to the right hook on the
hanger bar. (See Figure 9)
2) Take the sling leg lying over the right thigh and
attach to the left hook on the hanger bar, again
using the same length and color of loop strap on
each side.
3) Attach the straps located near the patient’s
shoulders to the lift hanger bar hooks using
the same length and color of loop strap on each
side. Example: If you choose the shortest loop
on the strap for the right shoulder, you must use
the shortest loop on the strap for the left
shoulder. (1T on Figure 3 Sling Diagram)
Figure 8 - Place sling behind patient
Figure 9 - Attaching the sling

9
Step 4
Lifting the patient
1) Push the UP button on the hand control to
initiate the upward motion of the lift. Continue
the upward motion until there is tension on the
legs of the sling, making sure all the loops on
the sling are securely hooked on the hanger bars.
(See Figure 10)
2) Smooth the sling legs under the patient’s thighs
with a slight pull on the outside seam of the
sling legs, if necessary.
3) Lift the patient to the desired height (usually
2-3” above the chair).
Step 5
Transferring the patient
1) Ensure there are no obstructions in the path of
travel.
2) Pull or push the lift using the operator’s handles
on the lift mast. Maneuver the lift to a desired
location.
Step 6
Lower the patient onto bed
1) Raise or lower the patient to a height necessary
to clear the bed. Move the patient over the bed.
2) Push the DOWN button on the hand control.
3) When the patient’s weight is supported by the
bed continue lowering the lift to release the
tension on the loops. (See Figure 11)
4) Detach sling from the EZ Way Smart Lift®and
move the lift away from the patient.
Step 7
Remove sling
1) Gently lift the patient’s left knee, pulling the
sling legs out from underneath the patient’s
thigh. Continue on right knee.
2) To remove the sling from under the patient,
gently log roll the patient away from you, folding
and tucking the near half of the sling under the
patient. Log roll the patient in the opposite
direction, allowing you to free the sling from
beneath the patient. (See Figure 12)
Figure 10 - Lifting the patient
Figure 11 - Lowering to bed
Figure 12 - Remove sling

10
Transferring patient from floor
EZ Way strongly recommends two caregivers
complete the transfer when picking a patient up
from the floor. Place a pillow under the patient’s
head. Follow same procedure used when lifting
patient from bed (See page 6). Unless using an EZ
Way Sling with Head Support, you may want to
have a caregiver support the patient’s head as he/she
is raised, depending on his/her condition.
Step 1
Position lift
Lift patient’s legs, pushing lift forward.
Keep both legs together, laying the patient’s legs
over either side of the base of the EZ Way Smart
Lift®. Note: While the previous instruction is
the preferred patient positioning for picking up
from the floor, the patient’s legs may also straddle
the mast or the patient’s head may be inside the
base and legs with the patient’s legs positioned
outward. No matter which position the patient
is in, it’s important to ensure the nose cone is
centered directly above the patient’s chest when
conducting a lift. (See Figure 13)
Step 2
Attach sling
Follow same procedure used when lifting patient
from bed (See page 6). You will, however, have to
use the longest loops (3T) by the patient’s shoulders
and possibly the sling legs as well (3B).
Step 3
Lift patient
Follow same procedure used when lifting patient
from bed (See page 6). Unless using an EZ Sling
with Head Support, you may want to have a
caregiver support the patient’s head as he/she is
raised, depending on his/her condition.
Important: Before lifting, make sure the sling is
not snagged on any objects or beneath the casters
or legs of the lift. The sling should be free from
obstruction.
Step 4
Follow same procedures used when transferring
patient and when lowering patient to bed, chair or
wheelchair. (See pages 7 & 9)
Step 5
Follow same procedure used for removing sling.
(See pages 7 & 9)
Head Support Slings
Many sling styles are available with a head support
option for patients with little or no head control.
Multi-Purpose Slings
These slings are used primarily for above the knee
amputees and people with large thighs and delicate
skin.
Mesh Slings
All designs are available in mesh for bathing
purposes.
Turning and Repositioning Slings
Available in various styles and fabrics, these slings
are for use in turning patients from side-to-side or
repositioning patients in bed.
Wipeable Slings
These slings can be wiped down between patients
or each use.
Single Patient Disposable Slings
These slings are for single patient use and can be
used for a period of not more than 10 days; then
must be discarded. These slings are not washable
and have a maximum lifting capacity of 660 lbs.for
sizes S-XL and 1,100 lbs. for size XXL but must only
be used to hold the amount of weight dictated by the
lift capacity.
Belted Mesh Hygiene Slings
These slings can provide additional assistance in
toileting. They can only be used with patients with
upper body strength, good muscle tone, and good
torso stability.
Hip Slings
These slings are for use with patients who must
remain in a supine position during transfer, but
whose legs will flex at the knees.
Other specialty slings are also available. Please call
EZ Way at 1-800-627-8940 for details or check out
our website www.ezlifts.com.
Figure 13 - Nose cone positioning

11
Sling laundering instructions
EZ Way slings are designed and manufactured to
the highest possible performance specifications.
They are constructed of high quality, durable,
100% synthetic fabrics and have been individually
inspected before shipping to ensure the safety of
the product. However, water washing temperature,
detergents and disinfectants, patient incontinence,
frequency of use, types and weights of patients, etc.,
all have an impact on the life expectancy of each
product. Because of these factors, the continued
integrity of the product is not guaranteed. The user
must therefore examine the product to ensure its
integrity before each use.
EZ Way offers a 6-month warranty on slings and
harnesses and recommends replacement after one
year or if the sling or harness shows any sign of
damage or wear. All slings and harnesses, except
for single-patient disposable slings and harnesses,
are washable and are capable of bearing a 1,000
lb. weight load, but must only be used to hold
the amount of weight dictated by the lift or stand
capacity.
Users must accept full responsibility for checking
the condition of all slings and harnesses before each
and every use on a patient.
EZ Sling and Harness Laundering Instructions
To get the longest life out of your product:
1) Do not bleach.
2) To prevent stains from setting, rinse 5 minutes
in 80° – 100° F. Stains will set when temperature
is over 105° F.
3) Washing temp. 160° F. maximum.
4) RINSE THOROUGHLY in 100° F. If high
alkaline detergent (with pH greater than 11.0) is
used, rinse twice.
5) Tumble dry, temperature 100° F. maximum. High
heat will weaken the fabric.
6) Snap the buckle together before washing and
drying. This will prevent any damage to the
plastic buckle.
7) If available, use a laundry bag to wash and dry
the harness.
Note: Wipeable sling and harness cleaning
instructions are packaged with each sling/harness
or they are available via the EZ Way website
www.ezlifts.com.
Charging the EZ Way Smart Lift®
battery
TWO battery packs and a UL Approved remote
charging unit are included with each EZ Way Smart
Lift®(See FIG. 14).
NOTE: When switching battery packs, always
remember to place the discharged battery pack into
the charging unit so it will be fully charged and
ready for use.
If the battery indicator on the EZ Way Smart Lift®
display window says “CHARGE BATTERY” or
“SWAP BATTERY”, locate the remote charging
unit and switch the depleted battery pack with the
recharged battery pack.
NOTE: If the battery indicator reads “SWAP
BATTERY”, the lift will go down, but not up.
The green light on the charging unit indicates the
battery is fully charged; the red light indicates the
battery is still charging. During the charging cycle,
the lights may alternate from red to green. This is
normal and should stop when the battery becomes
fully charged.
The EZ Way Smart Lift®battery packs have a long
life and are fully sealed requiring no maintenance
other than routine charging. The EZ Way lift
charging system will never overcharge the battery.
The charging cycle is approximately 6-8 hours. For
optimal battery life, charge batteries frequently.
Mounting holes are provided on the bottom of the
charger to mount the unit securely to a stud in the
wall.
Figure 14

12
Emergency lowering procedure
500 lb. and 600 lb. Capacity EZ Way Smart Lifts®
1) Position patient over bed or chair.
2) Pull up on Emergency lowering handle one to
three times and hold up.
3) Patient will slowly lower. To stop movement
release handle.
4) Call EZ Way, Inc.’s Service department at
800-627-8940 for assistance.
1,000 lb. Capacity EZ Way Smart Lift®
1) Position patient over bed or chair.
2) Grasp red collar on shaft of actuator.
3) Turn collar clockwise to manually lower patient.
4) Call EZ Way, Inc.’s Service department at 800-
627-8940 for assistance.
Scale usage instructions
The EZ Way Smart Lift®s do not require zeroing of
the slings and has a weight-lock feature.
1) Turn on the EZ Way Smart Lift®without
anything else touching it, including the sling.
The scale will automatically zero.
2) Apply the sling on the patient and unit as
directed in the Operating Instructions.
3) Raise the patient. Be sure no other object is
touching the lift.
4) Press the weight key. The lift will display the
weight, and when the = sign changes to a *, the
weight will be locked in. The weight will appear
on the display for four minutes unless the unit is
turned off. The scale automatically deducts 1.5
lbs. for the sling weight.
6) To weigh another patient, repeat steps two
through four.
NOTE: The ZERO key may be used to zero
out the scale by pressing the button between
weights, however this step is optional. The
scale can calculate weight in both pounds and
kilograms. Push the lb./kg key to select the unit
of measurement desired.
Recall last weight
If the EZ Way Smart Lift®is on but has not been
used for 4 minutes or has been shut off the last
weight reading display clears. To recall the last
weight taken:
Press and hold the DOWN key followed by the
WEIGHT key.
The weight will be displayed with a “#” symbol
indicating that the weight is recalled.
NOTE: Lift may lower if the time between
depressing buttons isn’t immediate.

13
EZ Way Smart Lift®Safety & Maintenance Checklist
The EZ Way Smart Lift®requires a minimum of servicing to keep it in good working order.
Nevertheless, it is important that certain basic checks be periodically made by maintenance staff to
ensure on-going safety throughout the life of the device.
The manufacturer suggests that the following components and operating points be scheduled for
inspection at intervals not greater than six months. Any detected deficiency must be rectified before
the lift is put back into service.
1) Check wear of hanger assembly bushing by moving hanger assembly up and
down. If hanger assembly moves up and down and the thickness of 2 quarters
can be inserted between hanger assembly and load cell the hanger assembly
needs to be replaced.
2) Check all bolts to ensure they are tight.
3) Check boom to hanger assembly pivot bolt, peel rubber back
to assure nut is tight and cotter pin is in place. Check boom to
mast pivot bolt by removing plastic cap to assure nut is tight
and cotter pin is in place. If plastic cap is missing order
replacement.
4) Check the point where sling hanger and hanger spreader bar meet. If
excessively worn, replace the bushings immediately. The hanger spreader and
sling hanger wear points need to be checked for wear. If hooks appear worn,
call EZ Way for instructions.
5) Check mounting bolts of actuator top and bottom. Pay particular
attention to top bolt hole for elongation.
BASE PIVOT REAR WHEEL FRONTWHEEL LINKAGE SPREADER
TOP OF
ACTUATOR
BADLY WORN
NEEDS REPLACEMENT
BOOM TO MASTBOOM TO HANGER
ELONGATED
BOTTOM OF
ACTUATOR

14
**IMPORTANT NOTICE**
It is the responsibility of the purchaser to ensure that regular maintenance inspection is conducted
on this device by competent staff.
Check actuator for the following.
a. Inspect the plastic housing for any dents or cracks.
b. Inspect the cables to see if they have been cut or pinched.
c. See if the actuator appears deflected when fully extended at full load.
d. Verify that the mounting points do not have any cracks or other defects.
e. Apply a heavy grease to actuator mounting pins as needed.
f. Verify that the inner or outer tubes do not have any dents, dings, or large
scratches in them.
Contact EZ Way’s Service Department at 1-800-627-8940 if the actuator shows any
signs of the issues listed above.
6) Test the Emergency Stop Switch. If the switch does not stop the lift when activated, call the EZ
Way Service Department immediately!
7) Perform a functional test of the emergency lowering feature of the lift actuator if it is so equipped.
8) Perform a functional test of the anti-pinch feature of the lift actuator. This feature turns the
actuator off when lowering the lift boom if an obstruction is encountered.
9) Check all the wheels and brakes to make sure they are functioning properly. Hair that gets picked up
and wrapped in between wheels should be cleaned out so that the lift will roll easily.
10) Do a visual check for any damaged, missing or loose parts. Repair as necessary.
11) Check the entire sling for damage or wear, including the loops and stitching. If damage or wear is
present, discard the sling and order a new one. It is recommended that slings be replaced after one
year or if the sling shows any sign of damage or wear.
12) Cleaning the lift: Do not spray any liquid cleaners directly onto the front panel graphics. To clean,
use a glass cleaner or mild cleaning solution, dampen a cloth and wipe the panel. To clean the body
of the lift, use standard hospital-grade germicidal cleaning products.
13) At six month intervals, attach a load equivalent to the rated capacity of the lift to the unit. Raise
and lower the load with the lift. Listen for any unusual noises while operating the unit. With the
test load applied to the lift, check all structural welds for any signs of stress or fatigue cracks. If any
unusual noises or cracks are found, stop using the lift and call the EZ Way Service Department
immediately!

15
Customer settings summary sheet
Guide to main functions and keys
Menu list Description
Inspection Reminder Enable/disable, Occurs every 30 days
Inspection Complete Resets 30-day counter
Overweight Counts Counts occurrences of lifting beyond a unit’s rated capacity, available on
units with scale
Actuator Minutes Actuator usage counter, should be reset upon actuator replacement
Actuator Overload Counts Counts occurrences of actuator overloads, should be reset upon actuator
replacement
Lift/Stand Total Minutes Stand/Lift usage counter in minutes
Lb./Kg Default Setting Sets default for weight unit of measure
Navigating through menus key
Scrolling to change menu item UP/DOWN Keys
Key to enter data Right Toggle Switch
Key to exit menu Left Toggle Switch
Main Functions Key Combination
ON/OFF Turns unit on and off
Weight Recall DOWN + Weight
Customer Settings Menu DOWN + UP – hold 5 seconds
UP Used to raise the EZ Way Smart Lift®boom upward
DOWN Used to lower the EZ Way Smart Lift®boom
Zero Used to zero out the scale
Weight Used to take weight readings on units with scale
LB/KG Switches weight reading between pounds and kilograms
Diagnostic messaging
Actuator Overload
When an actuator overload occurs the EZ Way Smart Lift®computer records the event to protect the unit’s
components, and an ‘ACTUATOR OVERLOAD’ message will display. An event count is stored in the
Customer Settings menu under ‘Actuator Overload Counts’. This read-only count can be accessed at any time.
Possible causes of actuator overload include lifting a patient that is heavier than the rated capacity of the unit, if
the Smart Lift is obstructed by another object during lifting or mechanical failure occurs (internal actuator
binding, etc.). In the event of an actuator overload, the EZ Way Smart Lift®will only operate in the DOWN
direction.
When the actuator overload count is greater than 4, a fault message will display when the unit is turned on,
reading ‘ACTUATOR OVERLOAD…CALL EZ WAY SERVICE’. When this message appears call the EZ Way
Service Department at 1-800-627-8940.
Weight Overload – Available for EZ Way Smart Lift®with Scale
When an UP or DOWN command is executed the circuit board monitors weight readings from the scale load
cell. If the weight measured is higher than the rated capacity of the EZ Way Smart Lift®the control will
recognize this condition and a ‘WEIGHT OVERLOAD’ message will display. An event count is stored in the
Customer Settings menu under ‘Weight Overload Counts’. This read-only count can be accessed at any time.
The weight overload may result from lifting a patient that is heavier than the rated capacity of the unit, if the
Smart Lift is obstructed by another object during lifting or a scale load cell failure occurs.
To override a ‘WEIGHT OVERLOAD’ press the DOWN key. The EZ Way Smart Lift®will only operate in
the DOWN direction during a weight overload. When the weight overload count is greater than 4 a fault
message will display when the unit is turned on. The message reads ‘WEIGHT OVERLOAD…CALL EZ WAY
SERVICE’. When this message appears call the EZ Way Service Department at 1-800-627-8940.

16
Duty Cycle Fault – Helping to Protect EZ Way Smart Lift®Actuator
In the unlikely event the EZ Way Smart Lift®has been run to the extent that it exceeds its duty cycle, the fol-
lowing message will appear; ‘ACTUATOR DUTY CYCLE FAULT…COOLING’.
When this fault occurs the lift can only be lowered. This safety feature has been added to maximize the life of
your unit.
LCD display menus
EZ Way Smart Lift®s include a built-in menu system that provides customer feedback on various functions. The
information below describes how to access and navigate through the Customer Settings menu.
NOTE: In this section, the UP and DOWN operations refer specifically to usage of the front panel UP and
DOWN buttons.
NOTE: The EZ Way Smart Lift®will not raise or lower while in the Customer Settings menu.
Entering the Customer Settings menu
After the unit has been turned on, press and hold the DOWN key followed by the UP key, holding both keys for
5 seconds.
To back out of the Customer Settings menu hit the left toggle switch.
Navigating through menus
1) Pressing the UP or DOWN front panel keys will allow users to move through the menu items (also described
as ‘scrolling’ below).
2) Pressing the Right Toggle Switch (also described as ‘enter’ below) will enter into a menu selection.
3) Pressing the Left Toggle Switch (also described as ‘exit’ below) key will exit the menu selection.
Changing parameter values
1) Pressing the UP or DOWN front panel keys will change various parameters found in the Customer Settings
menu.
2) Pressing the Right Toggle Switch will lock the parameter into memory.
3) Pressing the Left Toggle Switch will back out of the parameter without saving the selection.
Right Toggle
Switch
Left Toggle
Switch
Up
Button
Display
Window
On/Off
Switch
Down
Button

17
CUSTOMER SETTINGS MENU FUNCTIONS
Within the Customer Settings menu there are several functions that provide customer feedback. The functions
include an optional inspection reminder, lift usage measured in minutes, and diagnostic information. Below is a
description of each function.
Inspection Reminder – Optional
NOTE: A battery must be inserted in the unit at all times for the inspection reminder to be accurate.
The Inspection Reminder function tracks the last inspection occurrence. When the duration of time since the
last inspection exceeds 30 days, a reminder message will appear when the unit is turned on. The purpose of the
inspection reminder is to notify the user that the EZ Way Smart Lift®needs to be inspected using the EZ Way
Safety & Maintenance Checklist form included on pages 13 - 14. When the inspection is complete the reminder
can be reset in the Customer Settings menu as described below:
1) To enable/disable the Inspection Reminder enter the Customer Settings menu as described on page 13.
2) Press the right toggle switch to enter.
3) Scroll to Inspection Reminder using the UP and DOWN keys on the controls.
4) Press the right toggle switch to enter.
5) Scroll to choose Yes or No.
6) Press the right toggle switch to enter.
7) Press the left toggle switch twice to exit.
Inspection Complete
If ‘INSPECTION OVERDUE’ appears when the EZ Way Smart Lift®is turned on, inspect the unit following the
EZ Way Safety & Maintenance Checklist’. The EZ Way Smart Lift®will continue to operate normally.
Once inspection is complete, enter the Customer Settings Menu as described on page 13.
1) Press the right toggle switch to enter.
2) Scroll using the UP and DOWN keys to Inspection Complete.
3) Press the right toggle switch to enter.
4) Scroll to choose Yes.
5) Press the right toggle switch to enter.
6) Press the left toggle switch twice to exit.
Overweight Counts – Available on EZ Way Smart Lift®with scale
The Overweight Counts function tracks weight overload occurrences. When a weight overload occurs the
Overweight Counts register increments by one.
Actuator Minutes
The Actuator Minutes function tracks the accumulated amount of raising and lowering time of the actuator
by the minute. With each minute of runtime the Actuator Minutes register increments by one. This read-only
information provides accurate customer feedback of EZ Way Smart Lift®usage within the facility and can be
a valuable tool in monitoring a safe patient handling program. In the event of an actuator replacement the
Actuator Minutes register can be reset.
Actuator Overload Counts
The Actuator Overload Counts function tracks any actuator overload occurrences. When an actuator overload
occurs the Actuator Overload Counts register increments by one. Potential causes of an actuator overload
include accidental lifting of the EZ Way Smart Lift®against an obstruction, lifting a patient that is heavier than
the rated capacity of the unit, or mechanical failure (internal actuator binding).
Lift/Stand Total Minute Usage Count
The Actuator Total Minutes function tracks the accumulated amount of raising and lowering time of the unit.
The Lift/Stand Total Minutes is not reset when an actuator is replaced. This read-only information provides
accurate customer feedback of EZ Way Smart Lift®usage for the entire life of the unit.

ANSWERS: 1a) Located on control panel. 1b) Change when meter nearing “E” (empty) or “Swap Battery” appears on display or if “Emergency Stop”
appears yet button is not in down position. Remove battery by grasping handle and pulling towards body – insert charged battery in battery housing. 1c)
Using buttons on hand control - toggle switches on sides of control panel - “up” and “down” button on face of control panel. 1d) Red button located on
top of boom – unit will not operate when button is in down position. 1e) Red tab located at base of actuator shaft. 1f) Look for intact stitching & seams,
look for fraying or ripped loops and/or material, inspect material for excessive wear by holding up to light. 2a) Never lock the wheels of an EZ Way Smart
Lift®when lifting or transferring a patient. Unit self-adjusts center of gravity, wheels need to be unlocked to allow for this adjustment. 2b) At a minimum,
top of sling to top of “horseshoe” portion of sling should run from patient’s neckline to at least 2-inches below the tailbone, respectively. 2c) Crossing legs
is the safest procedure. Multi-purpose sling may be used to cradle legs instead of threading straps between legs to cross. Caregiver must assess condition of
patient to determine if this is appropriate. 2d) Leg loops: Shorter loops recline patient further; longer loops place body in upright sitting position. Shoulder
loops: Longer loops recline patient; shorter loops place in upright sitting position. 2e) Once sling is applied underneath a patient, attach two loops of
same color nearest the head and shoulders to the hangar bar hooks closest to the head. Once legs of sling have been fitted underneath legs and crossed,
attach two loops of same color to the hangar bar hooks located nearest the feet. Ensure all loops securely fastened to hooks before lifting. 2f) Straps are
for guiding patient and rotating patient while suspended; Also helps with upright seated positioning when the middle strap is held stationary, just prior to
seating patient. 3a) If supine, log roll patient to one side folding half of sling and tuck under patient. Roll patient in other direction and remove entire
sling from under patient. If seated, gently pull legs of sling from under patient’s legs placing sling legs to side of patient. Grasp middle handle and gently
pull upward, removing sling from behind patient.
EZ Way Smart Lift®Competency Checklist
Purpose: To assist in the proper training of operating the EZ Way Smart Lift®.
Staff Name: Date: Observed by:
Yes No
1. EZ Way Smart Lift®Pre-Operation Check
a) Demonstrate how to turn EZ Way Smart Lift®on/off.
b) Demonstrate how and when to change batteries.
c) What are the 3 different methods to raise/lower the resident/patient?
d) Locate emergency stop button and its purpose.
e) Locate safety release button.
f) Check to ensure sling is in good condition, no excessive wear (loops, etc.).
2. EZ Way Smart Lift® Operation
a) Do you lock the wheels? Why or why not?
b) Demonstrate proper fitting of sling to the resident/patient.
c) Do you cross the legs of the sling?
d) Explain the different loops and their usage for positioning.
e) Demonstrate proper attachment of sling to lift.
f) What are the 3 straps on the back of the sling for?
3. EZ Way Smart Lift®- Sling Removal
a) Demonstrate proper removal of sling from resident/patient.
For any questions or concerns, please refer to the operator’s instructions or the EZ Way Smart Lift®video.
18

19

EZ Way Sling Sizing Chart
(Applies to washable and disposable slings.)
1NOTE! The size/weight designations are merely estimates and basic guidelines. A proper fit will depend on factors
other than weight measurements, including the height and girth of a patient. A proper fit will involve the judgment
of the caregiver.
*It is important to evaluate the width of a patient in
relation to the width of the sling.
**It is important that no portion of the patient
overlap the sides of the sling.
2Color Coding is used on the binding of slings. It is
not used with specialty slings.
3It is important that the base of the sling be
positioned two inches below the tailbone and the
top of the sling is parallel with the top of the
shoulder line (base of neck).
EZ Way, Inc • (800) 627 - 8940 • Fax (712) 542 - 1899 • www.ezlifts.com
Sling Size Small Medium Large XL XXL XXXL
Weight of Patient 70-100 lbs. 90-220 lbs. 190-320 lbs. 280-450 lbs. 400-600 lbs. 600 + lbs.
Maximum
distance from
patient’s tailbone
to base of neck3
**Does not apply to Belted
Mesh or Mutli-Purpose
slings**
21” 24” 26” 29” 36” 37”
EZ Way, Inc.
701 E. Washington St.
P.O. Box 89 yClarinda, IA 51632
800-627-8940 yFax 712-542-1899
www.ezlifts.com
EZ Way Sling Sizing Chart
(Slings used with EZ Way mobile lifts and ceiling lift systems only)
Sling Size1Small Medium Large X-Large XX-Large XXX-Large
Color Coding2(Gray) (Beige) (Burgundy) (Green) (Black) (Brown)
Weight of
Patient170-100 lbs 90-220 lbs 190-320 lbs 280-450 lbs 400-600 lbs 600+ lbs
Maximum
Distance from
Patient’s
Tailbone to Base
of Neck3
**Does not apply to
Belted Mesh or Multi-
purpose slings**
21” 24” 26” 29” 36” 37”
1NOTE! The size/weight designations are merely estimates and basic guidelines. A proper fit will
depend on factors other than weight measurements, including the height and girth of a patient.
A proper fit will involve the judgment of the caregiver.
*It is important to evaluate the width of a patient in relation to the width of the sling.
**It is important that no portion of the patient overlap the sides of the sling.
2Color Coding is used on the binding of slings. It is not used on single-use (disposable) slings or with
specialty slings.
Form # 2-150
Revised 4/17/2007
3Height of sling =
Two inches
below Tailbone
to top of
Shoulder Line
3It is important that the base of the sling be positioned two inches below the tailbone and the top of the
sling is parallel with the top of the shoulder line (base of neck).
To
p
Shoulder Line
2” Below Tailbone Base
Sling Color Coding System
S
Gray
M
Beige
L
Burgundy
XL
Green
XXL
Black
XXXL
Brown
Form #2-150
Rev. 7-31-18
WARNING: Cancer and Reproductive Harm - www.P65Warnings.ca.gov.
To order slings, please call 1-800-627-8940.
See a complete list of our accessories at www.ezlifts.com
Sling Sizing Chart
20
Table of contents
Other eZway Medical Equipment manuals
Popular Medical Equipment manuals by other brands

FISIOTECH
FISIOTECH ERMES Use and maintenance manual

Invacare
Invacare Aquatec Pico user manual

Hausted
Hausted HORIZON Series operating manual

Game ready
Game ready GRPro 2.1 user manual

ResMed
ResMed Swift FX user guide

Lowenstein Medical
Lowenstein Medical LM Flow Instructions for use and Technical description