manuals.online logo
Brands
  1. Home
  2. •
  3. Brands
  4. •
  5. FAAC
  6. •
  7. Remote Control
  8. •
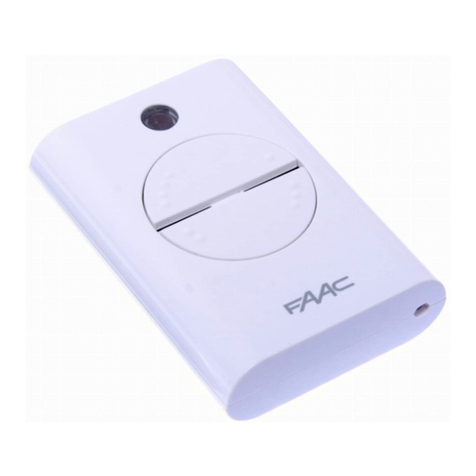
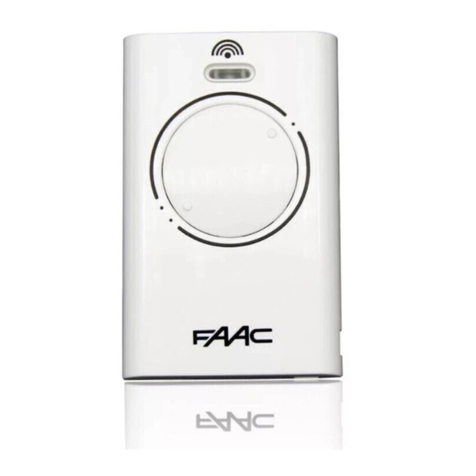
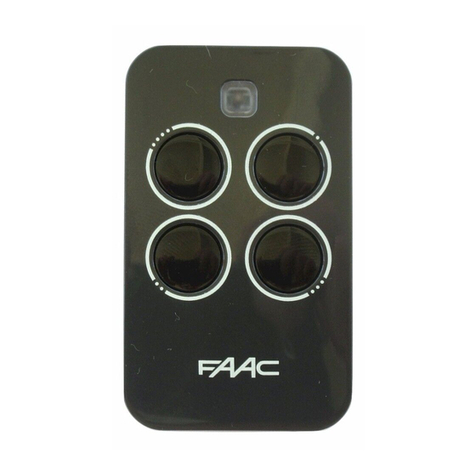
  9. FAAC XT4 433 RC User manual

FAAC XT4 433 RC User manual

1
FAAC XT4 433 RC
+
12 V
12 V
FAAC spa
Made in xxxxx
Model: xxxxxx
Batch: xxxx 434MHz
A - Manufacturer
B - Place of manufacture
C - Model identification code
D - Batch number identification
E - Notified Body reference
F - Operating instruction
G - Frequency
H - Observe the current regolations for a
correct disposal
DESCRIPTION OF THE LABELS
(XT4 433 RC p/n 787452 & 787454)
FAAC S.p.A.
Soc. Unipersonale
Via Calari, 10 - 40069 Zola Predosa BOLOGNA - ITALY
Tel. +39 051 61724 - Fax +39 051 758518
www.faac.it - www.faacgroup.com
Risk of explosion if battery is replaced by an
incorrect type
Dispose of used batteries according to the
instructions
P4
P1
P3
P2
AF
G
H
B
C
D
E
Frequenza: 433MHz Banda
Tipo batteria: 12V VR22 alcalina
Uso esclusivo: Apricancello
Questo prodotto è conforme alla direttiva
99/05/EC
Frequency: 433MHz Band
Battery type: 12V VR22 alcaline
Application: Automatic Opening
System for gate/door
This product complies with Directive 99/05/EC
Fréquence de fonctionnement: 433MHz Bande
Type Batterie: 12V VR22 alcaline
Usage exclusif: Ouvre-portail
Ce produit est conforme à la directive 99/05/EC
Betriebsfrequenz: 433MHz Band
Batterietyp: 12V VR22 Alkaline
Bestimmungsgemäßer Gebrauch: Toröffnung
DiesesProduktentsprichtderRichtlinie99/05/EC
Frecuencia de trabajo: 433MHz Banda
Tipo de batería: 12V VR22 alcalina
Uso exclusivo: Abrecancela
Este producto es conforme con la directiva
99/05/EC
Gebruiksfrequentie: 433MHz Band
Type batterij: 12V VR22 Alkaline
Exclusief gebruik: Poortopener
Dit product is in overeenstemming met de
richtlijn 99/05/EC
CE DECLARATION OF CONFORMITY
Manufacturer
:FAAC S.p.A. Soc. Unipersonale
Address
:Via Calari, 10
40069ZolaPredosaBOLOGNA-ITALY
Declares that: XT4 433 RC transmitter
conforms to the requirements of the following
1999/05/EC R&TTE Directive
and is compliant with technical standards
referenced here below:
EN 301 489 - 1 V1.9.2
EN 301 489 - 3 V1.6.1
EN 300 220 - 2 V2.4.1
EN 62311 : 2008
EN 60950 - 1 : 2006 + A11:2009 + A1:2010
+ A12:2011 + A2:2013
Bologna, January 1st, 2015
CEO
2
1. MEMORY STORAGE OF A REMOTE CONTROL
1) Press the button on the receiver corresponding
to the channel it is wished to memory store.
The Led corresponding to the choise channel,
will light up and stay on, indicating that the
receiver is in learning mode.
2) Within 10 seconds, press the button on the
remote control corresponding to the channel it
is wished to memory store, and keep it pressed
for at least 1 second.
3) If memory storage has successfully taken pla-
ce, the Led flashes twice.
4) After memory storage of the first remote con-
trol, the receiver remains in learning mode,
with the led continually lit.
5) To memory storage subsequent remote con-
trols (up to a maximum of 256) repeat the
procedure starting from point 2.
6) 10 seconds after memory storage of the last
remote control, the receiver automatically
leaves learning mode. It is possible to leave
learning mode manually by pressing, once the
remote control has been memory stored, one
of the buttons on the receiver.
2. MEMORY STORAGE OF FURTHER REMOTE CON-
TROLS
It is possible to memory storage further remote
controls by repeating the initial memory stora-
ge procedure or, without directly accessing the
receiver, following this procedure:
1) Move close to the receiver and press buttons
P1 and P2 on the already-memory stored re-
mote control for at least 5 seconds.
2) Again, on the already-memory stored remote
control, within 10 seconds press the button
which is to be copied on the remote control
to be added.
3) Press, on the remote control to be added, the
button it is wished to memory store.
4)To add other remote controls, repeat the ope-
rations starting from point 3.
Note:Wait at least 10 seconds after memory sto-
rage of the final remote control before pressing
any further buttons.
3. DELETION OF THE MEMORY
This procedure deletes all the remote controls
memory stored on the receiver, from both chan-
nels. It is not possible to delete just one channel.
Greatcareshouldbeexercisedinusingthisfunction.
To delete the memory of the receiver, you need
to press, and keep pressed, one of the buttons
on the receiver until the LEDs start to flash. Once
flashing has finished, the memory of the receiver
has been completely deleted.
Note:The receiver will not operate the gate until
it has come out of learning mode.
1. MEMORIZZAZIONE DEL TELECOMANDO
1)Premere sulla ricevente il pulsante relativo al
canale che si vuole memorizzare. Sulla rice-
vente, il led corrispondente al canale scelto, si
accenderà a luce fissa segnalando che questa
è in modalità di apprendimento.
2)Entro 10 secondi premere sul telecomando
e tenere premuto per almeno 1 secondo il
pulsante che si vuole memorizzare.
3) Se la memorizzazione è avvenuta con successo
il Led esegue un paio di lampeggi.
4)Dopo la memorizzazione del primo teleco-
mando la ricevente rimane in modalità di
apprendimento, led acceso fisso.
5)Per memorizzare successivi telecomandi (fino
ad un massimo di 256) ripetere le operazioni
dal punto 2.
6)Trascorsi 10 secondi dalla memorizzazione
dell’ultimo telecomando la ricevente esce au-
tomaticamente dalla fase di apprendimento.
È possibile uscire manualmente dalla proce-
dura di apprendimento premendo, una volta
memorizzato il telecomando, uno dei pulsanti
sulla ricevente.
2.MEMORIZZAZIONEDIULTERIORITELECOMANDI
È possibile memorizzare ulteriori telecomandi
ripetendo la procedura di programmazione ini-
ziale oppure, senza accedere direttamente alla
ricevente, seguendo la seguente procedura:
1) Avvicinarsi alla ricevente, premere per almeno
5 secondi i pulsanti P1 e P2 del telecomando
già memorizzato.
2) Sempre sul telecomando memorizzato preme-
re, entro 10 secondi, il pulsante che deve es-
sere copiato sul telecomando da aggiungere.
3)Premere sul telecomando da aggiungere il
pulsante che si vuole memorizzare.
4)Per aggiungere altri telecomandi ripetere le
operazioni dal punto 3.
Nota: Attendere almeno 10 secondi dalla me-
morizzazione dell’ultimo telecomando prima di
azionare altri pulsanti.
3. CANCELLAZIONE DELLA MEMORIA
Questa operazione cancella tutti i telecomandi
memorizzati sulla ricevente, da entrambi i canali.
Non è possibile cancellare solo un canale.
Si raccomanda di utilizzare con attenzione que-
sta funzione.
Per cancellare la memoria della ricevente e
necessario premere e mantenere premuto uno
dei pulsanti presenti sulla ricevente fino a che i
led iniziano a lampeggiare. Una volta terminato
il lampeggio la memoria della ricevente è stata
completamente cancellata.
Nota:Lariceventenonazionailcancellofinoaquan-
do non è uscita dalla modalità di apprendimento.
3
1. MÉMORISATION DE LA TÉLÉCOMMANDE
1)Appuyer sur le bouton du récepteur relatif au
canal qu’on souhaite mémoriser: Le LED corri-
spondant a le canal s’allumera fixe, signalant
que le récepteur est en mode d’apprentissage.
2)
Dansundélaide10secondes,appuyersurlatélécom-
mande et maintenir enfoncé pendant 1 seconde
au moins le bouton qu’on souhaite mémoriser
.
3)Si la mémorisation est concluante, la LED
exécute une paire de clignotements.
4) Après la mémorisation de la première télécom-
mande, le récepteur reste en mode d’appren-
tissage et la LED est allumée fixe.
5) Pour mémoriser des télécommandes successi-
ves (jusqu’à un maximum de 256), répéter les
opérations à partir du point 2.
6)10 secondes après la mémorisation de la
dernière télécommande, le récepteur sort au-
tomatiquement de la phase d’apprentissage.
On peut sortir manuellement de la procédure
d’apprentissage, une fois la télécommande
mémorisée, en appuyant sur l’un des boutons
du récepteur.
2.MÉMORISATION D’AUTRES TÉLÉCOMMANDES
On peut mémoriser d’autres télécommandes en
répétant la procédure de programmation initiale
ou, sans accéder directement au récepteur, en
procédant comme suit:
1) S’approcher du récepteur, appuyer pendant 5
secondes au moins sur les boutons P1 et P2 de
la télécommande déjà mémorisée.
2)Toujours sur la télécommande mémorisée,
appuyer, dans un délai de 10 secondes, sur le
bouton à copier sur la télécommande à ajouter.
3) Sur la télécommande à ajouter, appuyer sur le
bouton qu’on souhaite mémoriser.
4) Pour ajouter d’autres télécommandes, répéter
les opérations à partir du point 3.
Remarque: Attendre au moins 10 secondes à
compterdelamémorisationdeladernièretélécom-
mande avant d’actionner d’autres boutons.
3. EFFACEMENT DE LA MÉMOIRE
Cette opération efface toutes les télécommandes
mémorisées sur le récepteur, à partir des deux
canaux. Il est impossible d’effacer un seul canal.
On recommande d’utiliser cette fonction avec
attention.
Pour effacer la mémoire du récepteur, appuyer
sur l’un des boutons présents sur le récepteur en
le maintenant enfoncé jusqu’à ce que les LEDs
commencent à clignoter. Lorsque le clignote-
ment a cessé, la mémoire du récepteur a été
complètement effacée.
Remarque: Le récepteur n’actionne pas le portail
aussi longtemps qu’on n’est pas sorti du mode
d’apprentissage.
1. EINSPEICHERUNG DER FERNBEDIENUNG
1) An dem Empfänger dieTaste für den Kanal, der
eingespeichert werden soll, drücken. Die Led,
demgewüschtenKanalsentsprechend,leuchtet
mit Dauerlicht auf und zeigt damit an, dass
der Empfänger sich im Lern-Modus befindet.
2) Binnen 10 Sekunden auf der Fernbedienung
dieTaste, die gespeichert werden soll, minde-
stens 1 Sekunde lang drücken.
3)
NacherfolgreicherSpeicherungblinktdie LEDzwei Mal.
4) NachderSpeicherungdererstenFernbedienung
bleibt der Empfänger weiterhin im Lern-Mo-
dus, wobei die LED mit Dauerlicht aufleuchtet.
5)Für die Speicherung weiterer Fernbedienun-
gen (bis maximal 256) sind die Schritte ab
Punkt 2 zu wiederholen.
6) 10 Sekunden nach der Speicherung der letzten
Fernbedienung beendet der Empfänger au-
tomatisch die Lern-Phase. Der Lern-Modus
kann manuell beendet werden, wenn nach
der Speicherung der Fernbedienung eine der
Tasten auf dem Empfänger gedrückt wird.
2.SPEICHERUNG WEITERER FERNBEDIENUNGEN
Weitere Fernbedienungen können entweder
durch die Wiederholung des anfänglichen
Programmiervorgangs oder durch die nachfol-
genden Schritte ohne direkten Zugriff auf den
Empfänger gespeichert werden:
1)Auf den Empfänger zugehen, die Tasten P1
und P2 der bereits gespeicherten Fernbedie-
nung mindestens 5 Sekunden lang drücken.
2) Auf der gespeicherten Fernbedienung binnen
10 Sekunden die Taste drücken, die auf der
hinzuzufügenden Fernbedienung kopiert
werden soll.
3)Auf der hinzuzufügenden Fernbedienung die
Taste drücken, die gespeichert werden soll.
4)Zum Hinzufügen weiterer Fernbedienungen
die Schritte ab Punkt 3 wiederholen.
Hinweis:Vor der Betätigung andererTasten min-
destens 10 Sekunden nach der Speicherung der
letzten Fernbedienung abwarten.
3. SPEICHER LÖSCHEN
Mit diesem Vorgang werden von beiden Kanälen
alle auf dem Empfänger gespeicherten Fernbe-
dienungen gelöscht. Ein Kanal allein kann nicht
gelöscht werden.
Diese Funktion sollte mit größter Aufmer-
ksamkeit angewendet werden.
ZumLöschendesSpeichers des Empfängersmuss
eine derTasten auf dem Empfänger so lange ge-
drückt werden, bis die LED zu blinken beginnen.
Wenn die LED nicht mehr blinken, wurde der
Speicher des Empfängers vollständig gelöscht.
Hinweis:DerEmpfängerbewirktdieBewegungdes
Tors erst dann, wenn der Lern-Modus beendet ist.
4
1.
AFSTANDSBEDIENING IN HET GEHEUGEN OPSLAAN
1)
Druk op de ontvanger op de knop van het kanaal
dat u in het geheugen wilt opslaan. De led overe-
enkomstigmethetgekozenkanaalgaatbrandenen
duidtaandathijzich indezelflerendefasebevindt.
2)Druk binnen 10 seconden op de afstandsbe-
diening, en houd de knop die u wilt opslaan
minstens 1 seconde ingedrukt.
3)Als de opslag in het geheugen met succes heeft
plaatsgevonden, knippert de led een paar keer.
4) Na de eerste afstandsbediening in het geheugen
te hebben opgeslagen, blijft de ontvanger in de
zelflerende fase, de led blijft branden.
5)Herhaal de handelingen vanaf punt 2 om verde-
re afstandsbedieningen in het geheugen op te
slaan (maximaal 256).
6)Als 10 seconden zijn verlopen na het opslaan
van de laatste afstandsbediening, verlaat de
ontvanger automatisch de zelflerende fase. Het
is mogelijk de zelflerende procedure handma-
tig te verlaten door, als de afstandsbediening
eenmaal is opgeslagen, op een van de knoppen
op de ontvanger te drukken.
2. VERDERE AFSTANDSBEDIENINGEN IN HET
GEHEUGEN OPSLAAN
Er kunnen verdere afstandsbedieningen in het
geheugen worden opgeslagen door de procedure
voor de eerste programmering te herhalen of, zon-
der rechtstreekse toegang tot de ontvanger, door
de volgende procedure te volgen:
1) Ga naar de ontvanger, en druk minstens 5 secon-
den op de knoppen P1 en P2 van de afstandsbe-
diening die al in het geheugen is opgeslagen.
2) Druk eveneens op de opgeslagen afstandsbedie-
ning binnen 10 seconden op de knop die op de
toe te voegen afstandsbediening moet worden
gekopieerd.
3)Druk op de toe te voegen afstandsbediening op
de knop die u in het geheugen wilt opslaan.
4)
Omverdereafstandsbedieningentoetevoegenmo-
etendehandelingenvanafpunt3wordenherhaald.
Opmerking: Wacht minstens 10 seconden nadat de
laatste afstandsbediening in het geheugen is opge-
slagen alvorens andere knoppen in te drukken.
3. GEHEUGEN WISSEN
Deze handeling wist alle in het geheugen van de
ontvanger opgeslagen afstandsbedieningen, op
beide kanalen. Het is niet mogelijk slechts één
kanaal te wissen. Het wordt aangeraden goed op
te letten bij het gebruik van deze functie. Om het
geheugen vande ontvanger tewissen moet eenvan
de knoppen op de ontvanger worden ingedrukt en
ingedrukt worden gehouden tot de leds beginnen
te knipperen. Als het knipperen is gestopt, is het
geheugen van de ontvanger volledig gewist.
Opmerking: De ontvanger schakelt de poort niet
in zo lang de zelflerende fase niet is verlaten.
732564 - Rev. C
1. MEMORIZACIÓN DEL TELEMANDO
1)Presione en el receptor el pulsador re-
lativo al canal que se desea memorizar,
SW1 para memorizar CH1 y SW2 para me-
morizar CH2. El Diodo 1 o el Diodo 2 se
encenderá con luz fija para indicar que
el receptor está en modo aprendizaje.
2)Antes de que transcurran 10 segundos pre-
sione en el telemando y mantenga presiona-
do durante al menos 1 segundo el pulsador
que se quiere memorizar.
3)Si la memorización se ha realizado correcta-
mente, el Diodo realiza un par de destellos.
4) Después de la memorización del primer tele-
mando,elreceptorpermaneceenmodoapren-
dizaje y el diodo está encendido con luz fija.
5) Para memorizar sucesivos telemandos (hasta
un máximo de 256) repita las operaciones
desde el punto 2.
6)
Transcurridos 10 segundos desde la memori-
zación del último telemando, el receptor sale
automáticamente de la fase de aprendizaje. Se
puede salirmanualmentedel procedimiento de
aprendizaje presionando, una vez memorizado
eltelemando,unodelos pulsadoresdelreceptor.
2. MEMORIZACIÓN DE OTROS TELEMANDOS
Sepueden memorizar otrostelemandos repitien-
doelprocedimientodeprogramacióninicialobien,
sin acceder directamenteal receptor, siguiendoel
procedimiento que se describe a continuación:
1)Acérquese al receptor y presione durante al
menos 5 segundos los pulsadores P1 y P2 del
telemando ya memorizado.
2)Siempre en el telemando memorizado pre-
sione, antes de que transcurran 10 segundos,
el pulsador que debe copiarse en el teleman-
do que se quiere añadir.
3)Presione en el telemando que se quiere aña-
dir el pulsador que se ha de memorizar.
4)Para añadir otros telemandos repita las ope-
raciones desde el punto 3.
Nota: Espere por lo menos 10 segundos desde
la memorización del último telemando antes
de accionar otros pulsadores.
3. BORRADO DE LA MEMORIA
Esta operación borra todos los telemandos
memorizados en el receptor, de ambos canales.
No se puede borrar sólo un canal.Se aconseja
utilizar con atención esta función. Para borrar
la memoria del receptor hay que presionar y
mantener presionado uno de los pulsadores
presentes en el receptor, hasta que los diodos
empiecen a destellar. Una vez terminado el
destello, la memoria del receptor está comple-
tamente borrada.
Nota: El receptor no acciona la cancela hasta
que no ha salido del modo aprendizaje.

Other FAAC Remote Control manuals

FAAC XT2 433 SLH User manual

FAAC

FAAC XT2 433 SLH User manual

FAAC XT4433RC User manual

FAAC

FAAC XT4433RC User manual

FAAC 787005 User manual

FAAC

FAAC 787005 User manual

FAAC T-MODE Series User manual

FAAC

FAAC T-MODE Series User manual

FAAC Genius KILO TX 868 JLC User manual

FAAC

FAAC Genius KILO TX 868 JLC User manual

FAAC T-Mode TM XT6 433 User manual

FAAC

FAAC T-Mode TM XT6 433 User manual

FAAC TM2 X R COMPACT User manual

FAAC

FAAC TM2 X R COMPACT User manual

FAAC TM2 X TT-50 User manual

FAAC

FAAC TM2 X TT-50 User manual

FAAC T-MODE TM XT1 M 433 User manual

FAAC

FAAC T-MODE TM XT1 M 433 User manual

FAAC XT2 868 SLH User manual

FAAC

FAAC XT2 868 SLH User manual

FAAC TOUCH-1L User manual

FAAC

FAAC TOUCH-1L User manual

FAAC Genius ECHO TX4 433 RC User manual

FAAC

FAAC Genius ECHO TX4 433 RC User manual

FAAC XT4 433 RC User manual

FAAC

FAAC XT4 433 RC User manual

Popular Remote Control manuals by other brands

Hitachi SPX-RCDA manual 

Hitachi

Hitachi SPX-RCDA manual 

Kemppi R30 operating manual

Kemppi

Kemppi R30 operating manual

ANATEL L5B83G user manual

ANATEL

ANATEL L5B83G user manual

Bush URC3541 instruction manual

Bush

Bush URC3541 instruction manual

Map KF316 Programming instructions

Map

Map KF316 Programming instructions

Hitachi PC-ARFHE-02 instruction manual

Hitachi

Hitachi PC-ARFHE-02 instruction manual

EVE BUTTON Get started guide

EVE

EVE BUTTON Get started guide

Loewe assist easy Operation instructions

Loewe

Loewe assist easy Operation instructions

Muller paladin 670 010 rf manual

Muller

Muller paladin 670 010 rf manual

Mitsubishi PJZ012D103 installation manual

Mitsubishi

Mitsubishi PJZ012D103 installation manual

Sleipner-Marinno EXTURN RC-10XE Installation & user manual

Sleipner-Marinno

Sleipner-Marinno EXTURN RC-10XE Installation & user manual

Velleman VRC801D2 manual 

Velleman

Velleman VRC801D2 manual 

Essick 1999 instruction manual

Essick

Essick 1999 instruction manual

Speedtech Scip Hand Remote STHR-4 installation guide

Speedtech

Speedtech Scip Hand Remote STHR-4 installation guide

Abus HomeTec Pro CFF3100 operating instructions

Abus

Abus HomeTec Pro CFF3100 operating instructions

Contro l4 RCZ-SRC2-B Specifications

Contro l4

Contro l4 RCZ-SRC2-B Specifications

Resolution 2GIG RE200-5T install guide

Resolution

Resolution 2GIG RE200-5T install guide

smart home SB-IR Remote-HH manual

smart home

smart home SB-IR Remote-HH manual

manuals.online logo
manuals.online logoBrands
  • About & Mission
  • Contact us
  • Privacy Policy
  • Terms and Conditions

Copyright 2025 Manuals.Online. All Rights Reserved.