manuals.online logo
Brands
  1. Home
  2. •
  3. Brands
  4. •
  5. Facom
  6. •
  7. Measuring Instrument
  8. •
  9. Facom E.406 User manual

Facom E.406 User manual

E.306
1
2
3
7
8
4
5
6
E.406
903592 NUen-E.406/0811
En France, pour tous renseignements techniques sur l'outillage à main, téléphonez au : 01 64 54 45 14
BELGIQUE
LUXEMBOURG
FACOM Belgie B.V.B.A.
Egide Walschaertsstraat 14-16
2800 MECHELEN
BELGIQUE
✆
: +32 15 47 39 35
Fax : +32 15 47 39 71
NEDERLAND FACOM Gereedschappen BV
Postbus 1007
2600 BA DELF
NEDERLAND
✆ : 0800 236 236 2
Fax : 0800 237 602 0
DANMARK
FINLAND
NORGE
SVERIGE
FACOM NORDIC
Farverland 1B
DK-2600 GLOSTRUP
DENMARK
✆ : +45 7020 1510
Fax : +45 7022 4910
SINGAPORE
FAR EAST
FACOM TOOLS FAR EAST
N° 25 Senoko South Road
Woodlands East Industrial Estate
Singapore 758081
SINGAPORE
✆ : (65) 6752 2001
Fax : (65) 6752 2697
SUISSE
ÖSTERREICH
STANLEY WORKS (Europe) Gmbh
Ringstrasse 14
CH - 8600 DÜBENDORF
SUISSE
✆ : 00 41 44 802 80 93
Fax : 00 41 44 820 81 00
ESPAÑA FACOM Herramientas S.L.
Poligono industrial de Vallecas
C/Luis 1°, n° 60 - Nave 95 - 2°Pl.
28031 Madrid
ESPAÑA
✆ : 91,778,21,13
Fax : 91,778,27,53
ITALIA SWK Utensilerie S.r.l.
Sede Operativa: Via Volta 3
21020 Monvalle (VA)
ITALIA
✆ : 0332 790326
Fax : 0332 790307
POLSKA STANLEY Black & Decker Polska Sp. zo.o.
ul. Postępu 21D
02-676 Warszawa
POLSKA
✆ : +48 22 46 42 700
Fax : +48 22 46 42 701
UNITED
KINGDOM
EIRE
STANLEY UK Ltd
3 Europa Court
ENGLAND
✆ : +44 1142 917266
Fax : +44 1142 917131
Europa Link SHEFFIELD S9 1XZ
FRANCE &INTERNATIONAL
FACOM S.A.S.
6-8, rue Gustave Eiffel B.P.99
F-91423 Morangis cedex
FRANCE
✆ : 01 64 54 45 45
Fax : 01 69 09 60 93
http:/ /www.facom.com
DEUTSCHLAND
Otto-Hahn-Straße 9
42369 Wuppertal
DEUTSCHLAND
✆ : (02 02) 69819-300
Fax : (02 02) 69819-350
STANLEY Deutschland GmbH
ΜΠΑΡΜΠΕΡΗΣ ΕΠΕ
Αργοναυτών 7-9
151 26 MAΡΟΥΣΙ
✆ :
210-8062811 ή 12
Fax. : 210-8029352
ΕΛΛΆΔΑ
CZECH REPUBLIC
& SLOVAKIA
Türkova 5b
149 00 Praha 4 - Chodov
Stanley Black & Decker Czech Republic s.r.o.
✆ : +420 261 009 780
Fax : +420 261 009 784
LATIN AMERICA
9786 Premier Parkway
Miramar, Florida 33025
USA
FACOM S.L.A.
✆ : +1 954 624 1110
Fax : +1 954 624 1152
SUISSE STANLEY WORKS (Europe) Gmbh
In der Luberzen 42
CH - 8902 URDORF
SUISSE
✆ : +41 44 755 60 70
Fax : +41 44 730 70 67
EN
A
B
11
10
9
E.316
Instruction manual
Dear Customers,
Thank you for purchasing our digital angle meter. This manual will help you to use
the many features of your new digital angle meter. Before operating the digital angle
meter, please read this manual completely, and keep it nearby for future reference.
MAIN FEATURES
• Digital angle value readout
• +/-2° accuracy ( rotating 90° at speed of 30°/sec)
• CW and CCW operation
• Buzzer and LED indicator for the 9 pre-settable target torques
• 50 data memory for recall and joint torque auditing
• Auto Sleep after about 2 minutes idle
• Both AAA and rechargeable batteries are compatible
NAMES AND FUNCTIONS OF PARTS A
1. LED Indicator 7. Start/Setting button
2. Buzzer 8. Power on/Reset button
3. LCD Display 9. Communication Port
4. Pre-set angle selection 10. Battery Compartment
5. Up button 11. Magnet
6. Down button
E.406
Accuracy *1 ±2° for 90° rotation @ 30°/sec
Display range 0 ➞999,0°
Resolution 0,1°
Pre-setting No 9 sets
Range 1 ➞360,0° (increment 1°)
Data memory size BN : 50
PC Connectivity *2 No
Bright LED 6 LED / 1 Red+5 Green
Button 5
Battery AAA x 2
Battery Life *3
(Continuous operation)
48 hrs.
Battery Life *3
(Standby)
1 Year
Operating Temperature -10°C ➜60°C
Storage Temperature -20°C ➜70°C
Humidity Up to 90% non-condensing
Drop Test 1 m
Vibration Test *4 10 G
Environmental test *5 Pass
Electromagnetic compatibility
test *6
Pass
SPECIFICATIONS
Note:
*1: The accuracy of the readout is guaranteed from 0.0° to 360.0° and
the test speed is 30°/sec. For maintaining accuracy, calibrate the meter at
regular intervals (1 year recommended).
*2: Use a special designed cable (accessory) to upload record data to PC.
*3:
Use two AAA batteries (Tested condition: Toshiba carbon-zinc R03UG battery)
*4: Horizontal and vertical test
*5: Environmental test:
a. Dry heat e. Impact (shock)
b. Cold f. Vibration
c. Damp heat g. Drop
d. Change of temperature
*6: Electromagnetic compatibility test:
a. Electrostatic discharge immunity (ESD)
b. Radiated susceptibility
c. Radiated emission
FAST GETTED START
➜Press to power on.
➜ Press or to set target angle.
➜ Press to start the angle measurement.
➜ Start rotation.
➜ Rotation stop and the LCD will be flashing.
➜ Now press to record angle or
press to clear or
press to count from current angle.
BEFORE USING THE METER
BATTERY INSTALLATION B
• Remove the battery cover.
• Insert two AAA batteries matching the -/+ polarities of the battery
to the battery compartment.
•
Put on the battery cap and rotate it tightly according to the following figures.
POWER ON AND RESETTING THE METER
•Press to power on the meter.
•Usually press to reset the meter before using it.
((..((..((.. ..))..))..))..))
M
M
M
(((((((((.. ..))))))))))
M
Mor
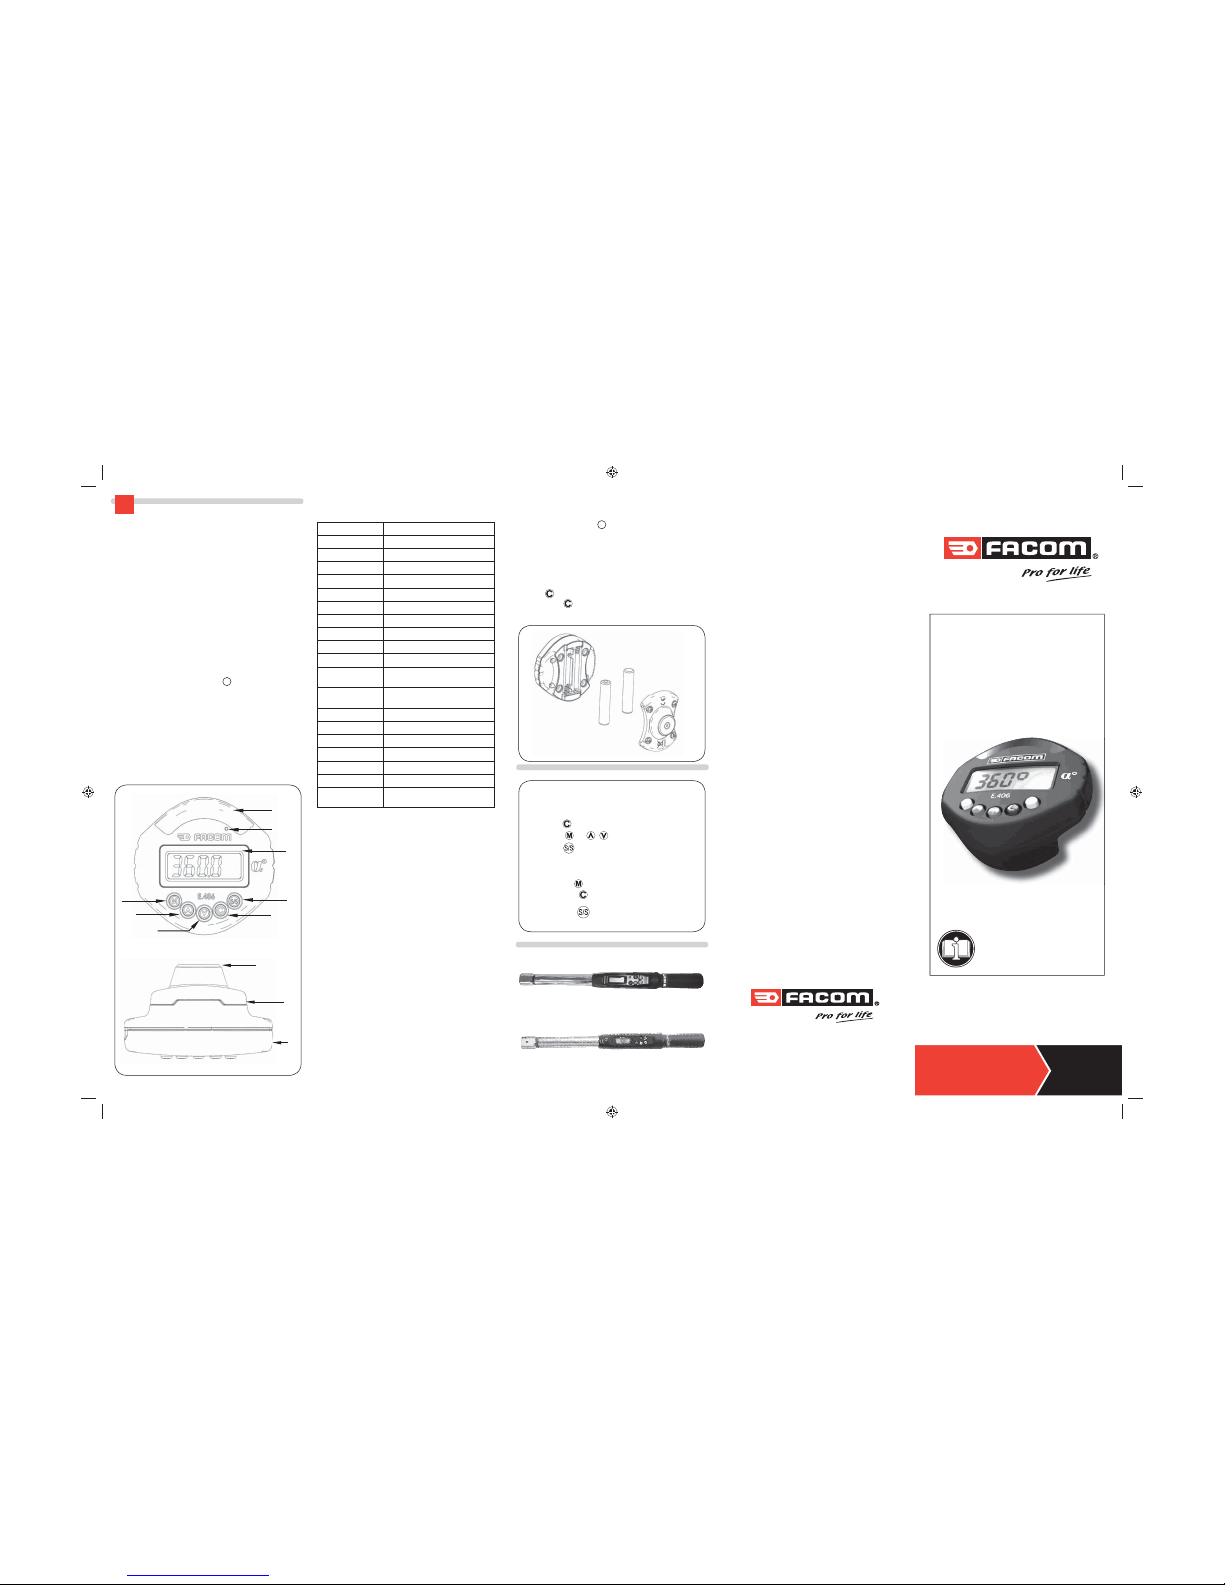
99.5% 97.5% 95% 90% 85% 80%
Note
1. There are 6 LEDs to indicate the current angle reaching 80%, 85%,
90%, 95%, 97.5% and 99.5% of target angle.
2. There is also a buzzer to indicate the reaching level of target angle.
Interval sound means it reaches over 80% and long sound means it
reaches over 99.5% of target angle.
7- CLEAR ANGLE VALUE or
CALCULATRING ANGLE AGAIN or
SAVE ANGLE RECORD
●
Pressing will clear the current angle.
●
Pressing will calculate angle again from current angle.
●
Pressing will record the current value and then clear the current value.
SET UP MENU INTRODUCTION
●From the current target angle screen, long press to go into
setup menu. Continuously press can visit the direction menu, record
menu, record clear-all menu and communication menu. Finally press
again to skip out the setup menu and go back to the current target
angle screen.
OPERATION
1- PUT THE METER ON THE WRENCH
2- POWER ON THE METER AND RESET
●Press to power on the meter or reset it.
●Finally the current target angle will be shown.
●Make sure the direction. If you want to change to direction, please
refer to “CHANGE ANGLE DIRECTION”.
Press
3- SET TARGET ANGLE
●Press to select the pre-set target angle (M1➜M9).
●Or press or to modify the current target angle. Note that
the target angle will be saved automatically with the current Mnumber.
4- PRE-TIGHTEN WRENCH
●Hold on your wrench
to pre-tighten the screw.
(eliminate the backlash of wrench)
5- START TO MEASURE ANGLE
●
Press to start the angle meter and immediately pull your wrench.
6- STOP AND WAIT FOR LCD FLASHING
●As the angle meter does not move for a few second, the LCD screen
will be flashing and the current angle
is holding on screen.
It also means the meter stop calculating angle.
CHANGE ANGLE DIRECTION
●Visit the direction menu, press or to select the
direction. (Positive) means clockwise direction and
(negative) is counter-clockwise direction.
●After setting the direction, continuously press to skip out
the setup menu and go back to the current target angle screen.
VIEW ANGLE RECORD
●Visit the record menu, press or to select the data
number and view it.
●If no record exists, will be shown.
●Continuously pressing will skip out the setup menu and go
back to the current target angle screen.
CLEAR A SINGLE RECORD
●Visit the record menu
●Press or to select the data number you want to delete.
●Press twice to delete the current data.
( will be shown)
●If press once, will be shown. If you want to
abandon, just press to skip out this menu.
●Continuously pressing will skip out the setup menu and go
back to the current target angle screen.
MAINTENANCE AND STORAGE
ATTENTION:
One-year periodic recalibration is necessary to maintain accuracy.
Please contact your local dealer for calibrations.
CAUTION:
1- Do not shake violently or drop meter.
2- Do not leave this meter in any place exposed to
excessive heat, humidity, or direct sunlight.
3- Do not use this apparatus in water.(it is not waterproof)
4- If the meter gets wet, wipe it with a dry towel as soon as possible. The
salt in seawater can be especially damaging.
5- Do not use organic solvents, such as alcohol or paint thinner when
cleaning the meter.
6- Keep this meter away from magnets.
7- Do not expose this meter to dust or sand as this could cause serious
damage.
8- Do not apply excessive force to the LCD panel.
BATTERY MAINTENANCE
1- When the meter is not going to be used for an extended period of
time, remove the batteries.
2- Keep a spare battery on hand when going on a long trip or to cold
areas.
3- Do not mix battery types or combine used batteries with new ones.
4- Sweat, oil and water can prevent a battery’s terminal from making
electrical contact. To avoid this, wipe both terminals before loading a
battery.
5- Dispose of batteries in a designated disposal area. Do not throw
batteries into a fire.
CLEAR ALL RECORDS
●Visit the record clean-all menu
●Press twice to delete the all record data.
( will be shown)
●If press once, will be shown. If you want to
abandon, just press to skip out this menu.
●Continuously pressing will skip out the setup menu and go
back to the current target angle screen.
POWER ON
●Gently press to power on.
Press
Note: First the direction sign or will show .
Then the LCD shows . It indicates the meter is under resetting
process. Finally if the reset process is completed, the target angle will be
shown. For example Mis shown.
Caution:
During resetting process, never vibrate or shake the meter. Keep it rest.
AUTO POWER OFF
●The meter will auto power off after about 2 minutes idle for
power saving.
Caution:
During communication period ( appears), the auto power-off
function is disabled.
ZERO RESET
●Press for zero reset
● Ussually press to zero reset the digital angle meter before
using the meter. It will guarantee a better accuracy.
Caution:
1.During resetting process, never vibrate or shake the meter. Keep it rest.
2.If shows. Refer to ‘‘ERROR MESSAGE’’ section.
HARDWARE RESET
● To do hardware rest, use a pin to touch the reset button which is
located in the hole of the meter back.
● Another way is remove battery and re-install it.
● If the meter does not work functionally, please do hardware reset.
ERROR MESSAGE
LOW VOLTAGE INDICATOR
If the battery voltage is too low, the meter will display a battery
symbol and then turn off. Replace batteries.
If the meter does not reset successfully for a period of time,
will be shown. Press to do zero-reset again. Notice that
during resetting process, never vibrate or shake the meter. Keep it rest.
shows that the meter does not work functionally, please do
hardware reset. Refer to “HARDWARE RESET”.
If the meter rotates too fast, will be shown.
Do press to zero reset the meter.
Press
to select
target angle
Flashing
Current Target Angle
Low battery indicator
FAST GETTED START
➜Press to power on.
➜ Press or to set target angle.
➜ Press to start the angle measurement.
➜ Start rotation.
➜ Rotation stop and the LCD will be flashing.
➜ Now press to record angle or
press to clear or
press to count from current angle.
Current Target Angle
Press or
to modify target
angle
Press
Flashing Current Target Angle
Press
Flashing Start to count angle
from 30.3
Press
Flashing Show record and data number
Press
Current Target Angle Press
Direction
menu
Record
menu Press
Red Green
Record
clear-all
menu
Press
Communication menu
Press
Press or
Press or to select data
Abandon
Press or
to select data
Press
Press
Press
Abandon
Press
Press
Press
➜ over 80 %
Pre-tighten
➜ over 99.5 %
Positive direction

This manual suits for next models

1

Other Facom Measuring Instrument manuals

Facom DX.10 User manual

Facom

Facom DX.10 User manual

Facom 714 User manual

Facom

Facom 714 User manual

Facom 712 User manual

Facom

Facom 712 User manual

Facom 712B User manual

Facom

Facom 712B User manual

Facom 1300E User manual

Facom

Facom 1300E User manual

Facom 720.C User manual

Facom

Facom 720.C User manual

Facom 701A User manual

Facom

Facom 701A User manual

Facom E.LM30 User manual

Facom

Facom E.LM30 User manual

Facom CDS Series User manual

Facom

Facom CDS Series User manual

Facom 712 User manual

Facom

Facom 712 User manual

Popular Measuring Instrument manuals by other brands

Ludlum Measurements 177-84-2 Operator's manual

Ludlum Measurements

Ludlum Measurements 177-84-2 Operator's manual

Chauvin Arnoux C.A 1110 user manual

Chauvin Arnoux

Chauvin Arnoux C.A 1110 user manual

Interacoustics ad226 Instructions for use

Interacoustics

Interacoustics ad226 Instructions for use

FLIR EXTECH INSTRUMENTS PQ34-12 user guide

FLIR

FLIR EXTECH INSTRUMENTS PQ34-12 user guide

Digatron DT-31K2 operating instructions

Digatron

Digatron DT-31K2 operating instructions

Neptune E4000 installation manual

Neptune

Neptune E4000 installation manual

Voltech VC-2 Operation manual

Voltech

Voltech VC-2 Operation manual

Polimaster PM1610B Operation manual

Polimaster

Polimaster PM1610B Operation manual

BEKA BA314E manual

BEKA

BEKA BA314E manual

SICK FFU operating instructions

SICK

SICK FFU operating instructions

R&S FSMR3000 user manual

R&S

R&S FSMR3000 user manual

Elvaco CMe2100 Quick manual

Elvaco

Elvaco CMe2100 Quick manual

OWL Fiber OWL 7+ Operation guide

OWL

OWL Fiber OWL 7+ Operation guide

Telestream PRISM MPI2-25 Installation and safety instructions

Telestream

Telestream PRISM MPI2-25 Installation and safety instructions

Lafayette 16011 User instructions

Lafayette

Lafayette 16011 User instructions

Draper D370 instructions

Draper

Draper D370 instructions

Sartorius PT-10 operating instructions

Sartorius

Sartorius PT-10 operating instructions

Eurochron ETH 8003 operating instructions

Eurochron

Eurochron ETH 8003 operating instructions

manuals.online logo
manuals.online logoBrands
  • About & Mission
  • Contact us
  • Privacy Policy
  • Terms and Conditions

Copyright 2025 Manuals.Online. All Rights Reserved.