FAL FAL-45-SQS User manual

Cooker hood
Instruction manual
Model No.:FAL-45-SQS

Page 1 (Inside)
Please be careful when removing and installing the Island installation Brackets and Stainless
Steel chimneys. The Stain Less steel chimneys contains sharp edges and can possibly lead to
cuts.
Generally asked Questions and Answers:
1. Q: My extractor fan is not extracting
A: before logging a service call please ensure the installation on your extractor fans was done
properly to avoid a service call out fee charge. Herewith a list of commonly found mistakes on
everyday installations:
* Installer did not remove the tape on the butterfly valve. (Q: 13).
*Installer did not secure the power cord inside the chimney. (Q: 13).
*Your ducting hose is exceeding the recommended maximum length. (Q: 13).
*Your unit is not at the recommended height. (Q: 3).
*Your unit is installed above the wrong application. (Q: 2).
R 450.00 Service fee will apply when we log a service call and any of the points above apply.
2. Q: Can I use the extractor fan above my gas braai?
A: NO. Please note that this unit was designed for the intended purpose of domestic kitchens
only and cannot be used as a commercial extractor fan. Commercial usage includes but is not
limited to: Restaurants, Coffee Shops, Soup Kitchens, Tuck shops, Food trailers, Gas braai’s
inside or outside your property, any other form of braai and any kitchen that is used for
commercial purposes. Using the extractor you purchased on any commercial application
poses a serious fire risk and will result in immediate void of your warranty.
3. Q: What is the correct installation height?
A: The recommended installation height is 750mm above gas and 650mm above electrical.
On either application it is recommended that your installation height does not exceed 750mm
to ensure the best results.
Q: Do I require a recirculation kit?
A: No. The extractor was designed to be used on both applications; External and Re-
circulation air operation and no additional kit are required.
4. Q: What is the difference between External and Re-circulation air operation?
A: Re- circulation; All wall mount units are supplied with aluminium and charcoal filters. For
Re-circulation mode you will simply install the unit. The air will filtrate through both sets of
filters, you’re outside aluminium filters and you’re inside charcoal filters. The air discharged
from your extractor is then clean and crease free and cannot cause any damage. There are
1

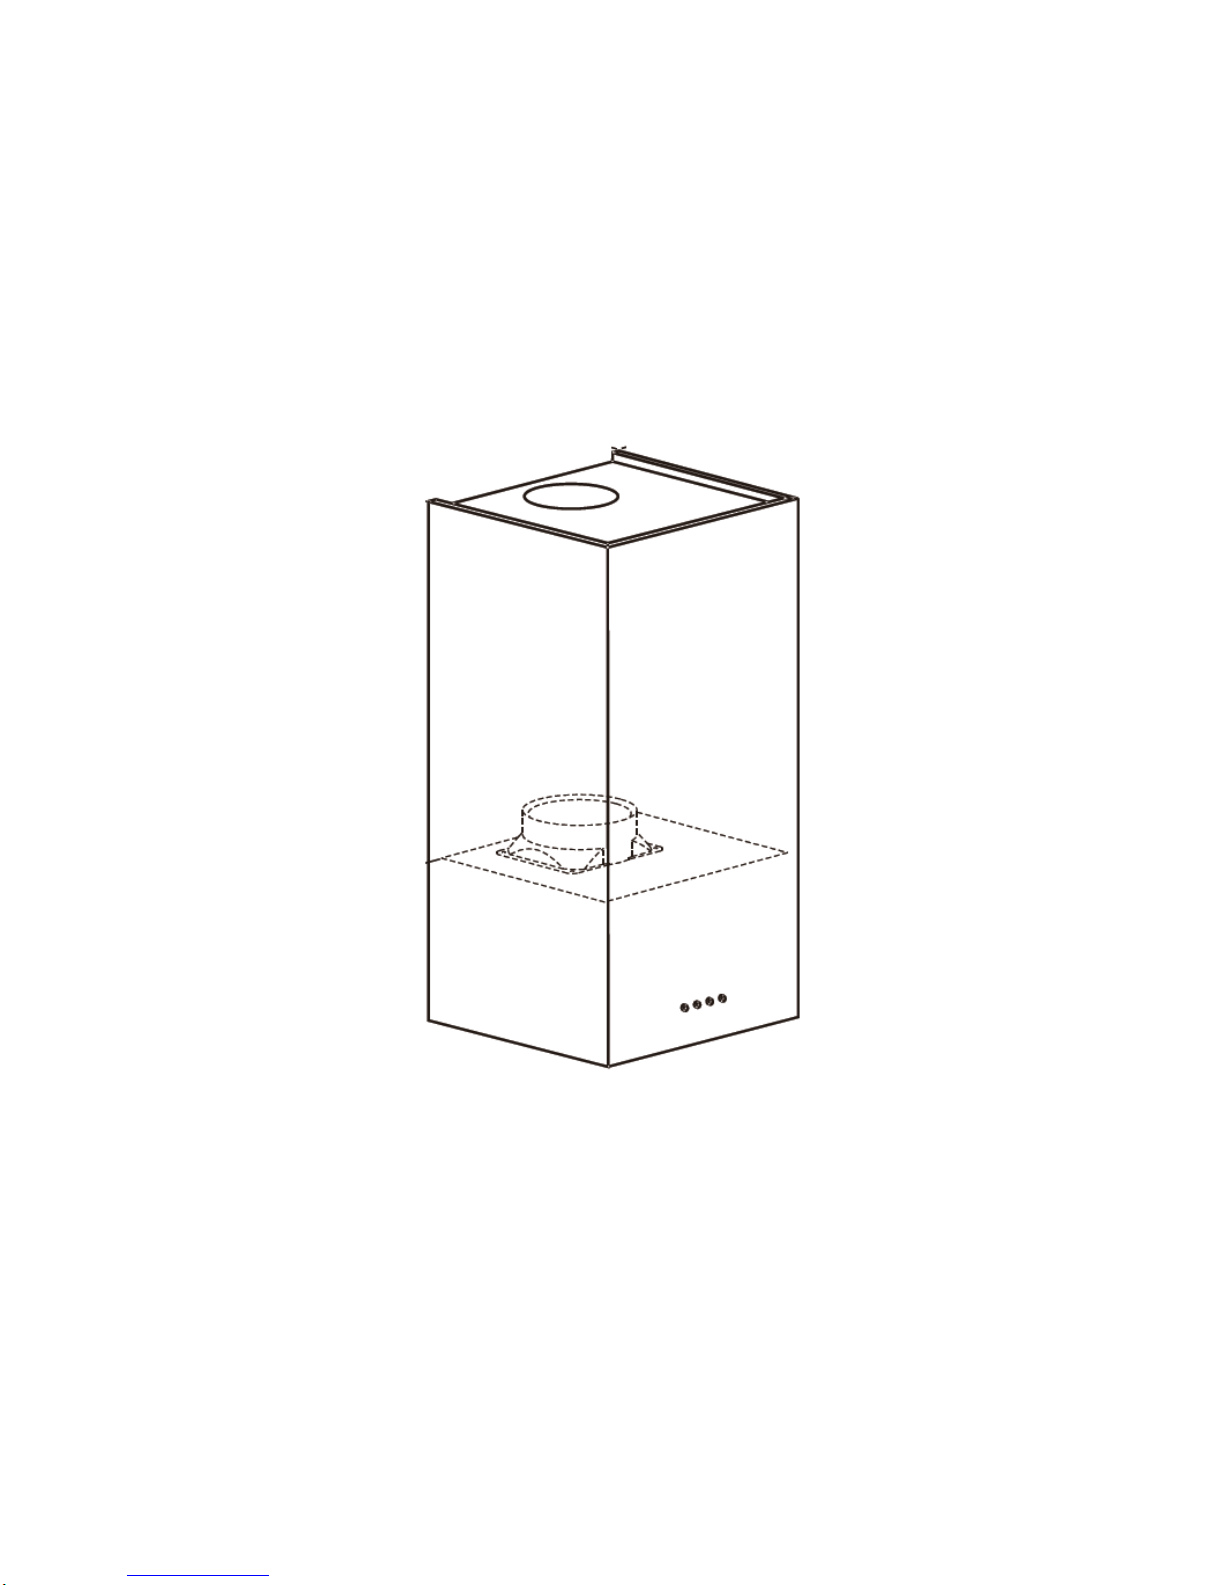
two options when using your extractor on Re-circulation. 1 –Let the filtrated air escape
through the vents on top of your top chimney or you can use the extendable ducting house to
vent the air into your ceiling. Activated charcoal in the charcoal filters removes odour and
smoke particles from the air before releasing the cleaned air back into the kitchen.
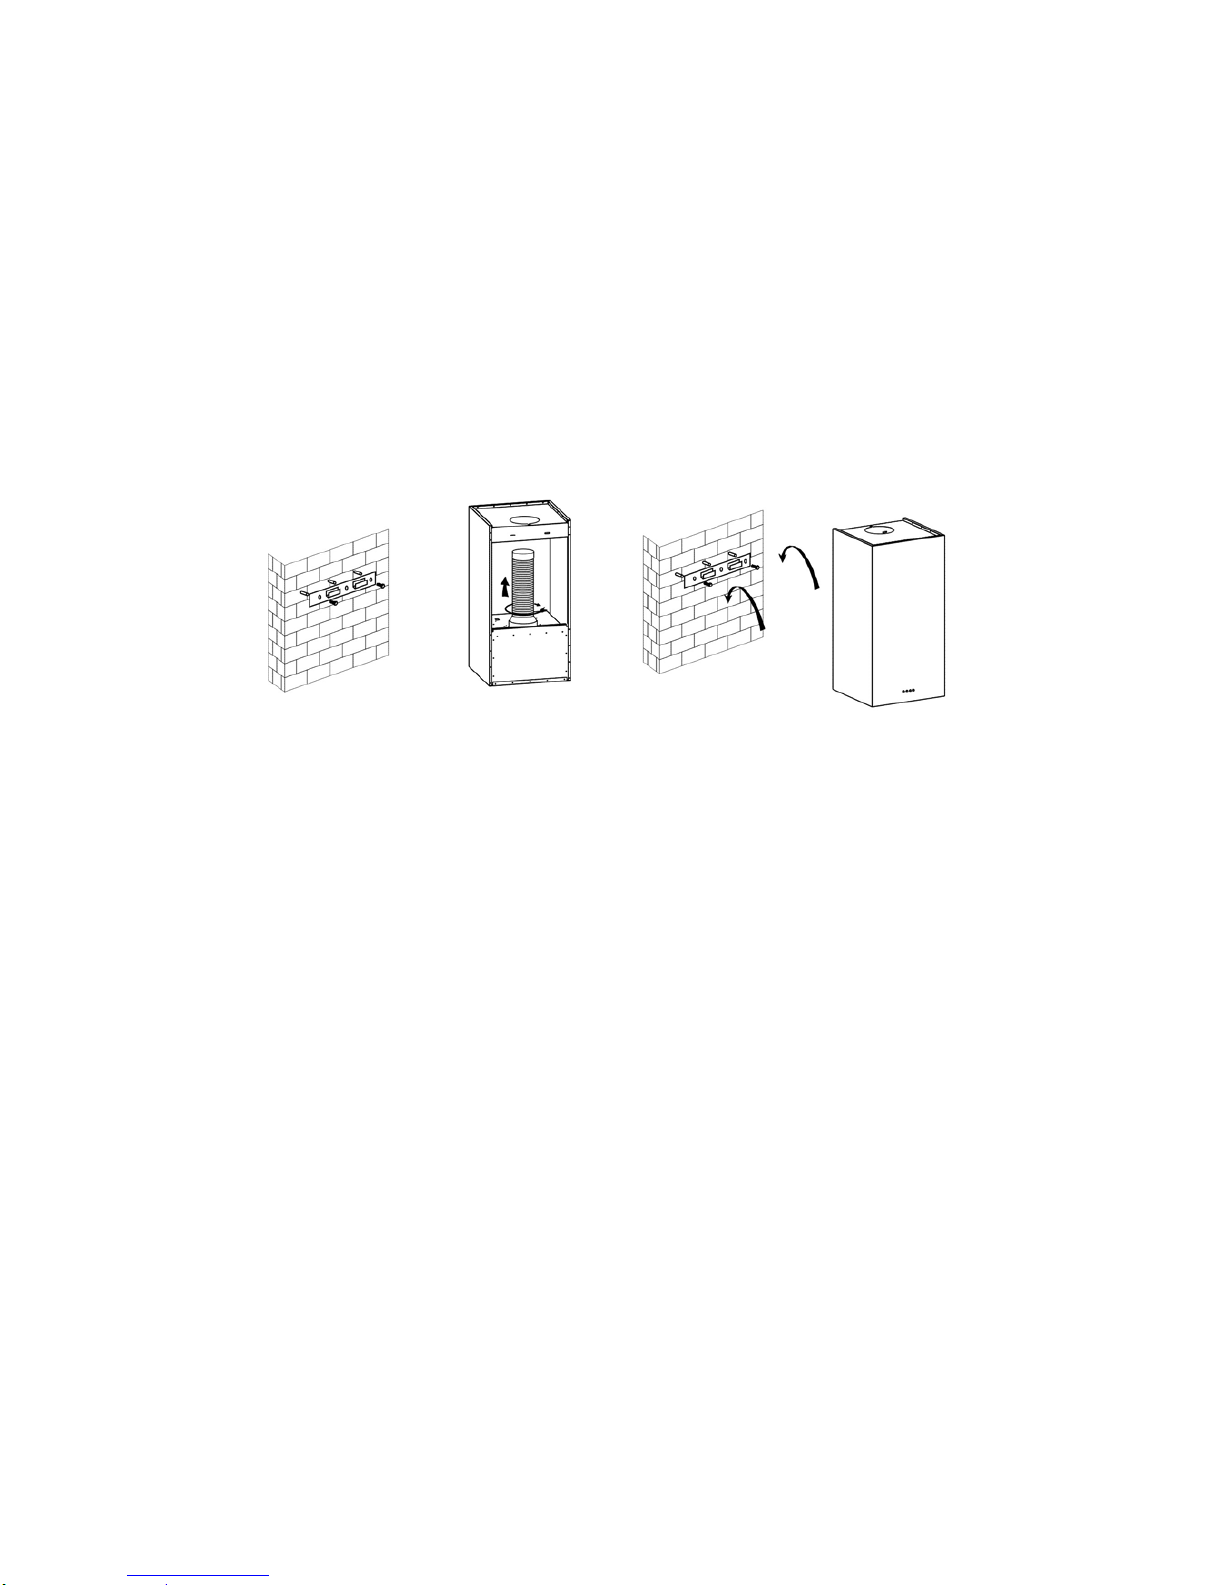
External: The only difference between Re-circulation mode and external mode is that on
external mode you are venting the air to the outside of your property using a ducting hose.
This means the clean filtrated air will not be discharged into your kitchen or ceiling but to the
outside. The unit is supplied with an extendable ducting hose. When venting your air
outwards the charcoal filters can be removed to improve the suction rate. Removing the
charcoal filters on re-circulation mode is not recommended.
|
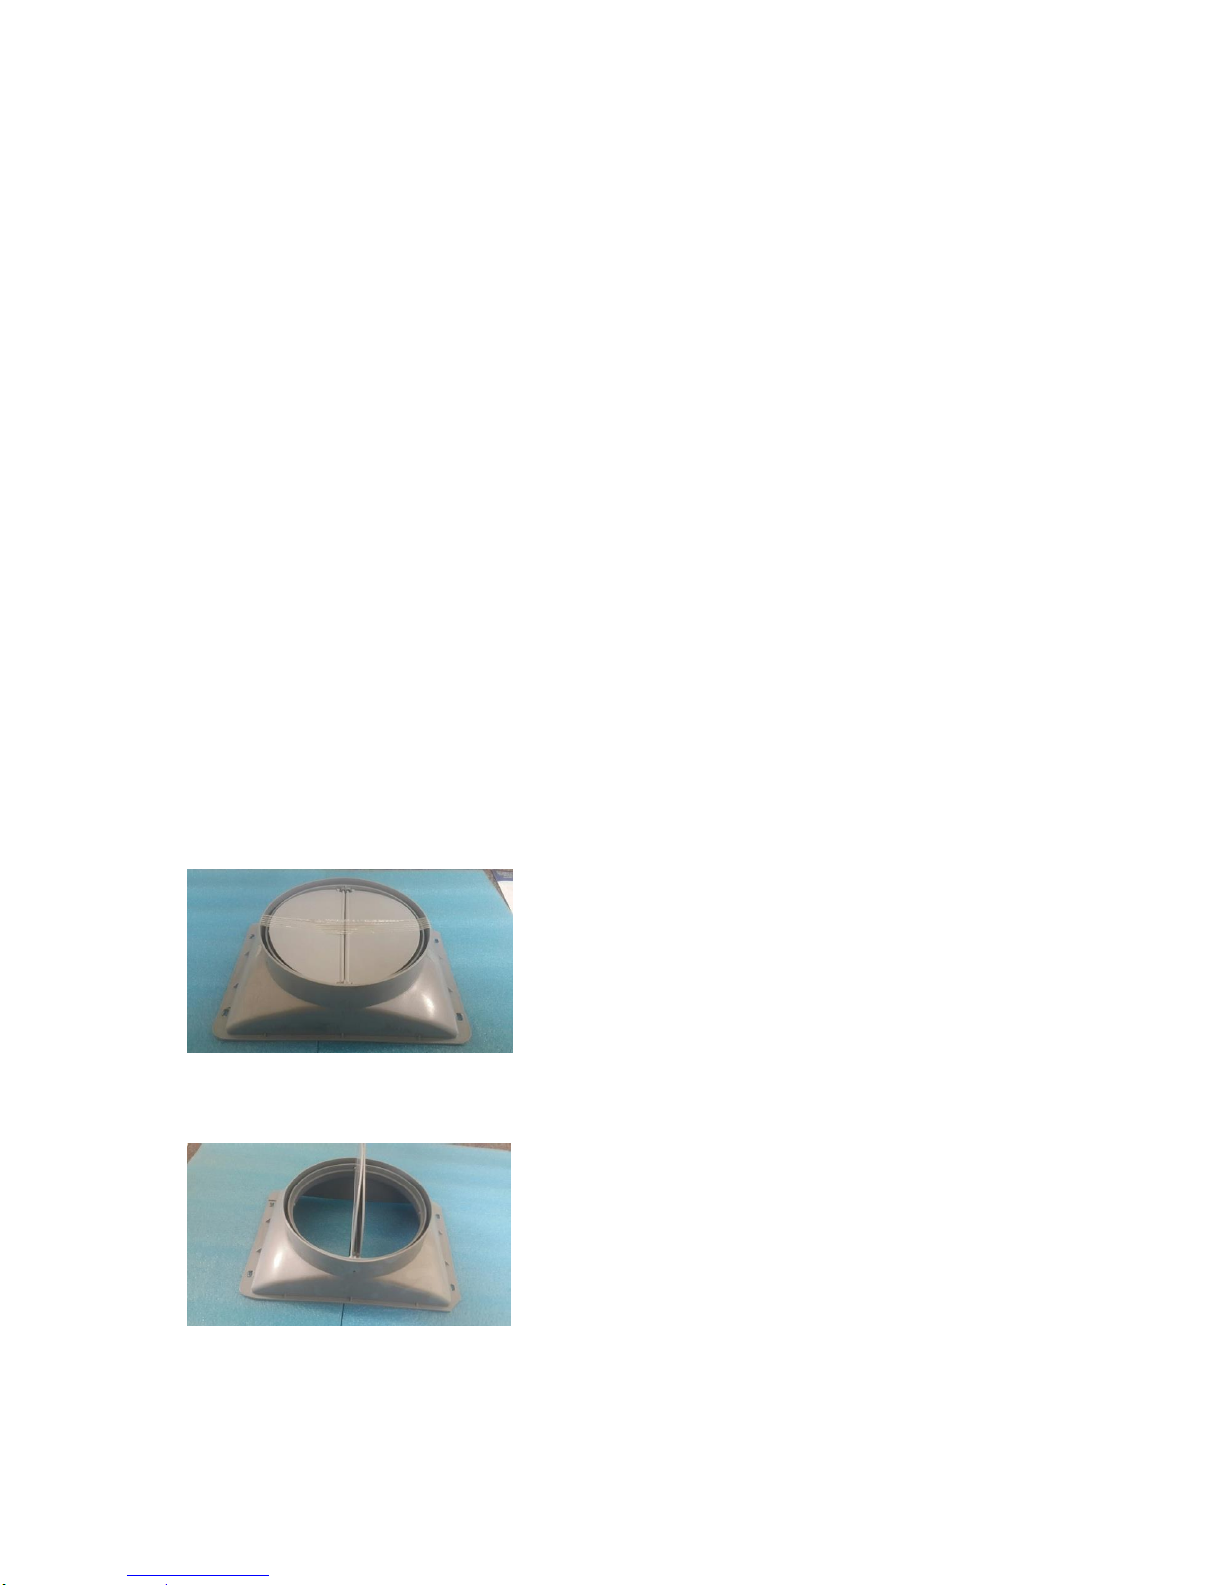
Please note that the wall fitting that fits into your wall when venting your air outwards
is not supplied with the extractor and can be purchased locally.
5. Q: How does an Extractor Fan work?
A: Extractor fans are designed to remove airborne grease, steam, heat smoke and odours
from cooking by extracting and filtration of the air in your kitchen and above your cooking
surface.
6. Q: Are my downlights/bulbs covered under the guarantee period?
A: NO. Downlights, bulbs, aluminium and Charcoal filters and are not covered under the
guarantee period. For the full list of terms and condition of the guarantee period please read
the warranty certificate supplied inside the box or in your manual. You can also download it
from www.falco.co.za
7. Q: How often do I have to replace my filters?
A: With daily use we recommend that you replace your charcoal filters every 6 months. Your
aluminium filters can be cleaned in luke warm water and dishwashing liquid. Please do not
put your aluminium filters in the dishwasher as this will discolour the filters and they will
become dull. Alternatively you just purchase new aluminium filters.
8. Q: How long is my warranty and what does it entail?
A: All our extractor fans carry a two year guarantee. Motors, PC Boards, Capacitors,
Transformers (for units with 12volt downlights), 220Volt light sockets(for units with normal
220v light bulbs), Main Control Switches and motor fan blades are covered by our two year
parts and labour guarantee.
9. Q: What is excluded from my warranty?
A: Downlights and bulbs, Glass panels and extractor glass, aluminium and charcoal filters are
excluded from the warranty.
10. Q: How do I clean my Stainless steel extractor?
A: Always ensure your extractor is cleaned with non-abrasive cleaners. Always read the
product instructions and ensure that the product is safe for the use of Stainless steel. Two
great products are window cleaner, which is also a stainless steel cleaner, and spray on wood
polish, another certified stainless steel cleaner. Please note that abrasive cleaners will
damage the stainless steel and will cause rust or rust stains.

11. Q: Why is there rust marks on my extractor?
A: Stainless steel can rust if cleaned with abrasive cleaners. The chemicals inside abrasive
cleaners react with the stainless steel and the result will be rust. There are many day to day
cleaning products in our kitchens that are abrasive cleaners and unknown to the consumer.
Please make sure you read the instructions and if Stainless Steel is not mentioned, then do
not use the product on Stainless steel.
12. Q: Can I extend my stainless steel chimneys if they are to short?
A: Yes only on a wall mount unit. Island extractor chimneys CANNOT be extended. Please
make sure of your measurements before starting your installation process. Additional bottom
chimneys are sold by Lategan & Van Biljoens in Pretoria and they are used to extend the
chimneys on wall mount units.
13. Q: My extractor is blowing and not extracting?
A: There are three main reasons that can cause your extractor to blow instead of extracting
and most of the time (98%), this is caused by faulty installations. Please make sure that there
is no obstruction on top or inside your ducting hose. Make sure the power cable is neatly
secured inside the chimneys and make sure the power cable is not causing an obstruction on
top of your butterfly valve. Poor workmanship and failure to secure the power cable causes
the cable to lie on top of the butterfly valve and this will block and prevent the unit from
extracting properly.
Please ensure that the tape stuck over your butterfly valves in the factory is removed when
your unit is installed. Failure to remove the tape on the two butterfly valves will result in airflow
outlet to be restricted and this will cause the air to be returned causing the blowing of air
instead of the extraction of air. Before booking a service call make sure you check this first to
avoid being charged.
(a)This is a picture of the butterfly valve closed with the tape on top:
The tape should be removed when installed. Both butterfly valves open when the extractor is switched
on:
(b) Ducting hoses exceeding the 2.5meters will also have a negative effect on the extraction rate of
your extractor fan. If you are out-venting the air and the extension of ducting hose exceeds 2.5meter
you need to purchase an addition extraction motor that must be installed in line with the ducting hose
to support in the extraction of the air. The longer your ducting hose the less your extraction rate will

be. If your ducting hose is too long and you did not install an additional extracting motor in line with
the ducting hose, your extractor will not extract the air. Please ask your installer about an additional
inline motor when your ducting hose is exceeding 2.5m.
14. Q: Parts Availability
A: Full range of spares are available from Lategan & Van Biljoens in Pretoria.
www.appliancesspares.co.za
15. Q: What is the diameter of my ducting hose?
A: 150mm
16. Q: More Queries?
A: Please email any queries to: christie@falco.co.za, Tel: 011 454 6423/4314.
Spares can be viewed and ordered online: www.appliancespares.co.za
4

5
NOTICE
1. Thank you for choosing our cooker hood. Please read the
instruction manual carefully before use.
2. The installation work must be undertaken by a qualified and
competent fitter.
3. The manufacturer disclaims all liability for any damage or
injury caused as a result of not following instructions for
installation contained in the following text.
Feature
1. The cooker hood uses high quality materials, and is made with a
streamlined design.
2. Equipped with a large power low noise electric motor and
centrifugal leaf, it produces strong suction, low noise, non stick
grease filter and easy to clean.
3. With the isolated low voltage circuit board control, 12vAC
input, the lights are therefore safer.
4.Special wind tunnel construction and oil collector design, free
dirt will be absorbed in a second.

6
Installation
1. The cooker hoods should be placed at a distance of 65-75cm
from the cooking surface for best effect. See Pic 1.
2. To install onto the wall every 100mm drill 3 holes of Ø8mm on
a suitable place in line with the hook on the hood.
3. Insert expended screws into the holes. Fix the hook on the wall,
See Pic 2.
4. Add the soot tube to the one way valve, and extend it to a
perfect height as you need. See Pic 3.
5. Hang the hood onto the hook. See Pic 4.
Pic 2
Pic 3 Pic 4

7
Notice of Installation
1.Before installation, please ensure the area is clean to avoid
suction of the remaining bits of broken wood and dust.
2.It cannot share the same air ventilation tube with other
appliance such as gas tube, warmer tube, and hot wind tube.
3.The bending of ventilation tube should be120°, parallel or
above the start point and should be connected to the external wall.
4.After installation, make sure that the extractor is level to
avoid grease collection at one end.
Safety Warning
Never let the children operate the machine
The cooker hood is for home use only, not suitable for
barbecue, Roast shop and other commercial purpose.
Please ask the technical person to do the assembling.
The cooker hood and its filter mesh should be clean regularly
in order to keep in good working order.
Before cleaning, please switch the power off at the main
supply.
Clean the cooker hood according to the instruction manual and
keep the cooker hood from the danger of burning.
If there is any fault with the appliance, please call the service
department to arrange a service engineer.

8
Operation
Electronic button
1. Push the low button, the indicating light on, and the motor runs at
low speed. Push it again and the motor will stop.
2. Push the middle button, the indicating light on, and the motor
runs at mid speed.Push it again and the motor will stop
3. Push the high button, the indicating light on, and motor runs on
high speed. Push it again and the motor will stop
4. Push the light button; the indicating light on, and the two lighting
lamps will come on. Push it again and the lamps will turn off.

9
Abnormity and Solution
Fault Cause Solution
Light on, but motor
does not work
The leaf blocked Get rid of the blocking
The capacitor damaged Replace capacitor
The motor jammed bearing
damaged Replace motor
The internal with of motor off or
a bad smell from the motor Replace motor
Light does not work,
motor does not work
Beside the above mentioned, check the following:
Light damaged Replace lights
Power cord looses Connect the wires as per
the electric diagram
Oil leakage One way valve and the air
ventilation entrance are not
tightly sealed
Take down the one way
valve and seal with glue
Leakage from the connection
of U-shaped section and
cover
Take U-shaped section
down and seal with soap
or paint
Shake of the body The leaf damaged and causes
shaking Replace the leaf
The motor is not tightly
hanged Lock the motor tightly
The body is not tightly
hanged Fixed the body tightly
Insufficient suction The distance between the
body and the gas top too long Readjust the distance
Too much ventilation from
open doors or windows Choose a new place and
resemble the machine
The machine inclines The fixing screw not tight
enough Tighten the hanging
screw and make it
horizontal
The hanging screw not tight
enough Tighten the hanging
screw and make it
horizontal
This manual suits for next models
1
Other FAL Ventilation Hood manuals