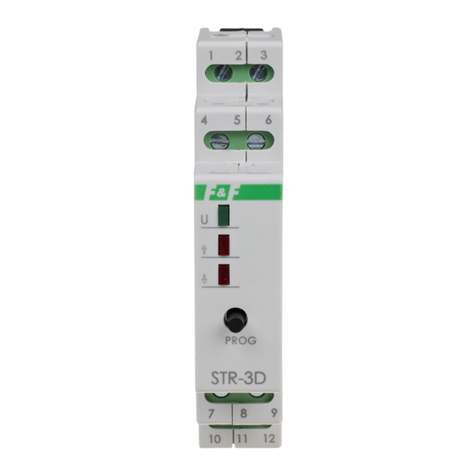
F&F CRT-06 User manual

PURPOSE
The CRT-06 controller is multi-function, programmable electronic
devices which enable control of heating or cooling devices in
order to maintain a stable room temperature, as well as to control
ambient and substance temperatures in industrial conditions,
with the option of supervising technological processes.
CRT-06CRT-06
www.fif.com.pl
ul. Konstantynowska 79/81
tel/fax 48 42 2270971 POLAND
e-mail: [email protected]
95-200 Pabianice
F&F products are covered by an 24 months warranty from date of purchase
DIGITAL TEMPERATURE
REGULATOR
DESCRIPTION OF CONTROL PANEL:
To work and programming of regulator CRT-06 is use control
panel. It include two line with eight sign on alfanumerical display
and keyboard with five buttons, which is situated under the
display.
In standard work mode on display are present values of
temperaturer which are measure by sensors C1 and C2. If is
connect only one sensors- C1, then at place on display for reprts
from C2 anything is diplaied.
Signs on the left side of display, signalize work mode of regulator
in position of output relay. This sign present:
In programming mode button Return make possible to
return main menu. If button will be push at edition mode,
then program return to main menu without save all
registry. Button Return enable to delete information
abaut errors.
BUTTONS FUNCTIONS:
L1
L2
L3
CRT
N
N
L
N
N
CONTROLLERS FEATURES:
- controlling panel use for programming and monitor to work of
regulator
- possibilty of connection two independent temperature probes
PT-100
- two outputs of relay 1P which were attribute to sensors
- control panel for programming and monitoring;
- 10 operation functions;
- 2 independent temperature sensors;
- two independent temperature values may be set;
- 2 x 1P contacts applied to the temperature sensors;
- 2 hysteresis set values, one for each sensor;
- AUTOMATIC mode - operation with one selected function;
- MANUAL mode permanent closing or opening of the contact
without a temperature measurement. Separate temperature
drops for the P1 and P2 contacts.
- memory feature for maximum and minimum temperature values
registered, independent for the C1 and C2 sensors;
- CORRECTION related to the temperature read-out error
against the model thermometer;
- WARNING - visual signalisation of the temperature sensor
failure, range exceed and speed riasing or falling temperature
exceed
- limiting access to program menu using PIN code
- LIGHT selection of display illumination mode.
- LANGUAGE program menu in three languages: Polish, English
or Russian
CRT-05 is equipped to:
CRT-05
OKOK MenuMenu
+125şC
+97şC
Two liness,
with eight sign
alfanumeric
display
Controll
buttons
At programming mode buttons UP and DOWN make to
possibility to select position of menu and to increase or
reduce value of edited parameter.
In programming system mode button OK enable to pass
to selected position from menu and enter the changes.
In standard work button OK is use to change order
temparature T1 and T2 .
Button Menu enable to pass to programming mode of
regulator.
In change order value mode use it cause reconnection
between setting for first and secon sensor.
OKOK
MenuMenu
5 9 0 8 3 1 2 5 9 2 7 1 6
+125º
+97º
Reprts from
sensor C1
Reprts from
sensor C1
Position of output
realy P1
Position of output
realy P2
Open joint - automatic work mode
Open joint - manual work mode
Close joint - automatic work mode
Close joint - manula work mode

Pass to programming mode is possible by push button MENU.
Structure of main menu:
PROGRAMMING
To select position from menu we use buttons “UP” and “DOWN”.
If you want pass to selected position then you need push button
OK. Pass to main menu is possible by push button return.
Menu -> MODE
Instruction to select work mode: :
1. By button Menu pass to main menu.
2. Prees button OK.,to entered pass to menu.
3. By buttons “UP” or “DOWN” select work mode: HADWORK or
AUTO, enter by OK.
4. If will choosen hadnwork mode, wil displaied additional menu
to set position outout of relay (open or close). Select by buttons
“UP” or “DOWN” and enter by OK. Pass to main menu without
save all settings is possible by push button return.
This mode is use to set mode of work: automatic or handwork. In
automatic work position of output relay is depend of reprts from
sensors which are connect to regulator and executed program.
Hadwork mode make possibility set of output relays independent
of reports from sensors.
5. In automatic work will dispalied menu to select program ( one of
tenth) saved in device memory.
OKOK
MenuMenu
Info
MENU
System
MENU
Settings
MENU
Tryb
MENU
Mode
MENU
ATTENTION!:
Choose handwork mode is signalize by sign R near sings which
present position of relays.
P1 ON - joint of relay P1 is close, but joint of relay P2 is
open.
P1P2 ON - joints of relays P1 and P2 are close.
P2 ON - joint of relay P1 is open, but joint of relay P2 is
close.
P1P2 OFF - joints of relays P1 and P2 are open.
Tryb
Tryb
P1 ON
P1P2 ON
Handwork
Handwork
Tryb
Tryb
P1 OFF
P1P2 OFF
Handwork
Handwork
+23º
+21º
OKOK
OKOK
OKOK
OKOK
OKOK
OKOK OKOK
Tryb
MENU
Auto
Mode
Tryb
MENU
P1 ON
Manual
Tryb
MENU
P1 ON
Saved
Tryb
MENU
P2 ON
Saved
Tryb
MENU
P1P2 ON
Saved
Tryb
MENU
P1P2 OFF
Saved
Tryb
MENU
P2 ON
Manual
Tryb
MENU
P1P2 ON
Manual
Tryb
MENU
P1P2 OFF
Manual
Tryb
MENU
MODE
MENU
OKOK OKOK
Tryb
MENU
Manual
Mode
...
By buttons “UP” or “DOWN” choose program ( option to use are
present under) and enter by button OK. Possible is return to main
menu without save all changes by push button return.

OKOK
Tryb
MENU
Mode
MENU
OKOK OKOK
Tryb
MENU
Manual
Mode
OKOK OKOK OKOK
OKOK
OKOK
OKOK
Tryb
MENU
Auto
Mode
Tryb
MENU
Prog 1
Auto
Tryb
MENU
Prog 10
Auto
Tryb
MENU
Prog 1
Saved
Tryb
MENU
Prog 10
Saved
................
...
PROG 1 HEATING mode
Regulator work with sensor C1 which have definited temperature
T1 and hysteresis H1.
PROG 2 COOLING mode
Regulator work with sensor C1 which have definited temperature
T1 and hysteresis H1.
T1
T1-H1
P1
P2
C1
T1+H1
If temeprature on output relay C1 fall under value (T1+H1), it
cause close a joint P1 and P2 in the same time. Joints P1 and P2
will be open if temperature on input sensor C1cross value (T1+
H1).
T1
T1-H1
T1+H1
P1
P2
C1
Relays P1 and P2 work in parallel connection and closing joints
when temperature is higher than value(T1+H1). Joints of realys
will be open when temperature fall under value (T1-H1).
PROG 3 HEATING/COOLING mode
Regulator work with sensor C1 which have definited
temperature T1 and hysteresis threshold H1.
PROG 4 HEATING mode- two regulators
Regulator works with sensors C1 i C2 in function two
independent thermostat which works in heating mode. For
sensor C1 is definited temperature T1 and hysteresis threshold
H1, but for sensor C2 is definited temperature T2 and hysteresis
threshold H2.
T1
T1-H1
T1+H1
P1
P2
C1
Relays P1 and P2 works alternately. P1 work in cooling mode,
closing joint when teperature fall under value (T1 H1) and
opening it when cross value (T1 + H1). Realy P2 work in heating
mode, closing joint when temperature fall under value (T1- H1)
and returnly opening it when cross value (T1 + H1).
P1
P2
T1
T2
T1-H1
T2-H2
C1
T1+H1
T2+H2
C2
PROG 5 COOLING mode- two regulators
Regulator works with sensors C1 and C2 in function two
independent thermostat which works in cooling mode. For sensor
C1 is definited temperature T1 and hysteresis threshold H1, but
for sensor C2 is definited temperature T2 and hysteresis
threshold H2.
If temperature of sensor C1 fall under value (T1-H1), it caue
close a joint P1. When temperature increase higher than value
(T1+H1), than joint P1 will be raturnly open. Similary for sensor
C2 when temperature will be smaller than (T2-H2) than joint P2
will be close, returnly opening will be possible than temperature
cross value (T2+H2).
T1
T2
T1-H1
T2-H22
T1+H1
T2+H2
P1
P2
C1
C2
If temperature from sensor C1 increase higher than value (T1 +
H1), then joint P1 will be closed. But when temperature fall under
value (T1 - H1), than joint P1 will be returnly open. Similary for
sensor C2, when temperature will be higher than value (T2 + H2)
tham joint P2 will be closed. It will be returnly open when
temperature fall under value (T2 - H2).

PROG 6 HEATING mode- two regulators.
Second regulator dependent from first regulator.
Regulator work witg two sensors C1 and C2, whiches have
definited temperature T1 and T2 , and hysteresis thresholds H1 i
PROG 7 Differential regulator
Regulator work with two sensors C1 and C2. Ordered parameter
is distinction of temperatures. If distinction beteween reprts from
the first and second sensors (C1 C2) cross ordered value then
will be closed joint P1. If distinction of temperatures will be
smaller than ordered value then joint P2 will be close.
P1
P2
T1
T1 - H1
C1
T1 + H1
T2
T2 - H2
C2
T2 + H2
The first thermostat, is connect with sensor C1, it close when
temeratute from relay and output fall under value (T1-H1) and
open it when cross value (T1+H1). Position of the second
thermostat, which is connect with sensor C2 and outpu P2,
depend from position of the first thermostat and temerature from
sensor C2. Joint P2 will be closed when temperature from
sensor C2 will be smaller than value (T2-H2) and joint P1 will be
closed. Condition for open joint P2 is crossing by sensor C2 value
(T2+H2) or open joint P1 .
Ordered value.
P1
P2
(C1 - C2)
PROG 8 Window mode (one sensor)
Regulator work with sesor which is connect to joint C1. If
temperature from sensor will be in range definited by values T1
and T2, then realys joints P1 and P2 will be closed.
PROG 9 Window mode (two sensors)
Regulator works with two sensors C1 and C2. If temperature from
two sensors will be in range, which is definited by values T1
iandT2, then relay joints P1 and P2 will be closed.
C1
P1
P2
T1
T2
ATTENTION: When will set value T2 > T1 then regulator will be
work correct.
PROG 10 Window mode - two regulators
Device works as two independent thermostats, which works in
window mode. Sensor Czujnik C1 dependent from parameter s
T1 and T2 and steer output of relay P1. Sensor C2 dependent
from parameters T3 and T4 i, steer output of relay P2 .
C1 C2
P1
P2
T1
T2
ATTENTION: When will be set value T2 > T1 then regulator will
be work correct.
P1
P2
C1
T1
T3
C2
T4
T2
If temperature from sensor C1 will be included in range between
values T1 and T2, then joint of realy P1 will be close.Similary if
temperature from sensor C2 will be included in range between
values T3 iandT4, then joint of relay P2 will be close.
ATTENTION: When temerature will T2>T1, or T4 >T3, tthen
regulator doesn’t work correct
Menu -> SETTINGS
This menu is use to configuration parameters of regulator in
automatic work.
If you need edit parameters follow with procedure:
1. By button Menu pass to main menu.
2. By buttons “UP” or “DOWN” select menu Menu -> Settings and
enter OK..
3. By buttons “UP” or “DOWN” select parameter to edition and
prees OK...
4. By buttons “UP” or “DOWN” set value of parameter and enter
by OK..
5. Entered of change is signalize by raport: Saved with value of
saving parameter.
6. Possible is out from edition mode to main menu without save all
changes by button return.

Example of change parameter value.
OKOK OKOK
OKOK
Tryb
MENU
Settings
MENU
Tryb
MENU
Temp.T1
Set
Tryb
MENU
+ 0°
Temp.T1
Tryb
MENU
+ 60°
Temp.T1
Tryb
MENU
+ 60°
Saved
OKOK
Tryb
MENU
Settings
MENU
OKOK Tryb
MENU
Temp.T1
Settings
Tryb
MENU
Temp.T2
Settings
Tryb
MENU
Temp.T3
Settings
Tryb
MENU
Temp.T4
Settings
Tryb
MENU
Hyst.T1
Settings
Tryb
MENU
Hyst.T2
Settings
MENU
Settings
MENU
Settings
Delay T1
MENU
Settings
Tryb
MENU
Cor.CT1
Settings
Tryb
MENU
Cor.CT2
Settings
Distinction
Delay T2
ATTENTION: Edition of setting is possible for parameter which
are use ina executigram. When need to change parameter which
isn’t use in program then option will not able.
ATTENTION: Settings which were able to program, are present
under ( numbers aren’t cross out):
Ordered value of temperature T1
Temperature could be set in range: -100÷400°C
with precision 1°C.
ATTENTION!!: Possible is quick change value of
ordered temperature T1 and T2 without pass to
menu-> settings. You need in standard work push
button OK. It cause display actual value. Next by
buttons “UP” or “DOWN” set new value and enter by
OK. If need edit next temperature push button OK.
Push a button return cause out from edition mode
without save all changes.
12345678910
Tryb
MENU
Temp.T1
Settings
Ordered value of temperature T2.
Te m p e r a t u r e c o u l d b e s e t i n r a n g e
-100÷400°C with precision 1°C.
Ordered value of temperature T3.
Te m p e r a t u r e c o u l d b e s e t i n r a n g e
-100÷400°C with precision 1°C.
Ordered value of temperature T4.
Te m p e r a t u r e c o u l d b e s e t i n r a n g e
-100÷400°C with precision 1°C.
Value of hysteresis for temperature T1.
Te m p e r a t u r e c o u l d b e s e t i n r a n g e
1÷100°C with precision 1°C.
Value of hysteresis for temperature T2.
Te m p e r a t u r e c o u l d b e s e t i n r a n g e
1÷100°C with precision 1°C.
Ordered distiction of temeratures which is use as
parameter prog 7.
Distiction of temperaturs could be set in range
1÷500°C with precision 1°C.
1
1
1
1
1
1
2
2
2
2
2
2
3
3
3
3
3
3
4
4
4
4
4
4
5
5
5
5
5
5
6
6
6
6
6
6
7
7
7
7
7
7
8
8
8
8
8
8
9
9
9
9
9
9
10
10
10
10
10
10
Tryb
MENU
Temp.T2
Settings
Tryb
MENU
Temp.T3
Settings
Tryb
MENU
Temp.T4
Settings
Tryb
MENU
Hyst.T1
Settings
Tryb
MENU
Hyst.T2
Settings
MENU
Settings
Distiction
Minimal time to hold a one position (ON or OFF) of
retay output
Parameter DelayT2 is dependent from sensor C2.
Example of work for prog 1 with delay . Delay was
present in earlier point.
Correction of sensor reports C1.
Sensor reprts could be corrected by ±20°C with
precision 1°C.
Minimal time to execute one cycle of program (ON
or OFF)
Parameter DelayT1 is dependent from sensor C1.
Example of work for prog 1 with delay . Delay is
present on under picture..
1
1
1
2
2
2
3
3
3
4
4
4
5
5
5
6
6
6
7
7
7
8
8
8
9
9
9
10
10
10
MENU
Settings
MENU
Settings
Tryb
MENU
Cor.CT1
Settings
P1
P2
C1
T1
T - H
1 1
T + H
1 1
Delay Delay Delay
Delay T1
Delay T2

Correction of sensor reports C2.
Sensor reprts could be corrected by ±20°C with
precision 1°C.
12345678910
Tryb
MENU
Cor.CT2
Settings
Menu -> System
This menu is use to set settings which were left, independendt of
work mode and executing program.
1. By button Menu pass to main menu.
2. By buttons “UP” or “DOWN” select menu Menu -> Settings and
enter OK.
3. By buttons “UP” or “DOWN” select option (one of seventf) and
enter by OK.
OKOK
Tryb
MENU
System
MENU
OKOK
Tryb
Tryb
Tryb
MENU
MENU
MENU
MENU
MENU
Zero W-N
Gradient
Deafult set.
System
Language
MENU
System
Light
MENU
System
Password
System
System
System
System
Samples
OKOK
OKOK OKOK
System
Language Polish
Language
English English
Polish
Saved
Saved
5. System->Light. This parameter make possibility to lighting a
display of regulator. Possible is set lighting for all the time for
display or lighting only for some second after push any button
If you need way of lighting you need to pass menu System -> Light
and select by buttons “UP” or “DOWN” correct option and enter
by button OK.. Return to main menu is possible by push button
Return.
OKOK OKOK OKOK
System
Light Saved
Saved
Button
Light
Button
Language
Language
Light
for all time for all time
4. System->Language.This parameter make possiblity to
choose on of three language in which will be display reports. If
you need change language you need pass to menu System ->
Language by buttons “UP” or “DOWN” select language and enter
by button OK. Return to main menu is possible by push button
return.
OKOK
System
Password
New PIN
New PIN New PIN Saved
>> 456
New PIN
OKOK
Editing
digit
Editing
digit
.....
PIN
>> 0
PIN
>> *5
PIN
>> 4
PIN
>> **0
PIN
PIN
>> *0
>> **6 OKOK
MenuMenu
MenuMenu
ATTENTION:
Work in safe mode is signalize by dispalied a sign . In this
cause pass to setting of regulator ( press button MENU) is
previuos by key correct a pin code.
Example of key PIN code:
6. System-> Password. This parameter is use to safe acces for
all user to menu. Password is a number from range 0 to 999,but
save password to 0 unlock a menu. Set password another than 0,
cause pass timer to safe mode. In cause change of PIN need to
pass menu System -> Language and by buttons “UP” or “DOWN”
set the first digit of PIN code. Push a button Menu cause pass to
edit the next digit of PIN code. After set all PIN enter by button
OK, Possible is out from edition PIN code mode without save
changes by button return.
PIN code is entered only once for all time to edit parameters from
edition mode. After out from edition mode regulator stay in
unlock position about 10sec, ( it is signalize by blinking key sign in
display). At this time could return to edition mode (button MENU)
without key PIN code.
ATTENTION: In safe mode possible is quick change ordered
temperature T1 and T2 (press button OK in standard work).
7. System -> Zero W-N. This mode is use to delete min and max
temperature (which could be read from Menu->Info) registered by
sensor. In cause to delete min and max value of temperature
need pass to menu System -> Zero W-N and enter by OK. Next
by buttons “UP” or “DOWN” select value YES and enter by OK.
OKOK OKOK
System
Zero W-N
Zero W-N
NO
Zero W-N
YES
Zero W-N
Done
8. System -> Gradient. This parameter make possibility to set
max value of change temperature spped. Cross this value will be
signalize by ERROR of regulator. If want to change gradient pass
to menu System -> Gradient and by buttons “UP” or “DOWN” set
gradient value (option list is present under) and enter by OK.
Possible is out to main menu without save changes by button
return.

OKOK
System
Gradient
OKOK
Gradient
1°C/s
OKOK
Gradient
2°C/s
OKOK
Gradient
3°C/s
OKOK
Gradient
4°C/s
OKOK
Gradient
6°C/min
OKOK
Gradient
Off
ATTENTION: Cross acteable speed teperature change value
cause error with code 02.
9. System -> Samples. This parameter is use to set frequency
wiht will be update reprts from temerature sensor. frequency
could be change from range 1÷120 samples for minute. To
change sample frequency need to pass menu System ->
Samples , by buttons “UP” or “DOWN” set frequency and enter by
OK Return to main menu without save all changes is possible by
button return.
OKOK
System
Samples
OKOK 1/min
120/min
OKOK
...............
Samples
Samples
10. System-> Default settings. Default settings make possibility
to return all settings of regulator to target values. If you need
restore default settings pass to menu System -> default settings
and enter by button OK. Next by buttons “UP” or “DOWN” set
value YES and push button OK.
OKOK OKOK
System
Default sett.
Default sett.
NO
Default sett.
YES
Saved
YES
ATTENTION! Return to default settings cause delete all earlier
configurations with saved programs.
Rest of parameters of regulators are set with values:
Menu -> Info
This Menu -> Info is use to display max and min values which
were registered by temperature sensor.
OKOK
Hi+54°
Lo-23°
Info
MENU
Code :01
Error
Code :02
Error
Error codes
Wrong work of regulator is siganalize by blinkig display
illumination and dispaly error number code. Delete information
abaot error ( if break will be fixe) possible is by push button return.
Explain of error codes::
Cross acceptable range for reports from sensor C1.
Lack or break sensor C1.
Cross acceptable speed change temperature value
for sensor C1.
Mode Manual
T1 0,0°C
T2 0,0°C
T3 0,0°C
T4 0,0°C
H1 0,0°C
H2 0,0°C
Delay to C1 0min
Dealy to C2 0min
Sensor correction C1 0,0°C
Sensor correction C2 0,0°C
Distincation 0,0°C
Password Lack
Light All time
Gradient OFF
Sampling 30 samples/min
Language poliash
Code :04
Code :03
Error
Error Cross acceptable range for reports from sensor C2.
Lack or break sensor C2. (only for pgrograms which
use sensor C2 .
Cross acceptable speed change temperature value
for sensor C2.

ASSEMBLY:
1. Take OFF the power.
2. Regulator put on the rail in the switchgearbox.
3. Connect supply: L to joint 1; N to joint 2.
4 Out cable of probe of temperature C1 connect to joints
10-11-12.
5. Out cable of probe of temperature C2 connect to joints 7-8-9.
6. System which enclose receiver is dependent from sensor C1
connect in line to joints 3-4.
7. System which enclose receiver is dependent from sensor C2
connect in line to joints 5-6
8. Set program to regulation temperature.
WIRING DIAGRAM
ATTENTION!
Do not any change in device. It impend break or wrong work of
device, it will cause break contolled device or menace for user. In
this cause producer is not responsible of arise accidents and
could refuse given warranty for regulator in cause submit a claim.
A090706
sensor PT100
dimensions of sensor Ø4; h=85mm
sensor isolation steel bush
cable PC 3×0,34mm˛; l=1,5m
PROBE RT56
TECHNICAL DATA
supply 230V AC
current load 2×(<16A)
joint separated 1P
range of regulation temperature -100÷400°C
hysteresis setting range 0÷100°C
precision 1°C
reconnection delay 0
model correction ±20°C
gradient 4°C /sec÷6°C/min.
sample frequency 1÷120 samples/min.
power consumption 1,5W
working temperature -20÷40°C
terminal screw terminals 2,5mm²
dimensions 3 modules (52,5mm)
fixing on rail TH-35
÷45min
CRT-06
WW
RR
RR
7
35
46
P2 P1
PT100
8
9
LN
12
10
PT100
11
12
C2 C1

X-ON Electronics
Largest Supplier of Electrical and Electronic Components
Click to view similar products for Temperature Sensor Modules category:
Click to view products by F&F manufacturer:
Other Similar products are found below :
HPP809A031 MBT 3560-0000-0050-10-110 MBT 3560-0000-0100-10-110 MBT 3560-0001-0050-10-120 MBT 3560-0001-0100-10-120
TCN4L-22R TX4H-14R TX4H-24R TX4H-A4R TX4H-B4R TX4L-14R TX4L-A4R TX4L-B4R TX4M-14R TX4M-24R TX4M-A4R
TX4M-B4R QP99 CP-02 CP82 CP99 R38-LAOO R38-LARR 72-11304023-0150.0050 72-11304027-0150.0050 72-23304003-
0150.0050.GGP 72-23904001-0300.0040.TM 72-34904001-0300.0040.TM TEM 73 A AT403-414-1000 AT403-614-1000 AT-503-1141-000
AT-503-1161-000 AT-503-6140-000 AT-603-1141-000 AT603-414-1000 AT-903-1161-000 ATR121-AD ATR121-B TPMC-5 TPMC-8W
K39-HCRR K39T-HCRR K49-HCRR K49P-HCRR K85-HERR KR1-LCRR-D LHI874 LHI944 LHI968
Other F&F Controllers manuals
Popular Controllers manuals by other brands

Biamp
Biamp Impera Tango Installation and setup guide

Kelly
Kelly KBS-X user manual

Evco
Evco EV3271 manual

EASE Diagnostics
EASE Diagnostics Universal Reprogrammer II+ quick start guide

Regada
Regada SO 2 Installation, service and maintenance instructions

Texas Instruments
Texas Instruments LM5160A user guide

Mitsubishi Electric
Mitsubishi Electric MELSEC Q Series Programming manual

Bosch Thermotechnik
Bosch Thermotechnik AGK11 quick start guide

cashco
cashco 1000HP Installation, operation & maintenance manual

OVER
OVER OMeter manual

Stahl
Stahl ConSig 8040 Series operating instructions

Pellas X
Pellas X S.Control Operation and installation manual