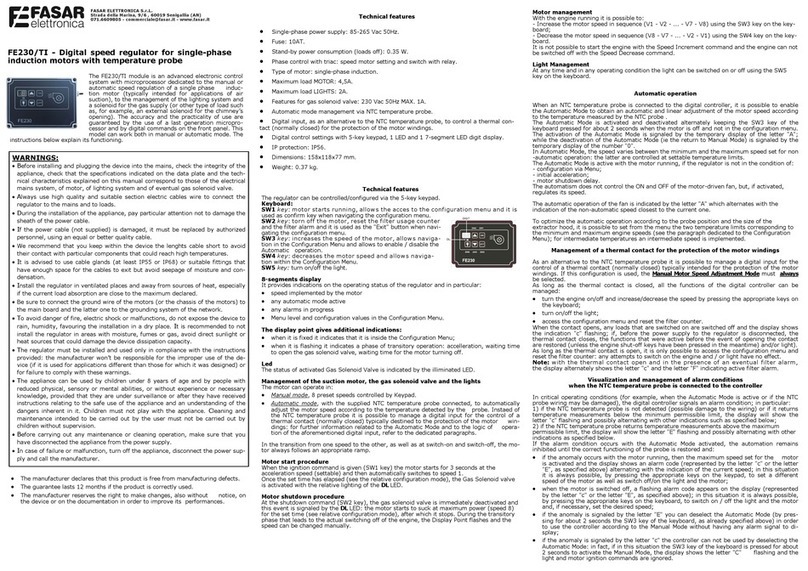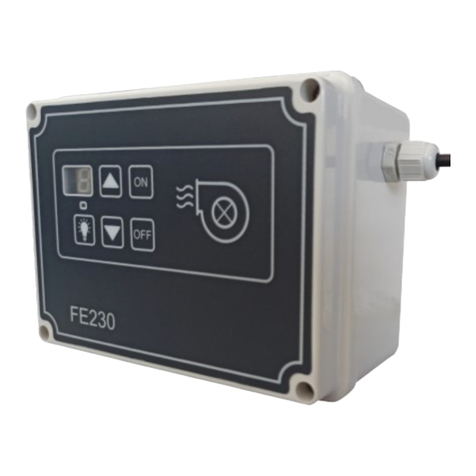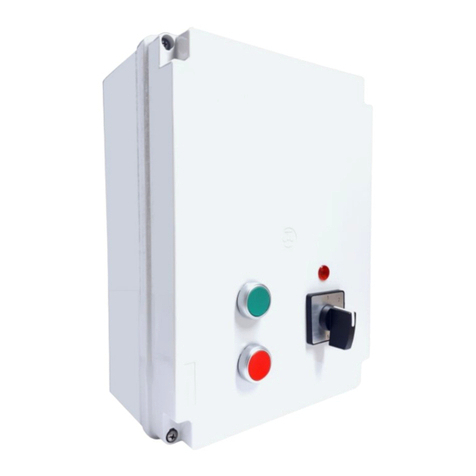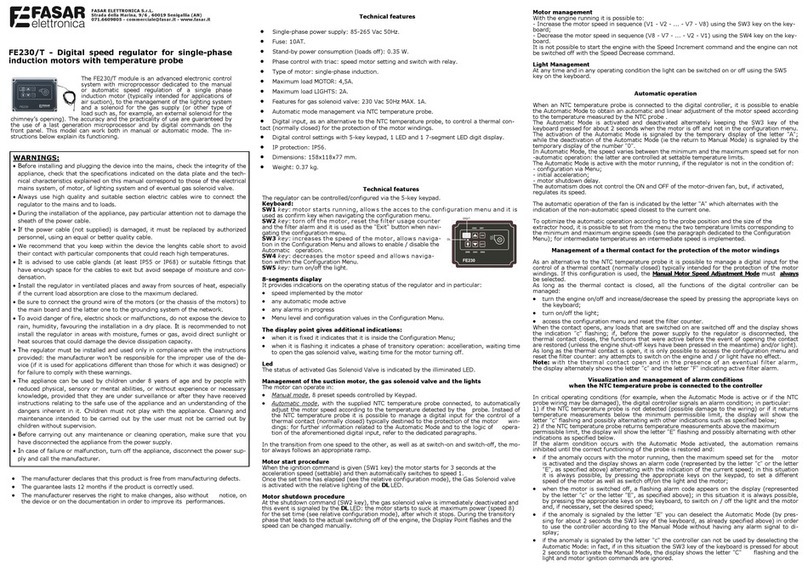
Il regolatore FE230 è un avanzato sistema elettronico di controllo a microprocessore dedicato alla
regolazione manuale o automatica della velocità di un motore monofase ad induzione (tipicamente
destinato ad applicazioni di aspirazione dell’aria), alla gestione dell’impianto di illuminazione e di
un’elettrovalvola dell’erogazione del gas (o altra tipologia di carico come, ad esempio, un’elettroval-
vola esterna per l’apertura di un camino). La precisione e la praticità di utilizzo sono garantite
dall’utilizzo di un microprocessore e dai comandi digitali posti sul pannello frontale: la figura 1 e le
seguenti istruzioni operative illustrano le funzioni gestite dal controllore che lo rendono la soluzione
ideale per moltissime applicazioni nel settore dell’aspirazione dell’aria in ambito domestico e profes-
sionale (aspiratori di odori, fumi, vapori, cappe aspiranti domestiche, professionali ed industriali,
sistemi automatici ed “intelligenti” per il disinquinamento ed il trattamento dell’aria, etc..).
Particolare attenzione nel progetto del sistema FE230 è stata dedicata alla realizzazione di un siste-
ma di controllo elettronico innovativo, caratterizzato dal più basso consumo elettrico in stand-by
attualmente disponibile sul mercato per questa categoria di prodotti. Tale caratteristica, oggi parti-
colarmente apprezzata, unita alla possibilità di automatizzare la funzione di aspirazione tramite
collegamento di sensori opzionali (versione FE230/T) e alla possibilità di utilizzare un controllo da
remoto (versione FE230/R e radiocomando FE1004), consente di installare un sofisticato sistema
per il trattamento dell’aria in tutte le tipologie di ambienti, caratterizzato da elevata dinamica ed
efficienza.
FE230 - Regolatore digitale di velocità per motori ad induzione monofase
Caratteristiche funzionali di base
In relazione alle funzionalità descritte di seguito, si faccia riferimento alla fig.1.
Quando il motore è acceso il display a sette seg-
menti indica valori numerici compresi fra 1 e 8, che
rappresentano la velocità impostata per il motore di
aspirazione. Nel passaggio da una velocità all’altra,
nonché all’accensione e allo spegnimento, il motore
segue sempre un’opportuna rampa.
Tasto SW1: Il tasto SW1 comanda l’accensione del
motore e seleziona automaticamente la velocità 1:
ad ogni avvio è comunque previsto che il motore
giri, per 3 secondi, ad una velocità differente
(velocità di spunto). Trascorsi 20 secondi dall’ac-
censione viene attivata l’elettrovalvola gas, e questo
evento è segnalato dall’accensione del led DL.
Tasto SW2: Premendo il tasto SW2 viene immediatamente disattivata l’elettrovalvola gas
e questo evento è segnalato dallo spegnimento del led DL: il motore inizia ad aspirare alla
massima potenza (velocità 8) per 20 secondi, dopodiché si arresta.
Tasto SW3: Ad ogni pressione del tasto SW3 si incrementa la velocità del motore
secondo lo schema: V1 V2 … V7 V8.
Tasto SW4: Ad ogni pressione del tasto SW4 si diminuisce la velocità del motore
secondo lo schema: V8 V7 … V2 V1.
Tasto SW5: A motore spento o a motore acceso, la pressione del tasto SW5 consente di
attivare/disattivare l’illuminazione.
Fig. 1: Comandi sul pannello frontale.
Premere il tasto SW1 per confermare la scelta e procedere con l’impostazione della
velocità minima: il display indica “1.” mentre il motore continua a girare alla veloci-
tà di spunto precedentemente selezionata. Agire sui tasti SW3 e/o SW4 per au-
mentare e/o diminuire la velocità sino a quando si ottiene il valore desiderato per
la velocità minima, considerando che per essa non è possibile selezionare un valore
maggiore di quello scelto per la velocità di spunto.
Premere il tasto SW1 per confermare la scelta e procedere con l’impostazione della
velocità massima: il display indica “8.” ed il motore inizia a girare alla massima
velocità impostabile.
Agire sui tasti SW3 e/o SW4 per aumentare e/o diminuire la velocità sino a quando
si ottiene il valore desiderato per la velocità massima: il minimo valore che può
essere selezionato per essa è funzione della velocità minima precedentemente se-
lezionata.
Premere il tasto SW1 per uscire dalla procedura di taratura delle velocità del moto-
re: le impostazioni relative alla velocità di spunto, alla velocità minima e alla veloci-
tà massima vengono salvate, il motore si arresta ed il display si spegne.
Durante l’impostazione dei valori di velocità, è possibile aumentare e/o diminuire
rapidamente il valore della velocità corrente tenendo premuto il tasto SW3 e/o
SW4.
Mentre è in corso la procedura di taratura delle velocità del motore è possibile, in
ogni momento, ripristinare i valori di default relativi alla velocità di spunto, alla
velocità minima e alla velocità massima: a questo scopo è necessario tenere pre-
muto per 3 secondi il tasto SW2. Tale operazione determina inoltre l’arresto del
motore, lo spegnimento del display e l’uscita dalla procedura di taratura.
Rev. 10 07/2023
Caratteristiche tecniche
Alimentazione: 85-265 Vac 50/60Hz.
Fusibile interno: 10AT.
Assorbimento in modalità stand-by (carichi spenti): 0.35 W.
Regolazione velocità motore tramite parzializzazione di fase con triac e seziona-
mento con relè dedicato.
Tipo di motore utilizzabile: Monofase ad induzione.
Corrente di assorbimento massima uscita motore: 4,5A.
Corrente di assorbimento massima uscita luci: 2A.
Caratteristiche uscita elettrovalvola gas: 230 Vac 50Hz MAX. 1A.
Possibilità di ricevere comandi da remoto wireless tramite Radiocomando
(opzionale).
Possibilità di collegare sensori opzionali (temperatura, qualità dell’aria, gas-odori,
umidità, CO2, anemometri, ecc..).
Impostazioni dei comandi digitali con tastiera a 5 tasti, 1 led e 1 display digit led a
7 segmenti.
Grado di protezione: IP56.
Dimensione: 158x118x77 mm.
Peso: 0.37 kg.
Procedura di taratura delle velocità del motore
Quando i carichi sono disattivati è possibile accedere alla procedura di taratura delle
velocità del motore, mediante la quale l’utente può personalizzare il valore della velocità
minima, massima e di spunto. Una volta completata la procedura di taratura, le velocità
intermedie (dalla velocità 2 alla 7) vengono definite via software in funzione della mini-
ma e della massima impostate.
Se l’utente non esegue la procedura di taratura per l’impostazione della velocità minima,
massima e di spunto del motore, ai parametri in questione vengono assegnati i valori di
default.
Tenere premuti contemporaneamente per 3 secondi i tasti SW3 e SW4 per accedere alla
procedura di taratura delle velocità del motore: il display indica “0.”, per segnalare che è
abilitata l’impostazione della velocità di spunto, e viene automaticamente selezionata la
minima velocità che può essere associata a tale parametro (è bene notare che tale velo-
cità, a seconda del tipo di carico applicato, potrebbe non essere sufficiente a far partire il
motore: in tal caso premere il tasto SW3 per incrementarla sino a quando il motore si
avvia). Agire sui tasti SW3 e/o SW4 per aumentare e/o diminuire la velocità sino a quan-
do si ottiene il valore desiderato per la velocità di spunto.
Installazione del regolatore
Dopo aver rimosso il coperchio, praticare sulla scatola i fori necessari al passaggio
dei cavi e dei passacavi. Al termine dell’operazione non devono essere presenti
sbavature, ammaccature o simili che possano pregiudicare il grado di protezione
dell’involucro. Fissare quindi la scatola al supporto desiderato (parete, cappa..) ed
effettuare i collegamenti alla morsettiera presente sulla scheda rispettando lo
schema di connessione illustrato in Fig.2 (N.B. Nel caso in cui il motore utilizzato
nell'installazione abbia uno chassis metallico, si raccomanda di collegare quest'ulti-
mo ad uno dei 2 morsetti di terra sulla scheda. Il secondo morsetto dovrà poi es-
sere collegato alla terra della rete elettrica).
Dopo aver effettuato i collegamenti, fornire alimentazione al regolatore. Questo
rimarrà in modalità basso consumo (stand-by) fintanto che non verranno attivate
le uscite oppure si accederà al Menu di Configurazione.
Verificare il corretto funzionamento delle uscite agendo sugli appositi tasti del pan-
nello frontale.
Chiudere infine il coperchio tramite le apposite viti: l'apparecchio è pronto all'uso.
Fig. 2: Schema di connessioni esterne del regolatore.
FASAR ELETTRONICA S.r.L
Strada della Marina 9/6, 60019 Senigallia (AN)
- 071.6609805— [email protected]- www.fasar.it
AVVERTENZE:
Prima di installare ed alimentare il prodotto, assicurarsi dell’integrità dell’apparecchio e verifica-
re che i dati di targa e le caratteristiche tecniche riportate sul presente manuale siano coerenti
con le caratteristiche della rete elettrica di alimentazione, del motore, dell’impianto di illumina-
zione e dell’eventuale elettrovalvola-gas utilizzati.
Utilizzare sempre cavi elettrici di qualità e sezione adeguata per il collegamento del regolatore
alla rete di alimentazione e ai carichi.
Durante l’installazione dell’apparecchio, prestare particolare attenzione a non danneggiare la
guaina del cavo di alimentazione.
Se il cavo di alimentazione (non fornito) è danneggiato, esso deve essere sostituito da persona-
le autorizzato, usando un cavo di qualità pari o superiore.
Si consiglia di mantenere all’interno del dispositivo le lunghezze dei cavi corte per evitare il loro
contatto con particolari componenti che potrebbero raggiungere temperature elevate.
Si consiglia di utilizzare pressacavi (almeno IP55 o IP68) o opportuni raccordi per far uscire i
cavi per evitare l’ingresso di umidità e condensa.
Installare il regolatore in luoghi ventilati e lontano da fonti di calore soprattutto se le correnti di
assorbimento dei carichi si avvicinano a quelle massime dichiarate.
Avere cura di collegare il filo di terra del motore (o lo chassis del motore stesso) alla scheda e
quest’ultima all’impianto di terra della rete.
Per evitare il pericolo di incendi, di scosse elettriche o di malfunzionamenti in genere, non
esporre l’apparecchio alla pioggia, all’umidità, privilegiando l’installazione in luoghi asciutti. Si
raccomanda di non installare il regolatore in zone esposte alla condensa, a vapori o gas, evitan-
do la radiazione solare diretta o fonti di calore che potrebbero compromettere la capacità di
dissipazione in potenza del dispositivo.
Il regolatore deve essere installato ed utilizzato solo conformemente alle modalità operative
previste: il costruttore non si assume alcuna responsabilità in caso di utilizzo improprio del di-
spositivo (utilizzo dell’apparecchio per applicazioni diverse da quelle per cui è stato progettato)
o in caso di inosservanza delle presenti avvertenze.
L’apparecchio può essere utilizzato da bambini di età non inferiore a 8 anni e da persone con
ridotte capacità fisiche, sensoriali o mentali, o prive di esperienza o della necessaria conoscen-
za, purchè sotto sorveglianza oppure dopo che le stesse abbiano ricevuto istruzioni relative
all’uso sicuro dell’apparecchio e alla comprensione dei pericoli ad esso inerenti. I bambini non
devono giocare con l’apparecchio. La pulizia e la manutenzione destinata ad essere effettuata
dall’utilizzatore non deve essere effettuata da bambini senza sorveglianza.
Prima di effettuare qualsiasi operazione di manutenzione o di pulizia, assicurarsi di aver scolle-
gato l’apparecchio dalla rete di alimentazione.
In caso di guasto o di mal funzionamento, spegnere l’apparecchio, scollegare la rete di alimen-
tazione e chiamare il costruttore.
Il costruttore dichiara che il prodotto è esente da difetti di fabbricazione.
La garanzia ha la durata di 12 mesi purchè il prodotto sia usato correttamente.
Il costruttore si riserva di apportare modifiche, anche senza preavviso, sulla macchina o sulla
documentazione associata allo scopo di migliorarne le prestazioni.

