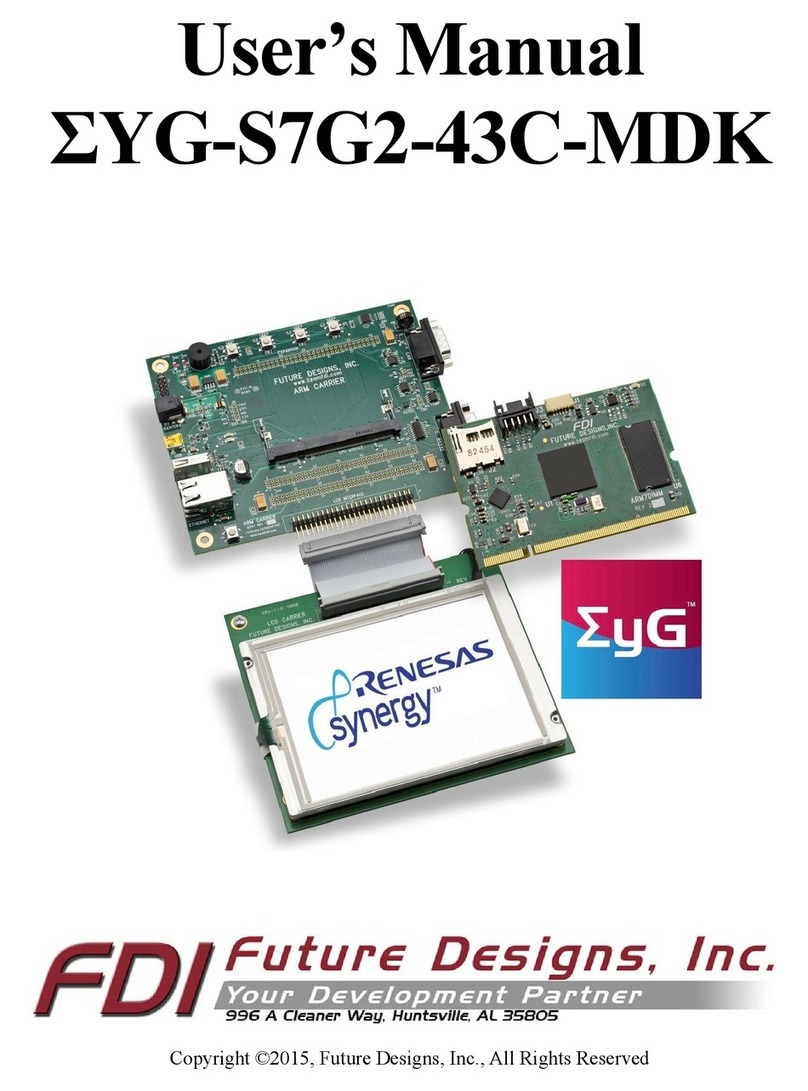
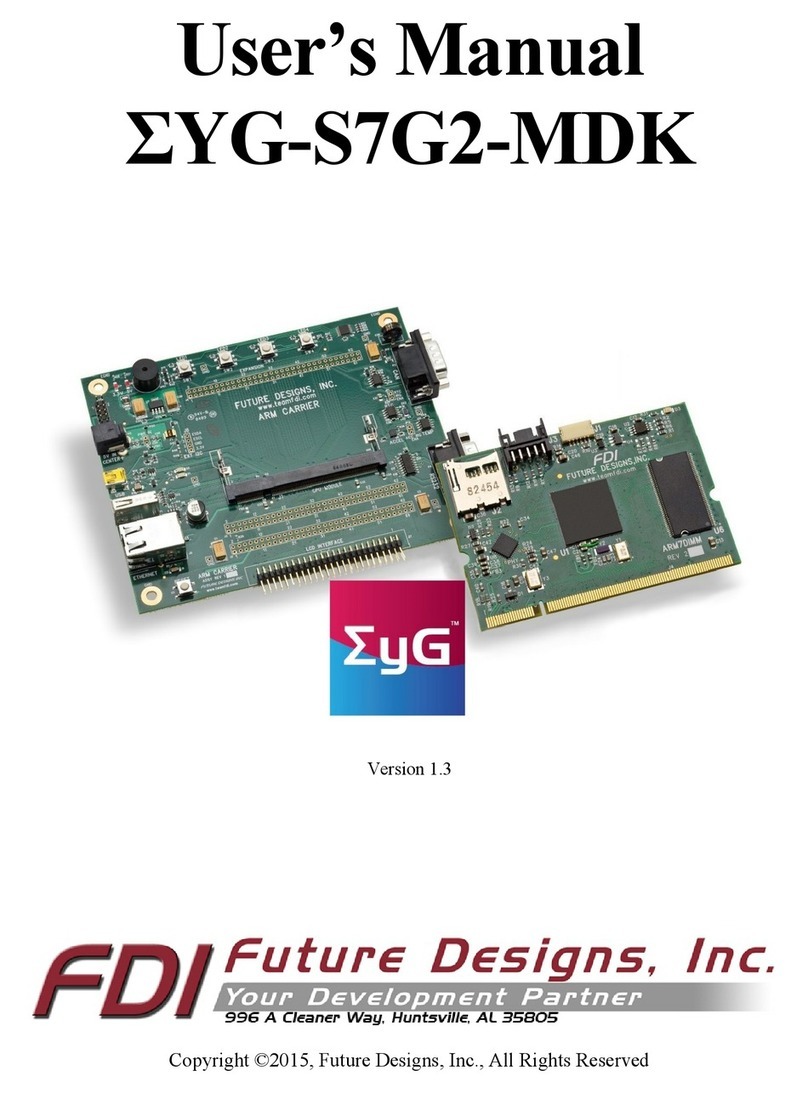
FDI ?YG-S7G2-70C-MDK User manual

Copyright ©2017, Future Designs, Inc., All Rights Reserved
User’s Manual
ΣYG-S7G2-70C-MDK

ΣYG-S7G2-70C-MDK User’s Manual
6/26/2017
Copyright ©2017,
Future Designs, Inc
Page
2
of
26
Important Legal Information
Information in this document is provided solely to enable the use of Future Designs, Inc. (FDI) products.
FDI assumes no liability whatsoever, including infringement of any patent or copyright. FDI reserves the
right to make changes to these specifications at any time, without notice. No part of this document may be
reproduced or transmitted in any form or by any means, electronic or mechanical, for any purpose, without
the express written permission of Future Designs, Inc. 996 A Cleaner Way, Huntsville, AL 35805.
NOTE: The inclusion of vendor software products in this kit does not imply an endorsement of the
product by Future Designs, Inc.
yG™ is a trademark of Future Designs, Inc.
Renesas Synergy™ is a trademark of Renesas Electronics Corporation.
Microsoft, MS-DOS, Windows, Windows XP, Microsoft Word are registered trademarks of Microsoft
Corporation.
Other brand names are trademarks or registered trademarks of their respective owners.
Printed in the United States of America.
For more information on FDI or our products please visit www.TeamFDI.com.
2017 Future Designs, Inc. All rights reserved.

ΣYG-S7G2-70C-MDK User’s Manual
6/26/2017
Copyright ©2017,
Future Designs, Inc
Page
3
of
26
Table of Contents
Important Legal Information ......................................................................................................................................... 2
ΣyG-S7G2-70C Modular Development Kit (MDK) Overview ........................................................................ 5
1.1 Introduction ................................................................................................................................................... 5
1.2 ESD Warning ................................................................................................................................................ 5
1.3 Renesas Synergy S7G2 Microcontoller Block Diagram ............................................................................... 6
1.4 ΣyG-S7G2-70C-MDK System Block Diagram ............................................................................................ 7
1.5 Requirements ................................................................................................................................................. 8
1.6 ΣyG-S7G2 SOM Power Requirements ......................................................................................................... 8
Getting Started .................................................................................................................................................. 9
2.1 Setting up the Hardware ................................................................................................................................ 9
2.2 Demonstration Software .............................................................................................................................. 10
ΣyG-S7G2 SOM System on Module Board Components .............................................................................. 11
3.1 ARM Mini-JTAG J2 ................................................................................................................................... 11
3.2 Tag Connect J3 ............................................................................................................................................ 12
3.3 MicroSD Socket J1 ..................................................................................................................................... 12
3.3.1 Inserting the microSD card into the microSD socket .......................................................................... 13
3.3.2 Removing the microSD card from the microSD socket ...................................................................... 14
3.4 Ethernet PHY U5 ........................................................................................................................................ 14
3.5 200-pin SOMDIMM Connector Details J4 ................................................................................................. 15
Carrier Board Components.............................................................................................................................. 19
4.1 DC Power Input ........................................................................................................................................... 19
4.2 Alternate Power Input ................................................................................................................................. 19
4.3 USB Power Device ..................................................................................................................................... 19
4.4 USB Power Host ......................................................................................................................................... 20
4.5 Ethernet ....................................................................................................................................................... 21
4.6 CAN/RS485 ................................................................................................................................................ 21
4.7 RS232 .......................................................................................................................................................... 22

ΣYG-S7G2-70C-MDK User’s Manual
6/26/2017
Copyright ©2017,
Future Designs, Inc
Page
4
of
26
4.8 External I2C ................................................................................................................................................ 23
4.9 External I2S Audio ...................................................................................................................................... 23
ΣyG-S7G2 System on Module Board Layout ................................................................................................. 24
3.1 Schematics......................................................................................................................................................... 24
3.2 Mechanicals....................................................................................................................................................... 24
Support ............................................................................................................................................................ 26
6.1 Where to Get Help ...................................................................................................................................... 26
6.2 Useful Links ................................................................................................................................................ 26

ΣYG-S7G2-70C-MDK User’s Manual
6/26/2017
Copyright ©2017,
Future Designs, Inc
Page
5
of
26
ΣyG-S7G2-70C Modular Development Kit (MDK) Overview
1.1 Introduction
The Future Designs, Inc. ΣyG
TM
Family provides a complete and qualified Graphical User
Interface (GUI) / Human Machine Interface (HMI) platform for the rapid release of customer
products. The core of ΣyG (pronounced, “sig”) is Renesas Synergy
TM
– a comprehensive and
integrated software-based microcontroller platform. FDI adds the Synergy platform to its GUI
hardware, systems and production expertise. The end result is a sum of high-quality products that
provide a robust and proven source for GUI and HMI solutions:
ΣyG = Renesas Synergy+ GUI
The ΣyG-S7G2 Modular Development Kit for the System on Module is the gateway for
beginning Renesas Synergy
TM
projects. The ΣyG-S7G2 Modular Development Kit is compatible
with FDI’s ΣyG Modular Development LCD Kits but can be used independently as a lower cost
option for those embedded applications without the need for a touch screen display. FDI offers low
cost customization services for customer specific hardware, software or packaging applications at
volumes of 500 units or more.
The ΣYG-S7G2-70C-MDK kit is a member of the ΣYG family and it combines the ΣYG-
S7G2-SOM with FDI’s Carrier Board, LCD Carrier Board, and 7.0” capacitive touch screen LCD.
This combination enables evaluation and development with the Renesas Synergy S7G2 MCU.
1.2 ESD Warning
The ΣYG-S7G2-70C-MDK is shipped in a protective anti-static package. Do not subject the
module to high electrostatic potentials. Exposure to high electrostatic potentials may cause damage
to the boards that will not be covered under warranty. General practice for working with static
sensitive devices should be followed when working with the kit.

ΣYG-S7G2-70C-MDK User’s Manual
6/26/2017
Copyright ©2017,
Future Designs, Inc
Page
6
of
26
1.3 Renesas Synergy S7G2 Microcontoller Block Diagram
Figure 1: S7G2 System Block Diagram

ΣYG-S7G2-70C-MDK User’s Manual
6/26/2017
Copyright ©2017,
Future Designs, Inc
Page
7
of
26
1.4 ΣyG-S7G2-70C-MDK System Block Diagram
Figure 2: ΣYG-S7G2-70C Kit Block Diagram

ΣYG-S7G2-70C-MDK User’s Manual
6/26/2017
Copyright ©2017,
Future Designs, Inc
Page
8
of
26
1.5 Requirements
The ΣYG-S7G2-70C -MDK requires a carrier board with a 200-pin SO-DIMM socket. The
socket should have the key at the 1.8V location. The CARRIER Board from Future Designs
provides this socket and should be utilized to develop your application for initial verification.
Each yG development kit includes:
• ΣyG-S7G2 System on Module (SOM)
• Renesas Synergy Software Platform
• Carrier Board
• 5 VDC, 2.3A North American Power Supply
• USB and Ethernet Cables
• Segger ARM Cortex-M Mini-JTAG debugger and cables
• Optional LCD Carrier Board
• Optional 4.3” or 7.0″ PCAP Touch Screen LCD
• microSDHC card
• USB Flash Drive
1.6 ΣyG-S7G2 SOM Power Requirements
The power requirement for the ΣYG-S7G2-70C-MDK is 5V DC Center Positive 2A Power
Supply.

ΣYG-S7G2-70C-MDK User’s Manual
6/26/2017
Copyright ©2017,
Future Designs, Inc
Page
9
of
26
Getting Started
2.1 Setting up the Hardware
The SOMDIMM should be inserted into the DIMM Socket as shown below and then
locked into place by pushing down to the Carrier Board. Ensure the SOMDIMM is inserted
completely into the socket prior to locking. The socket utilized on the CARRIER Board is
rated for a minimum of 25 insertions.
Figure 3: SOMDIMM Insertion
The following are step by step instructions for setting up the hardware.
1) Make sure you have a SOMDIMM board plugged into the CARRIER board at J1.
2) Verify the LCD Interface ribbon cable connects the LCD CARRIER board to the CARRIER (J7)
board.
3) With the power off, plug the 5V center-positive Power Supply into 5V (P5) of the CARRIER
board.
4) Connect an RJ-45 Ethernet cable to the ETHERNET (J5) interface of the CARRIER board.
5) Plug in a female-to-female DB9 serial cable between PC and RS232 (P4) on the CARRIER board.
6) Insert the microSD card with the demonstration files (included) into microSD connector on the
SOMDIMM.

ΣYG-S7G2-70C-MDK User’s Manual
6/26/2017
Copyright ©2017,
Future Designs, Inc
Page
10
of
26
2.2 Demonstration Software
Once the device is powered on, the demonstration software start menu will appear on the LCD
screen. The software consists of the Weatherpanel demonstration.
2.2.1 Weatherpanel Demonstration
After showing the splash screen for a short time, the Weatherpanel demo starts automatically.
Pressing on a day of the week will update the background with the weather for that day and play
the animation associated with the image in the center of the screen. Pressing on the (+) or (-)
buttons simulates adjusting a thermostat.

ΣYG-S7G2-70C-MDK User’s Manual
6/26/2017
Copyright ©2017,
Future Designs, Inc
Page
11
of
26
2.3 Software
PC with Windows 7 or Windows 10
e
2
studio Integrated Solution Development Environment (ISDE) from Renesas
Renesas Synergy
TM
Software Package (SSP)
GNU tool chain for ARM® Cortex®-M MCUs
You can download the latest versions of the SSP and e
2
studio ISDE from
https://synergygallery.renesas.com/
The GNU tool chain and installation instructions for the tool chain are included in the e2 studio
ISDE download.
ΣyG-S7G2 SOM System on Module Board Components
3.1 ARM Mini-JTAG J2
The ΣyG-S7G2 SOM uses a JTAG connector based on a Samtec 0.05” header. This smaller
connector provides 100% of the functionality of the standard 20-pin JTAG connector, but
utilizes 70% less board space.
Pin Number Description Pin Number Description
1
VCC
6
TDO
2
TMS
7
X
3
GND
8
TDI
4
TCK
9
GND
5
GND
10
JST#
Pin 7 on the JTAG Debug Connector is keyed to ensure correct connector orientation.
Figure 4: ARM Mini JTAG

ΣYG-S7G2-70C-MDK User’s Manual
6/26/2017
Copyright ©2017,
Future Designs, Inc
Page
12
of
26
3.2 Tag Connect J3
Use the Tag Connect 10-pin cable to program and JTAG the ΣyG-S7G2 SOM using a
Segger J-Link device.
Cable: http://www.tag-connect.com/tc2050-arm2010
Cable: http://www.tag-connect.com/TC2050-IDC-NL
Figure 5: Tag-Connect JTAG
3.3 MicroSD Socket J1
The ΣyG-S7G2 SOM utilizes a microSD for flexible mass storage. MicroSD flash cards are
common, cost effective, and provides a large amount of user-changeable memory.
Pin Number Description
1
DAT2/RSV
2
CD_DAT3/CS#
3
CMD/SDI
4
VDD
5
CLK/SCLK
6
VSS
7
DAT0/SDO
8
DAT1/RSV
9
CD
The microSD card must be removed using the spring loaded “push-pull” mechanism on the
microSD socket. Forceful removal of a microSD card will result in permanent damage to the
socket that is not covered under warranty. To insert the card, push it into the socket until a
“click” sound is heard. Similarly, to remove the card, push the card into the socket. The push-
pull mechanism will “click” again and eject the card from the socket. The card is now
available for safe removal.

ΣYG-S7G2-70C-MDK User’s Manual
6/26/2017
Copyright ©2017,
Future Designs, Inc
Page
13
of
26
3.3.1 Inserting the microSD card into the microSD socket
First, prepare to insert the microSD card into the
socket by positioning it with its text facing up.
Position the ridge, or “lip”, of the card furthest
from the socket.
Next, partially insert the card into the socket.
Then, use your figure to gently push the card
into the socket. When the card “clicks” into
place it is in its final, locked position. The card
is now ready for use.
Note: Once the microSD card is fully inserted it
should not fall out, even if the unit is shaken
vigorously.

ΣYG-S7G2-70C-MDK User’s Manual
6/26/2017
Copyright ©2017,
Future Designs, Inc
Page
14
of
26
3.3.2 Removing the microSD card from the microSD socket
Begin to remove the microSD card by gently
pushing the card into the socket. The socket
will “click” and eject the card.
Once the microSD card is ejected, it will
partially extend out from the socket.
Carefully grab the ridged edge or sides of the
microSD card to gently pull it out.
The microSD card is now fully removed from
the socket.
3.4 Ethernet PHY U5
The ΣyG-S7G2 SOM provides an Ethernet PHY from SMSC, LAN8720. The LAN8720 is
a single chip solution for a 100BASE-TX/10BASE-T physical layer transceiver. It has support for
reduced MII (RMII), and HP MDI-X auto crossover allowing for any standard Ethernet cable to be
used, even a crossover cable. The LAN8720 is fully compliant to IEEE 802.3u with support for
auto-negotiation and manual selection of 10/100Mbps speed as well as full and half-duplex modes.

ΣYG-S7G2-70C-MDK User’s Manual
6/26/2017
Copyright ©2017,
Future Designs, Inc
Page
15
of
26
3.5 200-pin SOMDIMM Connector Details J4
Pin
SOMDIMM Signal Name
Application Details
I/O
SOMDIMM Connection Details
1
ETH_TXP
Ethernet Transmit Positive
O
Output from KSZ8041 Ethernet PHY
2
ETH_RXP
Ethernet Receive Positive
I
Output from KSZ8041 Ethernet PHY
3
ETH_TXN
Ethernet Transmit Negative
O
Input to KSZ8041 Ethernet PHY
4
ETH_RXN
Ethernet Receive Negative
I
Input to KSZ8041 Ethernet PHY
5
3V3A
3.3V Analog
P
Analog 3.3V Output from PHY Circuit
6
GND
Ground
P
7
ETH_LED0
Ethernet LED0
O
Ethernet LED0 output from KSZ8041
8
ETH_LED1
Ethernet LED1
O
Ethernet LED1 output from KSZ8041
9
VBAT_IN
Vdd Battery Input
P
Vdd for battery backup of internal RTC
10
NC
Not Connected
U
11
RSTIN#
Reset Input
I
Reset input to POR IC TPS3801
12
RST#
O
Reset output from POR circuit
13
GPIO13_USB_ID
14
NC
Not connected
U
15
NC
Not connected
U
16
NC
Not connected
U
17
NC
Not connected
U
18
NC
Not connected
U
19
NC
Not connected
U
20
NC
Not connected
U
21
AVCC
22
AVCC
23 AVSS
24
GND
Ground
P
25
GPIO25_LCDPWR
LCD Power Enable
O
Connected to S7G2 Port 2 bit 0
26
GPIO26_LCDLE
LCD Latch Enable
O
Connected to S7G2 Port 2 bit 1
27
GPIO27_LCDCLK
LCD Clock
O
Connected to S7G2 Port 2 bit 2
28
GPIO28_LCDFP
O
Connected to S7G2 Port 2 bit 3
29
GPIO29_LCDEN
O
Connected to S7G2 Port 2 bit 4
30
GPIO30_LCDLP
O
Connected to S7G2 Port 2 bit 5
31
GPIO31_LCDVDR4
LCD Data Bit 4
O
Connected to S7G2 Port 2 bit 6
32
GPIO32_LCDVDR5
LCD Data Bit 5
O
Connected to S7G2 Port 2 bit 7
33
GPIO33_LCDVDR6
LCD Data Bit 6
O
Connected to S7G2 Port 2 bit 8
34
GPIO34_LCDVDR7
LCD Data Bit 7
O
Connected to S7G2 Port 2 bit 9
35
GPIO35_SSLB2
GPIO
U
Connected to S7G2 Port 2 bit 10
36
GPIO36
GPIO
U
Connected to S7G2 Port 2 bit 11
37
3.3V
3.3V Power
P
38
GND
Ground
P
39
3.3V
3.3V Power
P
40
GND
Ground
P
41
USBH_DP
USB Host Data Positive
B
Connected to S7G2 USB Port A D+
42
USBD_DP
USB Device Data Postive
B
Connected to S7G2 USB Port B D+
43
USBH_DM
USB Host Data Negative
B
Connected to S7G2 USB Port A D-
44
USBD_DM
USB Device Data Negative
B
Connected to S7G2 USB Port B D-
45
GPIO45_LCD_B2
46
GPIO46_LCD_B3
47
GPIO47_RD
GPIO / CAN Receive Data
I
Connected to S7G2 Port 0 bit 0
48
GPIO48_TD
GPIO / CAN Transmit Data
O
Connected to S7G2 Port 0 bit 1
49
GPIO49
GPIO
B
Connected to S7G2 Port 0 bit 2
50
NC
Not connected
U
51
GPIO51_SPCK
52
GPIO52

ΣYG-S7G2-70C-MDK User’s Manual
6/26/2017
Copyright ©2017,
Future Designs, Inc
Page
16
of
26
Pin
SOMDIMM Signal Name
Application Details
I/O
SOMDIMM Connection Details
53
GPIO53_MISO
54
GPIO51_SPCK
55
GPIO55
56
GPIO56_MOSI
57 GPIO57_TXD GPIO / Serial Transmit Data – For
RS232
O Connected to S7G2 Port 0 bit 10
58 GPIO58_RXD GPIO / Serial Receive Data – For
RS232
I Connected to S7G2 Port 0 bit 11
59
NC
Not connected
U
DO NOT USE!
60
GPIO60_USBD_UPLED
GPIO / USB Device Up LED
O
Connected to S7G2 Port 0 bit 13
61
GPIO61_USBD_CON
GPIO / USB Device Connect
O
Connected to S7G2 Port 0 bit 14
62
GPIO62_RSCK
GPIO / SPI Clock
O
Connected to S7G2 Port 0 bit 15
63 GPIO63 GPIO O Connected to S7G2 Port 0 bit 16 (used for
EEPROM CS)
64
GPIO64_MISO
GPIO / SPI MISO
I
Connected to S7G2 Port 0 bit 17
65
GPIO65_MOSI
GPIO / SPI MOSI
O
Connected to S7G2 Port 0 bit 18
66
GPIO66
67
GPIO67
68
GPIO68_USBH_OVC
GPIO / USB Host Over Current
I
Connected to S7G2 Port 0 bit 21
69
GPIO69_TPIRQ
GPIO / Touch IC IRQ Input
I
Connected to S7G2 Port 0 bit 22
70
GPIO70_AD0.0
GPIO / AD0 Bit 0
I
Connected to S7G2 Port 0 bit 23
71
GPIO71_AD0.1
GPIO / AD0 Bit 1
I
Connected to S7G2 Port 0 bit 24
72
GPIO72_AD0.2
GPIO / AD0 Bit 2
I
Connected to S7G2 Port 0 bit 25
73
GPIO73_AD0.5_DA1
GPIO / AD0 Bit 3
I
Connected to S7G2 Port 0 bit 26
74
GPIO74_SDA
GPIO / User IO I2C Bus SDA
B
Connected to S7G2 Port 0 bit 27
75
GPIO75_SCL
GPIO / User IO I2C Bus SCL
O
Connected to S7G2 Port 0 bit 28
76
GND
Ground
P
77
GND
Ground
P
78
GPIO78_ACC_IRQ
GPIO / Accelerometer IRQ
I
Connected to S7G2 Port 1 bit 2
79
NC
80
GPIO80_RTC_IRQ
GPIO / RTC IRQ Input
I
Connected to S7G2 Port 1 bit 5
81
NC
Not connected
U
82
NC
Not connected
U
83
NC
Not connected
U
84
NC
Not connected
U
85
NC
Not connected
U
86
GPIO86_LED_BR
87
GPIO87_USBH_PPWR
GPIO / USB Host Power Ctl
O
Connected to S7G2 Port 1 bit 19
88
GPIO88_LCD_G2
LCD Data Bit 10
O
Connected to S7G2 Port 1 bit 20
89
GPIO89_LCD_G3
LCD Data Bit 11
O
Connected to S7G2 Port 1 bit 21
90
GPIO90_LCD_G4
LCD Data Bit 12
O
Connected to S7G2 Port 1 bit 22
91
GPIO91_LCD_G5
LCD Data Bit 13
O
Connected to S7G2 Port 1 bit 23
92
GPIO92_LCD_G6
LCD Data Bit 14
O
Connected to S7G2 Port 1 bit 24
93
GPIO93_LCD_G7
LCD Data Bit 15
O
Connected to S7G2 Port 1 bit 25
94
GPIO94_LCD_B4
LCD Data Bit 16
O
Connected to S7G2 Port 1 bit 26
95
GPIO95_LCD_B5
LCD Data Bit 17
O
Connected to S7G2 Port 1 bit 27
96
GPIO96_LCD_B6
LCD Data Bit 22
O
Connected to S7G2 Port 1 bit 28
97
GPIO97_LCD_B&
LCD Data Bit 23
O
Connected to S7G2 Port 1 bit 29
98
GPIO98_USBD_VBUS
USB Device VBus Sense Input
I
Connected to S7G2 Port 1 bit 30
99
GPIO99_AD0
100
NC
Not connected
B
Unused
101
GND
Ground
P
102
GND
Ground
P
103
NC
Not connected
U
Unused

ΣYG-S7G2-70C-MDK User’s Manual
6/26/2017
Copyright ©2017,
Future Designs, Inc
Page
17
of
26
Pin
SOMDIMM Signal Name
Application Details
I/O
SOMDIMM Connection Details
104
NC
Not connected
U
Unused
105
NC
Not connected
U
Unused
106
NC
Not connected
U
Unused
107
NC
Not connected
U
Unused
108
NC
Not connected
U
Unused
109
NC
Not connected
U
Unused
110
NC
Not connected
U
Unused
111
NC
Not connected
U
Unused
112
NC
Not connected
U
Unused
113
5V0
5.0V Power
P
114
5V0
5.0V Power
P
115
NC
Not connected
U
Unused
116
GPIO116
GPIO
B
Connected to S7G2 Port 2 bit 14 / VOL_UD
117
GPIO117
GPIO
B
Connected to S7G2 Port 2 bit 15 / AMP_MODE
118
GPIO118
GPIO
B
Connected to S7G2 Port 2 bit 19 / RS485 Ren
119
GPIO119
GPIO
B
Connected to S7G2 Port 2 bit 21 / RS485 DE
120
GPIO120
GPIO
B
Connected to S7G2 Port 2 bit 22
121
GPIO121
GPIO
B
Connected to S7G2 Port 2 bit 23
122
GPIO122
GPIO
B
Connected to S7G2 Port 2 bit 25
123 GPIO123_SPKR_DA0 GPIO O Connected to S7G2 Port 2 bit 26 / SPEAKER
OUTPUT
124
GPIO124
GPIO
B
Connected to S7G2 Port 2 bit 27
125
GPIO125
126
GPIO126
127
GPIO127_LCD_R2
128
GPIO128_LCD_R3
129
GND
Ground
P
130
GND
Ground
P
131
GPIO131_LCD18B
132
GPIO132_LCD19B
133
GPIO133_LCD20B
134
GPIO134_LCD21B
135
GPIO135_LCD22B
136
GPIO136_LCD23B
137
NC
Not connected
U
Unused
138
GPIO138
139
GPIO139
140
NC
Not connected
U
Unused
141
GPIO141
142
GPIO142
143
GPIO143
144
GPIO144
145
GPIO145
146
GPIO146
147
GPIO147
148
GPIO148
149
GPIO149_RX
RS485
150
GPIO150_TX
RS485
151
GPIO151
152
GPIO152
153
GPIO153
154
NC
Not connected
U
Unused
155
NC
Not connected
U
Unused
156
NC
Not connected
U
Unused

ΣYG-S7G2-70C-MDK User’s Manual
6/26/2017
Copyright ©2017,
Future Designs, Inc
Page
18
of
26
Pin
SOMDIMM Signal Name
Application Details
I/O
SOMDIMM Connection Details
157
NC
Not connected
U
Unused
158
NC
Not connected
U
Unused
159
NC
Not connected
U
Unused
160
GPIO160_MD
161
NC
Not connected
U
Unused
162
GPIO162_NMI
Not connected
U
Unused
163
GND
Ground
P
164
GND
Ground
P
165
3.3V
3.3V Power
P
166
GND
Ground
P
167
NC
Not connected
U
Unused
168
NC
Not connected
U
Unused
169
NC
Not connected
U
Unused
170
NC
Not connected
U
Unused
171
NC
Not connected
U
Unused
172
NC
Not connected
U
Unused
173
NC
Not connected
U
Unused
174
NC
Not connected
U
Unused
175
NC
Not connected
U
Unused
176
NC
Not connected
U
Unused
177
NC
Not connected
U
Unused
178
NC
Not connected
U
Unused
179
NC
Not connected
U
Unused
180
NC
Not connected
U
Unused
181
NC
Not connected
U
Unused
182
NC
Not connected
U
Unused
183
NC
Not connected
U
Unused
184
NC
Not connected
U
Unused
185
NC
Not connected
U
Unused
186
NC
Not connected
U
Unused
187
NC
Not connected
U
Unused
188
NC
Not connected
U
Unused
189
NC
Not connected
U
Unused
190
NC
Not connected
U
Unused
191
NC
Not connected
U
Unused
192
NC
Not connected
U
Unused
193
NC
Not connected
U
Unused
194
TMS
195
TCK
196
TDO
197
TDI
198
NC
Not connected
U
Unused
199
3.3V
3.3V Power
P
200
GND
Ground
P

ΣYG-S7G2-70C-MDK User’s Manual
6/26/2017
Copyright ©2017,
Future Designs, Inc
Page
19
of
26
Carrier Board Components
4.1 DC Power Input
The Touch Screen Kit utilizes a 5VDC 2.3A Power Supply. The connector is 2.1mm with
center positive.
Pin Number Description
1 5VDC, +/- 10%, 2.0A (min)
2 Power Supply Ground
4.2 Alternate Power Input
The CARRIER Board includes an optional alternate power input connector, J8. This connector
provides an optional input connection for the on-board DC-DC regulator.
Pin Number Description
1 5VDC, +/- 10%, 2.0A (min)
2 Power Supply Ground
4.3 USB Power Device
The CARRIER Board includes one USB Device Interface allowing the unit to be connected to
a USB Host, such as a PC. Through this connection, the CARRIER represents a peripheral to the
USB Host. The operational mode of the port is dependent on the software utilized (i.e. Mass
Storage or Human-Interface).
The CARRIER Board may also be powered via the USB Device connector. Care must be taken to
not overload the USB Host since 500mA is the maximum current allowable via USB. The LCD
Backlight may be disabled or the brightness dimmed to facilitate this USB Powered mode. When
D1 is on it indicates a “good link” on the USB Device port. When D2 is on it indicates that the
USB Device port is enabled. D2 will also blink during re-enumeration.

ΣYG-S7G2-70C-MDK User’s Manual
6/26/2017
Copyright ©2017,
Future Designs, Inc
Page
20
of
26
Pin Number Description
1 USB 5V
2 D-
3 D+
4 NC
5 Signal Ground
4.4 USB Power Host
The CARRIER Board includes one USB Host Port allowing the unit to interface to various
USB peripherals such as a USB Flash Drive (Thumb Drive). The operational mode of this port is
dependent on the software utilized (i.e. driver support)
Please refer to the specific details of the processor module being utilized for support of the USB
Host function.
D3 indicates VBUS power is good for the USB Host port.
Pin Number Description
1 USB VBus
2 D-
3 D+
4 Signal Ground
Table of contents
Other FDI Microcontroller manuals
Popular Microcontroller manuals by other brands

SONIX
SONIX SN32F107 user manual

Texas Instruments
Texas Instruments SimpleLink MSP432P4111 user guide

Texas Instruments
Texas Instruments CC2540 quick start guide

Infineon
Infineon REF-SHA35WRC2SYS user guide

NXP Semiconductors
NXP Semiconductors KITMPXA6115AEVB quick start guide

Sino Wealth
Sino Wealth SH61F83 manual