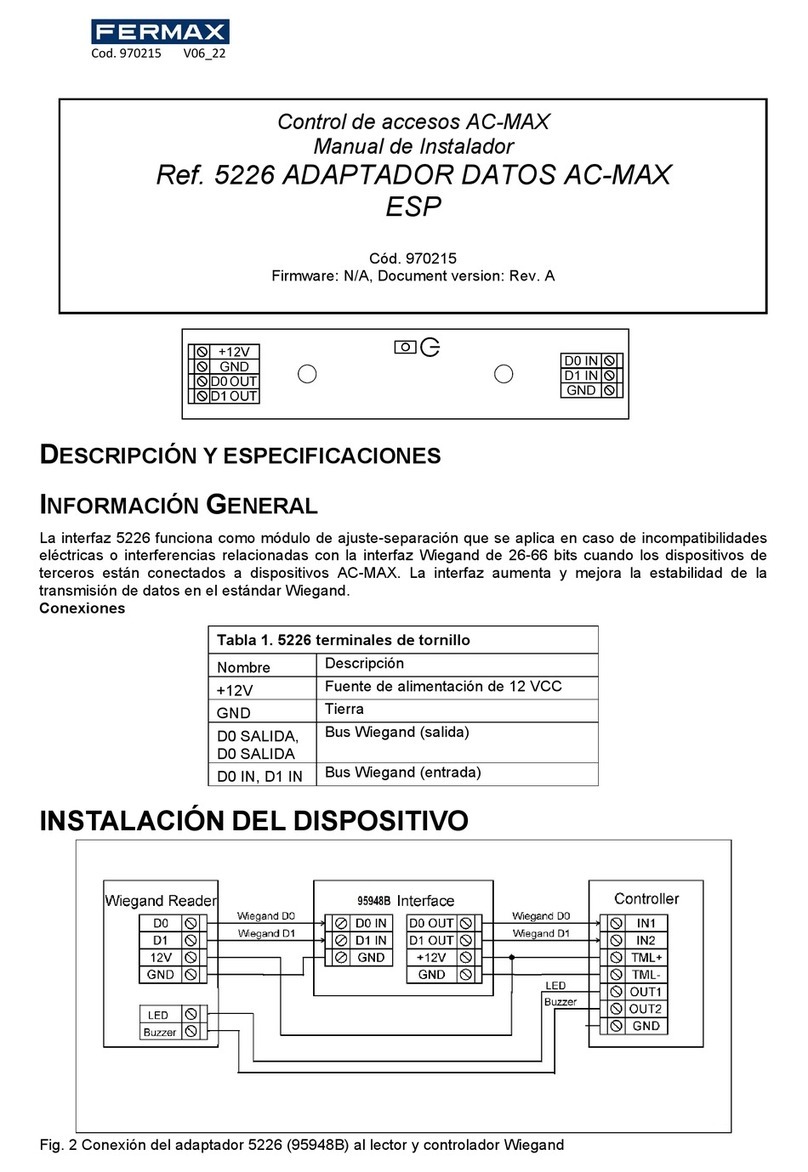
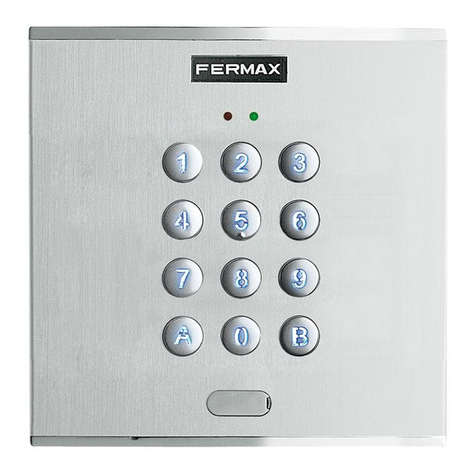
Fermax CITY FINGERPRINT READER Instruction Manual

ENGLISH
STAND-ALONE FINGERPRINT READER
USER& INSTALLER’S MANUAL

Pag 2
FINGERPRINTFINGERPRINT
FINGERPRINT
FINGERPRINTFINGERPRINT
FINGERPRINT
CONGRATULATIONSONPURCHASINGTHISQUALITYPRODUCT!
Fermax electronics develops and manufactures systems of renown that meet the highest
standards of design and technology. We hope you enjoy its range of functions.
Cod. 97666I, V11_11
Technical document published for information purposes by FERMAX ELECTRONICA.
FERMAX ELECTRONICA, in a policy of ongoing improvement, reserves the right to modify
the contents of this document and the features of the products referred to herein at any time
and with no prior notice. Any such modifications shall be reflected in subsequent editions of
this document.
ENGLISH

Pag 3
FINGERPRINTFINGERPRINT
FINGERPRINT
FINGERPRINTFINGERPRINT
FINGERPRINT
INDEX
Introduction .................................................................................................... 4
OperatingStatus ........................................................................................... 5
1. Not Set-Up .............................................................................................. 5
2. Standby .................................................................................................. 5
3. Programming......................................................................................... 5
AddUsers................................................................................................ 7
- a) Fingerprint Mode (1 finger)......................................................................... 7
- b) Fingerprint Mode (2 fingers) ...................................................................... 8
- c) 1 fingerprint + Proximity/Code Mode ......................................................... 10
- d) 2 fingerprints + Proximity/Code Mode....................................................... 11
- e) Only proximity or code mode...................................................................... 13
Operation............................................................................................14
- 1 or 2 fingerprints mode ................................................................................ 15
- 1 or 2 fingerprints with proximity mode........................................................ 15
- 1 or 2 fingerprints with code mode............................................................... 16
- Proximity only ................................................................................................... 16
- Code only.......................................................................................................... 17
DeleteUsers ............................................................................................17
- Using their user number................................................................................. 17
- FULL Reset of All Users ................................................................................. 18
TechnicalCharacteristics ...............................................................................29
Wiring Diagram ..............................................................................................30
Quick Programming Guide ...........................................................................30
Installation and Recommendations for Use and Maintenance ...................31
Installation or Replacement of the Battery in the Remote Keypad ............32
PCManagement .............................................................................................33
TimeConfiguration ..................................................................................18
- Lock-Release Timing ..................................................................................... 19
- Door Sensor Timing........................................................................................ 19
AuxiliaryOutputOperation .......................................................................20
- No option activated.......................................................................................... 20
- Door and door forced open alarm ................................................................. 20
- Intruder Alarm................................................................................................... 20
Special finger options ...............................................................................20
- Change master finger/card ............................................................................ 21
- Add a second master finger/card................................................................... 21
- Add a trade finger/card .................................................................................... 22
- Add an unblock finger/card ............................................................................. 23
- Add a security finger/card ............................................................................... 24
OperatingModes......................................................................................25
- Standard Mode................................................................................................. 25
- Security mode .................................................................................................. 25
NetworkIdentifier......................................................................................26
Copy ........................................................................................................27
Codelength..............................................................................................28
Centralisedcommunicationprotocol.........................................................28
Resettingthe Master Code.......................................................................28

Pag 4
FINGERPRINTFINGERPRINT
FINGERPRINT
FINGERPRINTFINGERPRINT
FINGERPRINT
ON
ON
512 3 4 768
ON
512 43678
+-Dt ACk B
PC CONNECTORA B
CN3
DESCRIPTION
CN4 DISPLAY
KEYPAD
CONNECTOR 8
STAND ALONE
CENTRALIZEDOFF
S 1
ON
-+
Bs
-
Sp
CN4 CN3
S 1
UP
12V
Aux ADt Ck R G B No C Nc B
MÓDULO LECTOR DE HUELLA CON PROXIMIDAD
FINGERPRINT READER & PROXIMITY MODULE
The following sections in the Manual explain in detail the configuration and management
of each of the system functions.
activates the lock-release or another device. To do this, just run your finger along the
reader sensor.
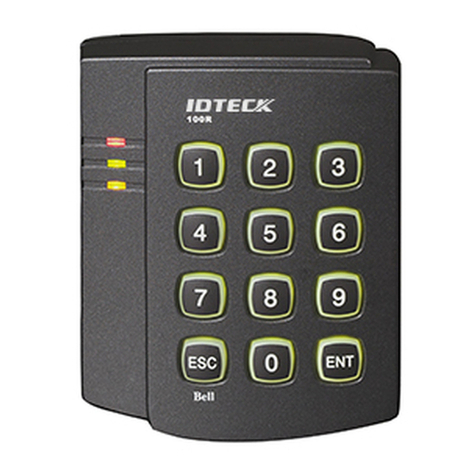
- Reader with 2 status leds and a 4 digit, 7 segment display.
- Infrared Keypad for Programming. The system is programmed with the Master fingerprint/
card and a remote infrared keypad.
- Lock-Release Activation Relay
- Auxiliary Relay for other Functions
-Auxiliary Input for Exit Button
- Input for Open Door Sensor
Can operate as a centralised or autonomous system (configurable using dipswitches).
AUTONOMOUS configuration.
This is codified using the dipswitch on the back of the device. To function as a centralised
reader dipswitch 8 of the reader has to be set to ON.
System Features:
The fingerprint reader is an autonomous reader with an integrated controller.
This is a biometric recognition system based on the users’ fingerprints, which allows a
greater level of security than that offered by other systems which use different types of
identifiers. It has a built in proximity reader with the following functionality:
- Some people’s fingerprints do not have the information required to register them in a
biometric system. An estimated 1% of the population. In these cases we use the built
in Proximity reader.
- Security mode: double security is activated, Fingerprint+Card or Fingerprint+Code (if
the reader has a keypad), for the same User.
Introduction
- Fingerprint reader with a thermal sensor and capacity to store up to 4500 fingerprints.
- Number of users:
* 4500 in 1 fingerprint per person mode.
* 2970 in 2 fingerprint per person mode.
The use of one of these fingerprints (if registered on the system) will result in the
activation of a relay which

Pag 5
FINGERPRINTFINGERPRINT
FINGERPRINT
FINGERPRINTFINGERPRINT
FINGERPRINT
0 0 0 2
E r r
A d d
1 bip
I n i
0 y
d 2. 2
0 y
Operating Status
1. Not Set-Up. Default Status (as set in factory). A master fingerprint/card has not yet been
registered.
2. Standby. Normal mode, waiting for registered users to use fingerprint identification.
Where the user is recognised this will be indicated by way of an acoustic tone, a green
light and the lock-release relay will also be activated.
Enter user card/
fingerprint
Lock-Release
Opening
Registered
Resulting
action
Data
Standby mode
Initial action
no action
Enter master
fingerprint/card Registered Enter
Programming
Mode
Not Registered 1 beep
Sound
Display/leds
beeep
Door Opening
TimePeriod
indicates the register’s
memory position
indicates an error
shows first programming
option
1 beep
RED GREEN
3. Programming.
In this mode the administrator can configure the system’s different operating
parameters.
It is accessed using the administrator’s master fingerprint/card.
a) Where a master fingerprint/card has not yet been registered (reader with default values).
b) Master fingerprint/card registered on the reader.
Register
master
fingerprint/
card
Resulting action
Data
Initial action
Enter master
fingerprint/card a)
Not Registered
(the reader will be
registeredforthe first
time with default
factory values)
Sound
Display/leds
- Enter the master
fingerprint/card. 1 beep
1 beep
1 beep
Mode Not Set-Up
Once powered up Ini will
appear on the display.
- Confirm the master
fingerprint/card

Pag 6
FINGERPRINTFINGERPRINT
FINGERPRINT
FINGERPRINTFINGERPRINT
FINGERPRINT
A d d
REMOTE UNIT
FOR ACCES CONTROL
+
321
7 8 9
0
x-
654
x
21 8 9
.....
Led
Sound
Display/leds
- Enter the master
fingerprint/card. 1 beep
EnterProgrammingMode
Standby Mode
resulting action
Data
Initial action
Enter master
fingerprint/
card
b)
Registered Enter
Programming
Mode
Led On Led Off Led Flashing
The system is programmed with the Master fingerprint/card and a remote infrared keypad.
This function can be used for:
a) Data Entry
b) Menu Selection
KeyFunctions
Led Off. Does not transmit any signal.
Red Led On. Correct Transmission.
The led lights up every time any of the keypad’s keys are pressed.
Indications:
Confirmation Key
CancelKey.Exit Programming Mode
Scroll Keys in Menus
Data Entry Keys
SUMMARY steps to enter/exit programming mode
Any time you wish to enter or exit Programming Mode you must follow these steps:
- to Enter Mode: enter master fingerprint/card.
- to Exit Mode: press the cancel button (X). The reader will automatically exit
programming mode after 60 seconds of inactivity.

Pag 7
FINGERPRINTFINGERPRINT
FINGERPRINT
FINGERPRINTFINGERPRINT
FINGERPRINT
0001
0002
0003
0004
Yaga Seelan
Will Smith
TomCruise
SarahParker
Nº Usuario Nombre Usuario
d 1. 1
REMOTE UNIT
FOR ACCES CONTROL
+
321
7 8 9
0
x-
654
A d d
0 y
d 1. 2 0 0 0 1
Add Users
To register new users. Every user has an associated "user number" from 0001 to maximum.
The codes are stored in the memory in sequence: user number - user fingerprint.
Number of Users:
* 4500 in 1 fingerprint per person mode.
* 2970 in 2 fingerprint per person mode.
NOTE:
- It is very important to compile a list linking the user names and numbers (fingerprint
recorded position) such that it will only be possible to delete a fingerprint if you know its
associated position. The only other option is to delete ALL fingerprints on the reader,
therefore we re-iterate the importance of compiling a list with aforementioned data.
Example of table:
The sequence for registering a user passes through all of the possible options
consecutively:
- 1 fingerprint user mode
- 2 fingerprint user mode
- With proximity card or code
EnterProgrammingMode
Standby Mode
1. Enter the master fingerprint
1 beep
2. Confirm the Add option with the
validation key
3. d1.1 is shown. Enter the user fingerprint you wish to register in the system.
1 beep 1 beep 1 beep
4. d1.2 is shown. Re-enter the user fingerprint you wish to register to confirm the fingerprint.
a) Add User in 1 Fingerprint Mode
1 beep 1 beep 1 beep
5. Relay is shown. Using the scroll keys the following sequence will appear relay, both, Au.... There are three
options the action of which associated with this user fingerprint is:
- relay: to open the door
- both: to open the door and activate the auxiliary exit simultaneously
- Au: to activate the auxiliary exit
Select the required option and confirm using the OK key

Pag 8
FINGERPRINTFINGERPRINT
FINGERPRINT
FINGERPRINTFINGERPRINT
FINGERPRINT
REMOTE UNIT
FOR ACCES CONTROL
+
321
7 8 9
0
x-
654
r e L a
E o t h
A u
REMOTE UNIT
FOR ACCES CONTROL
+
321
7 8 9
0
x-
654
x
d 1. 1
REMOTE UNIT
FOR ACCES CONTROL
+
321
7 8 9
0
x-
654
A d d
0 y
E r r
6. Cancel the rest of the options with "X" until the new option d1.1 is shown, to continue registering users.
Repeat the aforementioned steps to register new users in mode 1 fingerprint.
NOTES:
- The same fingerprint cannot be entered twice on different registers (user number), therefore if it is
already registered on the system it cannot be re-registered.
- The master fingerprint cannot be the user fingerprint either.
Details: If the reader is unable to read the user fingerprint an
error message will appear and it will re-start. 1 beep
b) Add User in 2 Fingerprint Mode
Allows two fingerprints be registered for one user. The user can chose between the
following second fingerprint functions:
- Allows the use of the second fingerprint where there is a problem with the first one
(short-circuit, fire damage .....etc).
For this functionality choose the corresponding option: relay (to open the door).
- Intimidation Alarm. Using the second fingerprint instead of the first one the lock-
release will activate as will the alarm output. Where the first fingerprint is used only
the lock-release activates.
For this functionality choose the corresponding option: Au (to activate the auxiliary exit
and the lock-release).
EnterProgrammingMode
Standby Mode
1. Enter the master fingerprint
1 beep
2. Confirm the Add option with the
validation key
3. d1.1 is shown. Enter the user fingerprint you wish to register in the system.
1 beep 1 beep 1 beep

Pag 9
FINGERPRINTFINGERPRINT
FINGERPRINT
FINGERPRINTFINGERPRINT
FINGERPRINT
d 1. 2 0 0 0 1
A u
REMOTE UNIT
FOR ACCES CONTROL
+
321
7 8 9
0
x-
654
REMOTE UNIT
FOR ACCES CONTROL
+
321
7 8 9
0
x-
654
r e L a
E o t h
A u
d 2. 1
d 2
REMOTE UNIT
FOR ACCES CONTROL
+
321
7 8 9
0
x-
654
0 y
0 0 0 2 r e L a
REMOTE UNIT
FOR ACCES CONTROL
+
321
7 8 9
0
x-
654
REMOTE UNIT
FOR ACCES CONTROL
+
321
7 8 9
0
x-
654
E o t h
d 1. 1
REMOTE UNIT
FOR ACCES CONTROL
+
321
7 8 9
0
x-
654
x
E r r
4. d1.2 is shown. Re-enter the user fingerprint you wish to register to confirm the fingerprint.
1 beep 1 beep 1 beep
6. d2 is shown. Confirm the second fingerprint option using the OK key Enter the user fingerprint you wish to use
for the functions described in fingerprint mode 2.
5. Relay is shown. Using the scroll keys the following sequence will appear relay, both, Au....There are three
options the action of which associated with this user fingerprint is:
- Relay: to open the door.
- both: to open the door and activate the auxiliary exit simultaneously.
- Au: to activate the auxiliary exit
Select the required option and confirm using the OK key.
1 beep
for example: Au
(to activate the auxiliary exit)
1 beep
7. Cancel the rest of the options with "X" until the new option d1.1 is shown, to continue registering users
Repeat the aforementioned steps to register new users in mode 2 fingerprints.
NOTES:
- The same fingerprint cannot be entered twice on different registers (user number), therefore if it is
already registered on the system it cannot be re-registered.
- The master fingerprint cannot be the user fingerprint either.
Details: If the reader is unable to read the user fingerprint an
error message will appear and it will re-start. 1 beep

Pag 10
FINGERPRINTFINGERPRINT
FINGERPRINT
FINGERPRINTFINGERPRINT
FINGERPRINT
d 1. 1
1 bip
REMOTE UNIT
FOR ACCES CONTROL
+
321
7 8 9
0
x-
654
A d d
0 y
0 0 0 1
d 1. 2
REMOTE UNIT
FOR ACCES CONTROL
+
321
7 8 9
0
x-
654
REMOTE UNIT
FOR ACCES CONTROL
+
321
7 8 9
0
x-
654
r e L a
E o t h
A u
d 2
REMOTE UNIT
FOR ACCES CONTROL
+
321
7 8 9
0
x-
654
x
P r o E d 1. 1
EnterProgrammingMode
Standby Mode
1. Enter the master fingerprint 2. Confirm the Add option with the
validation key
c) Add user Mode 1 Fingerprint + Proximity or Code
3. d1.1 is shown. Enter the user fingerprint you wish to register in the system.
1 beep 1 beep 1beep
4. d1.2 is shown. Re-enter the user fingerprint you wish to register to confirm the fingerprint.
1 beep 1 beep 1 beep
5. Relay is shown. Using the scroll keys the following sequence will appear relay, both, Au.... There are three
options the action of which associated with this user fingerprint is:
- Relay: to open the door
- both: to open the door and activate the auxiliary exit simultaneously
- Au: to activate the auxiliary exit
Select the required option and confirm using the OK key.
6. d2 is shown. Cancel with "X". The reader is ready (LEDs flashing) for a card or code to be entered (if the
reader has a keypad).
1 beep
Select an option Accept
7. Bring close the card that you wish to register. If it has registered correctly d1.1 is shown.
1 beep 1 beep

Pag 11
FINGERPRINTFINGERPRINT
FINGERPRINT
FINGERPRINTFINGERPRINT
FINGERPRINT
987
654
321
AB
0
321 4B
+)(
321 4B
4 digits
6 digits
+)(
4B
34
321
C o d e
. . .
d 1. 1
REMOTE UNIT
FOR ACCES CONTROL
+
321
7 8 9
0
x-
654
REMOTE UNIT
FOR ACCES CONTROL
+
321
7 8 9
0
x-
654
0 0 0 6
C o d e
REMOTE UNIT
FOR ACCES CONTROL
+
321
7 8 9
0
x-
654
A d d
8. d1.1 re-appears, allowing us to continue registering users. Repeat the aforementioned steps to register
new users in mode 1 fingerprint + keypad or code.
7b. If it was a keypad code (if the reader has a keypad).
4 or 6 digit code + B. Forexample:
Thecodehasalready
been registered
1 beep
1 beep
NOTE:
- The choice of number of digits (4 or 6) is chosen using the option: Code
Accept
Select an option:
0004 or 0006
NOTES:
- The same fingerprint cannot be entered twice on different registers (user number), therefore if it is
already registered on the system it cannot be re-registered.
- The master fingerprint cannot be the user fingerprint either.
- The same proximity card cannot be entered twice on different registers (user number), therefore
if it is already registered on the system it cannot be re-registered.
d) Add user Mode 2 Fingerprints + Proximity or Code
Allows two fingerprints be registered for one user. The user can chose between the
following second fingerprint functions:
- Allows the use of the second fingerprint where there is a problem with the first one
(short-circuit, fire damage .....etc).
For this functionality choose the corresponding option: relay (to open the door).
- Intimidation Alarm. Using the second fingerprint instead of the first one the lock-
release will activate as will the alarm output. Where the first fingerprint is used only
the lock-release activates.
For this functionality choose the corresponding option: Au (to activate the auxiliary exit)
2. Confirm the Add option with the
validation key
EnterProgrammingMode
Standby Mode
1. Enter the master fingerprint
1 beep

Pag 12
FINGERPRINTFINGERPRINT
FINGERPRINT
FINGERPRINTFINGERPRINT
FINGERPRINT
d 1. 2 0 0 0 1
d 1. 1 0 y
A u
REMOTE UNIT
FOR ACCES CONTROL
+
321
7 8 9
0
x-
654
REMOTE UNIT
FOR ACCES CONTROL
+
321
7 8 9
0
x-
654
r e L a
E o t h
A u
d 2. 1
d 2
REMOTE UNIT
FOR ACCES CONTROL
+
321
7 8 9
0
x-
654
0 0 0 2 r e L a
E o t h
REMOTE UNIT
FOR ACCES CONTROL
+
321
7 8 9
0
x-
654
REMOTE UNIT
FOR ACCES CONTROL
+
321
7 8 9
0
x-
654
P r o E d 1. 1
4. d1.2 is shown. Re-enter the user fingerprint you wish to register to confirm the fingerprint.
1 beep 1 beep 1 beep
3. d1.1 is shown. Enter the user fingerprint you wish to register in the system.
1 beep 1 beep 1 beep
5. Relay is shown. Using the scroll keys the following sequence will appear relay, both, Au.... There are three
options the action of which associated with this user fingerprint is:
- Relay: to open the door
- both: to open the door and activate the auxiliary exit simultaneously.
- Au: to activate the auxiliary exit
Select the required option and confirm using the OK key.
6. d2 is shown. Confirm the second fingerprint option using the OK key Enter the user fingerprint you wish to use
for the functions described in fingerprint mode 2.
1 beep
for example: Au
(to activate the auxiliary exit)
1 beep
6b. The reader LEDs start to flash. The reader is ready (LEDs flashing) for a card or code to be entered (if the
reader has a keypad).
7. Bring close the card that you wish to register. If it has registered correctly d1.1 is shown.
1 beep 1 beep

Pag 13
FINGERPRINTFINGERPRINT
FINGERPRINT
FINGERPRINTFINGERPRINT
FINGERPRINT
987
654
321
AB
0
321 4B
+)(
321 4B
4 digits
6 digits
+)(
4B
34
321
C o d e
. . .
d 1. 1
REMOTE UNIT
FOR ACCES CONTROL
+
321
7 8 9
0
x-
654
REMOTE UNIT
FOR ACCES CONTROL
+
321
7 8 9
0
x-
654
0 0 0 6
C o d e
d 1. 1
REMOTE UNIT
FOR ACCES CONTROL
+
321
7 8 9
0
x-
654
0 0 0 1
REMOTE UNIT
FOR ACCES CONTROL
+
321
7 8 9
0
x-
654
A d d
7b. If it was a keypad code (if the reader has a keypad).
4 or 6 digit code + B. Forexample:
The code has already
been registered
1 beep
1 beep
8. d1.1 re-appears, allowing us to continue registering users. Repeat the aforementioned steps to register
new users in mode 2 fingerprints + proximity or code.
NOTE:
- The choice of number of digits (4 or 6) is chosen using the option: Code
Accept
Select an option:
0004 or 0006
NOTES:
- The same fingerprint cannot be entered twice on different registers (user number), therefore if it is
already registered on the system it cannot be re-registered.
- The master fingerprint cannot be the user fingerprint either.
- The same proximity card cannot be entered twice on different registers (user number), therefore
if it is already registered on the system it cannot be re-registered.
e)Add user ONLY proximity or code.
Some people’s fingerprints do not have the information required to register them in a
biometric system. An estimated 1% of the population. In these cases use integrated
Proximity or a reader with a keypad to enter a code.
EnterProgrammingMode
Standby Mode
1. Enter the master fingerprint
1 beep
2. Confirm the Add option with the
validation key
3. d1.1 is shown. Press the OK key WITHOUT entering the user fingerprint. The user number that will be
registered in the system will be shown and the LEDs will flash. The reader is ready (LEDs flashing) for a card
or code to be entered (if the reader has a keypad).
1 beep1 beep

Pag 14
FINGERPRINTFINGERPRINT
FINGERPRINT
FINGERPRINTFINGERPRINT
FINGERPRINT
P r o E
0 0 0 1
987
654
321
AB
0
321 4B
+)(
321 4B
+)(
4B
34
321
C o d e
. . .
0 0 0 1
d 1. 1
REMOTE UNIT
FOR ACCES CONTROL
+
321
7 8 9
0
x-
654
REMOTE UNIT
FOR ACCES CONTROL
+
321
7 8 9
0
x-
654
0 0 0 6
E r r
REMOTE UNIT
FOR ACCES CONTROL
+
321
7 8 9
0
x-
654
REMOTE UNIT
FOR ACCES CONTROL
+
321
7 8 9
0
x-
654
S t d
M o d e S e c
4. Bring close the card that you wish to register. If it has registered correctly d1.1 is shown.
1 beep 1 beep
4b If it was a keypad code (if the reader has a keypad).
4 digits
6 digits
4 or 6 digit code + B. Forexample:
Thecode has already
been registered
1 beep
1 beep
5. d1.1 re-appears, allowing us to continue registering users. Repeat the aforementioned steps to register
new users - card or code only.
NOTE:
- The choice of number of digits (4 or 6) is chosen using the option: Code
Accept
Select an option:
0004 or 0006
NOTES:
The same proximity card cannot be entered twice on different registers (user number), therefore if
it is already registered on the system it cannot be re-registered.
Details:Ifthecardhasalreadybeenregisteredinthesystem
an error message will be shown when you try and
register it again. 1 beep
Operation
User mode 1 or 2 fingerprints.
User mode 1 or 2 fingerprints + proximity.
User mode 1 or 2 fingerprints + code.
User proximity only.
UserID only.
NOTE:
- For the functioning of users in Security Mode (double security): Fingerprint + Proximity or Fingerprint +
Code, in the option: Mode the Sec mode has to be selected (double security).
Accept
Select Sec
Std: Standard Sec: double security:
Security mode

Pag 15
FINGERPRINTFINGERPRINT
FINGERPRINT
FINGERPRINTFINGERPRINT
FINGERPRINT
OK
0001
Beeeep!
NO OK
Err
Beep!
ProE
OK
OK
Err
NO OK
0001 Beeeep!
Beep!
Err
NO OK
Beep!
User mode 1 or 2 fingerprints
User mode 1 or 2 fingerprints with proximity functioning

Pag 16
FINGERPRINTFINGERPRINT
FINGERPRINT
FINGERPRINTFINGERPRINT
FINGERPRINT
987
654
321
AB
0
+ Code: OK
Code 0001
Err
987
654
321
AB
0
+Code: NO OK
OK
987
654
321
AB
0
Beeeep!
Beep!
321 4B
+)(
21 4B
+)(
34
3
Err
987
654
321
AB
0
987
654
321
AB
0
NO OK
Beep!
0001
Beeeep!
OK
Err
NO OK
Beep!
User mode 1 or 2 fingerprints with ID functioning
User proximity only functioning

Pag 17
FINGERPRINTFINGERPRINT
FINGERPRINT
FINGERPRINTFINGERPRINT
FINGERPRINT
0001
Beeeep!
987
654
321
AB
0
OK
987
654
321
AB
0
321 4B
+)(
21 4B
+)(
34
3
Err
NO OK
987
654
321
AB
0
987
654
321
AB
0
Beep!
321 4B
+)(
21 4B
+)(
34
3
REMOTE UNIT
FOR ACCES CONTROL
+
321
7 8 9
0
x-
654
REMOTE UNIT
FOR ACCES CONTROL
+
321
7 8 9
0
x-
654
1 bip
REMOTE UNIT
FOR ACCES CONTROL
+
321
7 8 9
0
x-
654
A d d
E r A
0 0 0 0 A L L
REMOTE UNIT
FOR ACCES CONTROL
+
321
7 8 9
0
x-
654
REMOTE UNIT
FOR ACCES CONTROL
+
321
7 8 9
0
x-
654
3
0 0 0 0
REMOTE UNIT
FOR ACCES CONTROL
+
321
7 8 9
0
x-
654
0 y E r A0 0 0 3
User ID only functioning
Delete Users (ErA)
A registered user can be deleted by entering their user number. There is also another
option for deleting all users on the reader.
a) Delete Users by way of their "user number"
Standby Mode
2. Search using the menu’s scroll keys:
ErA
1. Enter the master fingerprint
EnterProgrammingMode
3. ErA is shown. Confirm with the OK key.
4. 0000 is shown. Using the scroll keys the following sequence will appear: 0000, ALL, 0000.... Select the
following option: 0000 and enter the "user number" that you wish to delete and confirm with the OK key.
1 beep
1 beep
1 beep For example:
Number of
User 3
1 beep
1 beep
1 beep
For example: Number of User 3

Pag 18
FINGERPRINTFINGERPRINT
FINGERPRINT
FINGERPRINTFINGERPRINT
FINGERPRINT
REMOTE UNIT
FOR ACCES CONTROL
+
321
7 8 9
0
x-
654
E r A
1 bip
REMOTE UNIT
FOR ACCES CONTROL
+
321
7 8 9
0
x-
654
A d d
REMOTE UNIT
FOR ACCES CONTROL
+
321
7 8 9
0
x-
654
0 0 0 0 A L L
REMOTE UNIT
FOR ACCES CONTROL
+
321
7 8 9
0
x-
654
E d i t E r A
E r r
REMOTE UNIT
FOR ACCES CONTROL
+
321
7 8 9
0
x-
654
REMOTE UNIT
FOR ACCES CONTROL
+
321
7 8 9
0
x-
654
t. Ab
REMOTE UNIT
FOR ACCES CONTROL
+
321
7 8 9
0
x-
654
T e M
b) FULL User Reset
Standby Mode
2. Search using the menu’s scroll keys:
ErA
1. Enter the master fingerprint.
EnterProgrammingMode
3. ErA is shown. Confirm with the OK key.
1 beep
4. 0000 is shown. Using the scroll keys the following sequence will appear: 0000, ALL, 0000.... Select the
following option: ALL and confirm with the OK key.
1 beep
1 beep
1 beep
NOTESon theDELETEoption:
- Deleting a user or resetting all users are irreversible actions, such that once deleted the
information cannot be recovered.
- You can delete a code if you know its associated position, therefore we re-iterate the
importance of compiling a table with the users names and numbers.
- If the "user number" entered does not exist or the data is incorrect an error message will appear
on the display. 1 beep
Time Configuration (TeM)
Standby Mode
2. Search using the menu’s scroll keys:
tEM
1. Enter the master fingerprint
1 beep
EnterProgrammingMode
3. tEM is shown. Confirm with the OK key. TeM is shown. Using the scroll keys the following sequence will
appear: t.Ab, t.ALM, t.SE, t.Ab.... Select the option you wish to configure.
NOTESon“DoorSensorTimes”and“AlarmActivationTimes”options:
- In options b and c the times are programmed but these functions have to be activated. See the
corresponding chapter on: "Auxiliary Output Time".
1 beep

Pag 19
FINGERPRINTFINGERPRINT
FINGERPRINT
FINGERPRINTFINGERPRINT
FINGERPRINT
REMOTE UNIT
FOR ACCES CONTROL
+
321
7 8 9
0
x-
654
REMOTE UNIT
FOR ACCES CONTROL
+
321
7 8 9
0
x-
654
3
0
0 0 4. S
REMOTE UNIT
FOR ACCES CONTROL
+
321
7 8 9
0
x-
654
0 0 3. S 0 y t. Ab
0
REMOTE UNIT
FOR ACCES CONTROL
+
321
7 8 9
0
x-
654
REMOTE UNIT
FOR ACCES CONTROL
+
321
7 8 9
0
x-
654
REMOTE UNIT
FOR ACCES CONTROL
+
321
7 8 9
0
x-
654
08
REMOTE UNIT
FOR ACCES CONTROL
+
321
7 8 9
0
x-
654
t. S E 0 0 0. S
0 0 8. S 0 y t. S E
t.AL M 0 0 0. S
0
REMOTE UNIT
FOR ACCES CONTROL
+
321
7 8 9
0
x-
654
REMOTE UNIT
FOR ACCES CONTROL
+
321
7 8 9
0
x-
654
3
0
0 0 3. S 0 y t.AL M
0
a) Lock-Release Timing
Time the door’s lock-release relay remains active.
1 beep
Default Value: 4 secs
1. Enter the required door opening time of between 01 and 99 seconds.
For example: 3 secs
1 beep
b) Door Sensor Timing
Maximum time the door can be open before an alarm goes off.
A magnetic door sensor is required. See diagram.
Initially these functions are disabled (000 value).
1 beep
For example: 8 secs
1. Enter a time of between 01 and 99 seconds after which, when the door is open an acoustic alarm integrated
into the reader will begin to sound.
1 beep
Default Value: 0 secs
c) Alarm Time (auxiliary output)
Time the alarm remains active. Initially these functions are disabled (000 value).
1 beep
Default Value: 0 secs
For example: 3 secs
1. Enter the time you wish the alarm to remain active for at between 01 and 99 seconds
1 beep
NOTE: the sensor time has to be greater than the lock-release time

Pag 20
FINGERPRINTFINGERPRINT
FINGERPRINT
FINGERPRINTFINGERPRINT
FINGERPRINT
REMOTE UNIT
FOR ACCES CONTROL
+
321
7 8 9
0
x-
654
REMOTE UNIT
FOR ACCES CONTROL
+
321
7 8 9
0
x-
654
REMOTE UNIT
FOR ACCES CONTROL
+
321
7 8 9
0
x-
654
A d d
Au - - - -
REMOTE UNIT
FOR ACCES CONTROL
+
321
7 8 9
0
x-
654
- - - - 0 y Au
REMOTE UNIT
FOR ACCES CONTROL
+
321
7 8 9
0
x-
654
0 y
A L P Au
REMOTE UNIT
FOR ACCES CONTROL
+
321
7 8 9
0
x-
654
0 y
A L I Au
Auxiliary Output functionality (Au)
The following functions are possible:
- None activated: - - -
- Door and door forced open alarm: ALP
- Intruder alarm following an incorrect fingerprint: ALI
Only one of these functions can be activated on the system.
NOTE:
- If any of these functions is configured do not associate the exit Au (auxiliary exit) with a user
fingerprint.
Standby Mode
2. Search using the menu’s scroll keys:
Au
1. Enter the master fingerprint
1 beep
EnterProgrammingMode
a) No option activated
Initially this function is disabled (- - - value).
3. Au is shown. Confirm with the OK key. - - - is shown. Using the scroll keys the following sequence will
appear: - - - -, ALI, ALP, - - - -.... Select the option you wish to configure.
1 beep
1 beep
1 beep 1 beep
1 beep
1 beep
b) Door and door forced open alarm
Door Alarm Activation Option. See the "Door Sensor Time" chapter.
c) Intruder alarm following an incorrect fingerprint
IntruderAlarmActivation Option.
1 beep
1 beep
Options with special MASTER (MSt) cards/fingerprints
Within the MSt option the following functions are possible:
- Change master fingerprint/card: MS1
- Add a second master finger/card MS2
- Add a trade finger/card: trd
- Add an unblock fingerprint/card: UnbL
- Add a fingerprint/card for the security/standard mode: Seq.
Table of contents
Other Fermax IP Access Controllers manuals

Fermax
Fermax AC-MAX User manual

Fermax
Fermax CITYLINE MEMOKEY Instruction Manual

Fermax
Fermax AC-MAX User manual

Fermax
Fermax 5226 User guide

Fermax
Fermax AC-MAX KIT 2 DOORS User guide

Fermax
Fermax ACMAX BOX-IP User guide

Fermax
Fermax SLIM 5255 User manual

Fermax
Fermax AC-MAX User manual

Fermax
Fermax WIEGAND DT-CK Cityclassic User manual

Fermax
Fermax Memokey 100C User guide
Popular IP Access Controllers manuals by other brands

ZKTeco
ZKTeco SF1005-V+ quick start guide

Gianni Industries
Gianni Industries GEM Easiprox+ Series installation guide

TECOM
TECOM ChallengerPlus Installation and Quick Programming Manual

Identiv
Identiv MobilisID Installation guide and user's manual

BQT
BQT BioX Series installation guide

LOXONE
LOXONE NFC CODE TOUCH TREE manual