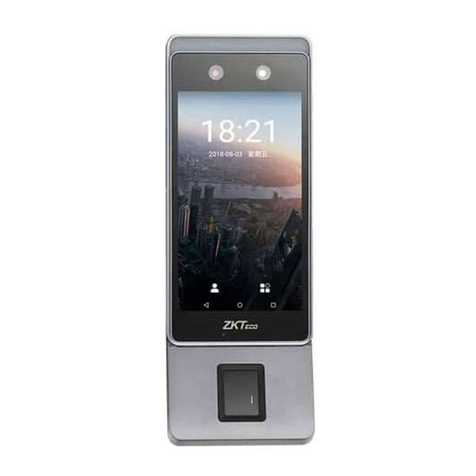
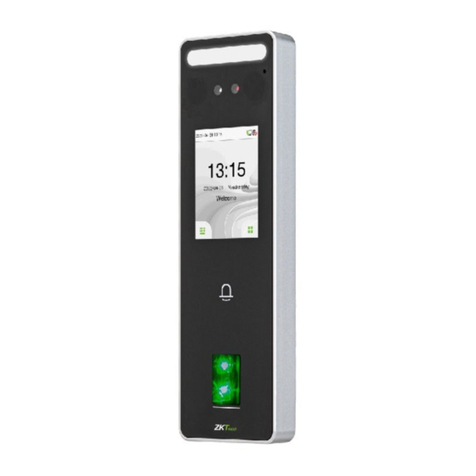
ZKTeco SF1005-V+ User manual

OPEN OPTIONS
ACCESS TECHNOLOGY
®
ZKTeco
Quick Start
Guide


This manual is proprietary information of Open Options, LLC. Unauthorized reproduction or
distribution of this manual is strictly forbidden without the written consent of Open Options,
LLC. The information contained in this manual is for informational purposes only and is subject
to change at any time without notice. Open Options, LLC. assumes no responsibility for
incorrect or outdated information that may be contained in this publication.
DNA FusionTM and SSPTM are trademarksof Open Options, LLC.
The DNA FusionTM Access Control Software and SSPTM Security System Processor use
equipment that generates, uses,and radiatesradio frequency energy.If not installed and
deployed in accordance with the guidelines of this installation manual, they may cause
harmful interference to radio communications. Operation of this equipment in a residential
area may cause harmful interference, in which case the user will be required to correct the
interference at their own expense.
The DNA FusionTM Access Control Software and SSPTM Security System Processor shall be
installed in accordance with this installation manual and in accordance with the National
Electric Code (N.E.C), ANSI and NFPA 70 Regulations and recommendations.
Publish Date: August 25, 2020
Manual Number: ZQSG-1.0
© Copyright 2002-2020 Open Options, LLC.All rights reserved.
Warranty
All Open Options products are warranted against defect in materials and workmanship for two
yearsfrom the date of shipment. Open Options will repair or replace products that prove
defective and are returned to Open Options within the warranty period with shipping prepaid.
The warranty of Open Options products shall not apply to defects resulting from misuse,
accident, alteration, neglect, improper installation, unauthorized repair, or acts of God. Open
Options shall have the right of final determination as to the existence and cause of the defect.
No other warranty, written or oral is expressed or implied.
16650 Westgrove Dr | Suite 150
Addison, TX 75001
Phone: (972) 818-7001
Fax (972) 818-7003
www.ooaccess.com

Open Options Software License Agreement
THE ENCLOSED SOFTWARE PACKAGE IS LICENSED BY OPEN OPTIONS, LLC. TO CUSTOMERS FOR THEIR
NON-EXCLUSIVE USE ON A COMPUTER SYSTEM PER THE TERMS SET FORTH BELOW.
DEFINITIONS: Open Options shall mean Open Options, LLC, which has the legal right to license the computer application
known as DNA Fusion herein known as the Software. Documentation shall mean all printed material included with the
Software. Licensee shall mean the end user of this Open Options Software. This Software Package consists of copyrighted
computer software and copyrighted user reference manual(s).
LICENSE: Open Options, LLC, grants the licensee a limited, non-exclusive license (i) to load a copy of the Software into the
memory of a single (one) computer as necessary to use the Program, and (ii) to make one (1) backup or archival copy of the
Software for use with the same computer. The archival copy and original copy of the Software are subject to the restrictions
in this Agreement and both must be destroyed or returned to Open Options if your continued possession or use of the original
copy ceases or this Agreement is terminated.
RESTRICTIONS: Licensee may not sub license, rent, lease, sell, pledge or otherwise transfer or distribute the original copy
or archival copy of the Software or the Documentation. Licensee agrees not to translate, modify, disassemble, decompile,
reverse engineer, or create derivative works based on the Software or any portion thereof. Licensee also may not copy the
Documentation. The license automatically terminates without notice if Licensee breaches any provision of this Agreement.
TRANSFER RIGHTS: Reseller agrees to provide this license and warranty agreement to the end user customer. By
installation of the software, the end user customer and reseller agree to be bound by the license agreement and warranty.
LIMITED WARRANTY: Open Options warrants that it has the sole right to license the Software to Licensee. Upon
registration by the Licensee, Open Options further warrants that the media on which the Software is furnished will be free
from defects in materials and workmanship under normal use for a period of twelve (12) months following the delivery of the
Software to the Licensee. Open Options’ entire liability and your exclusive remedy shall be the replacement of the Software
if the media on which the Software is furnished proves to be defective. EXCEPT AS PROVIDED IN THIS SECTION, THE
IMPLIED WARRANTIES OF MERCHANTABILITY AND FITNESS FOR A PARTICULAR PURPOSE ARE
EXPRESSLY DISCLAIMED. IN PARTICULAR, EXCEPT AS PROVIDED IN THIS SECTION, WITH RESPECT TO
ANY PARTICULAR APPLICATION, USE OR PURPOSE, LICENSOR DOES NOT WARRANT THAT THE
PRODUCTS WILL MEET THE LICENSEE’S REQUIREMENTS, THAT THE PRODUCTS WILL OPERATE IN THE
COMBINATIONS OF 3RD PARTY SOFTWARE WHICH THE LICENSEE MAY SELECT TO USE, OR THAT THE
OPERATION OF THE PRODUCTS WILL BE UNITERRUPTED OR ERROR FREE. NEITHER OPEN OPTIONS, NOR
ITS VENDORS SHALL BE LIABLE FOR ANY LOSS OF PROFITS, LOSS OF USE, INTERRUPTION OF BUSINESS,
NOR FOR INDIRECT, SPECIAL, INCIDENTAL, OR CONSEQUENTIAL DAMAGES OF ANY KIND WHETHER
UNDER THIS AGREEMENT OR OTHERWISE. IN NO CASE SHALL OPEN OPTIONS’ LIABILITY EXCEED THE
PURCHASE PRICE OF THE SOFTWARE.
The disclaimers and limitations set forth above will apply regardless of whether you accept the Software.
TERMINATION: Open Options may terminate this license at any time if licensee is in breach of any of its terms or
conditions. Upon termination, licensee will immediately destroy the Software or return all copies of the Software to Open
Options, along with any copies licensee has made.
APPLICABLE LAWS: This Agreement is governed by the laws of the State of Texas, including patent and copyright laws.
This Agreement will govern any upgrades, if any, to the program that the licensee receives and contains the entire
understanding between the parties and supersedes any proposal or prior agreement regarding the subject matter hereof.
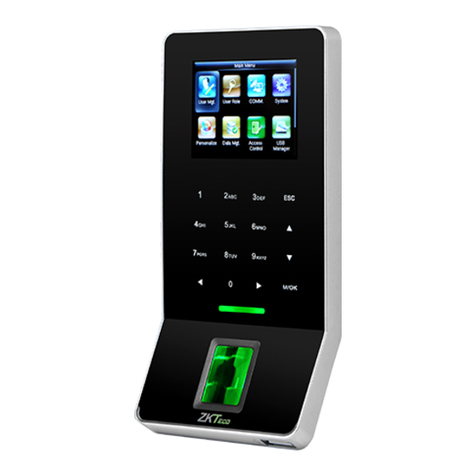
ZKTeco SF1005-V+:
Quick Start Guide
Page 1ZKTeco SF1005-V+ Open Options Condential
This Quick Start Guide explains the process of wiring and conguring the ZKTeco SF1005-V+ with the DNA
Fusion Access Control Software. To link the SF1005-V+ with DNA Fusion, an additional wiegand reader and
cards are required for user registration.
SF1005-V+ Diagram
Installation
Installation Environment - The ZKTeco SF1005-V+ should be installed indoors and away from direct
sunlight and exposure.
Step 1: Wiring the ZKTeco SF1005-V+ - Wire the Power In cables to power the device. For access
controller communication, wire the Wiegand Out cables to the DAT / CLK (D1 / D0) terminal of the SSP
controller.
NOTE: For user registration purposes, a wiegand reader needs to be wired to the SF1005-V+ to
link with DNAFusion. The additional reader may be disconnected once the Badge Number is linked
to DNAFusion.
Step 2: Adding a New User - Access User Mgt (Management) and select New User. Register any biometric
and/or card information to the user’s prole.
Step 3: Adding Verication Method - In the Access Control option, select Verication Mode and select the
desired mode.
Step 4: Adding the ZKTeco SF1005-V+ in DNAFusion - Add the SF1005-V+ as a reader. Match the User
prole from the SF1005-V+ to the Personnel prole in DNA Fusion.

Page 2 Open Options Condential
ZKTeco SF1005-V+: Quick Start Guide
Installation Environment
Follow these recommendations for the physical installation of the reader.
● Install Indoors
● Avoid Glass Refraction
● Avoid Direct Sunlight and Exposure
● Keep Away from Heat Source
● Eective Distance for Palm Scans: 30-50cm
● Eective Distance for Face Scans: 40-80cm

Page 3
ZKTeco SF1005-V+ : Quick Start Guide
Open Options Condential
Wiring the ZKTeco SF1005-V+
Follow the steps below to wire the ZKTeco SF1005-V+.
NOTE: The industry wiring colors do NOT apply to the ZKTeco SF1005-V+ wiring harness.
1. Wire the Power In (12V / GND) terminals to power the device.
2. To establish communication between the SF1005-V+ to the controller/sub-controller, wire Wiegand
Out terminals to the DAT D0 / CLK D1 (Reader Port 1 or 2) terminals on the controller/subcontroller.
3. Wire the proximity reader to the SF1005-V+.
a. Wire the Wiegand In to the wiegand reader’s power and data terminal.
b. Wire the Power Out (+12V / GND) terminals to the reader’s power in terminals.
4. Apply power to the SF1005-V+.

Page 4 Open Options Condential
ZKTeco SF1005-V+: Quick Start Guide
Additional Wiring
To wire any additional features to the SF1005-V+, see the diagrams below.
ZKTeco SF1005-V+ Wire Terminals
Exit Buttons, Sensors, and Alarm Connection

Page 5
ZKTeco SF1005-V+ : Quick Start Guide
Open Options Condential
Lock Relay Connection
RS485 and RS232 Connection

Page 6 Open Options Condential
ZKTeco SF1005-V+: Quick Start Guide
This Page Intentionally Left Blank

Page 7
ZKTeco SF1005-V+ : Quick Start Guide
Open Options Condential
Adding a New User
Once the SF1005-V+ is wired and powered, begin adding users to the device. See the following steps for
instructions on adding users.
1. On the SF1005-V+, select the Main Menu icon .
2. Select User Mgt.
3. Select New User.
The New User screen opens.
Keyboard icon. Used for
Password verication.
Main Menu icon.

Page 8 Open Options Condential
ZKTeco SF1005-V+: Quick Start Guide
User Credential Enrollment
Each New User is assigned with a User ID. Selecting User ID will allow the user to change the ID number.
Users have the option of setting up various biometric verications to register to the reader. Setting the
Badge Number verication is required to link DNA Fusion with the SF1005-V+.
NOTE: At least one form of verication must be added before the user’s name is saved to the
SF1005-V+.
In the New User screen:
1. If a wiegand reader was congured with the SF1005-V+, add the card information to the Badge
Number section.
a. Select Badge Number on the New User screen.
b. Present card to the wiegand reader.
The card’s information will be assigned to the user’s prole.
NOTE: The Badge Number displayed on the New User screen will appear dierent in DNA Fusion.
The Badge Number is NOT the same as the Card Number in DNA Fusion.
c. If needed, add the card format to Cards and Dual Comm in DNA Fusion.

Page 9
ZKTeco SF1005-V+ : Quick Start Guide
Open Options Condential
2. Select Name and enter the user’s name.
3. Select User Role and select a Role.
The user can be added as a Normal User or a Super Admin.
4. If needed, add the Palm verication.
a. Select Palm.
b. Present the new user’s palm to the SF1005-V+.
c. Follow the directions on the Enroll Palm screen.
The user’s palm will be authenticated once the progress bar at the bottom spans from one side of
the screen to the other.
5. If needed, add a Fingerprint verication.
a. Select Fingerprint.
b. Place the new user’s index nger to the ngerprint scanner thats located below the screen.
c. Follow the directions on the Enroll Fingerprint screen.

Page 10 Open Options Condential
ZKTeco SF1005-V+: Quick Start Guide
6. If needed, add a Face verication.
a. Select Face.
b. Present the new user’s face to the SF1005-V+.
c. Follow the directions on the Enroll Face screen.
The user’s face will be registered once the progress bar at the bottom spans from one side of the
screen to the other.
7. If needed, add a Password.
a. Select Password.
b. Enter a password.
c. Verify the password.

Page 11
ZKTeco SF1005-V+ : Quick Start Guide
Open Options Condential
Adding Verication Method
The SF1005-V+ allows the user to use multiple verication methods or combine verication methods.
1. In the Main Menu, select Access Control > Access Control Options > Verication Mode.
2. Select an option shown on the screen.
Additional Parameters
Additional parameters can be set in the SF1005-V+. Parameters like temperature screening can be
enabled through the Detection Management screen.
NOTE: The parameters mentioned in Additional Parameters are monitored in the SF1005-V+.
Adjustments for these parameters are not required in DNA Fusion.
To access the Detection Management screen:
1. Select the Main Menu icon.
2. Select System.
3. Select Detection Management.

Page 12 Open Options Condential
ZKTeco SF1005-V+: Quick Start Guide
4. If needed, select Enable temperature screening with infrared.
Enabling temperature screening allows for monitoring of the user’s body temperature.
5. If needed, select Enable mask detection.

Page 13
ZKTeco SF1005-V+ : Quick Start Guide
Open Options Condential
Adding the ZKTeco SF1005-V+ to DNAFusion
To add the SF1005-V+ to DNA Fusion, expand the SIO tree (either an SSP On-board or a seperate SIO)
and add the SF1005-V+ as a reader. A prole must also be created in DNA Fusion before the user can gain
access to the door.
1. Open DNA Fusion.
2. Expand SIO (subcontroller/On-board subcontroller) tree.
3. Right-click on a DNA Access Control Reader and select Add Door > Use Default.
Adding a New User to Personnel Properties
If a New User needs a personnel prole in DNA Fusion, follow the steps below to add the new user to the
Personnel Properties.
In DNAFusion:
1. Right-click on the Personnel browser.
2. Select Add New Cardholder.
3. In the Employee Info tab, enter desired information.
4. If needed, add the cardholders ID (Ex. 5486) in NEW Card tab.
5. Add any additional Card information.
Table of contents
Other ZKTeco IP Access Controllers manuals

ZKTeco
ZKTeco ProMA Series User manual

ZKTeco
ZKTeco inBIO 480 Guide

ZKTeco
ZKTeco ProMA Series User manual

ZKTeco
ZKTeco ZKX5030A User manual
![ZKTeco G4[QR] User manual ZKTeco G4[QR] User manual](/data/manuals/1j/2/1j2wo/sources/zkteco-g4-qr-ip-access-controllers-manual.jpg)
ZKTeco
ZKTeco G4[QR] User manual

ZKTeco
ZKTeco C2-260/inBio2-260 User manual

ZKTeco
ZKTeco C3 Pro User manual

ZKTeco
ZKTeco Green Label ProFace X User manual

ZKTeco
ZKTeco FR1200 Datasheet

ZKTeco
ZKTeco Horus User manual

ZKTeco
ZKTeco C5S120 User manual

ZKTeco
ZKTeco F19 User manual

ZKTeco
ZKTeco MultiBio 700 User manual

ZKTeco
ZKTeco MB20-VL User manual

ZKTeco
ZKTeco ProBio User manual

ZKTeco
ZKTeco F18 User manual

ZKTeco
ZKTeco F18 User manual

ZKTeco
ZKTeco TF1600 ZKTeco User manual

ZKTeco
ZKTeco X6 Instruction sheet

ZKTeco
ZKTeco F18 User manual