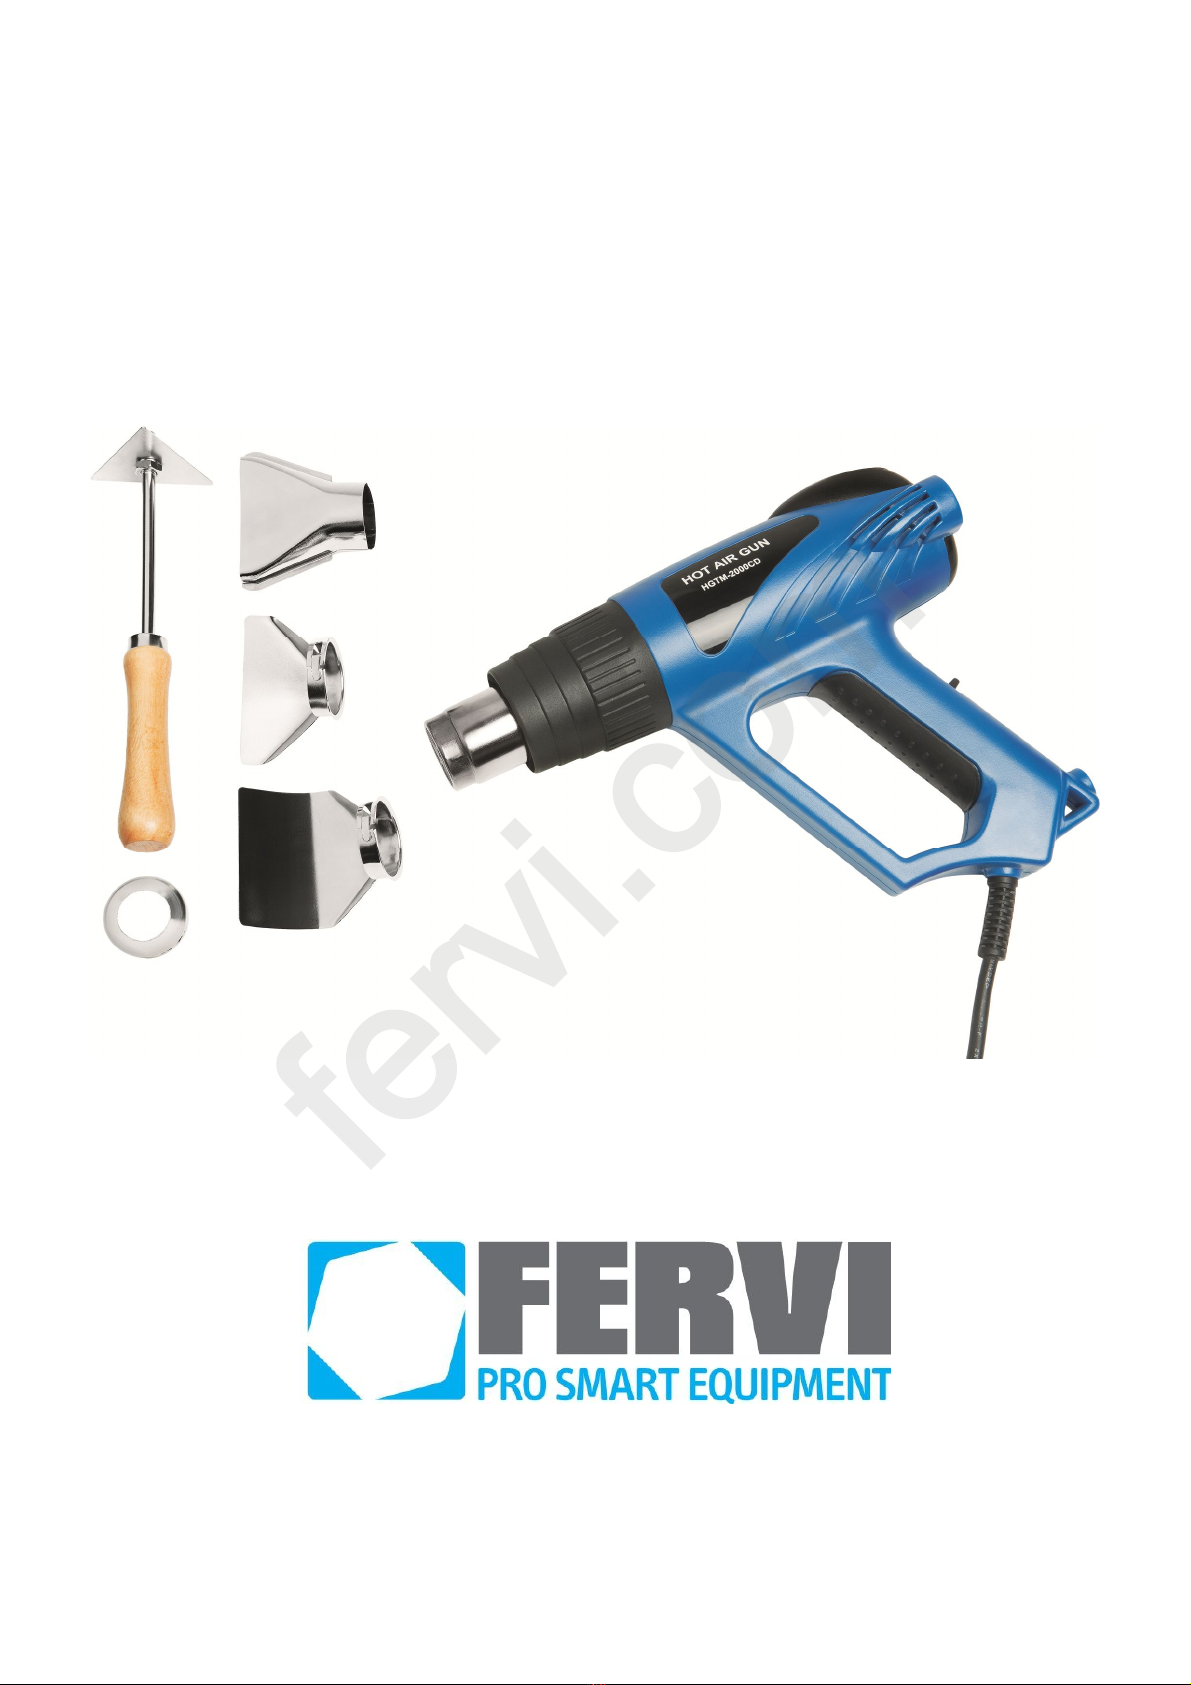
Fervi 444 User manual

OPERATION AND
MAINTENANCE MANUAL
Digital Paint Stripper
Art. 0444
ORIGINAL INSTRUCTIONS
fervi.com

HARDWARE
Page 2 of 9
FOREWORD
Read this manual before operating any machinery
ORIGINAL INSTRUCTIONS
Before starting any operation it is compulsory to read this instruction manual. The guarantee
of smooth operation and full performance of the machine is highly dependent on the
application of all the instructions contained in this manual.
Operator Qualification
The workers responsible for using this product must have all the necessary information,
education and receive adequate training regarding safety, including:
a) The conditions of use of the equipment;
b) Foreseeable abnormal situations, pursuant to Article 73 of Legislative Decree
81/08.
We guarantee the product's conformity to specifications and technical instructions
described in the Manual on the date of issue, as listed on this page; however, the
product may be subject to potentially major technical changes in the future, without
the Manual being updated.
Therefore, see FERVI for information about modifications that could be implemented.
REV. 1 November 2013
fervi.com

HARDWARE
Page 3 of 9
CONTENTS
1 PRECAUTIONS WITH REGARD TO ELECTRIC SHOCK.................................. 4
1.1 Technical support..........................................................................................................4
2 DESCRIPTION OF THE PAINT STRIPPER AND INTENDED USE ................... 5
2.1 Technical specifications ................................................................................................6
3 IMPROPER USE AND CONTRAINDICATIONS.............................................. 6
4 COMMISSIONING...................................................................................... 7
4.1 Installation ...................................................................................................................7
5 HOW TO USE ............................................................................................. 7
5.1 Power On / Off..............................................................................................................7
5.2 Using the paint stripper for "stripping paint"................................................................7
5.3 Other Uses ....................................................................................................................8
6 MAINTENANCE AND CLEANING................................................................. 9
fervi.com

HARDWARE
Page 4 of 9
1 PRECAUTIONS WITH REGARD TO ELECTRIC
SHOCK
Risks associated with electric shocks
Check that the power plug is disconnected before touching live parts.
Make sure the power supply complies with the machine's required voltage and
frequency requirements.
DO NOT use different types of power supplies.
DO NOT spray or pour water on the unit.
In case of contact with water, immediately unplug the power supply.
Avoid using the disassembled unit.
For repairs, contact Customer Support.
1.1 Technical support
For any problems and/or concerns, please contact, without hesitation, the Customer Service
Department of the dealer, who has specialised staff, specific equipment and spare parts.
fervi.com

HARDWARE
Page 5 of 9
2 DESCRIPTION OF THE PAINT STRIPPER AND
INTENDED USE
The Paint Stripper (Art. 0444) is a device that produces a powerful jet of hot air, to be
used exclusively for the removal of layers of paint.
It is intended for indoor use. Do not expose to rain or moisture and always store indoors.
The paint stripper is made up of the following parts (see Figure 1):
Figure 1 - Overview of the machine
1Body of the paint stripper
2Handle
3Power cable
4Hot air output nozzle
5Control system
6Diffusers
7Diffuser - spatula
8Scraper
1
2
3
4
6
7
8
5
fervi.com

HARDWARE
Page 6 of 9
2.1 Technical specifications
Voltage 230 V
Frequency 50 Hz
Power 2000 W
Airflow
Step I 300 l/min
Step II 300 l/min
Step III 500 l/min
Air temperature
Step I 70° C
Step II 70° - 600 °C
Step III 70° - 600 °C
3 IMPROPER USE AND CONTRAINDICATIONS
IT IS STRICTLY FORBIDDEN TO:
Place the unit on a surface that is unstable and/or sensitive to heat, causing a risk of
burns.
Attention! The heat can be transmitted to combustible materials that are outside the
field of view;
Allow the appliance to be used by untrained personnel and those who have not read the
instruction manual;
Use this device in uncontrolled climatic conditions, humid conditions, in potentially
explosive atmospheres or near surfaces or flammable gases;
Use the equipment without wearing appropriate PPE, such as gloves and goggles;
Touch the paint stripper's hot air output nozzle. It reaches a very high temperature;
Use the paint stripper as a hair dryer;
Use the paint stripper in the presence of children;
Leave the plug in the socket;
Direct the air flow in the direction of people or animals;
Block or insert objects into the nozzle of the paint stripper;
Use the paint stripper together with chemical solvents;
Modify and/or tamper with the device;
Use power sources other than those prescribed;
Throw water on the device and/or touch it with wet hands.
fervi.com

HARDWARE
Page 7 of 9
4 COMMISSIONING
4.1 Installation
Open the plastic case containing the paint stripper and all the accessories. Lay the paint
stripper on the workbench.
5 HOW TO USE
5.1 Power On / Off
Insert the plug into a 230 V (50 Hz) socket.
To remove the plug, hold it by the body and never pull by the
cord.
To turn on the paint stripper, it is necessary to push the four-
position switch located on the back of the handle from position 0
to position I, II or III according to the volume of air and the
desired temperature.
To switch off the device, turn the switch to the "I" position for 3
minutes, then turn the switch to "0".
After work is completed, always unplug the paint stripper and
leave to cool completely before storing in the box.
Figure 2 – Power supply
connection
5.2 Using the paint stripper for "stripping paint"
Personal Protective Equipment (PPE)
Before using the paint stripper, wear suitable clothing, a mask, gloves and goggles.
Figure 3 – Power supply connection
Workspace
Be familiar with the work area. The areas behind ceilings, floors, etc. can easily hide
flammable materials. Always check these areas before using the device. Keep the work area
clean, uncluttered and well lit.
Smoke may come out of the body of the paint stripper the first time it is turned on.
The first few times, you may want to use the paint stripper on a very small area and verify
the results before proceeding to larger areas.
fervi.com

HARDWARE
Page 8 of 9
N.B. The paint stripper is designed to remove water and oil-based paints.
Conversely, it is not suitable to deal with fillers.
Select the operating mode on the paint stripper by moving the four-position switch
located on the back of the handle.
Use the control system on the back of the paint stripper to select the desired hot air
temperature. There is a + button that will increase the preset temperature by 10 ° C
each time it is pressed, and a - button that will decrease the preset temperature by 10
° C each time it is pressed. The selected temperature will flash until it has been
reached, then its display will become fixed.
Wait about one minute to allow the paint stripper to heat up completely.
Hold the nozzle 8 to 10 cm from the paint that must be removed. The paint will
become soft and begin to bubble; do not burn it or the job will be more difficult.
Begin to scrape the paint from the top down using a spatula or
scraper: scrape with a light touch and even surface heating in front
of the scraper, moving the paint stripper slightly from side to side.
Scrape the paint as soon as it softens, otherwise it will harden
again.
Frequently clean the edge of the scraper so it remains sharp and to prevent paint from
accumulating.
Paint can be removed from profiled or moulded surfaces using a wire brush.
5.3 Other Uses
Remove adhesive labels and trims.
Loosen rusted or over tightened nuts and bolts.
Unblock pipes, frozen locks and padlocks, etc..
N.B. Do not defrost plastic pipes, it will deform them!
Polish wood surfaces before painting or varnishing them.
Quickly dry paints or lacquers.
Dry wet-processed wood prior to refining it.
Tightening shrink wrap packaging and plastic sheaths for electric cables.
Waxing.
Constrict and dry.
Precautions for use
When working on small or irregularly shaped objects, secure the work piece in a vice
with soft jaws.
Always protect your hands with anti-burn gloves and eyes with glasses or protective
shields.
Clean the dried paint or lacquer from the nozzle and the scraper after use. It could
catch fire.
The stripper should be placed with the nozzle upwards until it cools
fervi.com

HARDWARE
Page 9 of 9
6 MAINTENANCE AND CLEANING
The purpose of this chapter is to provide all the cadences and maintenance procedures
necessary to maintain the efficiency of the Paint Stripper.
INTERVENTION Frequency
Daily Weekly
1. General visual inspection X
2. General cleaning X
3. Clean the air outlet nozzle X
1. General visual inspection: check the overall status of the device and, in particular,
the flexible power cable and the presence of any damage or missing parts.
Condition of the Power Supply Cord
The power cord only protects from hot parts for a brief moment. According to safety
standards, the device may not be used if the cable has been damaged.
If the power supply cord is cut or damaged, it must be replaced by trained personnel
with an equivalent cord.
2. General cleaning: cleaning is necessary to rid the body of paint, dust or dirt
accumulation.
Risks associated with cleaning
Disconnect the plug from the power outlet and wipe the body of the device, only when at
room temperature. Do not use organic solvents to avoid deformation or discolouration. Do not
use flammable solvents for cleaning.
3. Clean the air outlet nozzle: cleaning is necessary to free the hot air outlet nozzle of
paint build-up.
Keep inlets and outlets clean and free from dirt and debris. Use only common
household cleaning products to clean the nozzle.
DO NOT use paint thinner, gasoline, or similar substances to clean the nozzle.
fervi.com
Table of contents
Other Fervi Power Tools manuals